
Duplicating Around a Center Point in CorelDRAW
How do I create a graphic with duplicated sections rotated around a center point?
The Duplicate tool in CorelDRAW is one of our favorite features because it allows us to quickly design many of our laser projects. For certain projects, we often customize the Duplicate tool to copy a design and rotate it around a specific point on the page. This is helpful when creating all types of different designs, especially very geometric images like flowers and snowflakes.
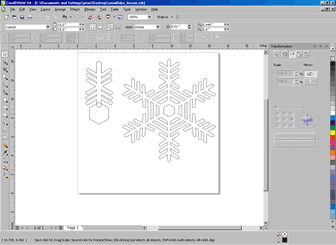
For this exercise, we'll be demonstrating how to create a quick, custom snowflake design in CorelDRAW X4.
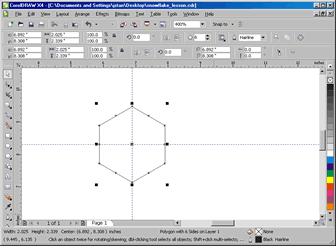
1) Start by creating a hexagon using the Polygon tool in the tool bar on the left side of the page. This will be the center of the snowflake design. Drag in the guidelines from the rulers at the top of the page and the side of the page to mark the center point of the hexagon.
2) Next, create one of the arms to the snowflake. This can made up of any grouping of shapes you'd like. Try a mixture of circles, rectangles, ovals, or any other shapes you'd like. We're going to take this arm and duplicate it six times around the center point of the hexagon we marked in step one.

3) Open the Rotate Panel by selecting Window > Dockers > Transformations > Rotate.
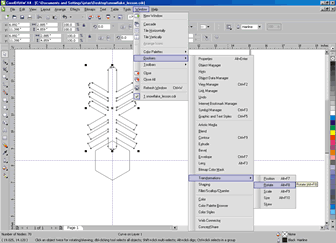
4) Now you'll see the Rotate transformation box on the right side of the page. With the Pick Tool (arrow) selected, click on the arm of the snowflake twice so the rotate arrows appear on the sides of the selection and a bullseye appears in the center of the arm.
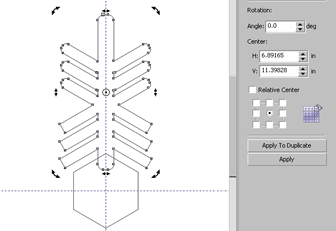
5) Click on the bullseye in the center of the snowflake's arm and drag it to the center point of the hexagon we marked with the guidelines. In the Rotate Transformation window, set the angle of rotation to 60 degrees. (Since we'll evenly duplicate it six times around the hexagon, we divided 360 by 6.) Press the Apply to Duplicate button.
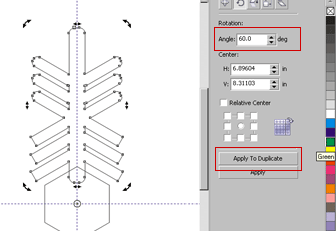
6) Continue to press the Apply to Duplicate button until the arm of the snowflake has been duplicated around the entire hexagon.
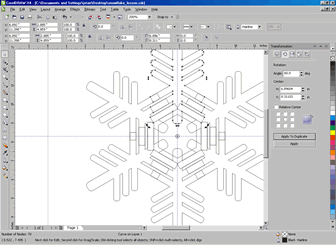
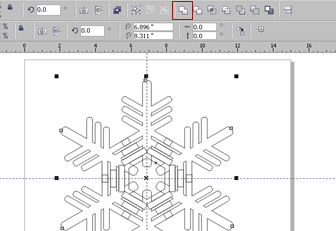
7) Finally we'll combine all of the parts of the snowflake we've designed. With the entire snowflake selected, press the Weld button.
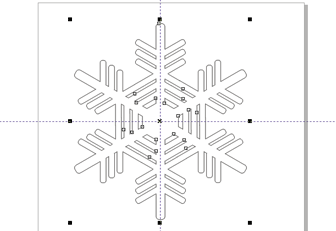
8) Your snowflake is now complete! Try creating your own unique snowflake design, or get even more practice by using the same technique to create a petal and duplicate it around a flower.
Attachments
No attachments.
Related Articles
No related articles.