
Auto Focus Plunger Replacement on the Mini/Helix
How do I replace the Auto Focus Plunger on my Mini or Helix?
Autofocus plunger replacement for the Mini and Helix engravers.
Machine Type: Epilog Mini 18/24, Helix
Tools Needed:
- Small screw driver
- 5/64 Allen wrench
Intro:
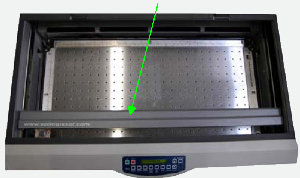
This procedure details steps to replacing the auto focus plunger on the Legend Mini and Helix machines. Before starting on this procedure, lower the engraving table a few inches and then turn off the machine. Please consult the exploded drawing of the X-carriage assembly for part names.
Procedure:
Remove the gray X-beam cover.
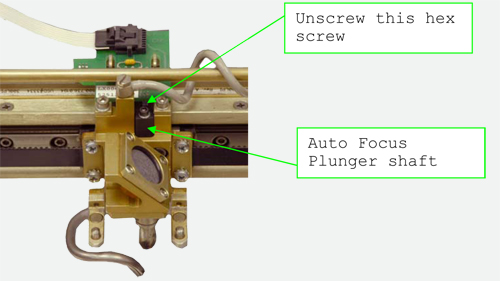
Remove the 5/64 hex screw from the Auto Focus plunger shaft.
- Replace the auto focus plunger with a new plunger.
- Put the Auto focus plunger into the spring and gently push up.
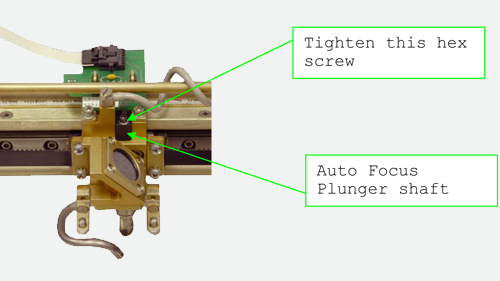
Tighten the 5/64 hex screw on the Auto focus plunger shaft.
Replace the gray X-beam cover.
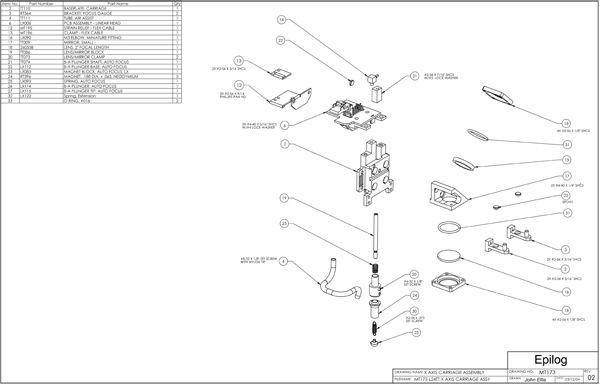
For a larger image of the exploded drawing of the X-Axis Carriage, click here.
Attachments
No attachments.