
Windows 10 TCP/IP Port Setup
How do I set up the TCP/IP Port settings on my computer?
Setting up a direct connection through Ethernet requires a static TCP/IP address on your computer. The address of the TCP/IP Port is not the same as the IP address for the laser. This guide will show you how to configure the TCP/IP Port settings on a Windows 10 computer.
Note: The laser should be on and connected with an Ethernet cable before beginning.
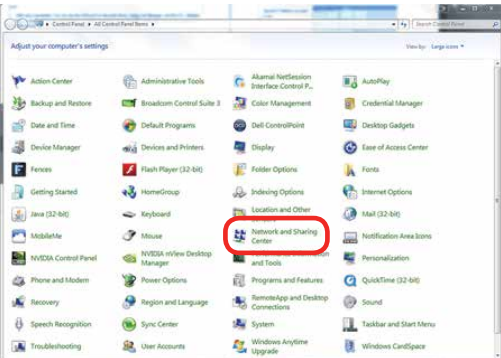
- Go to the Network and Sharing Center in your computer’s Control Panel.
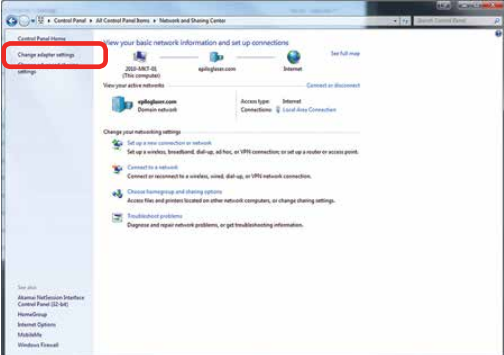
- Click Change Adapter Settings.
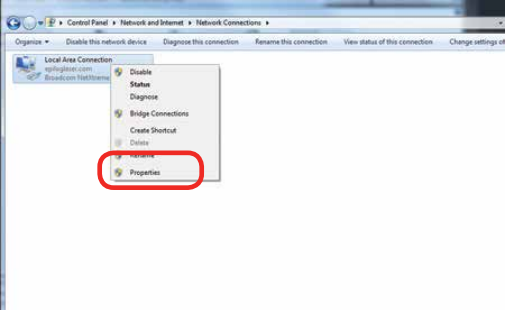
- Right click Local Area Connection, then click Properties.
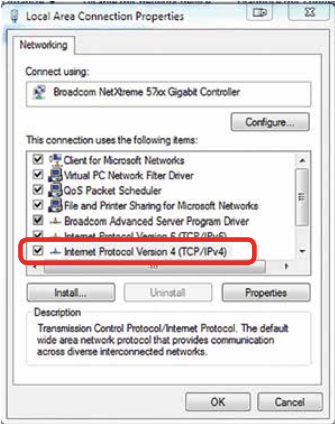
- Select Internet Protocol Version 4 (TCP/IP).Then click Properties
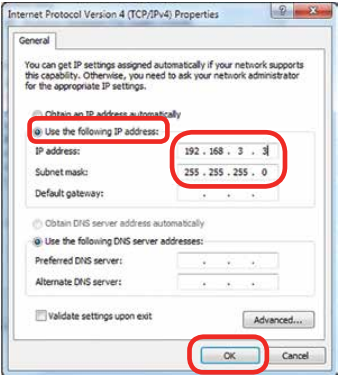
- Select Use the following IP Address. Type in the IP Address: 192.168.3.3.
- Type in the Subnet Mask 255.255.255.0. Click OK.
Note: If you have multiple options here, look for the one labeled Unidentified Network. You can always disconnect and reconnect the laser to identify its connection.
Note: This number is not an error; the last digit of the IP address in this window must be different than the IP address you set in the laser.
Summary:
You’ve now completed the TCP/IP setup required for a direct connection. For more information on setting up your machine please check out the related articles on the right.