
Power Supply Replacement for the Epilog Zing
How do I replace the power supply on my Epilog Zing?
Machine Type: Epilog Zing 16 and 24 Laser
Tools Required: Phillips screw driver
- Lower the table to the bottom of the machine using the focus buttons on the display.
- Disconnect the machine from its power source.
- Remove the power cord from the machine.
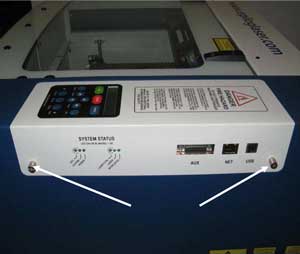
Remove the controller board from the machine by loosening the two captured screws. Note: The screws will be retained in the controller housing when they are completely loose. You will not be able to remove them from the controller unit. The captured screws are identified by the arrows in Picture 1.
Picture 1
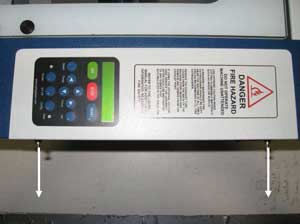
To remove the controller board, grasp the captured screws and pull the controller away from the engraver, as shown in picture 2. Note: A small amount of force will be required to remove the board from the machine. You are disconnecting electrical connections when the board is removed.
Picture 2
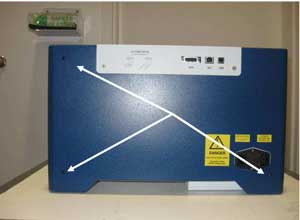
Remove the three screws shown in picture 3a and the one screw shown in picture 3b.
Picture 3a
Picture 3b
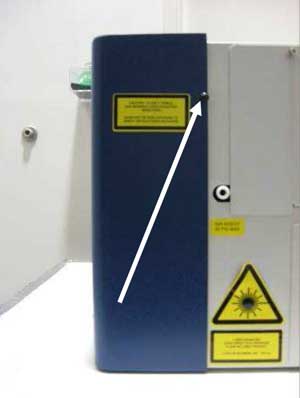
To remove the right hand side cover, lift up on the bottom of the cover and pull toward you as shown in picture 4, and lift up.
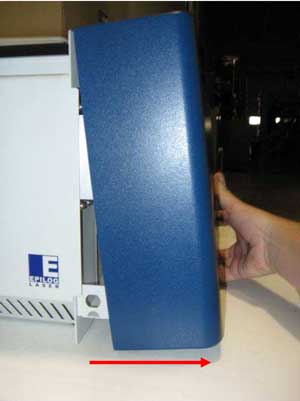
Picture 4
The power supply is the silver box in the lower left hand corner as you face the machine from the right hand side as indicated in picture 5.
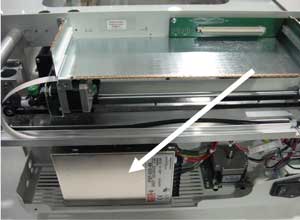
Picture 5 - Zing Power Supply
To the right of the power supply there are three power connections that must be disconnected. They are shown in picture 6. Note that there is a lock on the lower connection in the picture. To “open” the lock, depress the tab and pull the connection apart.
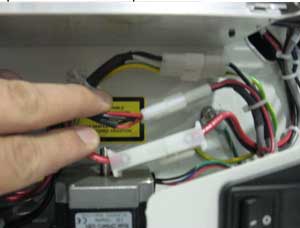
Picture 6 - Power Supply Connections
Open the engraving area access window and look to the right hand side of the machines chassis. There you will find the two Power supply mounting screws. They are shown in picture 6.
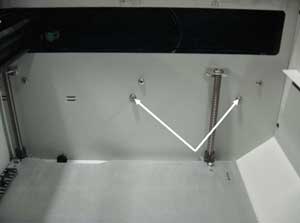
Picture 6 -Power Supply Mounting Screws
Loosen the three power supply mounting screws. Note that the mounting screws will be retained in the chassis even after the screws have been fully removed from the supply.
- Remove the supply from the machine.
Supply Installation
- Install the power supply in the machines chassis.
- Install the two power supply mounting screws in to the power supply.
- Reconnect the three power supply connections. Note: The connections are unique and can not be misconnected.
- Replace the side panel.
- Replace the controller board.
Attachments
No attachments.