
Troubleshooting an Ethernet Cable Connection
Why aren't jobs going to my engraver while connected with ethernet?
If you find yourself unable to print when connected to the host computer via crossover cable, please check the following items for a possible resolution.
- Delete all jobs from queue.
- Confirm the Epilog Laser being used is "online."
- Confirm the IP address of the TCP/IP port matches the laser’s IP address.
- Check the status of the network connection.
- Confirm that the correct IP address is being used for the network connection.
- "Ping" the laser.
Note: This technical library article is written for a direct connection from the computer’s network adapter to the network port on the Epilog Laser using a crossover Ethernet cable. Using a standard straight-through CAT 4/5/6 cable will not work.
To determine if you are working with a crossover cable, check the colored wires on each end. On a crossover cable, the colored wires at each end will not be in the same sequence.
Due to the infinite types and setups when working with either a residential or business network, Epilog Laser supports a direct network connection via a crossover cable only. If you are trying to install you Epilog laser on an existing business or residential network, please contact your company’s IT support person or a network professional for further assistance.
If you are using two or more lasers and each is connected to a separate Ethernet port on the host computer, you will need to set up each laser as a separate printer, using separately created TCP/IP ports that match the laser’s IP (described below). You also will need to configure each network connection to match (described below.)
Deleting All Print Jobs from Queue:
Sometimes a job may get stuck in the Windows Print Queue. This will cause all other jobs to pile up behind the job that is stuck. Make sure you have no jobs that are now stuck in queue.
To check and delete the Windows Print Queue:
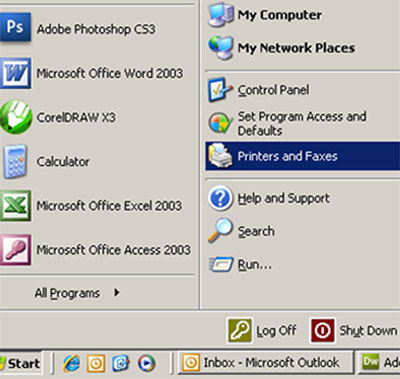
Click the Start button and select “Printers and Faxes."
Double-click the printer you are using to open its Print Queue.
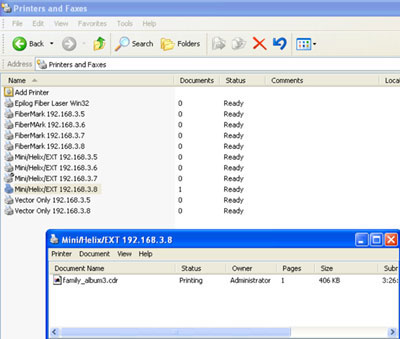
Right-click the document you want to stop printing, and then click Cancel. You can cancel the printing of multiple documents by holding down the CTRL Key and then selecting each document you want to cancel.
Once all the documents are selected, right-click one of them and click Cancel.
Confirm the Printer being used is “Online."
A printer connected to any TCP/IP port must have a current status of “Online” in order to communicate with the host computer via Ethernet cable. If this status is “Offline” then you will be unable to send print jobs to the laser.
To check the laser’s status:
- Open “Printers and Faxes” by clicking Start, click Control Panel, click Printers and Other Hardware, and then click Printers and Faxes.
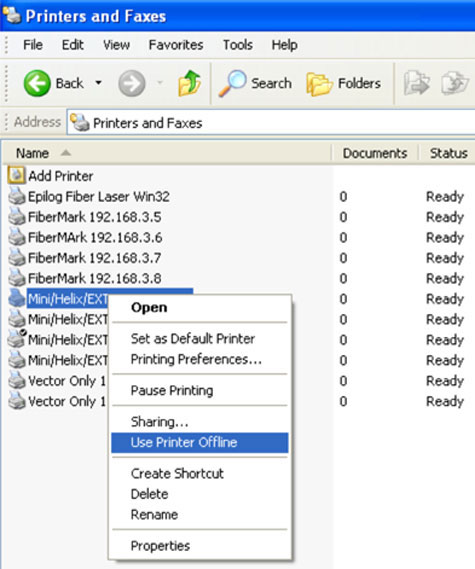
- Right click on the icon for the Epilog Laser to open its menu.
- There should be a menu item labeled “Use Printer Offline." If you see that menu item, it indicates the printer is currently online. If this option reads “Use Printer Online,” it means you are currently offline.
Confirm the IP Address of the TCP/IP Printer Port Matches the Laser’s IP address
A standard Internet TCP/IP port was created when your laser was installed. If the IP address of the port does not match the IP address of the laser, the computer will be unable to communicate properly with the laser.
To check this, you will first need to get the current IP address of the laser. To check the IP address of the laser on the:
Legend/Legend EX/Legend 24TT:
- Go to the “Options” menu and press Enter.
- Choose “Networking” in the Options menu and press Enter.
- Note the current IP Address.
- Press “Escape” to exit and return to the Menu Screen
Mini/Helix:
- Quickly depress and release the “Go” and “Pointer” buttons simultaneously to display the “Functions Menu”
- Continue to press the “Go” button until the IP Address is visible and note the address.
- Continue to press the “Go” button until the display reads “GO/SAVE” and then press “Go” to return to the jobs screen.
36EXT:
- Press the “Config” button on the display panel.
- Using the “Down Arrow” button, cycle down until the IP Address is visible and note the value given.
- Press “Cancel” to return to main job screen.
Once the address of the laser is known, you will need to compare this address with the one that was entered when creating the TCP/IP port.
To check this address:
- Click the “Start” button in Windows and choose the “Printers and Faxes” icon.
- Right click the icon for the Epilog Laser and choose “Properties” from the menu.
- Click on the “Ports” tab in the Printer Properties and note the port being used. This port should either read “Internet TCP/IP port” or something to effect of “IP_192xxxxx”.
- Choose “Configure Port” to view the Port information.
- Note the IP address that is currently set for the printer, making sure that it matches the IP address that was obtained from the laser.
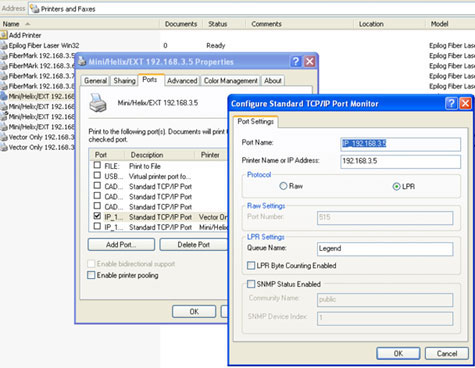
If the IP address given for the Printer in the Port Setting does not match the IP address of the Epilog Laser, change the address in the Port Settings to match and click the “OK” button and the then “Close” button to confirm the new Port Settings.
Port Settings should also be specific for both the Protocol and the Queue Name.
- The settings and values for each are below:
- Protocol should be set to “LPR.”
- Queue name should be “Legend.”
Checking the Status of the Network Connection:
You can check the current status of the network connection in Windows. This status can help to determine what the issue may be. To check a network connection status:
- Click the Windows “Start” button and choose “Control Panel”.
- Right click “Network Connections” in Control Panel to view the network connections.
- Right click the LAN connection that is associated with the Epilog Laser and choose “Status” from this menu.
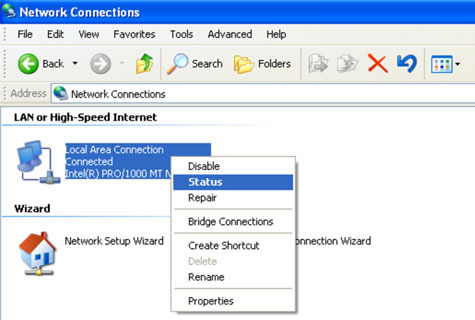
The current LAN connection status will be displayed in the open window and when connected, should read “Status: Connected."
If you see the following:
Limited or No Connectivity - There is most likely an IP address conflict that is causing the issue and portions of this article will address possible solutions.
Network Cable Unplugged - A cable is unplugged or the laser is turned off. Check the connection of the crossover cable to both the computer and the laser, making sure both ends are securely in place and properly connected.
Confirming the correct IP address is being used for the Network Connection
When establishing a network connection to the Epilog laser using the crossover cable, the network adapter on your computer was configured with an IP address that is different from the IP address in the laser. The IP addresses used in the manual will be used as examples in this section.
IP Address Examples from Manual:
Laser IP 192.168.3.4
Network IP 192.168.3.3
Please Note! – Earlier in this document we had you check to make sure the IP address from your laser was the same as the Printer Port. For this portion of the article we need to ensure your Network IP address is different from the IP address of your laser. We point this out because some users are not familiar with setting up IP addresses, and it can sometimes be confusing as to which IP address needs to be the same and which needs to be different.
To check and ensure the IP address of your network adapter is within the same string as the Epilog laser, follow these instructions:
- Click the Windows “Start” button and choose “Control Panel”.
- Double click the “Network Connections” icon to open Network Connections.
- Right click on the “LAN” connection and choose “Properties” from the right click menu.
- In the “Local Area Connection Properties” window, highlight “Internet Protocol TCP/IP” and then click the “Properties” button below it.

After clicking on “Properties” you will have two options: “Obtain IP Address Automatically” and “Use the Following IP Address." You will want to make sure that “Use the Following IP Address” is selected.
The setting should read something like this:
IP: 192.168.3.3 - The last digit in this string must be different than the last digit of the IP address that you recorded from your laser.
Subnet Mask: 255.255.255.0
Default Gateway: 000.000.000.000
Once you have ensured the IP address in the Network Connection is set properly, clic… No Results
Attachments
No attachments.
Related Articles
No related articles.