
Setting up a Gun Stock for Engraving
How do I setup a gunstock in the laser for engraving?
Engraving an irregular or curved shaped object, like a gun stock, can be quite the challenge. We're going to show you a few different CorelDRAW techniques and tools that will make the task of engraving on a curved surface like this much easier.
For this exercise, we'll be demonstrating how to setup a gun stock for 3D engraving in CorelDRAW X4.
The file that was created in this exercise can be downloaded here.
1) Start by looking at the gun stock from the butt end and on its side. Approximate the center point of the curve and place a dot of putty or tape at this point.
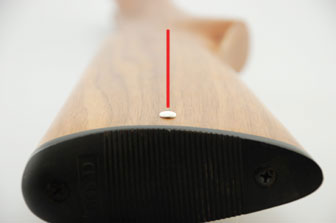
2) Next, using a ruler, measure 1/8" from the top edge of the gun stock and place a dot.
3) Using your ruler again, place the top edge over the your dot. Where the ruler meets the edge of the stock, put two dots approximately 1/2" in on the wood surface of the gun stock (Figure 3a). The result will look similar to Figure 3b.
Figure 3a
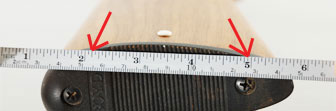
Figure 3b

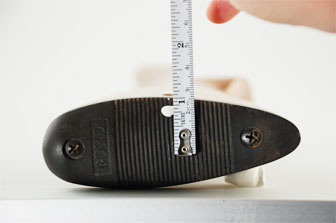
4) Viewing the gun stock on its side, place a dot 6.5" from the bottom mark, then measure .75" up from the bottom of the stock and place a dot (pictured right). Now do the same from the top mark and place a dot. 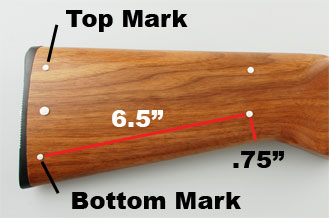
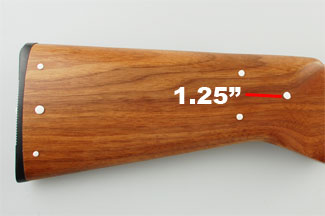
5) For the last dot, measure 1.25" from the center of the two previous dots.
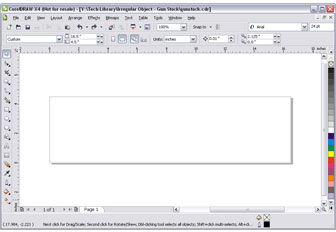
6) Now that you've marked the gun stock with the bounds for the engraving area you're ready to move into CorelDRAW. Open CorelDRAW and create a page 16.5" x 4.5" (the outer dimensions of the gun stock).
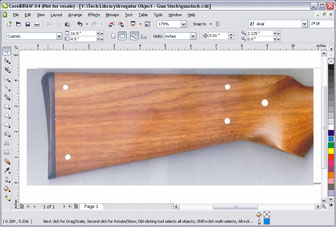
7) Using a scanner or digital camera to scan or photograph the gun stock and import the graphic into CorelDRAW. Note: Before you scan or photograph the gun stock, remove the center point mark from step one.
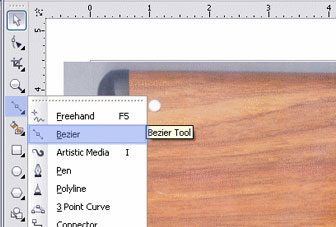
8) Next, click and hold the Freehand Tool until the drop-down menu appears. In the drop-down menu select the Bezier Tool.
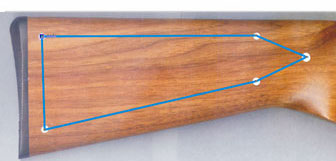
9) With the Bezier Tool selected, start by clicking on the top-left point you marked. Next, click on the dot to the top-right to create a line (Figure C). Following the dots clockwise, click each dot until you end up back at the beginning (Figure D).
Figure C
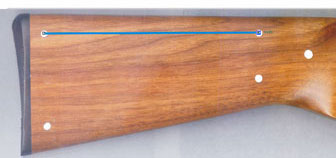
Figure D
10) Select the Pick Tool.

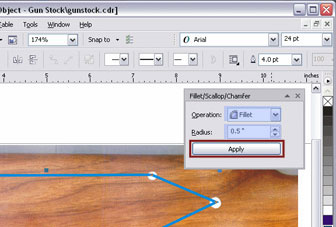
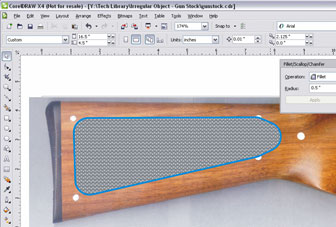
11) Open the Fillet/Scallop/Chamfer Panel by selecting Window > Dockers > Fillet/Scallop/Chamfer.
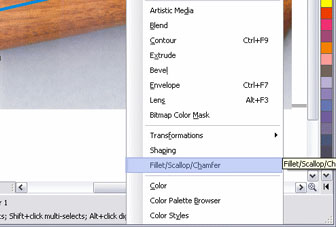
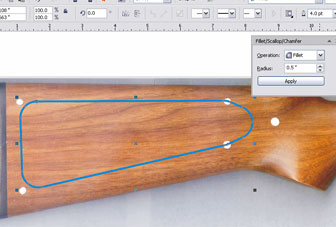
12) Now you'll see the Fillet/Scallop/Chamfer Panel on the right side of the page. Set the Operation to Fillet and the Radius to 0.5", then click Apply to create a rounded corner effect.
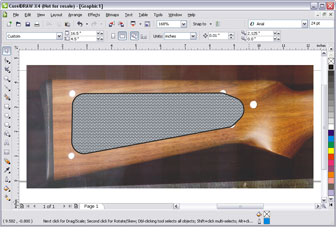
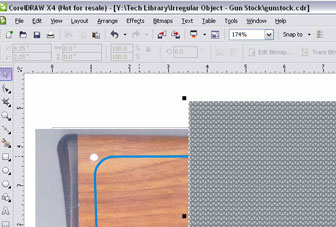
13) Now that the engraving area of the gun stock has been outlined, we're ready to Powerclip a 3D pattern to the outline we've created. Import the 3D pattern into the page by selecting File > Import and choosing the 3D pattern from the dialog box.
14) Next, select the Pick Tool and click on the 3D pattern.
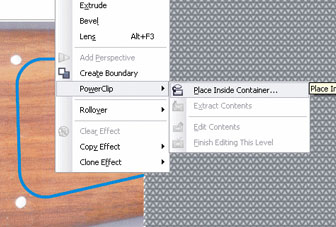
15) Select Effects > PowerClip > Place Inside Container, then click on the shape to place the 3D pattern inside the shape.
16) Remove the gun stock image from the background and you're ready to engrave the 3D pattern on a gun stock. Use the Red Dot Pointer to run the outline border of your image to make sure that the gun stock is placed correctly in the machine, then send over the powerclipped image to start engraving your design.
Attachments
No attachments.
Related Articles
No related articles.