
Print Merge in CorelDRAW
How do I create several plaques with different names in Corel using Print Merge?
In our last discussion of Imposition Layout (see related articles), we showed you how to use CorelDRAW's Imposition Layout feature to engrave several plaques to fill the engraving table without having to duplicate the image.
Now we're going to take this concept to the next level and add in the ability to create custom names on each of the plaques.
In CorelDRAW, we've opened the plaque we want to add the names of each Founding Member to.
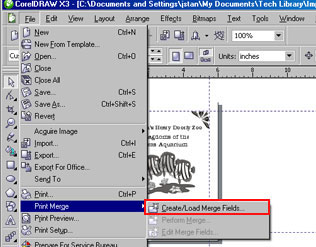
We will be using the Print Merge feature in Corel to load a list of each of the names we are using for this project. The Print Merge feature is found under the File menu at the top of the page.
From the Print Merge drop-down menu, select Create/Load Merge Fields.
In CorelDRAW, we've opened the plaque we want to add the names of each Founding Member to.
We will be using the Print Merge feature in Corel to load a list of each of the names we are using for this project. The Print Merge feature is found under the File menu at the top of the page.
From the Print Merge drop-down menu, select Create/Load Merge Fields.
- In CorelDRAW, we've opened the plaque we want to add the names of each Founding Member to.
We will be using the Print Merge feature in Corel to load a list of each of the names we are using for this project. The Print Merge feature is found under the File menu at the top of the page.
From the Print Merge drop-down menu, select Create/Load Merge Fields.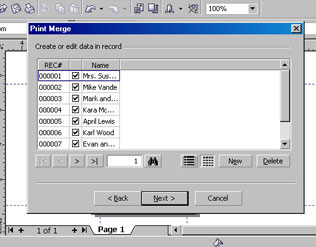
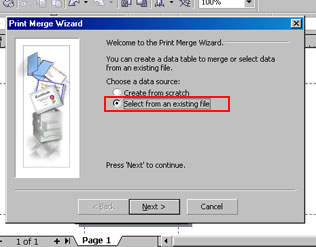
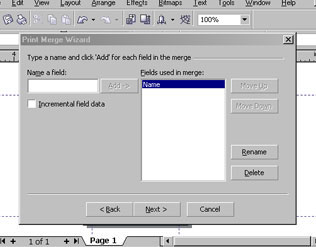
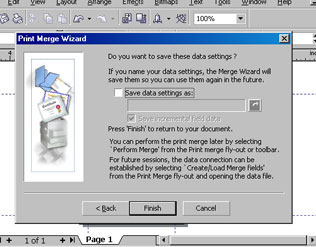
Next we're given the choice to save our settings for this merge. You would want to do this if you were going to be using the Founding Member list for more projects.
We're only using the list once, so click the Finish button
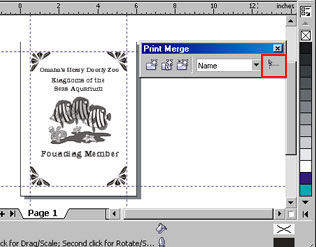
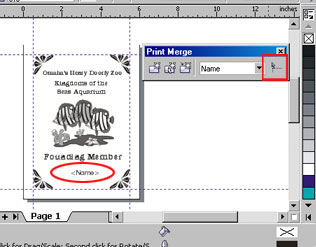
Back on our document, a Print Merge menu has popped up. First we need to import our Name field to the plaque.
Click on the button to the far right of the menu to insert the field.
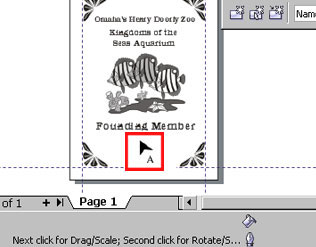
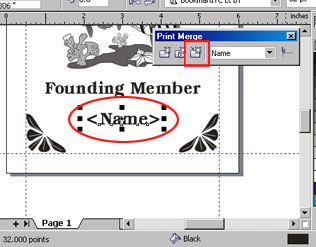
- The cursor will change to a black arrow with a letter "A" next to it. You can place this cursor on the page where you want the field to be placed.
- The Name field will be placed on the page. Click the Insert Field icon again to turn off that option.
With the field name selected, format the font so it matches the rest of the plaque.
When it is set up the way you want it, click the Perform Print Merge icon to merge the names with the plaques.
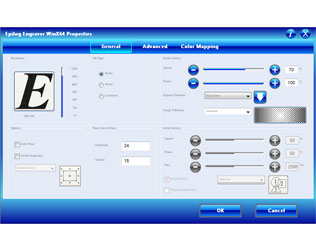
- Select the laser as your printer and click on Properties. With our other properties already set, change the piece size to match the entire area of the engraving table. We'll be creating this on a Helix system, so enter a piece size of 24" x 18". Click the OK button when you are done.
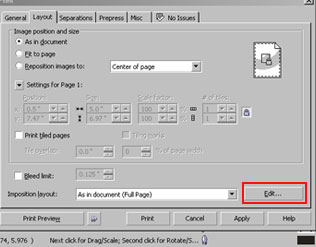
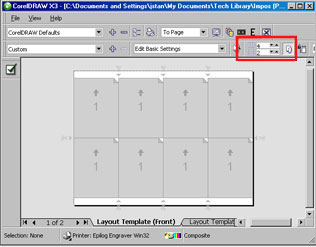
- Click on the layout tab at the top of the page. At the bottom of the Layout tab, you'll find the Imposition Layout setup. Choose Edit so we can setup our custom settings for our job.
- At the top of the page you can choose the number of columns and rows of plaques you want to print. We currently have one plaque set up on the page. We need to change this to maximize the number we can fit on the engraving page. Since we have a full 24" across the table to use, and each plaque takes up 6" horizontally we can fit 4 plaques across the table, and two rows of plaques.
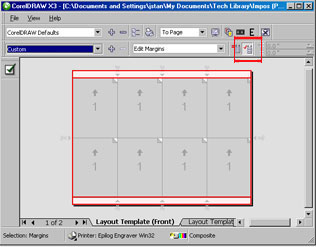
- Select the page margins by clicking on the white margins above or below the page. With the page margins selected, you'll see a new button at the top of the page that is highlighted. This is the Auto Margins button. We want to deselect this so that the page margins will be 0".
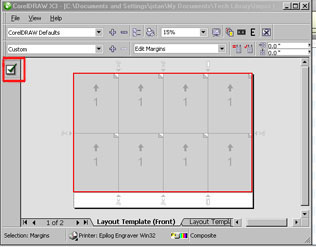
- The page is now correctly laid out. To close the Imposition Layout window, click the check mark on the left side of the page.
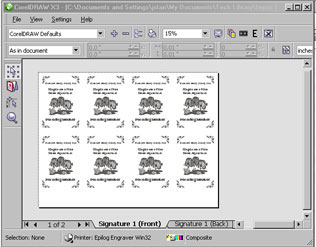
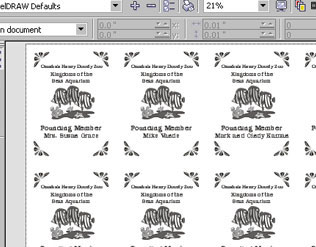
- In the Print Preview window we can see the layout of the plaques and that we've created eight different plaques in just a few steps! Print the file to the laser, and you're done!
Attachments
No attachments.