
Laser 3D Model Making with 123D Make
How do I turn a 3D Model into a real-world object?
Systems All:
Turning your 3D models into a real-world objects is quick and easy with the combined power of AutoDesk's 123D Make software and an Epilog Laser system.
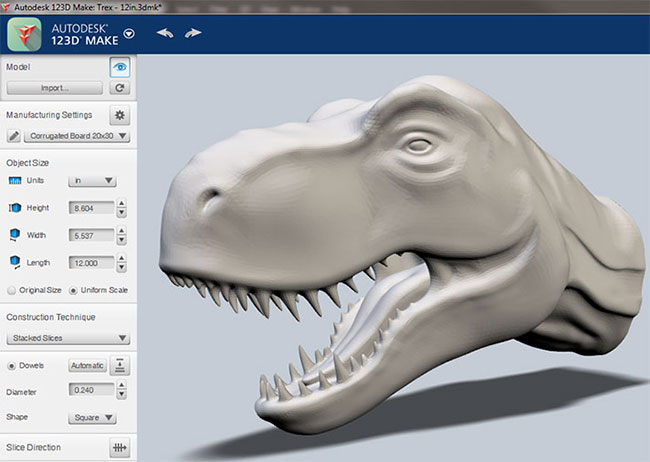
1. Start by opening one of the example models in 123D Make or a model of your own.
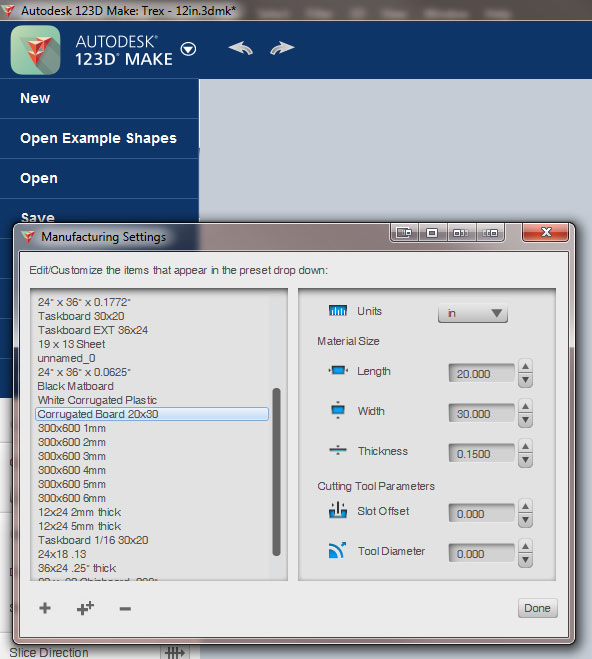
2. Then set up the sheet parameters for the material you will be using to manufacture your model.
Enter the Width, Height, and Thickness of the sheet you will be using, and fill in 0.00 for both the Slot Offset and Tool Diameter.
3. In the Object Size panel you can change the size of the model. In this example the model's length was changed to 12" and the other measurements scale to proportion.

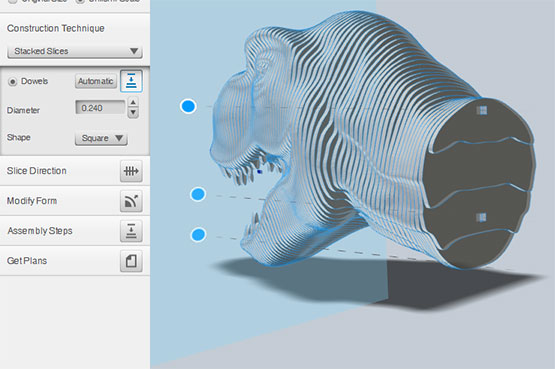
4. Now select your Construction Technique from the drop-down menu. This example is the Stacked Slices technique.
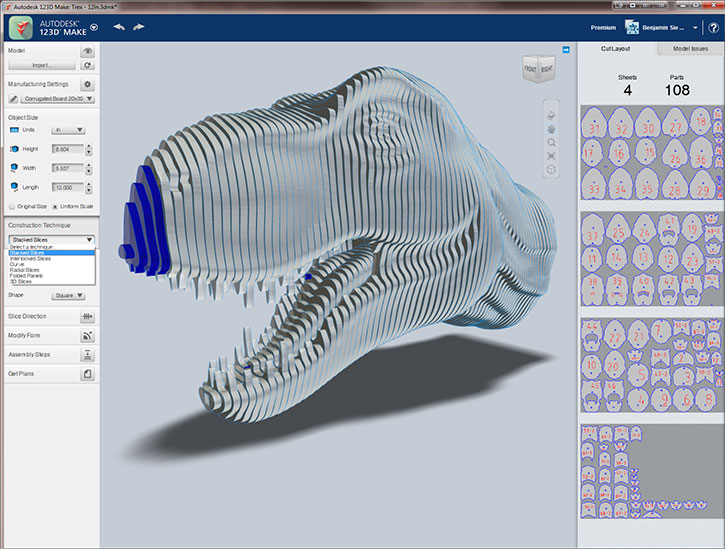
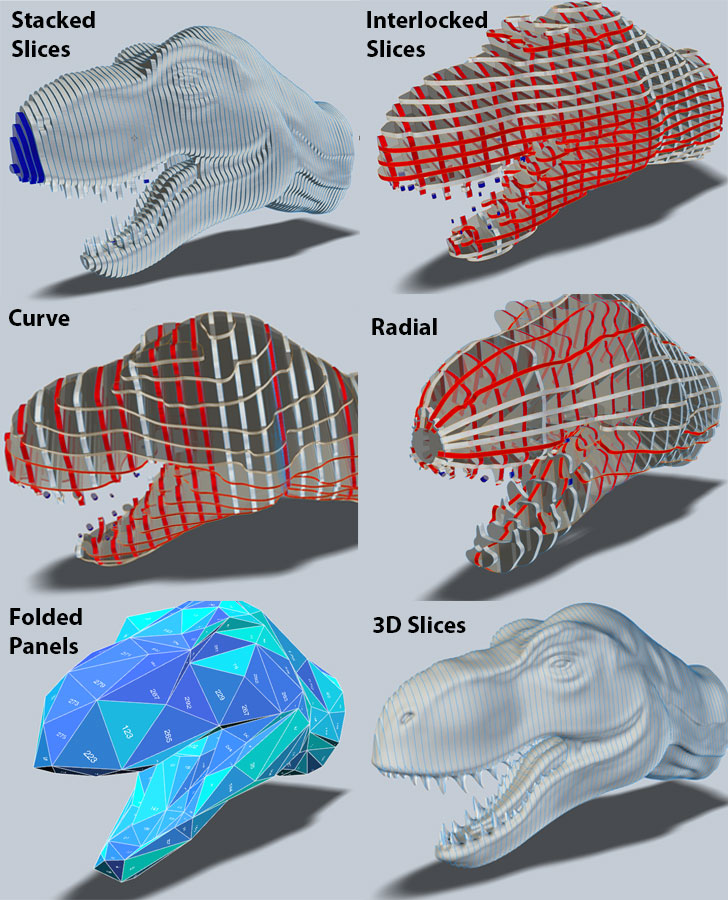
Note: There are 6 different Construction Techniques to select from: Stacked Slices, Interlocked Slices, Curve, Radial, Folded Panels, and 3D Slices. Each Construction Technique provides a very different style of assembly and look that benefits different types of models in different ways. Select the method that best visually represents your model, is the quickest to assemble, or wastes the least amount of material - it is really up to you!
5. Now that we have selected Stacked Slices as the Construction Technique, we need to define the Diameter and Location of the dowel holes we will use to build the model. Select Square from the Shape drop-down menu and enter the Diameter of the dowels you will be using to build the model. To add more dowels holes simply double click close to where you want the hole to be, then click and drag the blue dot to the location you want the hole.
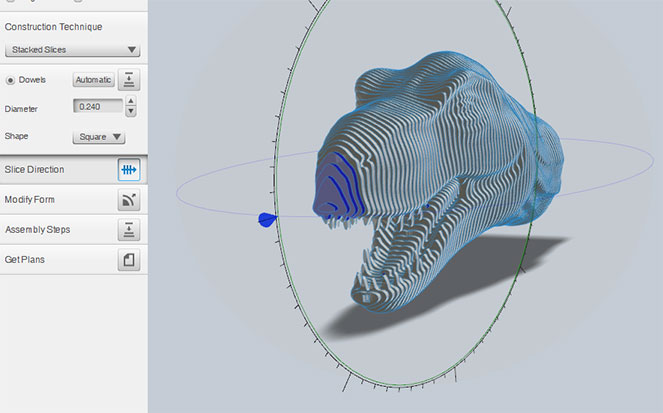
6. Depending on the results you are looking for, you can define a different Slice Direction for your model by clicking on Slice Direction then dragging the blue cone.
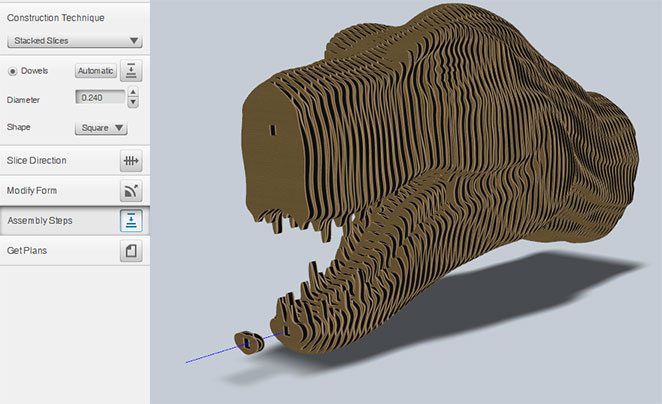
7. 123D Make has a built-in Assembly Steps panel to help you through the assembly process. This feature comes in handy for some of the other styles of Construction Techniques, depending on the complexity of the model.
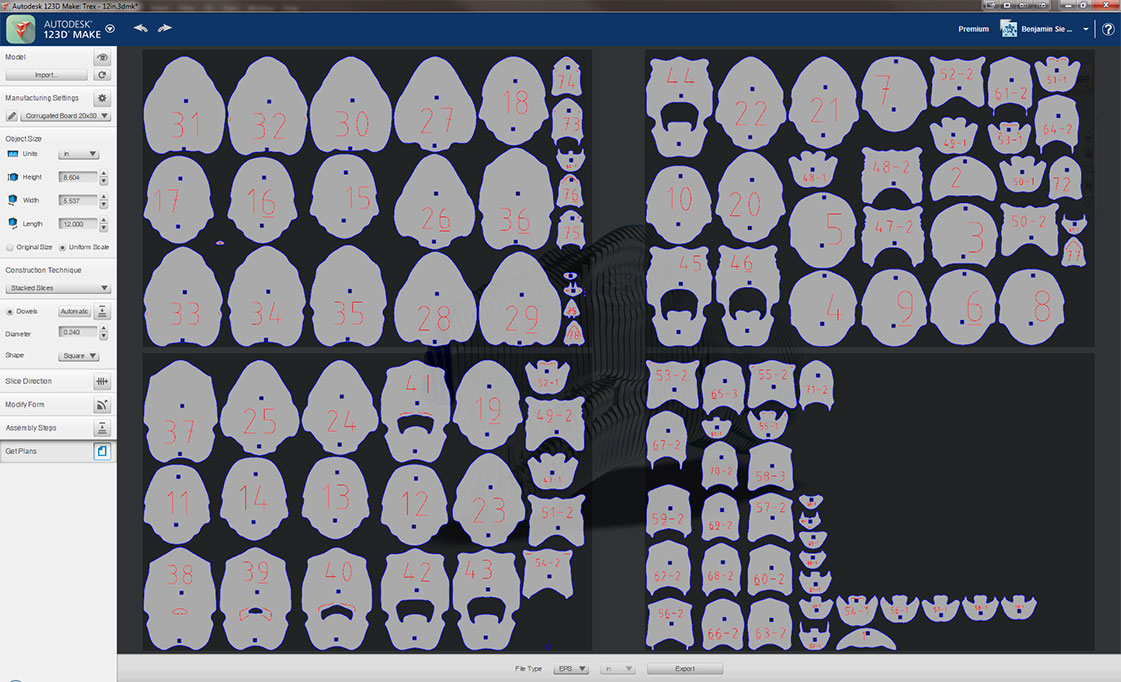
8. The final step in the process of bring your 3D model to life is to Export the files as PDF, EPS, or DXF files and then open them in a vector-based graphic software and printing the files to a laser for cutting.
To download a copy of the 3D T-Rex model and the cut files for creating one visit our Laser Cut Cardboard Model of a T-Rex Head Sample Club page.
Attachments
No attachments.