
X-Axis Belt Replacement on the Mini
How do I replace the x-axis belt on my Mini?
X-Axis belt replacement in the Mini and Helix engravers.
Machine Type: Epilog Mini 18/24
Tools Needed:
- #1 and #2 Screwdriver
- Stapler
- Turn off the machine and unplug the power cord.
Remove theleft side panel from the engraver by removing the six screws that fix it to the body of the Mini or Helix. There are four on the side by the hand hold and two on the rear part of the cover.
Remove I-Beam cover by loosening the two screws on the front side of the beam and the four screws on the rear. It is the grey or blue metal cover.
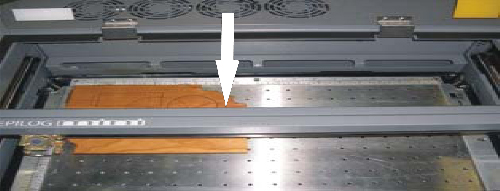
Picture 1
Looking at the left side of the I-Beam loosen the Philips screw that sits between the black belt pulley and the spring and push bracket to extend spring to loosen belt tension.
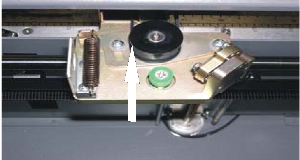
Picture 2
Remove the four Philips screws that fix belt to each side of the laser head and leave the belt in place.
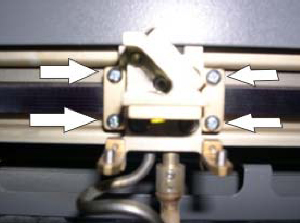
Picture 3
- Attach one side of old belt to the new belt with a stapler then pull on opposite end of old belt to fish the new belt through.
- Attach one side of belt to laser head and tighten the Phillips screws that hold it in place.
- With one side of the belt fixed in place measure the non-fixed end up to the laser head in order to cut belt to length.
- The new belt should fit all of the way under its clamp while having just a little play from the beam. Tighten up the two Phillips screws.
- Make sure belt runs in the center of the pulleys and does not rub any of the lips on the pulleys.
- Loosen Philips screw on cable tensioner from step 4 and let the spring add tension to belt. Once belt has tension tighten Phillips screw.
- Reinstall theI-beam cover that was removed in step 3.
- Reinstall the left side cover with the six screws.
Attachments
No attachments.