メインコンテンツへスキップ

Air Assist Solenoid Configuration Update

はじめに

This guide provides troubleshooting steps if your Ascent laser’s air assist solenoid is not energizing properly and is failing to deliver airflow to the laser carriage.

Phase 1: Test Solenoid Function

Before taking anything apart, verify whether the solenoid is working correctly. You will also use this exact process to test the machine after making adjustments.


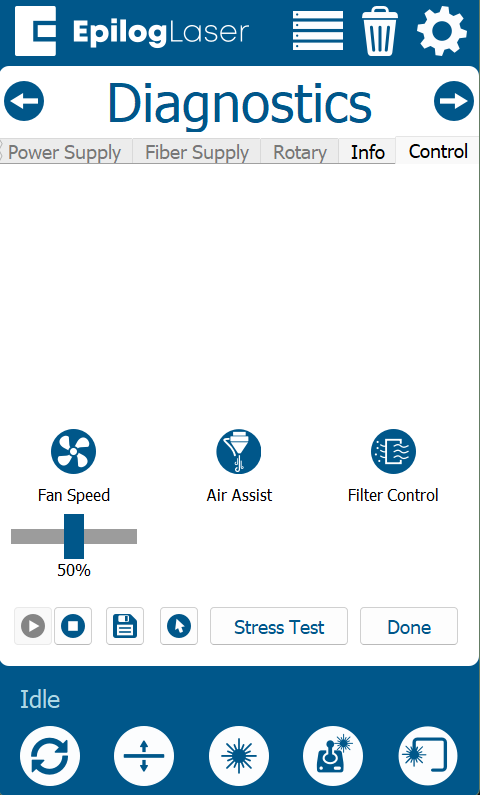
Diagnostics screen

Navigation:

Gear Icon Long-press the “Settings” title Diagnostics Right Arrow to “Control” tab Click Air Assist.

Listen and feel the carriage nose cone. Turn the air assist on and off to ensure it is completely cycling.

  • Pass: If air actively flows when on and stops when off, your solenoid is working. Stop here. No adjustments are needed.
  • Fail: If it is not flowing, or gets stuck open, proceed with Phase 2 below.


Phase 2: Tension Adjustment

If the solenoid isn’t activating, the internal mechanism may be bound by excessive tension. A simple adjustment to the retaining nut often resolves this.

Powering off the machine
ステップ1

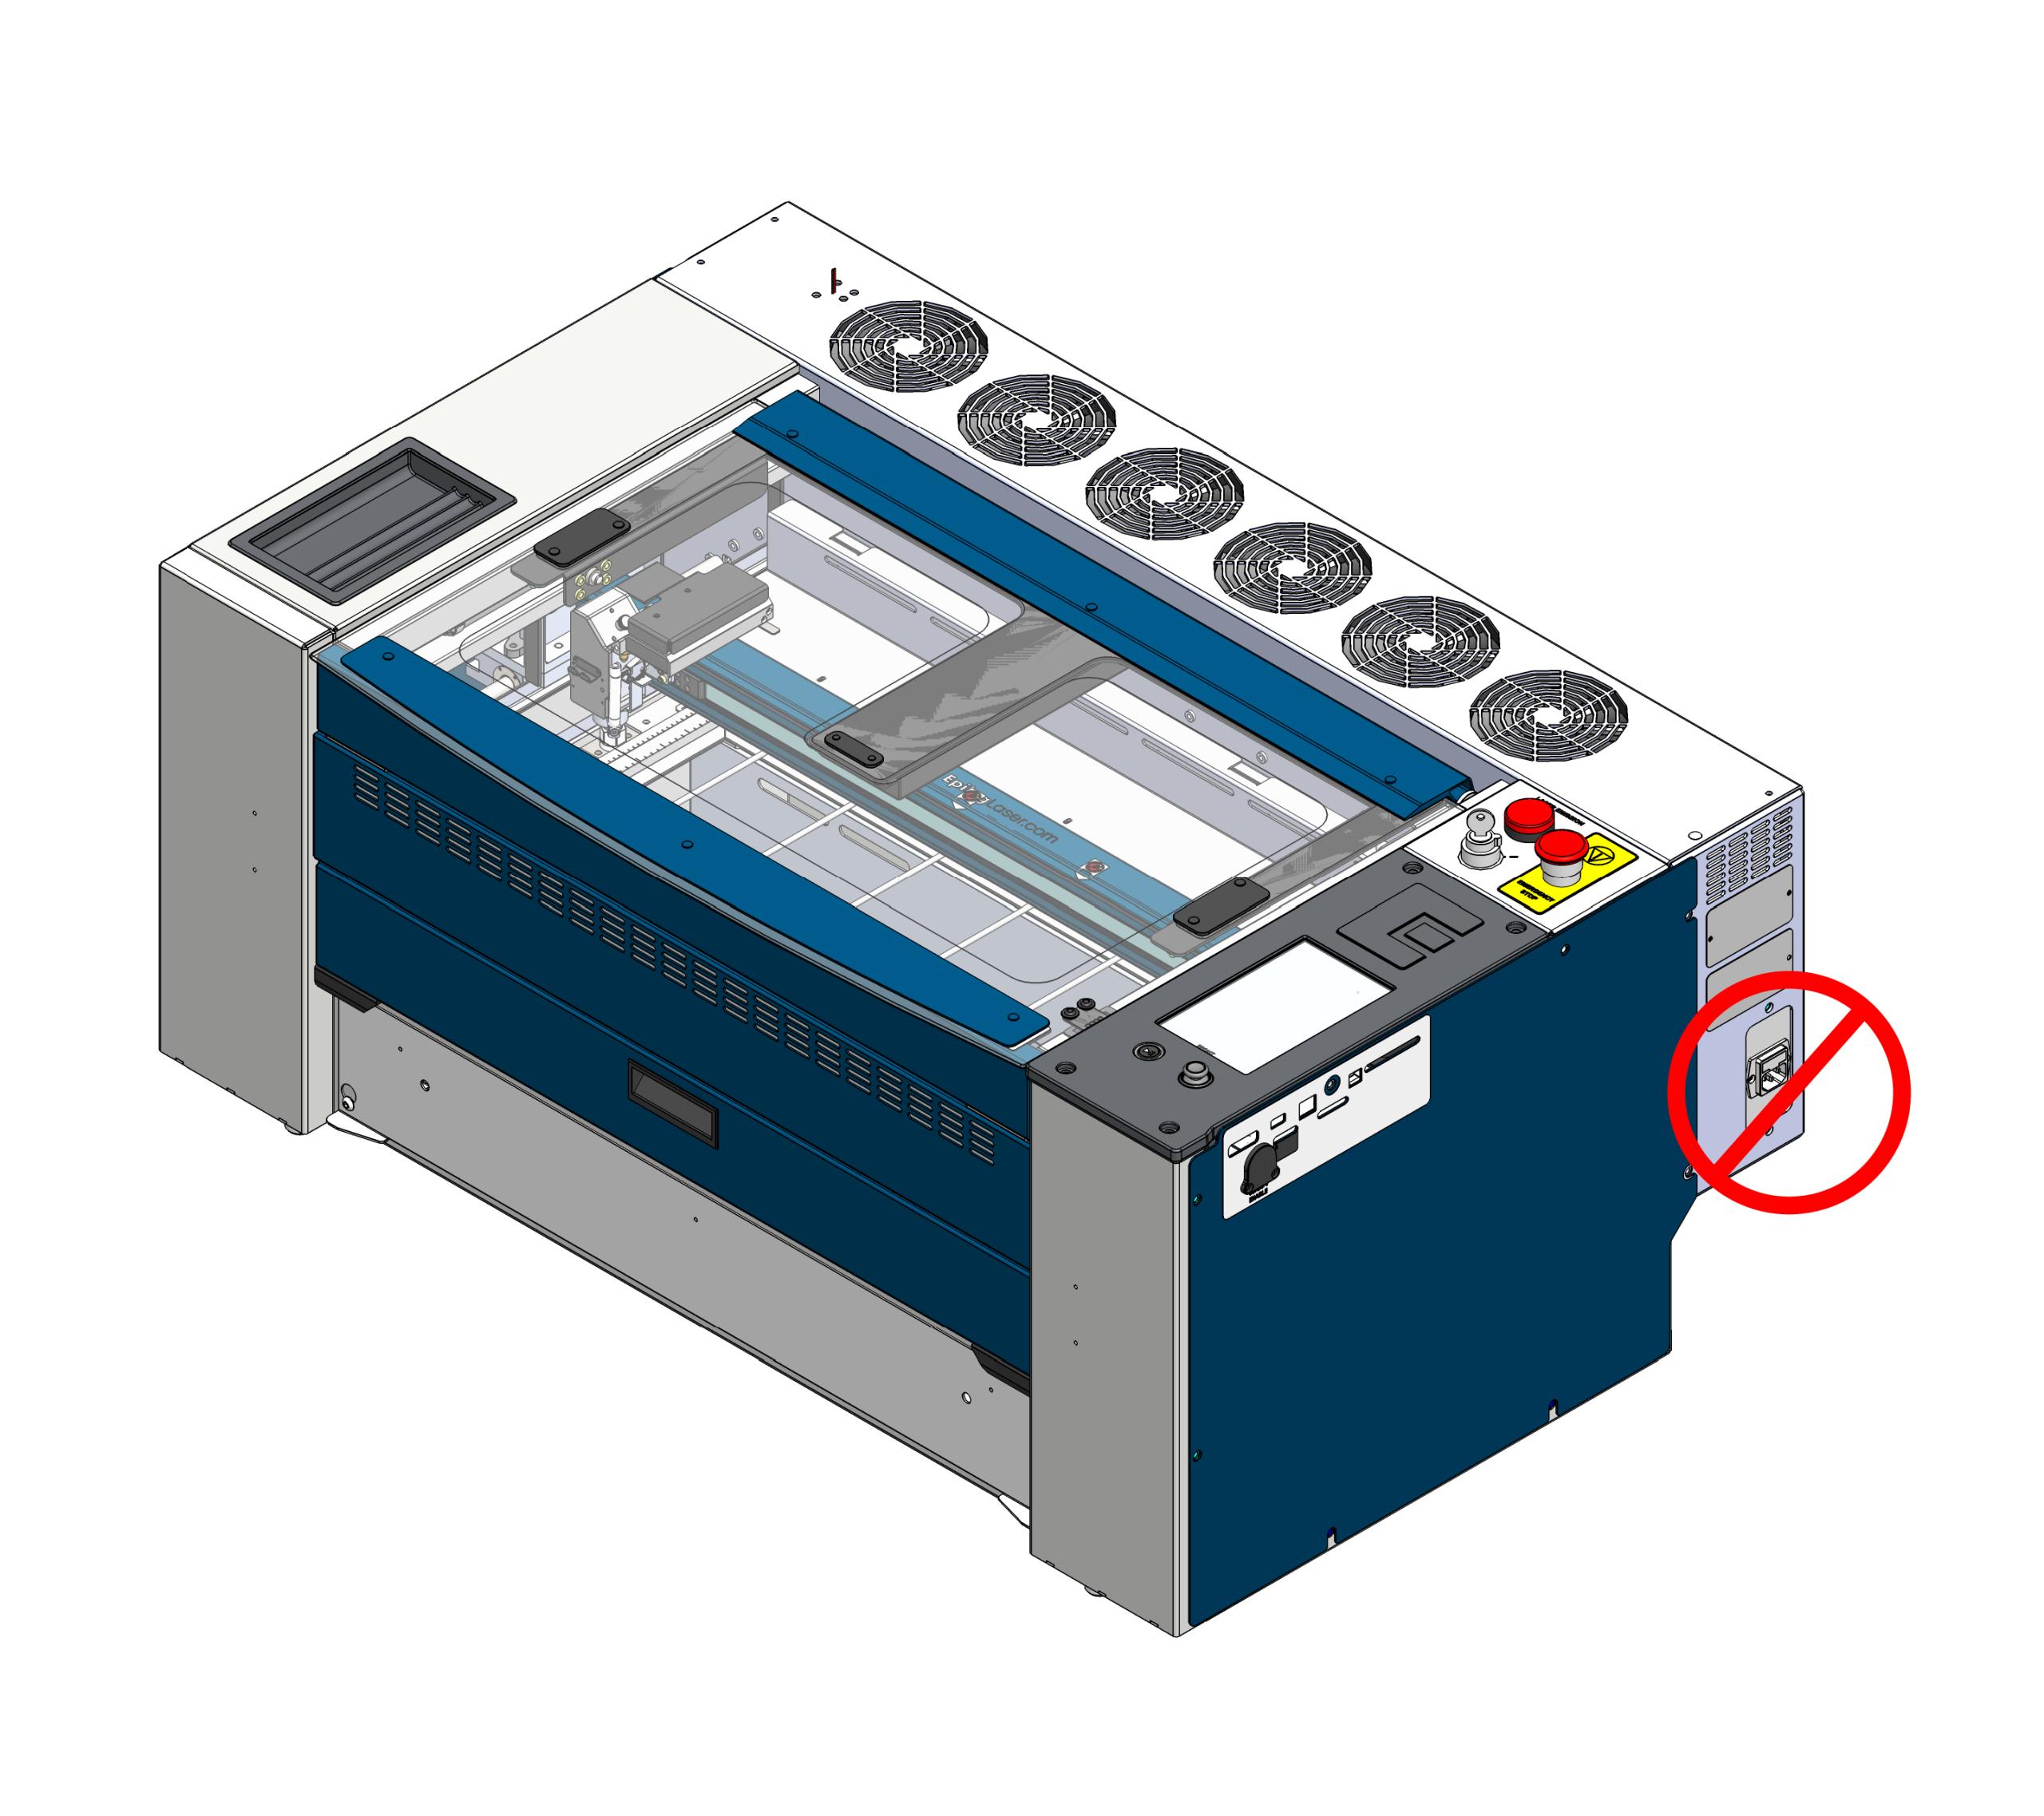
Power Off & Unplug

For your safety, completely power off the machine and unplug the main power cord from the wall before beginning this procedure.

Removing right side panel
ステップ2

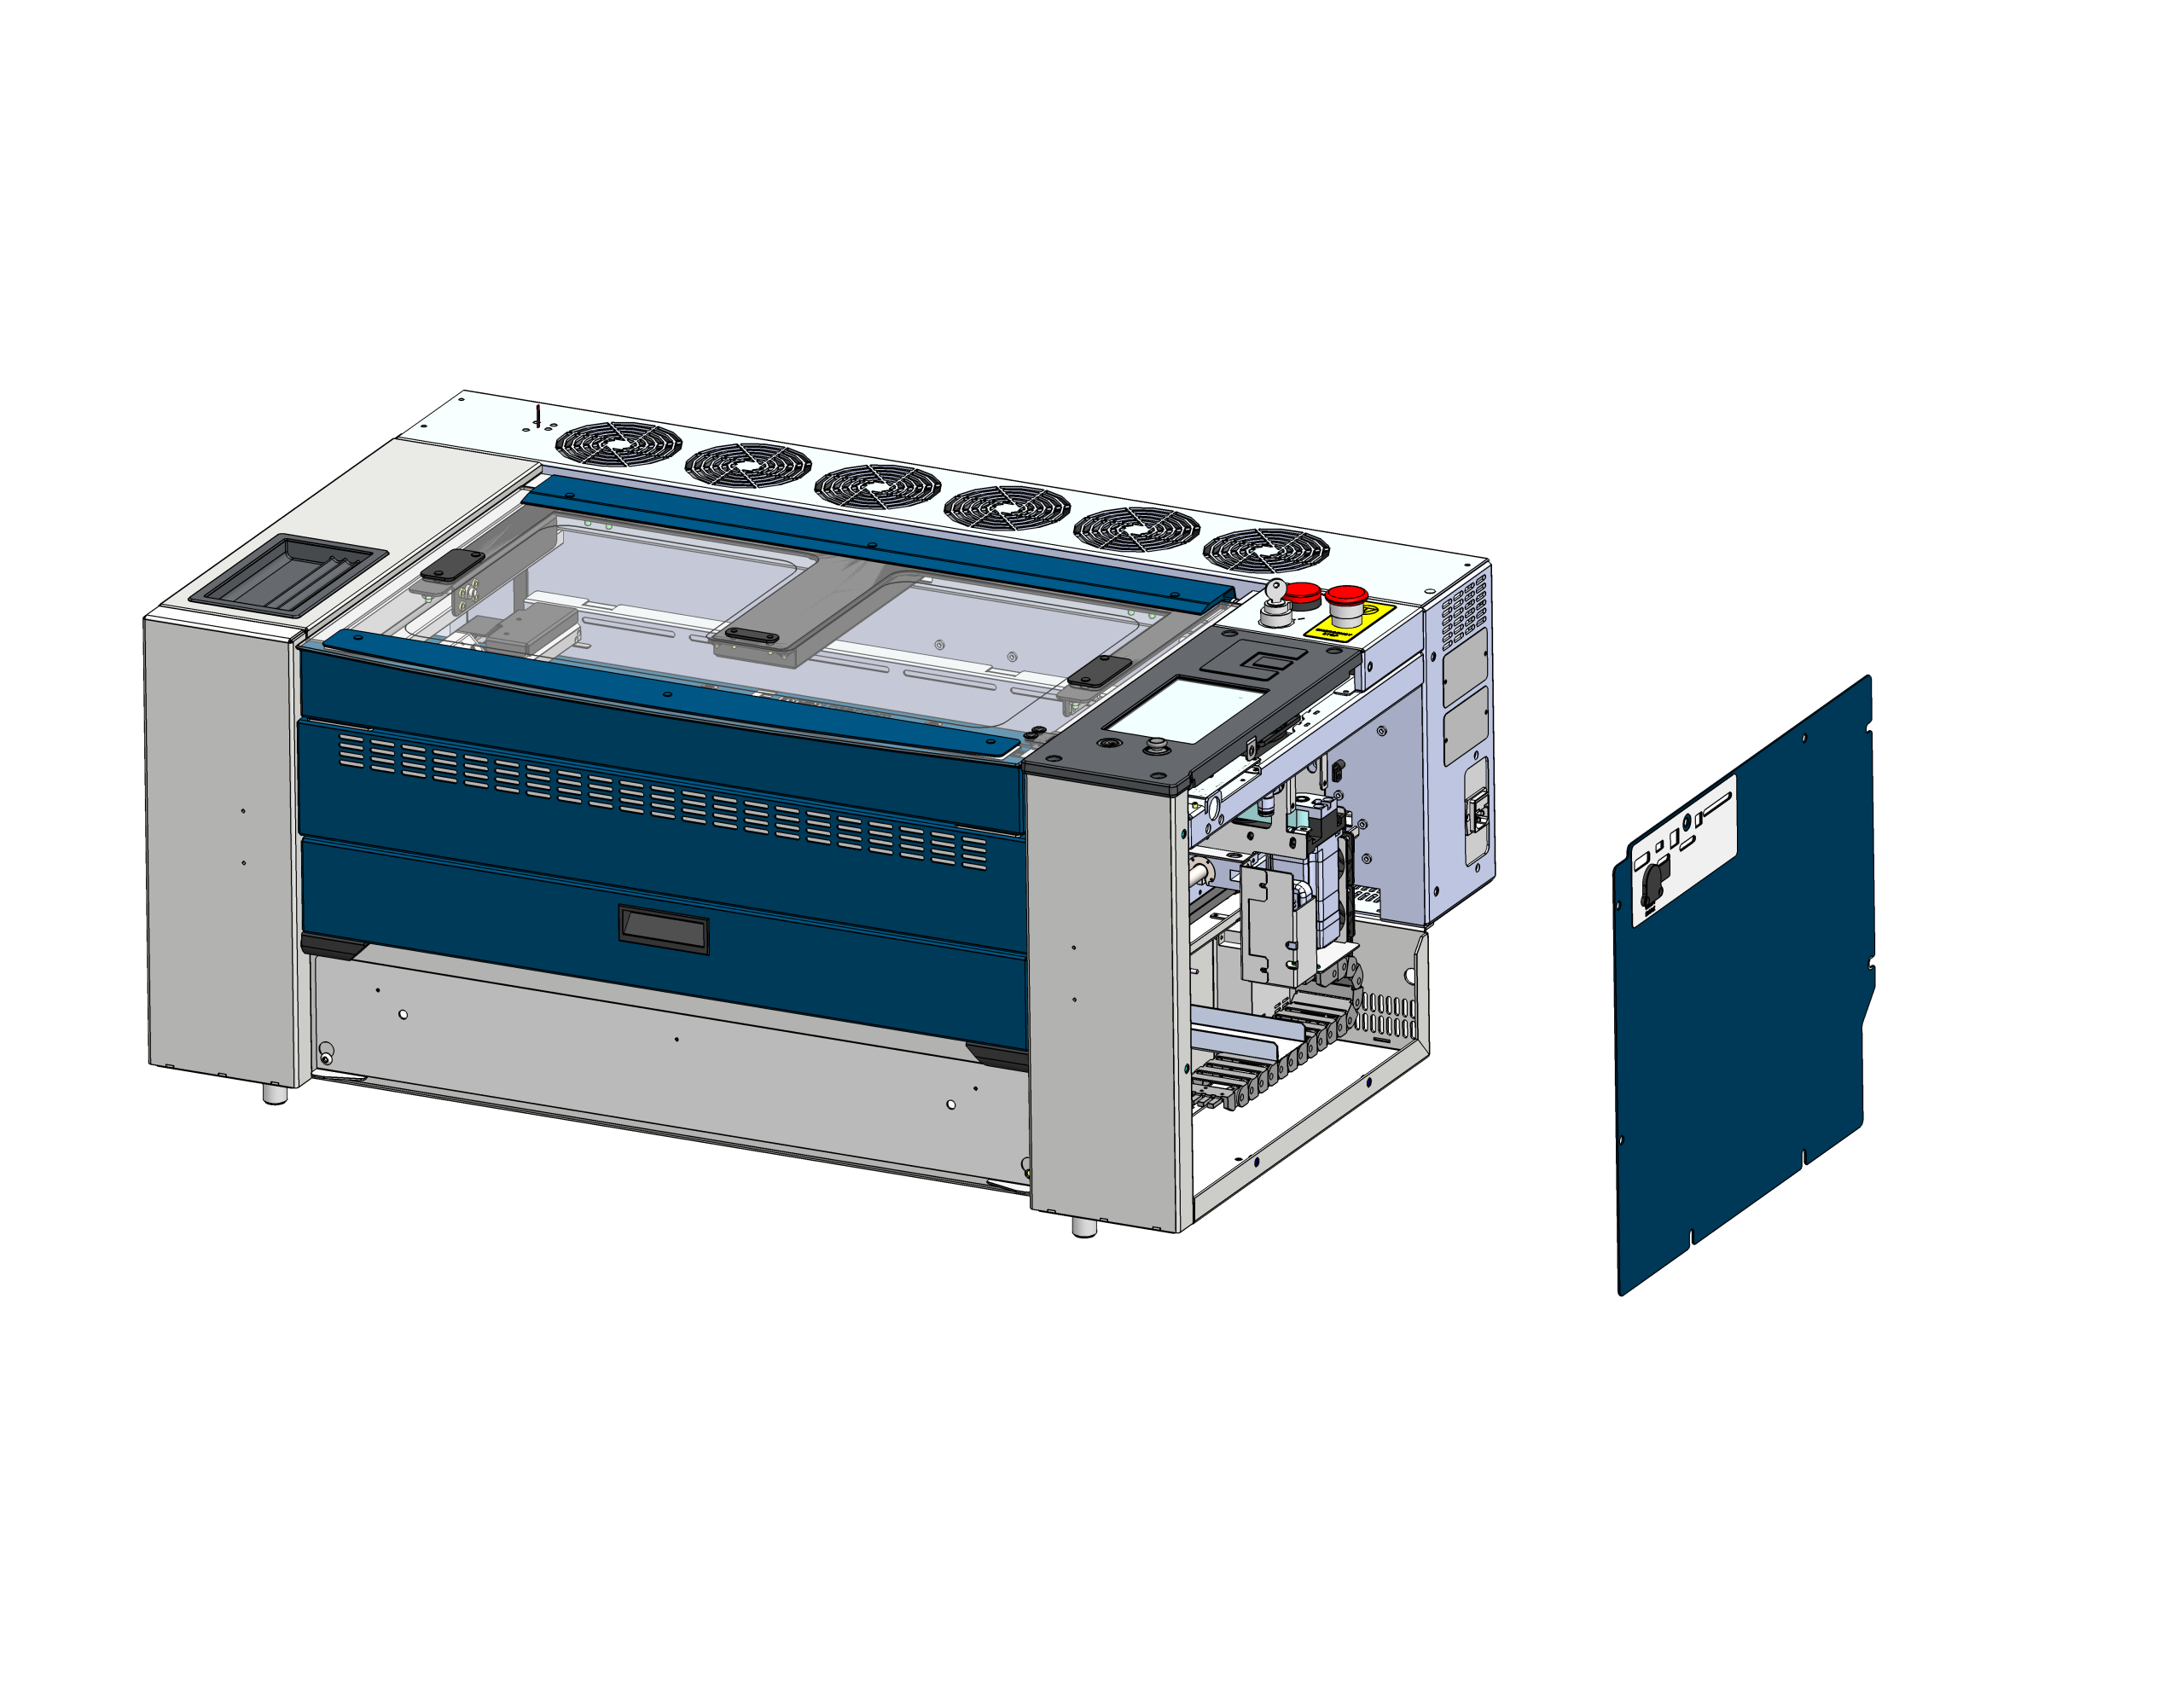
サイドパネルを取り外す

Locate and remove the right side panel of the laser chassis to gain access to the air assist solenoid assembly.

Locating the solenoid
ステップ3

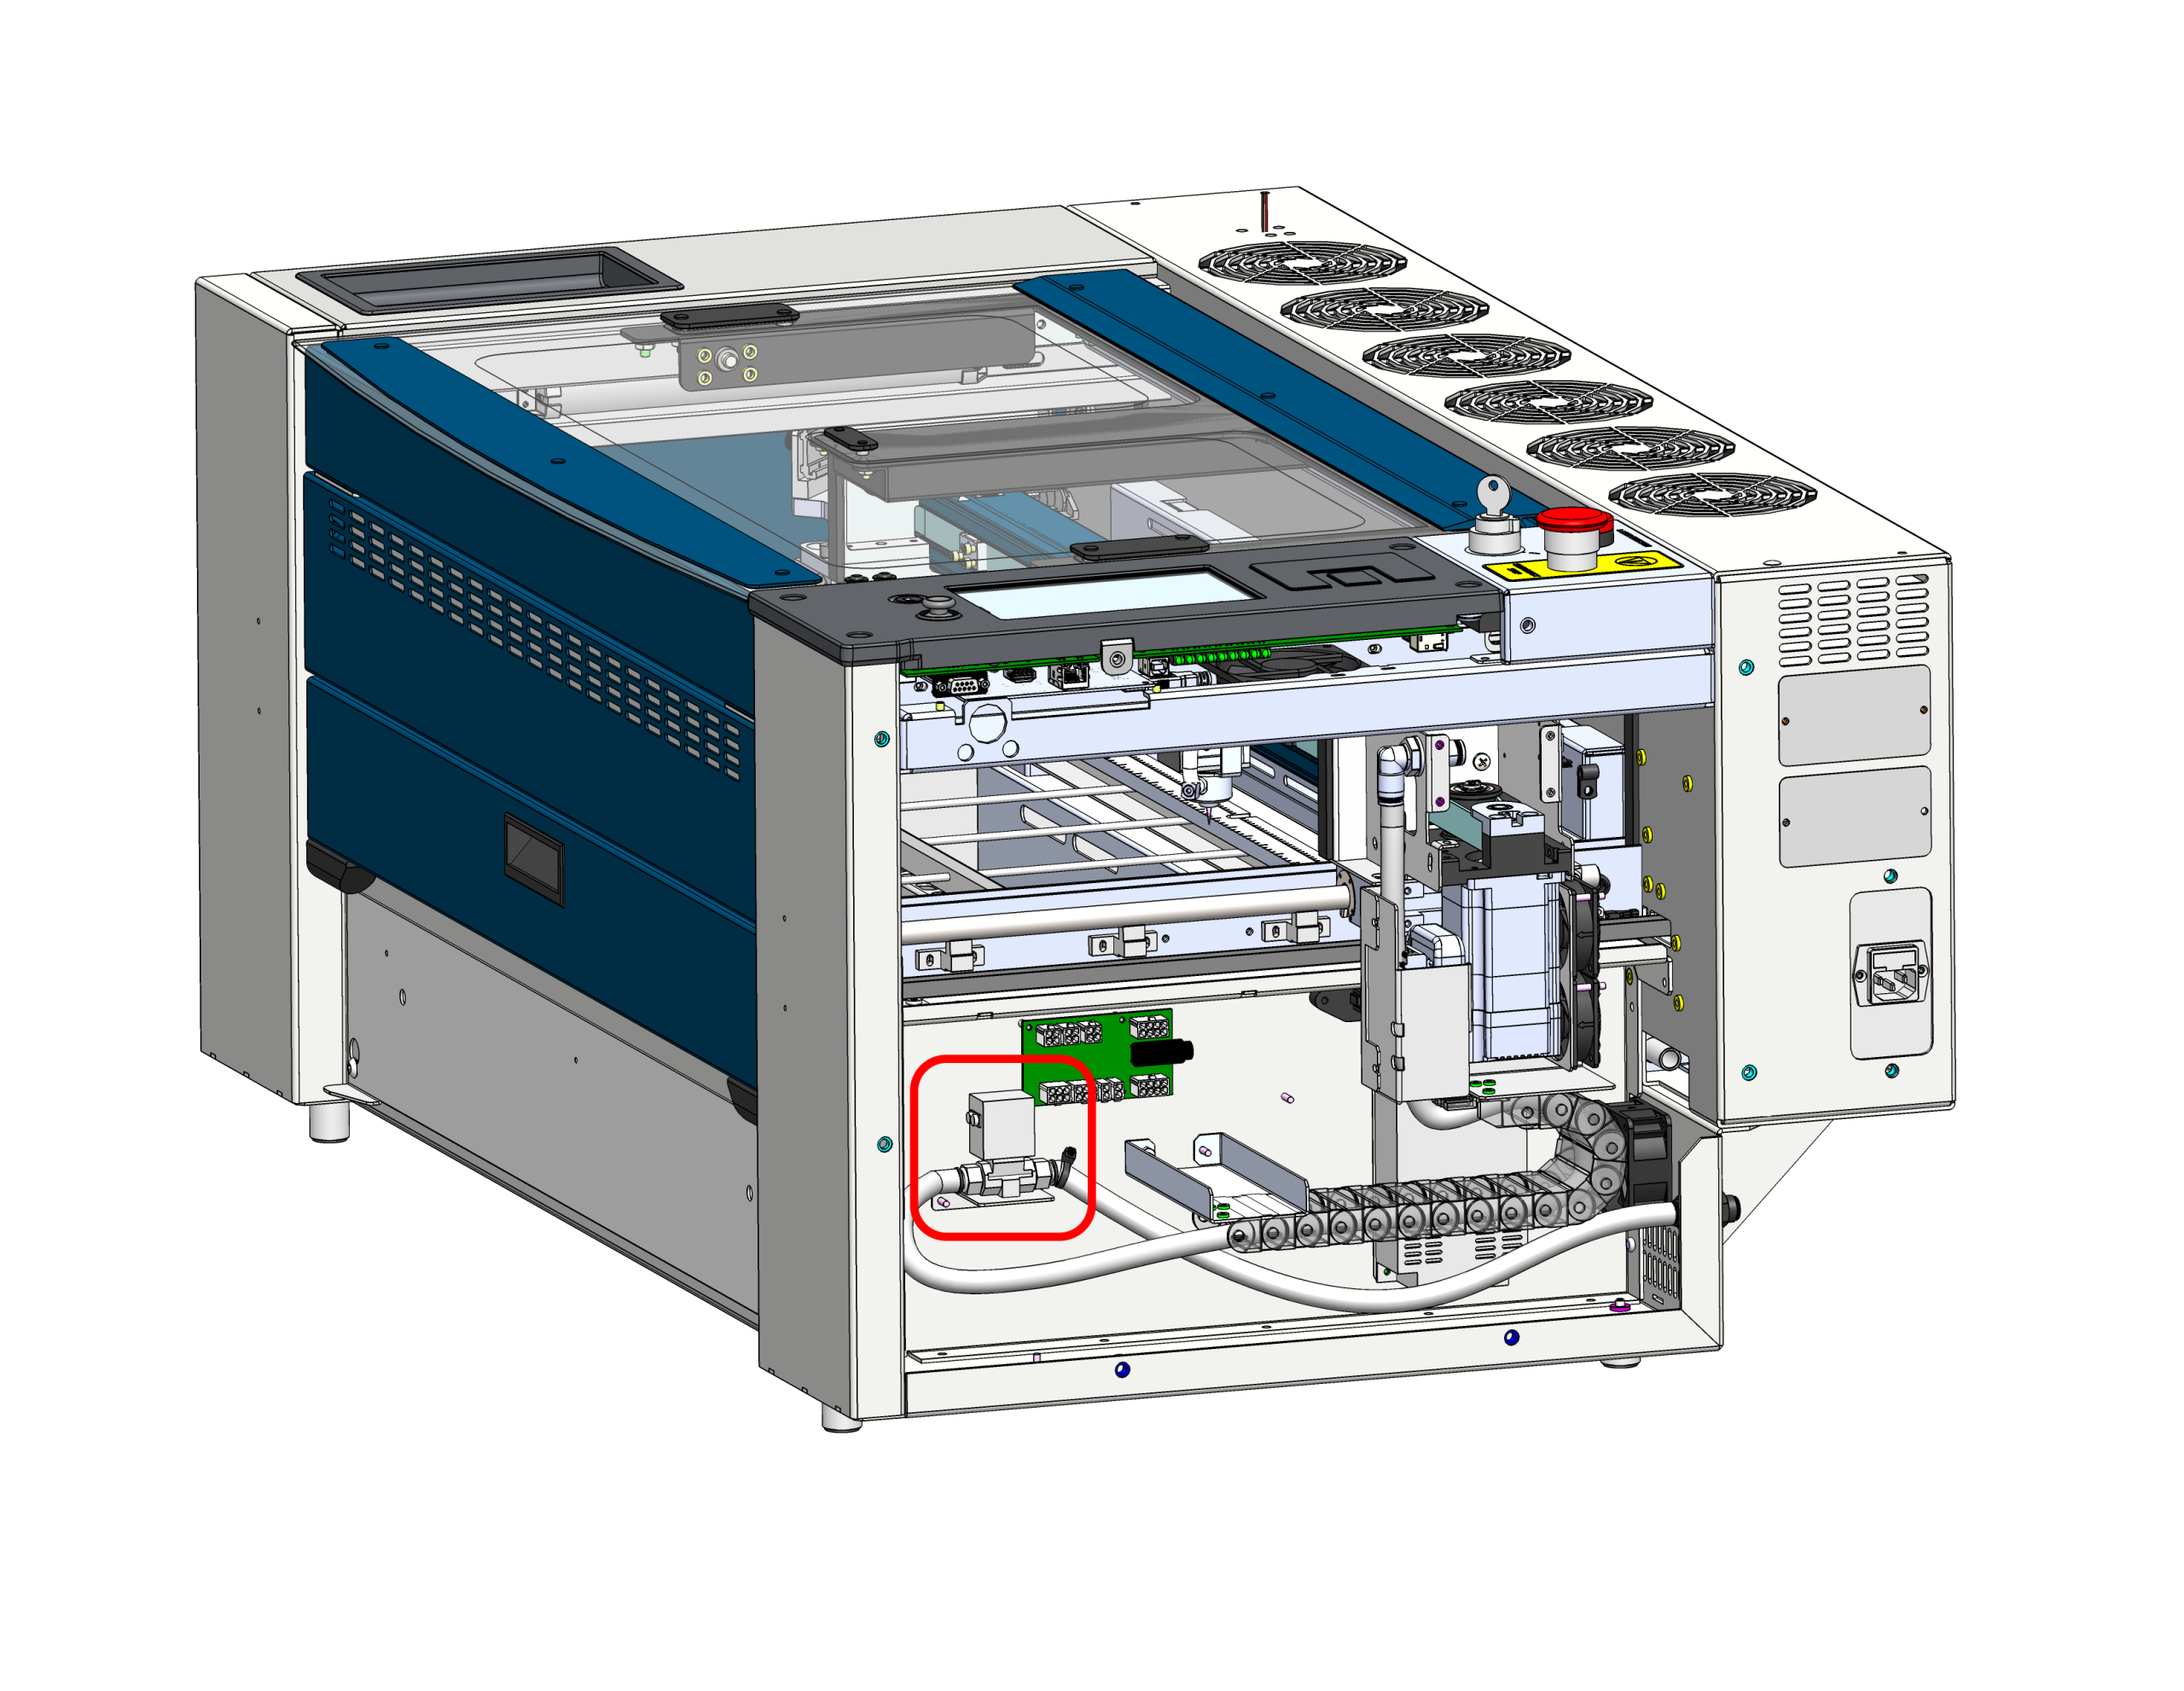
Locate Solenoid

Locate the air assist solenoid behind the right side panel. It’s mounted to the chassis of the machine (circled in red).

Loosening solenoid nut
ステップ4

Loosen Retaining Nut

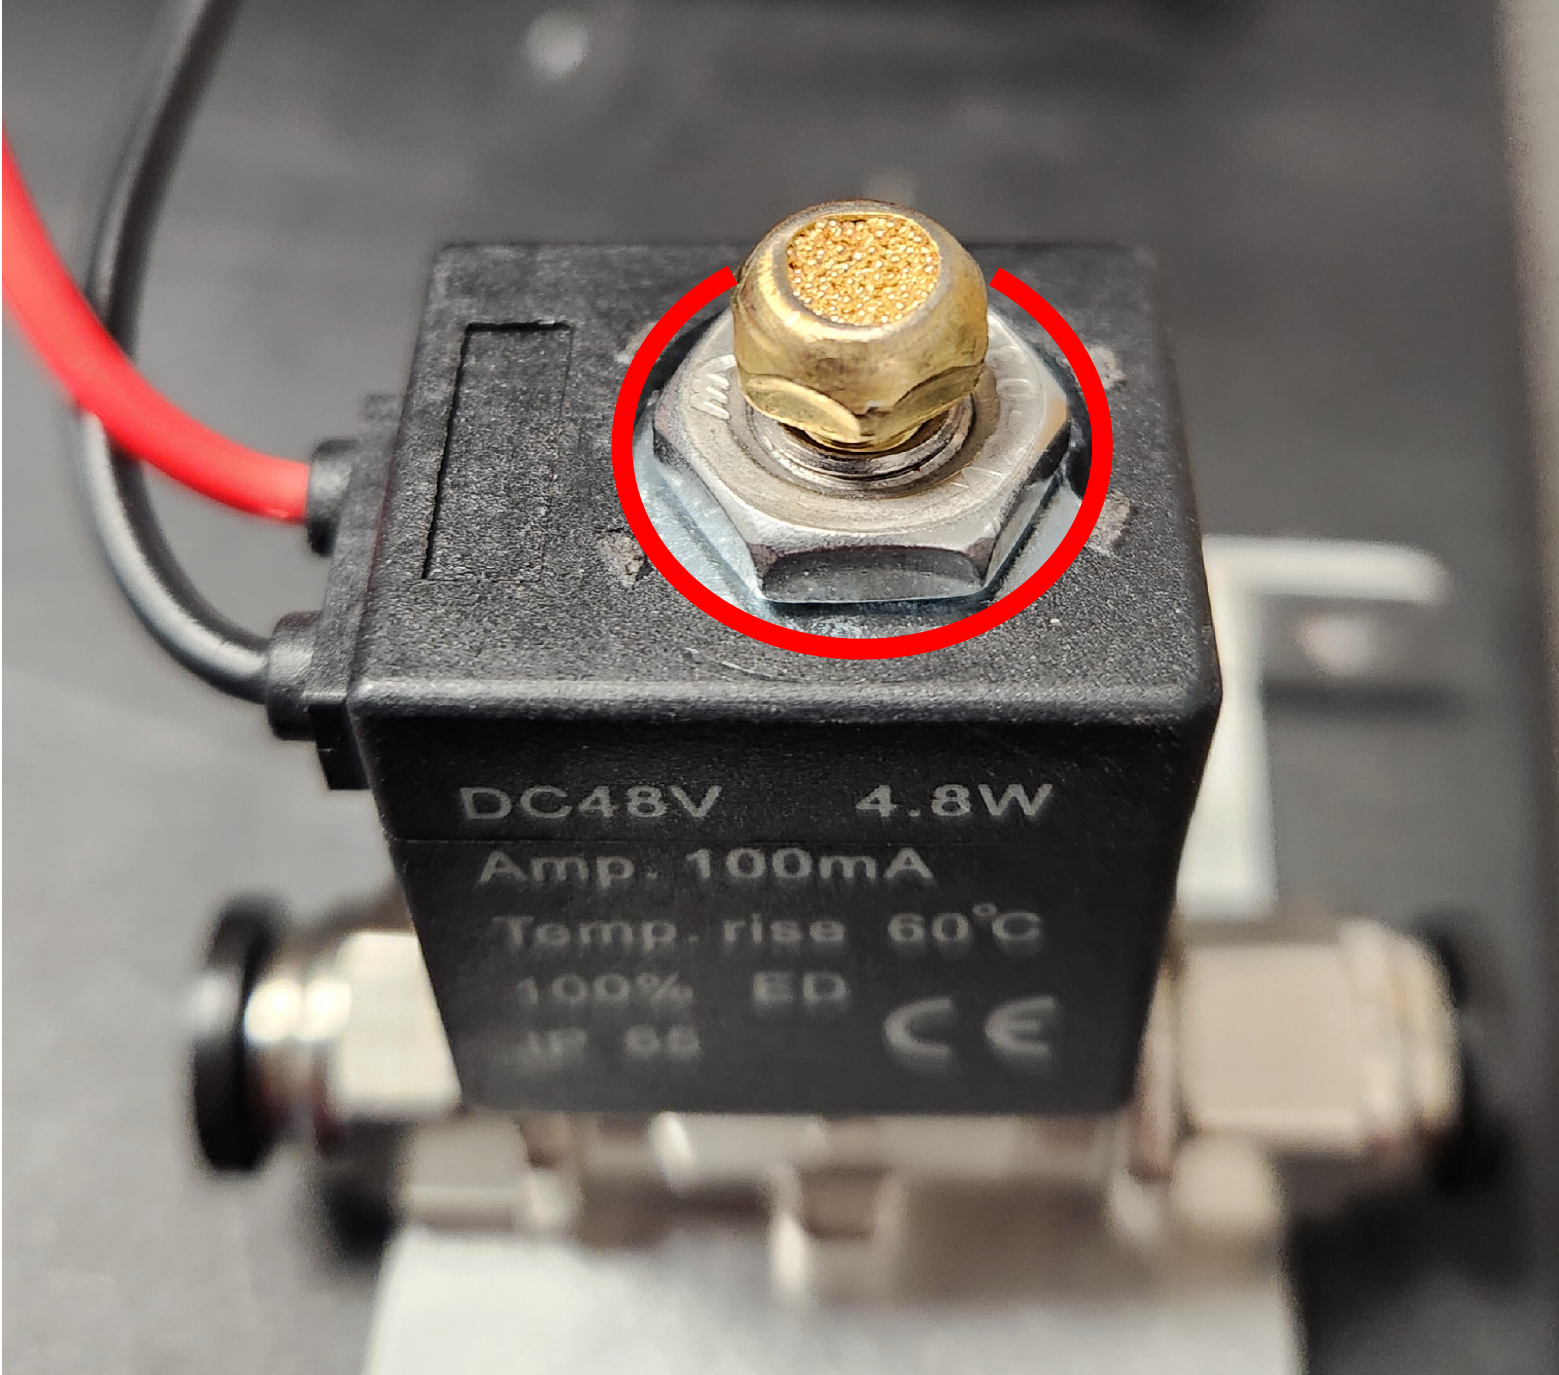
Locate the top retaining nut (silver nut, circled in red).

Loosen this nut slightly until the main body of the solenoid yields and turns freely, but remains physically secure to the assembly.

Testing diagnostics screen
ステップ5

Test & Verify

Replace the side panel. Plug the machine back in, power it on, and navigate to the Diagnostics menu to activate the air assist manually.

  • It works: You’ve successfully adjusted the solenoid tension and the procedure is complete.
  • It still fails: If you’ve loosened it to the point where the solenoid body rotates easily and it still won’t cycle, the solenoid is damaged and needs to be replaced.

Solenoid Replacement Required?

If you’ve completed the tension adjustment and the air assist is still failing to cycle, the solenoid assembly must be replaced. Please refer to the Air Assist Solenoid Replacement guide linked in the additional article menu on the right.

これは役に立ちましたか?

はい
いいえ
ご意見ありがとうございます!
  • ID:
    KA-01707
  • 日付:
    05/26/2026

ツール:

  • Adjustable Wrench

レーザー治療の旅を続けましょう

過去のレッスンを復習するか、次のステップに進んで新たな発見を!