Geschätzte Zeit: 15–20 Minuten • Schwierigkeitsgrad: Anfänger
Diese Anleitung führt Sie durch den Prozess des Ausbaus und Austauschs der Autofokus-Plunger-Baugruppe (AFP) Ihres Lasersystems. Der AFP ist eine wichtige Komponente, die zur automatischen Einstellung der richtigen Fokusentfernung zwischen dem Laserkopf und der Materialoberfläche dient. Der Austausch eines beschädigten oder fehlerhaften AFP gewährleistet eine gleichbleibende Gravurqualität und eine zuverlässige Autofokusleistung.
AFP-Entfernung
-
Power down and disconnect the machine.
Turn off the engraver and unplug it from the power source. -
Remove the carriage cover.
Loosen and remove the nine (9) Torx screws securing the carriage assembly cover, then lift the cover off to expose the AFP assembly.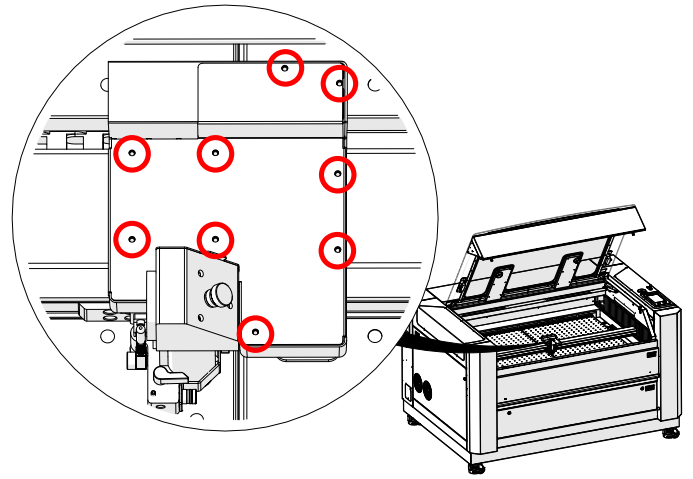
Abbildung 1: Positionen der Torx-Schrauben, mit denen die Abdeckung des Schlittens befestigt ist.
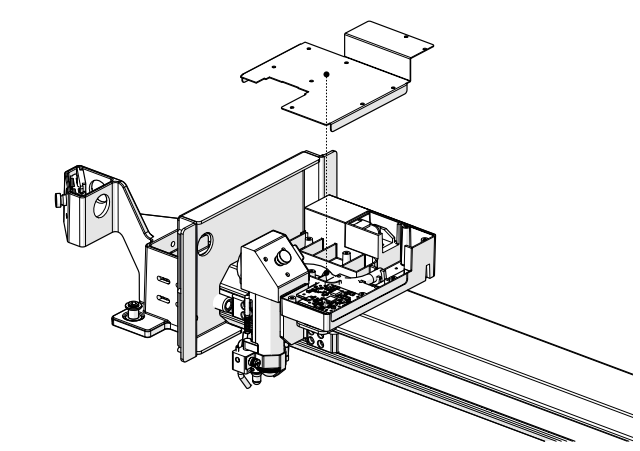
Bild 2: Die Abdeckung des Schlittens wurde entfernt, sodass die AFP-Baugruppe sichtbar ist.
-
Remove the AFP magnet block.
Using a 5/64” Allen wrench, loosen and remove the one (1) screw securing the AFP magnet block.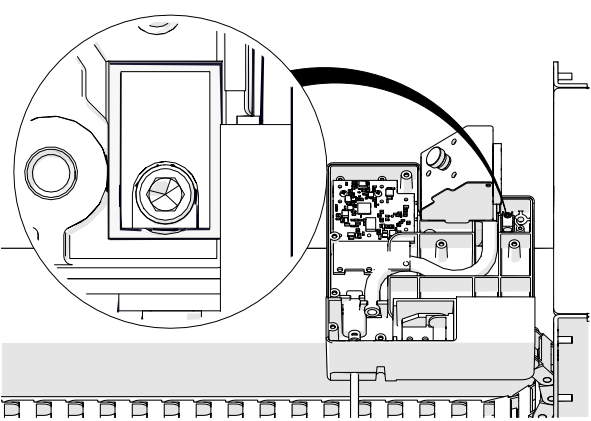
Bild 3: Entfernen der AFP-Magnetblock-Schraube.
-
Remove the AFP assembly.
Pull the AFP shaft downward and lift the AFP magnet block upward to remove the AFP assembly completely.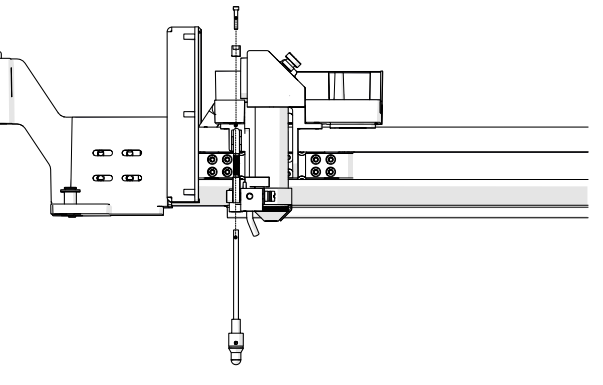
Bild 4: Entfernen der AFP-Baugruppe aus dem Schlitten.
AFP-Installation
-
Install the AFP assembly.
Insert the AFP shaft into the opening at the bottom of the carriage assembly. Position the AFP magnet block on top of the shaft and secure it with the one (1) 5/64” Allen screw.
Bild 5: Einbau der AFP-Baugruppe.
-
Orient the magnet correctly.
Ensure the magnet faces the back of the engraver before tightening the screw.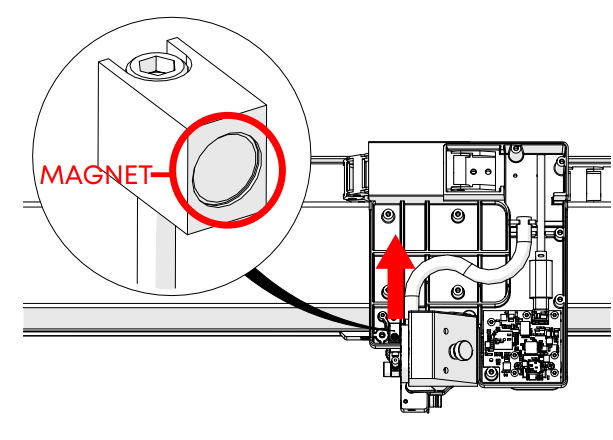
Abbildung 6: Korrekte Ausrichtung des Magneten.
Wichtig: Eine falsche Ausrichtung des Magneten verhindert, dass der AFP in seine Ausgangsposition zurückkehrt.
Testen der AFP
-
Test the plunger movement.
Press up on the AFP and release it. The plunger should quickly return to its resting position. If it does not, verify the magnet block is seated correctly and not crooked.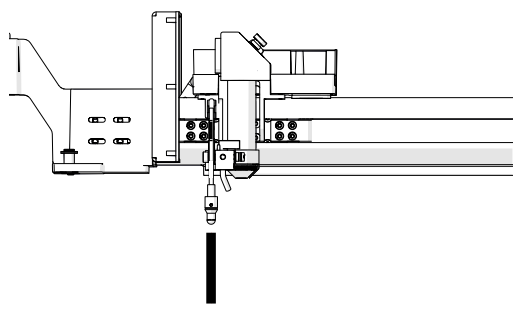
Bild 7: Testen der AFP-Kolbenbewegung.
-
Power on the engraver.
Reconnect the power cable and turn the engraver back on. -
Open the Settings menu.
On the display panel, press the gear icon in the upper-right corner to open the Settings menu.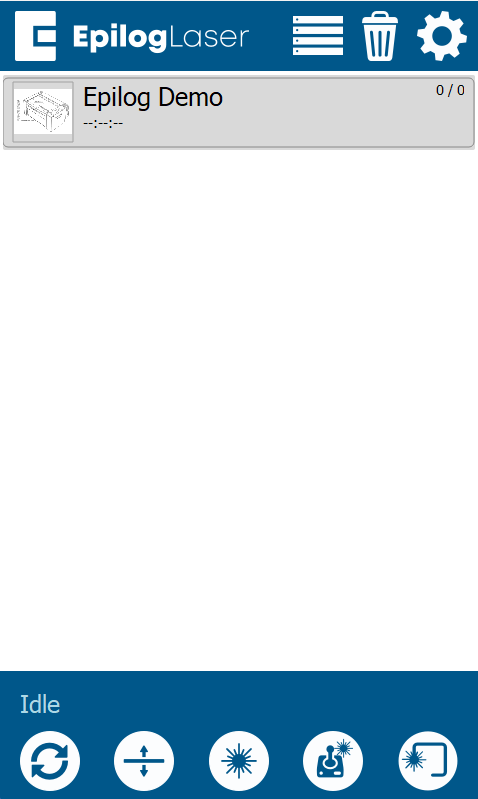
Bild 8: Aufrufen des Menüs „Einstellungen“.
-
Access Focus Settings.
Press“Focus” on the display to access the Focus Menu.
Bild 9: Fokus-Einstellungen aufrufen.
-
Run the AFP sensor test.
Turn Calibration Mode ON by pressing the “plus” symbol. Then select Table. Press up on the AFP and confirm that the “Plunger” indicator box on the right side of the screen activates. This ensures the sensor is functioning correctly.
Bild 10: Menü „Fokusbefehle“ mit Tabellenauswahl.
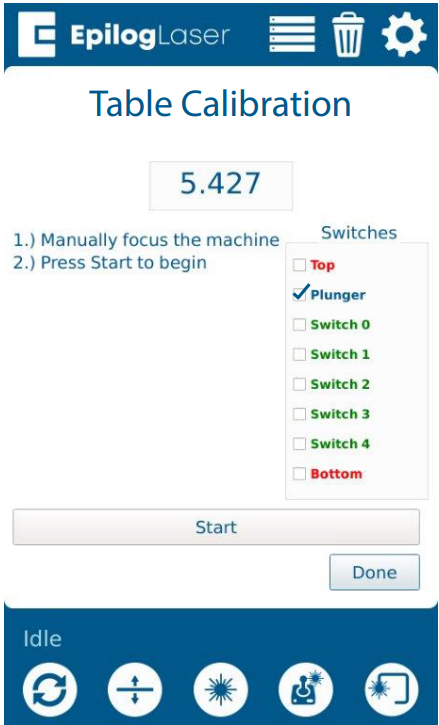
Bild 11: Drücken Sie die AFP-Taste, um die Sensoraktivierung zu testen.
Endmontage
-
Reinstall the carriage cover.
Place the carriage cover back onto the assembly.
Bild 11: Wiedereinbau der Wagenabdeckung.
-
Secure the cover.
Install and tighten the nine (9) Torx screws that hold the carriage cover in place.
Bild 12: Befestigung der Wagenabdeckung mit Torx-Schrauben.