Geschatte tijd: 30–45 minuten • Vaardigheidsniveau: gemiddeld
Deze procedure helpt je bij het verwijderen en installeren van de riem van de tafel (Z-as) op Fusion Pro 32- en 48-lasersystemen. Volg deze stappen om ervoor te zorgen dat de riem goed loopt, de juiste spanning heeft en de Z-as soepel beweegt voor nauwkeurig graveren.
Z-asriem verwijderen
-
Power down and disconnect the engraver.
Turn off the engraver and unplug it from the power source. -
Remove access panels.
Remove the front and right side panels of the engraver.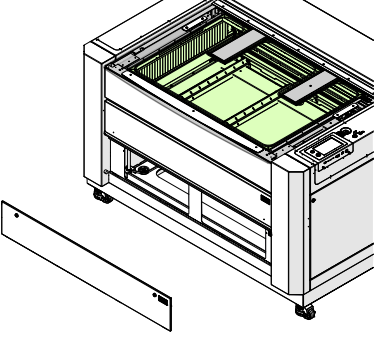
Afbeelding 1: Voorpaneel eraf gehaald.
-
Mark the motor location.
Use a pencil to mark the leading edge of the Z-Axis motor body on the chassis. This will help set proper belt tension during reinstallation.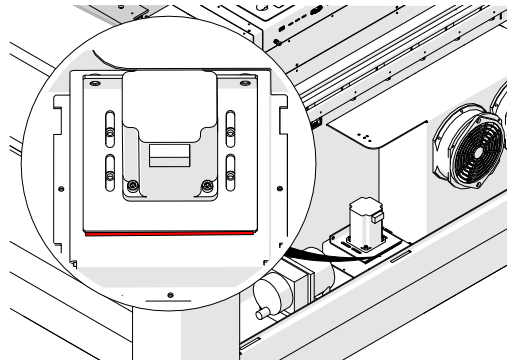
Afbeelding 2: Markeer de positie van de Z-as motor.
-
Koppel de kabelboom van de Z-as-motor los.
-
Release belt tension.
Loosen, but do not remove, the two 7/64” Allen screws on the tensioner.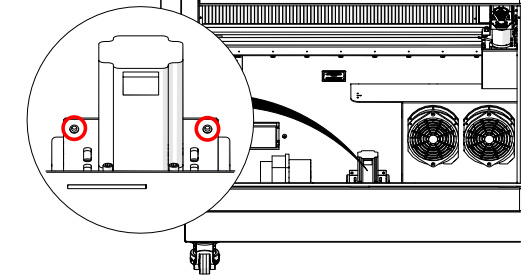
Afbeelding 3: Draai de spanbouten los.
-
Remove motor mounting screws.
Loosen and remove the four 7/64” Allen screws securing the Z-Axis motor to the chassis.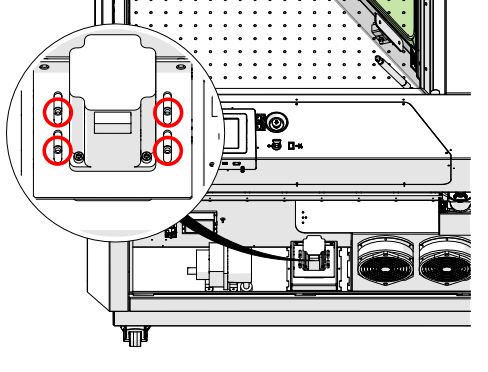
Afbeelding 4: Haal de schroeven waarmee de motor vastzit eraf.
-
Haal de Z-as-motor eraf.
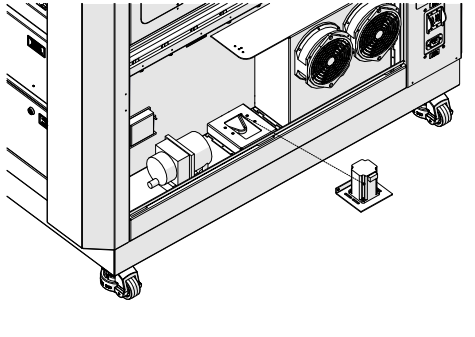
Afbeelding 5: Z-as motor eraf gehaald.
-
Remove the Z-Axis belt.
Press the belt flat against the bottom of the chassis and slip it underneath each lead screw pulley.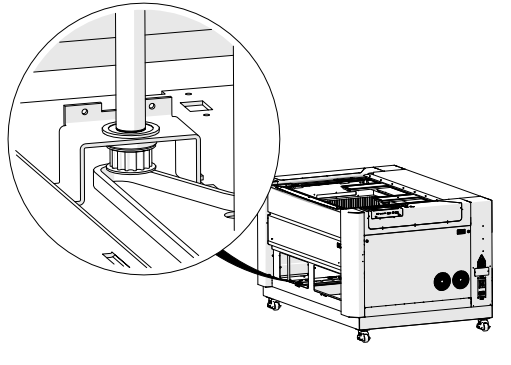
Afbeelding 6: Z-asriem verwijderd.
Installatie van de Z-asriem
-
Place the Z-Axis belt in the chassis.
Press the belt flat against the bottom of the chassis and slip it underneath each lead screw pulley. Ensure the toothed side wraps around the pulleys correctly.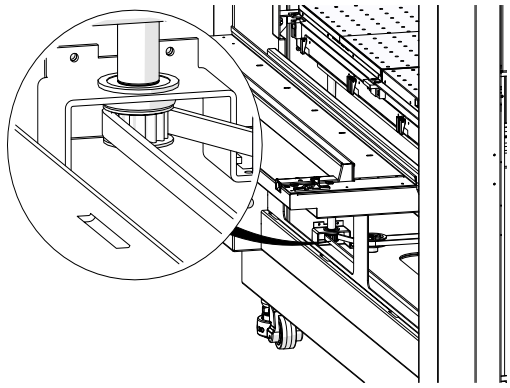
Afbeelding 7: Z-asriem goed geplaatst.
-
Reinstall the Z-Axis motor.
Position the motor so the pulley fits inside the belt, and loosely install the four 7/64” Allen screws.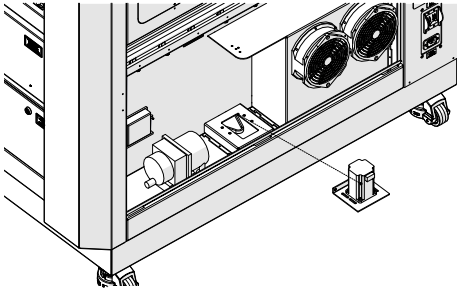
Afbeelding 8: Z-as motor is geïnstalleerd.
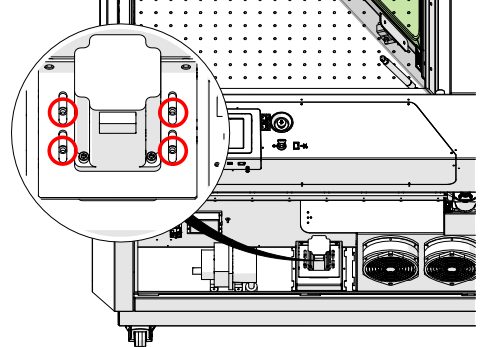
Afbeelding 9: Schroeven voor het bevestigen van de motor.
-
Route belts on all lead screws.
Repeat for all four lead screw assemblies, ensuring proper routing.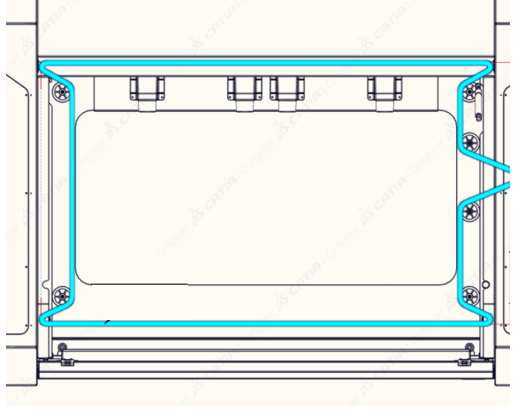
Afbeelding 9: Riemgeleiding op alle spindels.
-
Inspect belt placement.
Ensure the belt remains seated on all pulleys. Reposition if needed.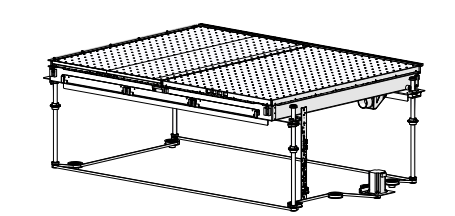
Afbeelding 11: Check hoe de riem zit.
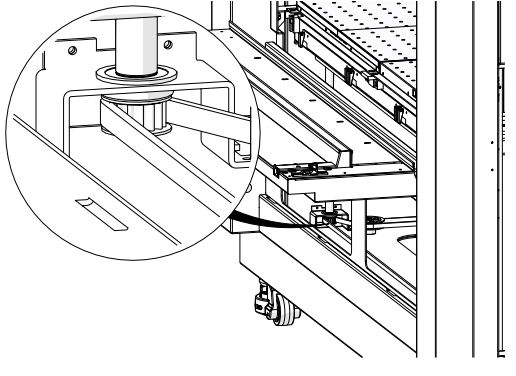
Afbeelding 12: Check de katrollen.
-
Tension the belt.
Tighten the two 7/64” Allen screws on the tensioner until the motor aligns with the pencil mark made earlier.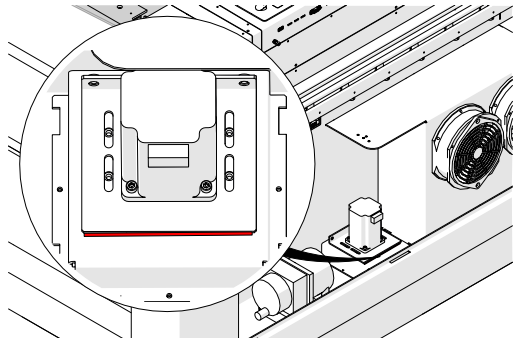
Afbeelding 13: Riemspanning aangepast.
-
Secure the motor.
Tighten the four motor mounting screws.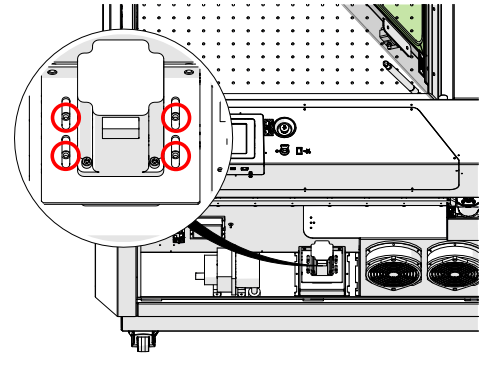
Afbeelding 14: Motor vastgezet.
-
Sluit de kabelboom van de Z-as-motor weer aan.
-
Reinstall all access panels.
Replace the front and right panels of the engraver.
Afbeelding 16: Toegangspanelen weer teruggeplaatst.