Geschatte tijd: 15–20 minuten • Vaardigheidsniveau: Beginner
Deze procedure helpt je bij het verwijderen en vervangen van de autofocusplunjer (AFP) op je lasersysteem. De AFP is een belangrijk onderdeel dat de juiste focusafstand tussen de laserkop en het materiaaloppervlak automatisch instelt. Door een kapotte of slecht werkende AFP te vervangen, zorg je voor een constante graveerkwaliteit en betrouwbare autofocusprestaties.
AFP verwijderen
-
Power down and disconnect the machine.
Turn off the engraver and unplug it from the power source. -
Remove the carriage cover.
Loosen and remove the nine (9) Torx screws securing the carriage assembly cover, then lift the cover off to expose the AFP assembly.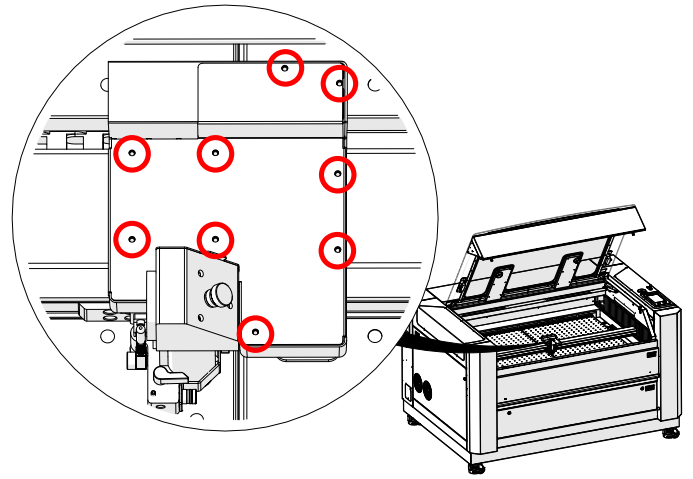
Afbeelding 1: Waar zitten de Torx-schroeven die de wagenafdekking vastzetten?
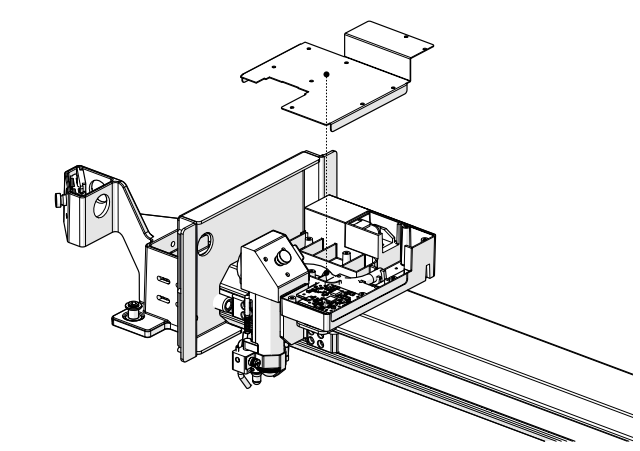
Afbeelding 2: De afdekking van de slede is eraf, waardoor je de AFP-assemblage kunt zien.
-
Remove the AFP magnet block.
Using a 5/64” Allen wrench, loosen and remove the one (1) screw securing the AFP magnet block.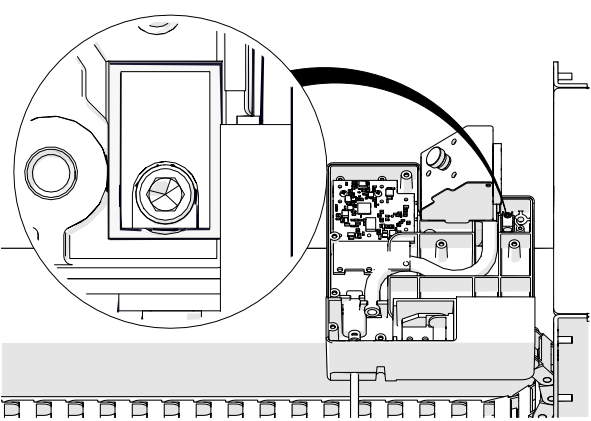
Afbeelding 3: De schroef van het AFP-magneetblok verwijderen.
-
Remove the AFP assembly.
Pull the AFP shaft downward and lift the AFP magnet block upward to remove the AFP assembly completely.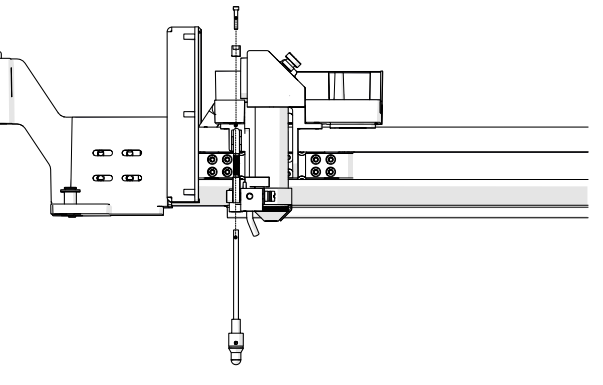
Afbeelding 4: De AFP-unit van de wagen halen.
AFP-installatie
-
Install the AFP assembly.
Insert the AFP shaft into the opening at the bottom of the carriage assembly. Position the AFP magnet block on top of the shaft and secure it with the one (1) 5/64” Allen screw.
Afbeelding 5: De AFP-assemblage installeren.
-
Orient the magnet correctly.
Ensure the magnet faces the back of the engraver before tightening the screw.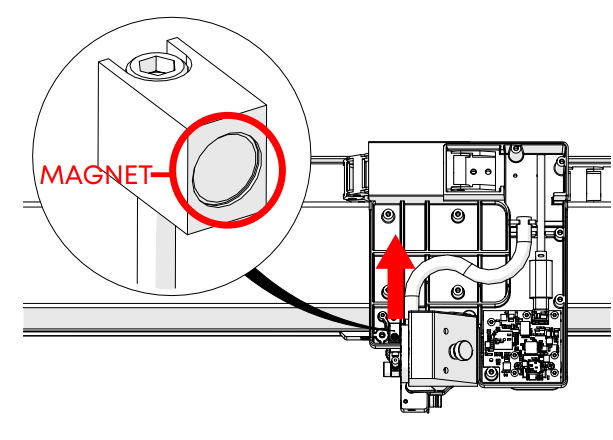
Afbeelding 6: Zorg dat de magneet goed zit.
Belangrijk: Als je de magneet verkeerd plaatst, kan de AFP niet terug naar zijn rustpositie.
Het AFP testen
-
Test the plunger movement.
Press up on the AFP and release it. The plunger should quickly return to its resting position. If it does not, verify the magnet block is seated correctly and not crooked.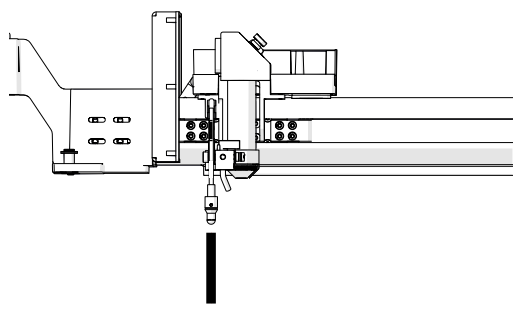
Afbeelding 7: De beweging van de AFP-plunjer testen.
-
Power on the engraver.
Reconnect the power cable and turn the engraver back on. -
Open the Settings menu.
On the display panel, press the gear icon in the upper-right corner to open the Settings menu.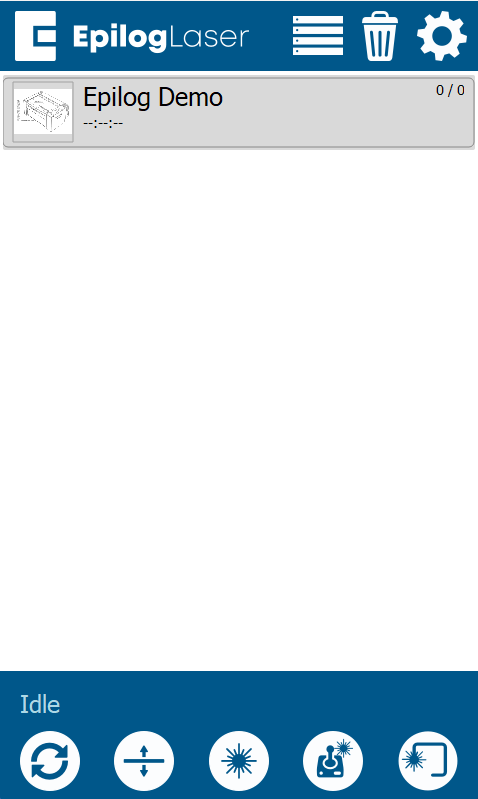
Afbeelding 8: Het menu Instellingen openen.
-
Access Focus Settings.
Press“Focus” on the display to access the Focus Menu.
Afbeelding 9: Focusinstellingen openen.
-
Run the AFP sensor test.
Turn Calibration Mode ON by pressing the “plus” symbol. Then select Table. Press up on the AFP and confirm that the “Plunger” indicator box on the right side of the screen activates. This ensures the sensor is functioning correctly.
Afbeelding 10: Menu Focusopdrachten met de optie Tabel selecteren.
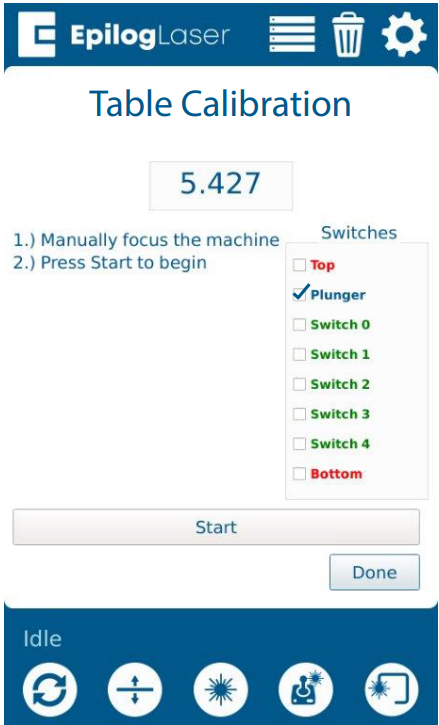
Afbeelding 11: Druk op de AFP om te kijken of de sensor werkt.
Eindassemblage
-
Reinstall the carriage cover.
Place the carriage cover back onto the assembly.
Afbeelding 11: De afdekking van de slede weer terugplaatsen.
-
Secure the cover.
Install and tighten the nine (9) Torx screws that hold the carriage cover in place.
Afbeelding 12: De afdekking van de slede vastzetten met Torx-schroeven.