Inhaltsverzeichnis
- Einführung
- Sicherheit
- Erste Schritte
- Setting Up Your Laser System
- Unpacking the Fusion Ascent
- Choose Where to Locate the System
- Connecting the Exhaust
- Connecting Electrical Power
- Connecting the Laser to Your Computer
- Power on the Laser
- Set the IP Address
- Install the Software Suite & Set Up Your Laser
- Sign Up for Driver Updates and Register Your System
- Systemsteuerung
- System Features
- Machine Maintenance
- Specifications
- Technical Support
- Warranty
- Material-Einstellungen
- Calibration
Symbols

Start-/Stopp-Taste
Press the Go/Stop button to start and pause a job.
- Pressing the Go/Stop button during a running job will stop the lens carriage and the laser beam will be shut off.
- If the Go/Stop button is pressed during raster engraving mode, the lens carriage will pause on either the far left or far right of the engraving line that is in process. If the Go/Stop button is pressed while in vector cutting mode, the lens carriage will stop at the end of a line segment or at the next line node location.
- Once the lens carriage has stopped, you can open the door to examine the job. By closing the door and pressing the Go/Stop button, the job will commence where it left off. If the item being engraved/cut has not been moved, the engraving/cutting registration will not be affected.
-
 Note: Opening the door on the laser during engraving or cutting will stop the laser from firing; however, the lens carriage will continue to move. It is important to stop the job before you open the door to ensure the engraving/cutting is completed.
 - If you press the Go/Stop button while in vector mode it may take some time for the system to actually stop. The system needs to get to the next node in a vector before it can stop.
LED Status
The outer ring of the Go/Stop button.
Der Ring um die Go/Stop-Taste ändert je nach Status der Maschine bestimmte Farben.
- White: The machine is booting.
- Purple: The machine is waiting for the touch screen configuration to load.
- Multi-colored: The machine is Homing.
- Alternating Light Blue to Green: Machine is Idle and ready to run a job.
- Green: Machine is actively running or tracing a job.
- Red: A drive has failed. The number of flashes determines the drive number that failed. If more than one drive has failed, it flashes for the first sequential drive.

Reset Key
Pressing the Reset key will move the carriage back to its Home Position. Press the Reset key after you have moved the carriage when in Jog mode.
You may also press this key if you want to start a job over after pausing it with the Go/Stop button. Reset does not erase the job from the laser system’s memory; rather it will stop the engraving job in process and send the carriage back to the Home Position.

Fokus
The Focus function allows you to manually set the table to the correct height for engraving while using the Focus Gauge. With Focus highlighted, use the Joystick to move the table up or down. The display will show a digital readout of the table position. Press once to enable the Focus feature and the icon will turn green. Press again to exit this feature.

Roter Punktzeiger
The Pointer key is a toggle switch that turns the laser system’s Red Dot Pointer on and off.

Joggen
The Jog function allows you to move the laser head around the table with the use of the Joystick. To make it easier to use, turn on the Red Dot Pointer for a visual indicator of where the carriage is moving. The carriage can be moved in X, Y or diagonally. The display will show a digital readout of the carriage position. This function is useful for bringing the focus gauge to any object on the table to ensure it’s focused properly.
For more information, see “Auto Focus vs Manual Focus”.

Trace
The Trace function allows you to preview the placement of your artwork on your work piece before you run the job. To use, turn on the Red Dot Pointer, select your job from the Job Menu, and press the Trace key. The laser head will begin tracing the entire outline of your job repeatedly. To stop tracing, press the Trace key again.

Job-Menü
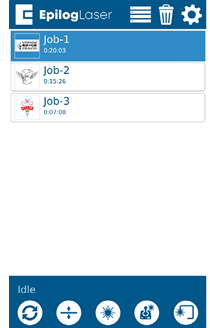
- The Job Menu allows you to scroll through the jobs in your laser system. You will be able to see a list of jobs that have been sent to the laser. The job name displayed is the same as the file name that you printed to the laser.
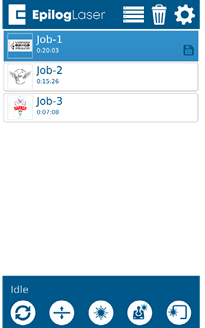
- When the job you want has been selected, it will be highlighted in blue. Press the Go/Stop button to start the job.
- After the job starts, the job’s settings and a timer will be activated and will be shown at the bottom of the display.
- Saved jobs will always be visible at the bottom of the list with a save icon next to the job name.
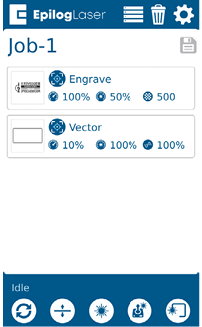
Pressing and holding down your finger on a job will pull up the job’s settings, allowing you to view the Speed, Power, and Resolution or Frequency. A save button will also be visible in the upper right corner that allows you to save the job permanently to the laser.

Delete Button
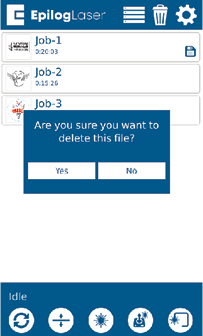
The Delete Button will permanently erase jobs from the Job Menu. To delete a job, select the job in the Job Menu, and then select the Delete Button. A dialog will pop up to confirm that you want to delete the file. Select “Yes” and the file will be removed from the Job Menu.
Note: If you have marked a job as “Saved” and delete the file, it will still be erased from the Job Menu.