所要時間:15~20分 •難易度:初心者向け
この手順では、レーザーシステムにおけるオートフォーカスタンジション(AFP)アセンブリの取り外しと交換プロセスを説明します。AFPは、レーザーヘッドと素材表面間の適切な焦点距離を自動的に設定する重要な部品です。損傷または故障したAFPを交換することで、安定した彫刻品質と信頼性の高いオートフォーカス性能を確保できます。
AFP除去
-
Power down and disconnect the machine.
Turn off the engraver and unplug it from the power source. -
Remove the carriage cover.
Loosen and remove the nine (9) Torx screws securing the carriage assembly cover, then lift the cover off to expose the AFP assembly.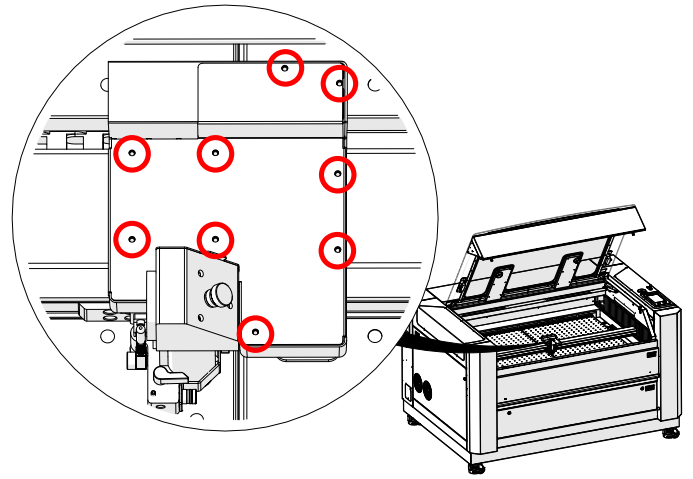
画像1:キャリッジカバーを固定するトルクスネジの位置。
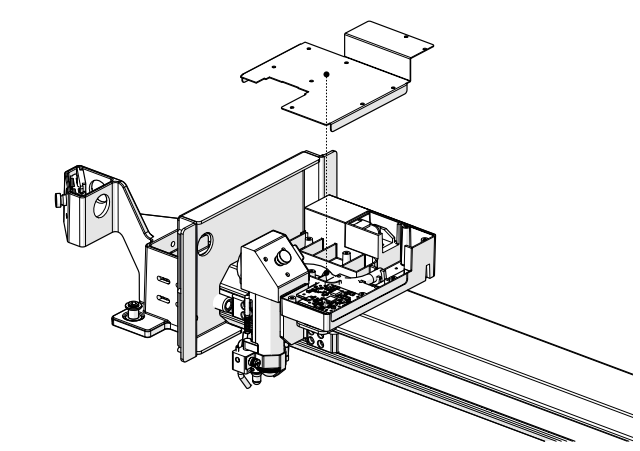
画像2:キャリッジカバーを外し、AFPアセンブリを露出させた状態。
-
Remove the AFP magnet block.
Using a 5/64” Allen wrench, loosen and remove the one (1) screw securing the AFP magnet block.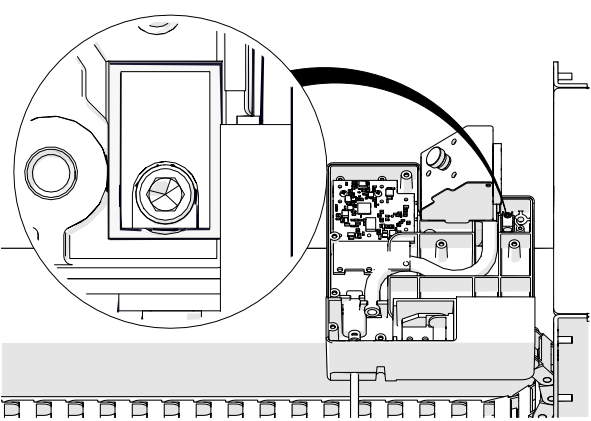
画像3:AFPマグネットブロックのネジを外す。
-
Remove the AFP assembly.
Pull the AFP shaft downward and lift the AFP magnet block upward to remove the AFP assembly completely.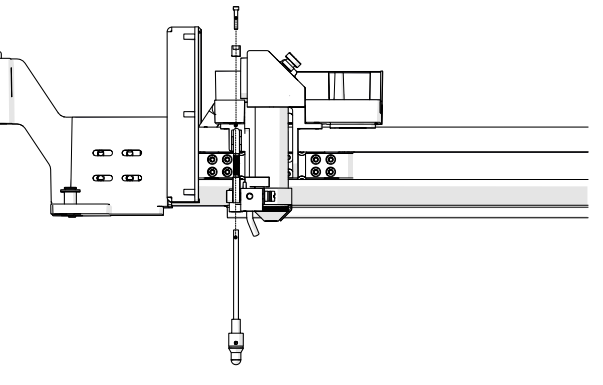
画像4:キャリッジからAFPアセンブリを取り外す。
AFPインストール
-
Install the AFP assembly.
Insert the AFP shaft into the opening at the bottom of the carriage assembly. Position the AFP magnet block on top of the shaft and secure it with the one (1) 5/64” Allen screw.
画像5:AFPアセンブリの取り付け。
-
Orient the magnet correctly.
Ensure the magnet faces the back of the engraver before tightening the screw.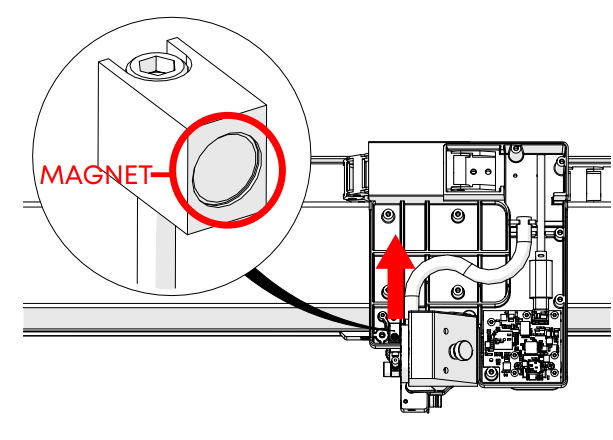
画像6:磁石の向きを正しくしてください。
重要:磁石の向きが正しくない場合、AFPが元の位置に戻らなくなります。
AFPのテスト
-
Test the plunger movement.
Press up on the AFP and release it. The plunger should quickly return to its resting position. If it does not, verify the magnet block is seated correctly and not crooked.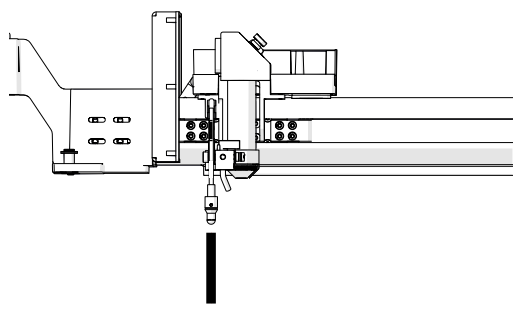
画像7:AFPプランジャー動作のテスト。
-
Power on the engraver.
Reconnect the power cable and turn the engraver back on. -
Open the Settings menu.
On the display panel, press the gear icon in the upper-right corner to open the Settings menu.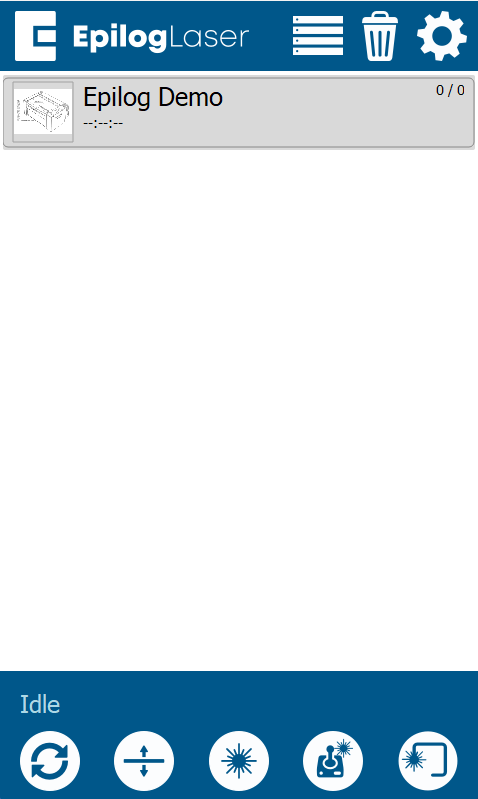
画像8:設定メニューへのアクセス
-
Access Focus Settings.
Press“Focus” on the display to access the Focus Menu.
画像9:フォーカス設定の入力。
-
Run the AFP sensor test.
Turn Calibration Mode ON by pressing the “plus” symbol. Then select Table. Press up on the AFP and confirm that the “Plunger” indicator box on the right side of the screen activates. This ensures the sensor is functioning correctly.
画像10:フォーカスコマンドメニュー(テーブル選択表示)
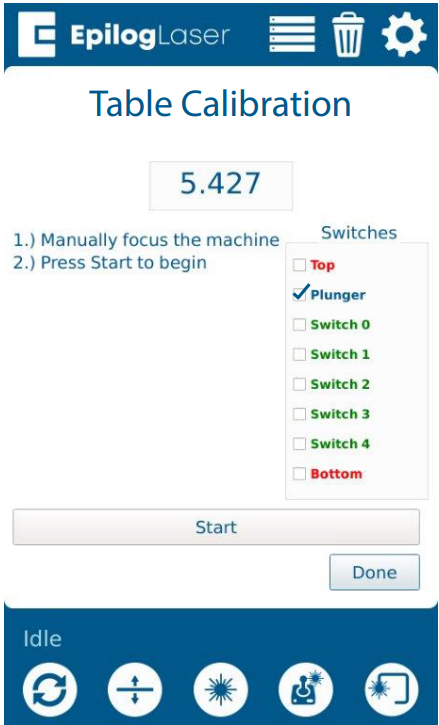
画像11:AFPを押してセンサー作動をテストする。
最終組立
-
Reinstall the carriage cover.
Place the carriage cover back onto the assembly.
画像11:キャリッジカバーの再取り付け。
-
Secure the cover.
Install and tighten the nine (9) Torx screws that hold the carriage cover in place.
画像12:トルクスネジでキャリッジカバーを固定する。