メインコンテンツへスキップ
X軸
シリーズ:8000

フィルター


はじめに (9)
Usage and Operation (93)
Service and Repair (49)
マニュアル (0)

オートフォーカスのプランジャー取り付け

helix オートフォーカスプランジャーを交換するにはどうすればよいですか?

はじめに

所要時間:15分 •難易度:初心者向け

This procedure walks you through replacing the Auto Focus Plunger on your laser system.
Following these steps carefully will ensure proper installation and reliable autofocus
operation after the replacement is complete.


コンポーネント概要

キャリッジ上のオートフォーカスポンプ部品図
キャリッジアセンブリの分解図

準備

  1. 機械の電源を入れる

    レーザーシステムを起動し、機械が原点復帰するまで待機してください。

    機械の電源が入りました
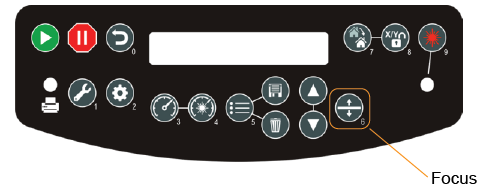
  2. フォーカスモードに入る

    コントロールパネルのフォーカスボタンを押してください。
    テーブルを下げる
  3. テーブルを下げてください

    テーブルを約2~3インチ(約5~7.5cm)下げ、キャリッジへのアクセススペースを確保してください。

    テーブルを下げる
  4. 機械の電源を切ってください

    機械的な作業を行う前に、システムを停止してください。

    機械の電源が切られています

オートフォーカスプランジャー交換

  1. レールカバーを外す

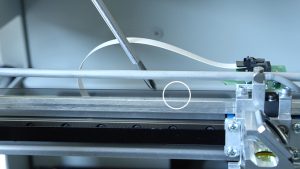
    レールカバーを固定している7本のプラスネジを緩め、カバーを取り外してください。

    レールカバーの取り外し
  2. 磁石ネジを外す

    5/64インチの六角レンチを使用して、オートフォーカスタンパの磁石を固定しているネジを外してください。

    オートフォーカスプランジャーマグネットの取り外し
  3. オートフォーカスのプランジャーを取り外す

    既存のオートフォーカスタンブラーをキャリッジからスライドさせて取り外す。

    オートフォーカスのプランジャーを取り外す
  4. 交換用プランジャーを取り付ける

    新しいオートフォーカスのプランジャーをキャリッジに挿入してください。

    新しいオートフォーカスのプランジャーを取り付ける
  5. 磁石を再取り付けする

    Apply light upward pressure to the plunger and reinstall the magnet using the 5/64" hex screw.
    Ensure the magnet is oriented toward the back of the machine.

    オートフォーカスマグネットの再取り付け
  6. レールカバーを再取り付けする

    レールカバーを再取り付けし、元のネジで固定してください。

    レールカバーの再取り付け
[参考になる]
  • ID:
    01647
  • 日付:
    02/09/2026

ツール:

  • 5/64インチ六角レンチ
  • プラスドライバー
/* === Aggressive removal of PrintFriendly injected header elements === */ #printfriendly #pf-title, #printfriendly #pf-src, #printfriendly .pf-header, #printfriendly header, #printfriendly .printfriendly-header, #printfriendly h1:first-of-type, #printfriendly .page-header, #printfriendly [class*="header"], #printfriendly [id*="header"] { display: none !important; visibility: hidden !important; height: 0 !important; margin: 0 !important; padding: 0 !important; } /* Hide any top bar or source URL container */ #printfriendly #pf-src, #printfriendly .pf-src, #printfriendly [class*="src"], #printfriendly [class*="url"] { display: none !important; } /* Force page margins and centered page numbers */ @page { size: letter portrait; margin: 0.7in 0.5in; } @page :left, @page :right { @top-left { content: none !important; } @top-center { content: none !important; } @top-right { content: none !important; } @bottom-center { content: counter(page); font-size: 0.95em; padding-bottom: 25px; } }