Problem Installing PhotoLaser Plus
I'm having problems installing Engrave Lab PhotoLaser Plus. How can I fix this?
These instructions provide solutions to installation problems customers have seen when installing PhotoLaser Plus (PLP). Our experience shows that installation problems can produce one of three error messages:
- Cannot install Product.ini
- This is a demo version and can only be used to produce 10 cuts
- Cannot find security key
We have found that the solution to all three error codes is to ensure there are license files in the C:/PhotoLaser Plus file folder.
To be able to access all of the PLP features, you must first activate the software. You can use some of the features without activating it, but since many of them will be missing, it won't be of much use prior to activation. The errors we're familiar with occur after connecting to the Internet and activating the product. The activation process is supposed to place two license files into the C:/PhotoLaser Plus file folder, but for some unknown reason, the license files are either not there, or cannot be recognized.
We have found that the license files are key to operating the software and must be in the correct folder for everything to work.
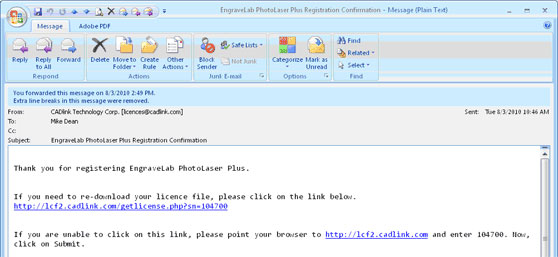
If any of your customers run into an error after activation of the program, have them retrieve new files from CADlink and then copy and paste (or, drag and drop) the license files into the C:/PhotoLaser Plus file folder. There are several different ways to get the correct license files. After PLP has been activated, CADlink sends a registration verification email to the customer. The email looks like this:

This email provides two different links that can be accessed to download the license files. Follow either link and download the Zip file that contains the license files. Unzip the license file and then place the two license files into the C:/PhotoLaser Plus file folder. You do not need to open the license files. Simply copy them into the folder. If you receive a message stating that the files already exist, copy over, or replace the old ones with the new files. This simple process has resolved all of the issues we have seen to date.
If further assistance is required, please visit www.epiloglaser.com/support to contact Epilog Laser Technical Support.
Attachments:
No attachments.