10000 - Zing Laser Tube Install
How do I replace the laser in my Zing Laser?
Machine Type: Epilog Zing 16 and 24 Lasers
Tools Required:
- #1 Phillips screw driver
- Lower the table to the bottom of the machine.
- Turn off the machine.
- Disconnect the machine from its power source.
Remove the four Phillips screws which secure the left hand side panel. There are three on the side and one on the rear as shown in picture 1a and 1b.
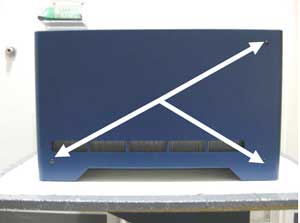
Picture 1a
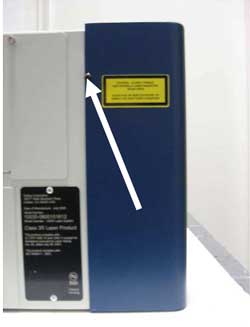
Picture 1b
Remove the side panel.
Disconnect the laser power connection, shown in picture 2, from the machines chassis. The connection is located above and behind the laser assembly. There is a lock on the connection, depress the lock and pull the connection toward you.
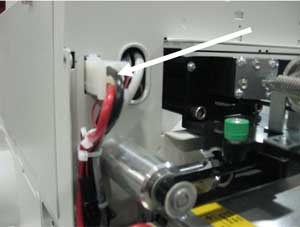
Picture 2
Disconnect the data cable from the laser assembly. The data cable is shown in picture 3. This connection works the same as your network cable. There is a lock on the connection that must be depressed before the connector will come out of the laser tube.
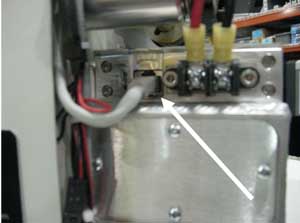
Picture 3
The laser is held in place by two green mounting plates. The mounting plates are located inside the engraving area on the left hand side. The location of the mounting plates is shown in picture 4.
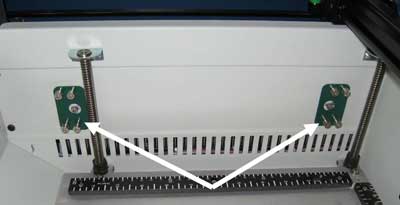
Picture 4
The four outer screws, identified by the arrows in picture 5a, secure the laser assembly and the single inner screw is a guide. The guide is identified in Picture 5b, by the arrow. Loosen the four outer screws, but DO NOT remove the guide screw. When the mounting screws are fully loosened, they will pop out from the mount, but you will not be able to remove them, they will stay with the mount.
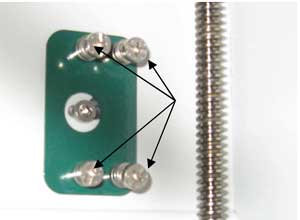
Picture 5a
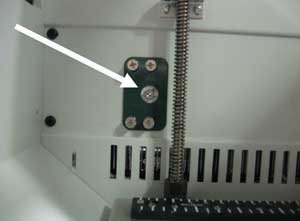
Picture 5b
Once the laser mounting plates are removed, you will note that the Laser guide pin fits in to a slot in your engravers chassis. To remove the laser assembly, lift it slightly and move the laser assembly so that the Laser Guide pin head is lined up with the hole in the machines chassis. The laser can now be removed from the machine.
Laser Installation:
Align the lasers guide pins with the holes in the side of the machines chassis and push the laser assembly against the side of the machine and slide the laser assembly toward the front of the machine.
Install the two laser mounting plates. Loosely install the four screws in each of the laser mounting plates. Once all four screws have been installed loosely, in each of the laser mounting plates, tighten all eight mounting screws.
Reconnect the data cable to the laser assembly, as shown in picture 6.
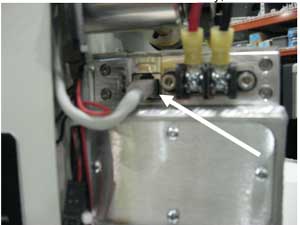
Picture 6
Reconnect the lasers power harness to the chassis as shown in picture 7.
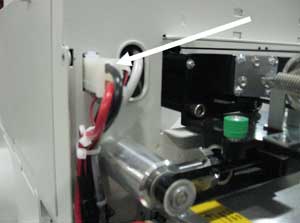
Picture 7
This completes the Laser Replacement process. You must now perform a laser alignment on your machine. To complete the laser alignment, please see Epilog Technical note “Aligning the Laser Beam on the Epilog Zing 16” or “Aligning the Laser Beam on the Epilog Zing 24.”
If further assistance is required, please visit www.epiloglaser.com/support to contact Epilog Laser Technical Support.
Attachments:
No attachments.