Removing the Background from a Photo
How do I remove the background from a photograph?
Anyone who has engraved photographs has had the experience of someone bringing in a photograph with a dark background that has no contrast with the person that is in the picture.
While you can fix a lot of the problems with software like Photograv, to really make the photo stand out and look good engraved on a product, such as a music box or jewelry box, you need to remove that dark background. Believe it or not, it isn’t as time consuming as you might think!
Using an inexpensive program like Photoshop Elements, which is available for under $100, you can make quick work of fixing a photo and prevent you from having to turn away a potential customer.

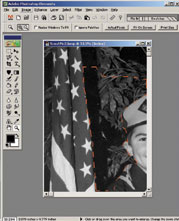
After you have scanned the photo in as a 600 dpi grayscale, open it in Photoshop Elements. Zoom in to a small area of the photo to work on. The closer you zoom in, the better your selection will be. Select the magnetic lasso tool, and click in the image to set the first fastening point. Fastening points anchor the area you want to select. Continue to follow the outline of the area of the background we want to delete. We are trying to delete the background by coming as close as possible to the portion of the photo we want to engrave. As you move the mouse, dots will appear where the program is selecting the area we want to get rid of.

As you move the pointer, the active segment snaps to the strongest edge in the image. Sometimes, the magnetic lasso tool adds fastening points to areas that you do not want to select. If this happens, move the mouse back close to the last correct selection point and click delete until all of the incorrect points are removed. In areas where the background is very close to the color of the photo you will have this happen. Move forward a little bit and click the mouse to create a manual selection point.
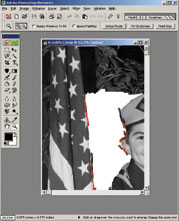
When you have selected the area you want to delete, click on the first selection point and the area will be selected (Image 2).

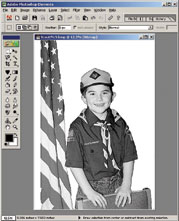
Click delete to remove that area (Image 3).

Clean up the edges of the photo where there is still background by creating a box selecting what is left on the page. Delete these portions of the background. Move on the screen to the next section of the photo and clean up that section until you have worked all of the way around the photo. (Image 4)
Don’t worry if the edges of the photo are not completely smooth. This inconsistency will look more natural than you expect when engraved. Try engraving the photo on a piece of scrap material. If you see a small selection that stands out and needs to be smoothed, you can select the eraser tool to get rid of that area. For more information on Photoshop Elements, go to www.adobe.com.

If further assistance is required, please visit www.epiloglaser.com/support to contact Epilog Laser Technical Support.