Converting Vector Artwork from CMYK to RGB - CorelDRAW
How do I convert my vector artwork from CMYK to RGB using CorelDRAW?
Date updated:
09/17/2024
Machine Series:
Mini, Helix, Fibermark | Legend 36EXT | Zing | Fusion, Fusion M2 | Fusion Maker, Fusion Edge, Fusion Pro | Fusion Galvo | Legacy Systems
Categories:
Graphics Software
How to convert vector artwork from CMYK to RGB in CorelDRAW.
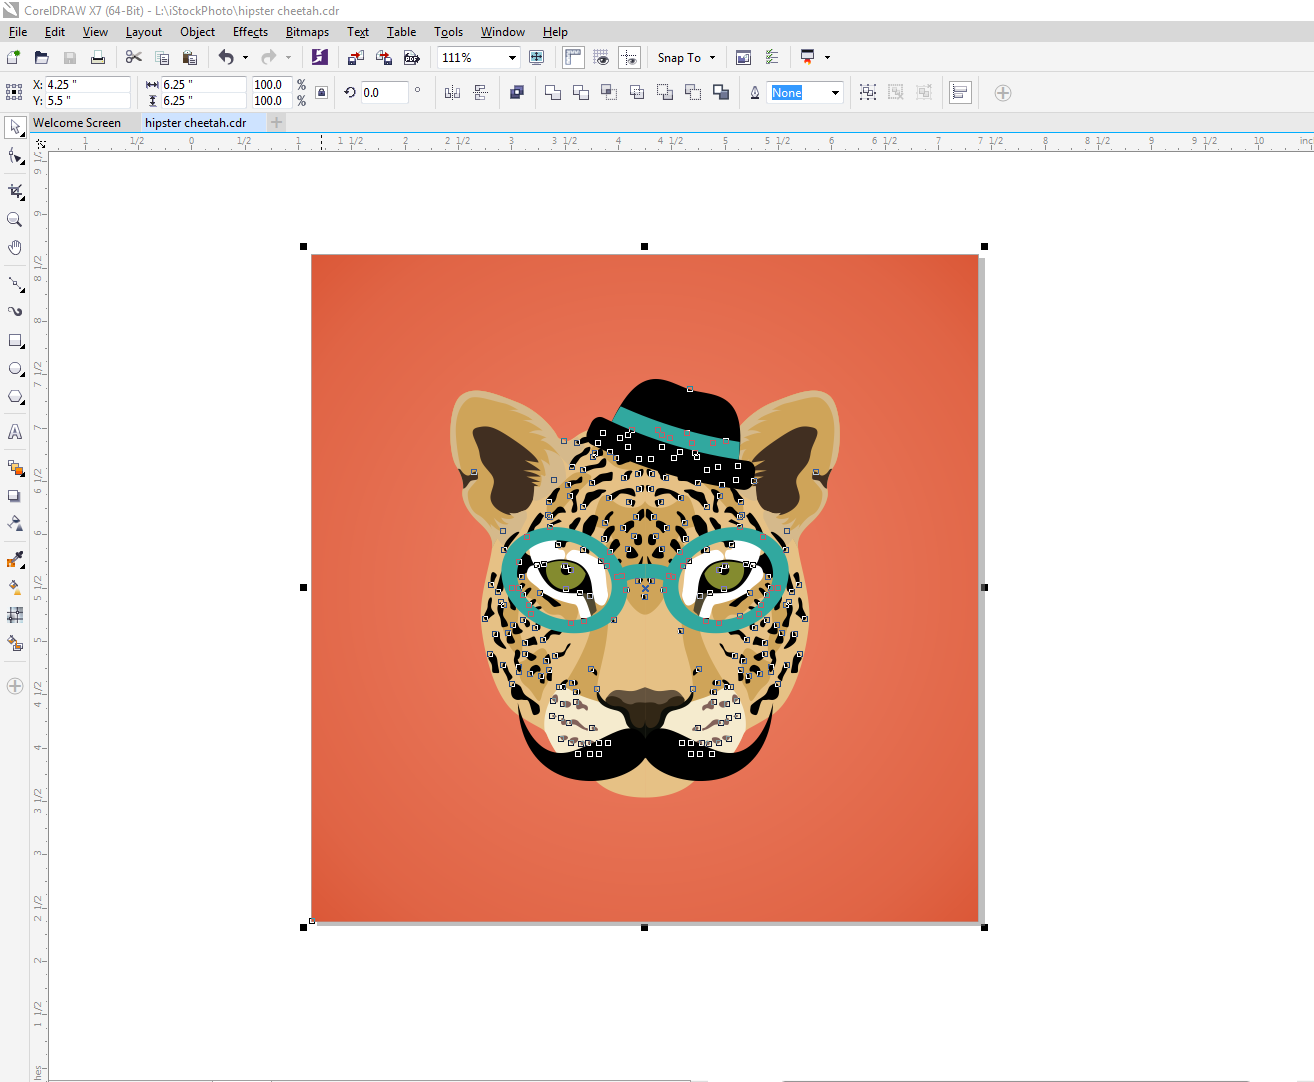
- Start by selecting all of your artwork with the Pick Tool (CTRL + A).
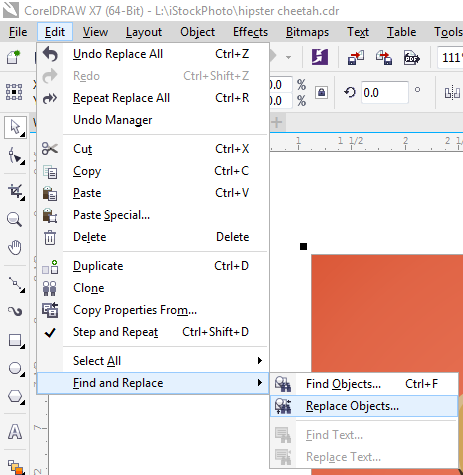
- Next open the Replace Objects Wizard, by selecting Edit / Find & Replace / Replace Objects from the drop-down menu option.
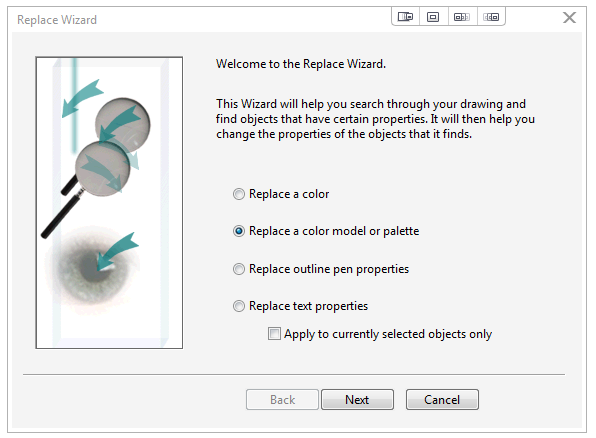
- Select Replace a color model or palette from the options, and click Next.
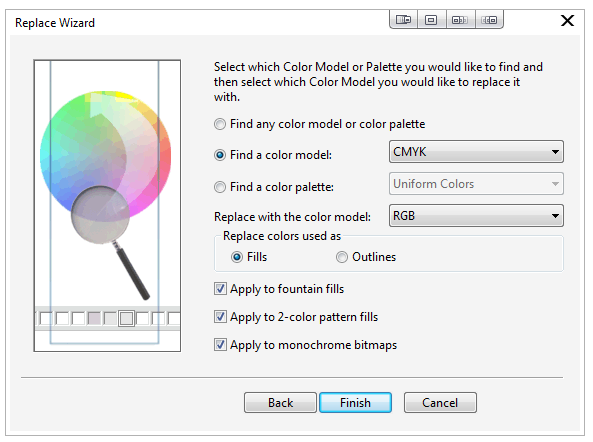
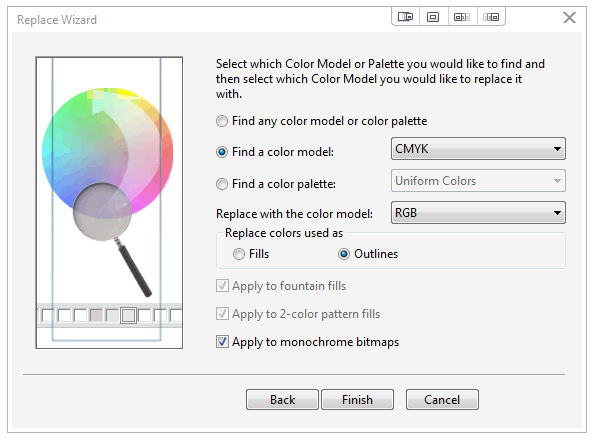
- Next, select the Find a color Model option and choose CMYK from the drop-down menu options. For the Replace with the color model option, select RGB from the drop-down menu. Leave the default option of Fills selected for the Find and Replace. Now make sure there is a check mark next to Apply to fountain fills, Apply to 2-color pattern fills, and Apply to monochrome bitmaps, then click Finish.
- With the artwork still selected, click the Replace All button and sit back and watch CorelDRAW change all the objects for you. Once finished, close the Find and Replace palette.

- If there are outlines in your artwork with CMYK colors, you will need to repeat these Find and Replace steps for the outlines in your artwork as well. To complete the process of converting outlines in your artwork from CMYK to RGB, repeat steps 1-4, but select Outlines at the Replace colors use as option, in step 4.
If further assistance is required, please visit www.epiloglaser.com/support to contact Epilog Laser Technical Support.