16000 - Fusion Pro 32 & 48 - Control Module Replacement
How do I replace the control module in the Fusion Pro 32 and 48?
Required Tools
- Phillips Head Screwdriver
- Anti-Static Strap
Control Module Removal
-
Turn off the engraver.
-
Disconnect engraver from power source.
-
Disconnect the connection cable (USB, Ethernet, fan control, etc.) from the engraver.
-
Place the anti-static strap around your wrist and attach the clamp to a bare metal surface on the machine.
-
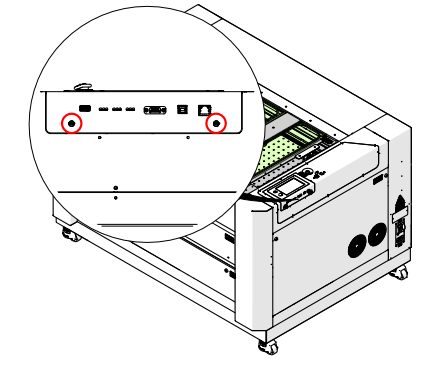
Loosen the two (2) Phillips screws on the control module.
-
Grip the two Phillips screws and gently pull the control module straight away from the engraver.
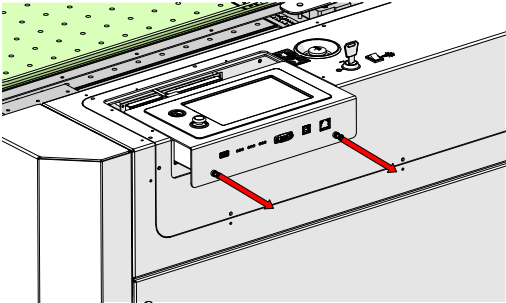
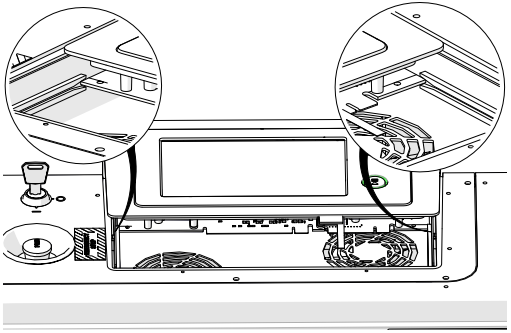
Note: The control module fits into plastic tracks located on the left and right side of the control module housing as shown in the image below. When removing or installing the control module do not lift up or pull down on the module. The control module should move in a straight line parallel with the top of the engraver
-
In certain cases the SD card from the old control module must be transferred to the new control module. If the new control module did not come with a replacement SD card, use the SD card installation instructions
Control Module Installation
-
Place the anti-static strap around your wrist and attach the clamp to a bare metal surface on the machine.
-
Locate the tracks that the control module slides in and out of on both the left and right sides of the control module housing.

-
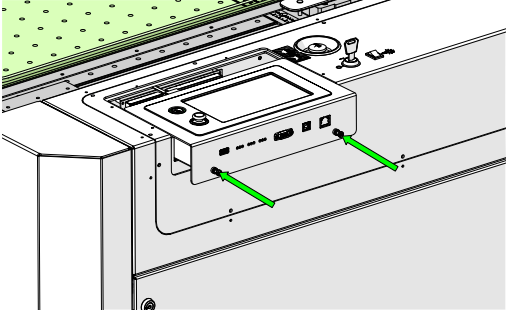
Place the sides of the control module in the tracks on the control module housing and gently slide the control module into the housing.
-
Tighten the two (2) Phillips screws on the control module.

-
Reconnect to power and turn on the engraver.
Programming the Control Module
-
At the display panel, press the gear icon in the upper right-hand corner of the display to open the Settings menu.

-
Press Update.

-
Press Program Peripherals.

-
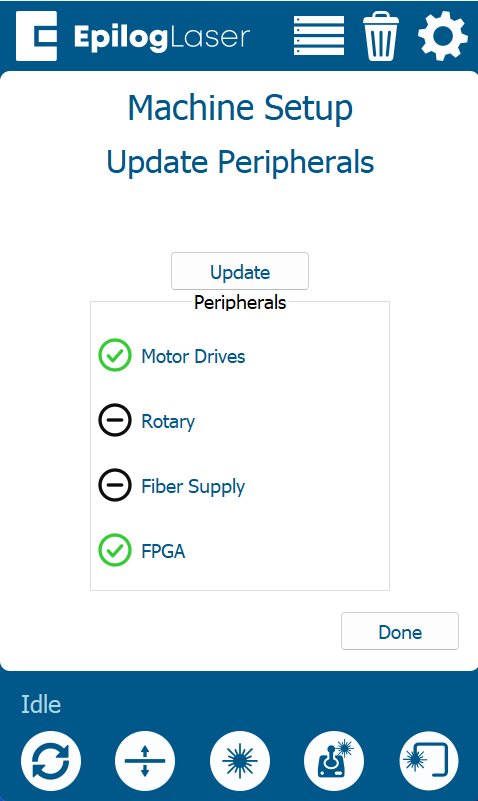
Once in the Peripheral Update menu, select all available components, and press Update.
-
Allow the engraver to run the update process.
Warning: When running a peripheral update, do not power off the engraver. During a peripheral update it is common for the display to power off. Once the update has been applied, the engraver will prompt to restart.
-
Once the engraver prompts you to restart, power cycle the engraver.
If further assistance is required, please visit www.epiloglaser.com/support to contact Epilog Laser Technical Support.