16000 - Fusion Pro 32 & 48 - Power Supply Replacement
How do I replace the power supply in the Fusion Pro 32 and 48?
Required Tools and Parts
- 5/32" Hex Wrench
- CS0830 - Assy, Power Supply, 2kW
- CS0953 - Assy, Power Supply, 24V, 1kW (Dual and Fiber Souce Engravers
- Alignment Target
- Phillips Head Screwdriver
Power Supply Locations
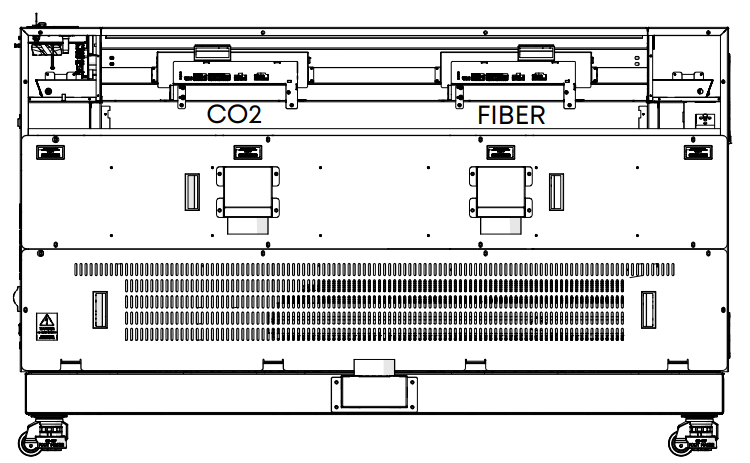
CO2- Only Fusion Pro
This model will contain only the CO2 power supply shown above.
- One (1) 48V 2kW power supply
Fiber- Only Fusion Pro
This model will contain the CO2 and fiber power supplies shown above
- One (1) 48V 2kW power supply
- One (1) 24V 1kW power supply
Dual Source Fusion Pro
This model will contain both the CO2 and fiber power supplies shown above
- One (1) 48V 2kW power supply
- One (1) 24V 1kW power supply
Warning: Attempting to service the power supply while the engraver is powered on can result in injury.
Warning: Attempting to service the power supply while the engraver is powered on can result in damage to components in the engraver.
Power Supply Replacement
Power Supply Removal
Note: The following procedure applies to power supplies found in all 16000 Fusion Pro engraver models and laser configurations.
-
Turn off the engraver.
-
Disconnect engraver from power.
-
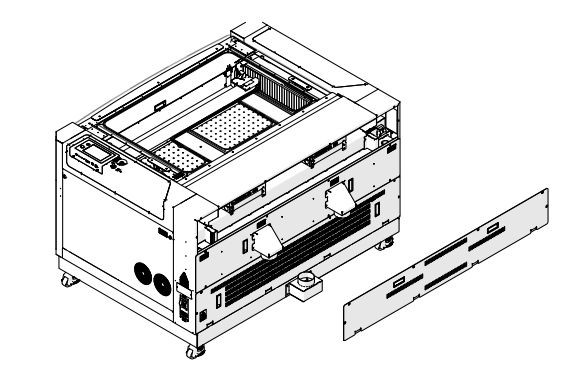
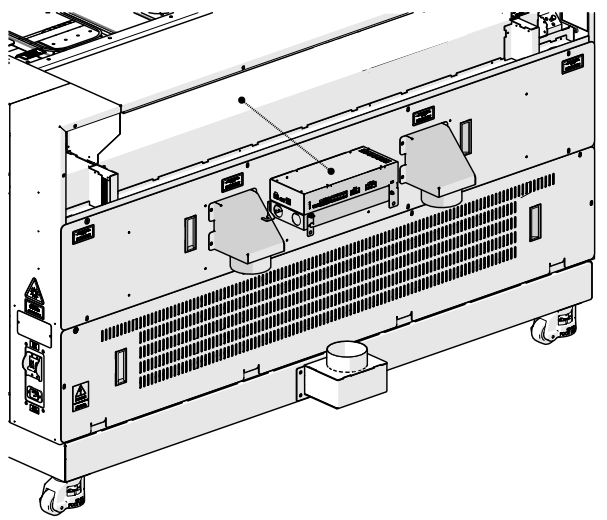
Remove the upper rear panel of the engraver.
-
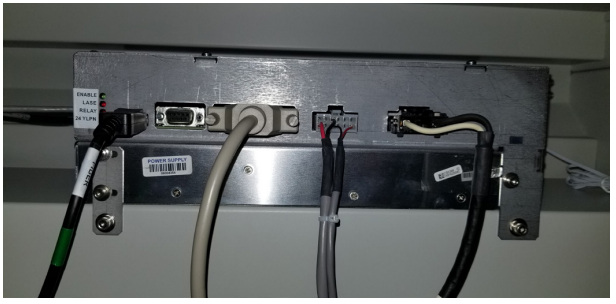
Disconnect the electrical harnesses from the power supply.
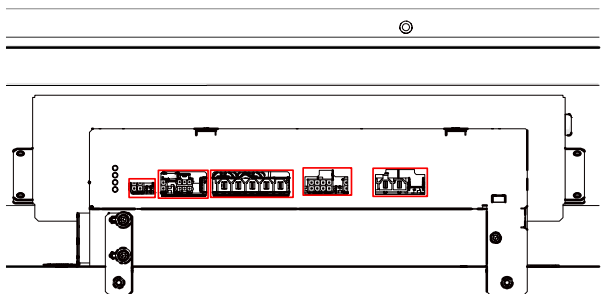
Note: Depending on which power supply is currently installed in the machine, the amount of and type of connectors may vary. Both the CO2 and fiber power supply connections are shown below:
CO2 Power Supply
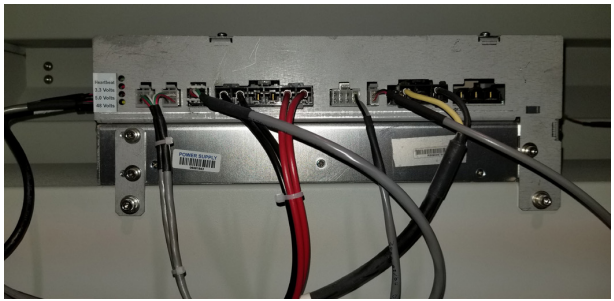
Fiber Power Supply
-
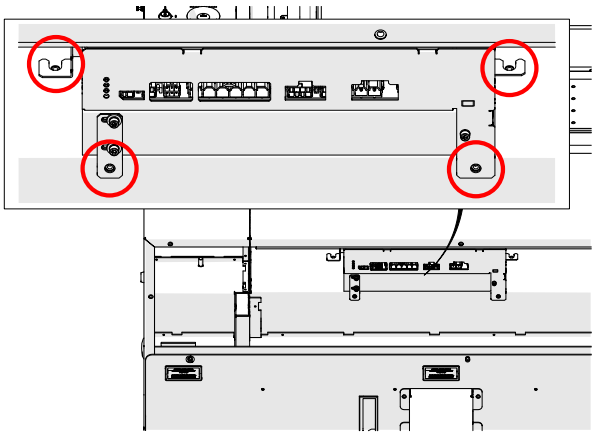
Loosen and remove the four (4) 5/32” Allen screws that secure the power supply to the engraver chassis.
-
Remove the power supply from the engraver.
Power Supply Installation
-
Place the power supply in the engraver.

-
Install and tighten the four (4) 5/32” Allen screws that secure the power supply to the engraver chassis.

-
Connect the electrical harnesses to the power supply.

-
Replace the upper rear panel of the engraver.

-
Reconnect to power and turn on the engraver.
Programming the Power Supply
-
At the display panel, press the gear icon in the upper right-hand corner of the display to open the Settings menu

-
Press Update.

-
Press Program Peripherals.

-
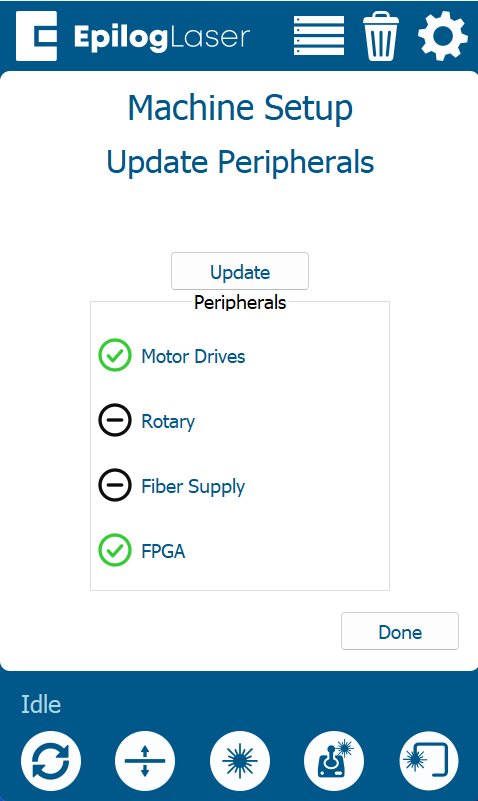
Once in the Peripheral Update menu, select Power Supply and press Update
-
Allow the engraver to run the update process.
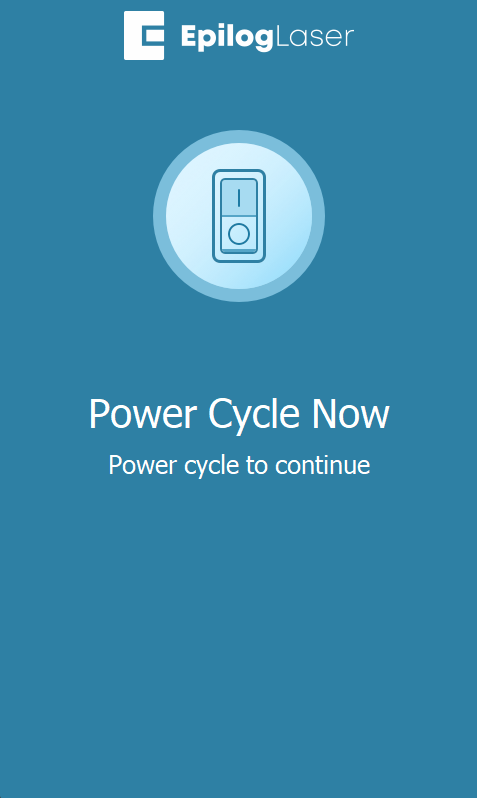
Warning: When running a peripheral update, do not power off the engraver. During a peripheral update it is common for the display to power off. Once the update has been applied, the engraver will prompt to restart.
-
Once the engraver prompts you to restart, power cycle the engraver.
If further assistance is required, please visit www.epiloglaser.com/support to contact Epilog Laser Technical Support.