8000 - Mini/Helix Optics Replacement
How do I replace the optics in my Mini, Helix, or Fibermark machine?
Required Tools
- 5/64" Hex Wrench
- 3/32" Hex Wrench
- Phillips Head Screwdriver
- 260558 Lens
- TT0009-CA Mirror
- MM0005 Lens (Fibermark)
- MM0004 Mirror Carriage (Fibermark)
- MM0953 Mirror Steering (Fibermark)
Getting Started
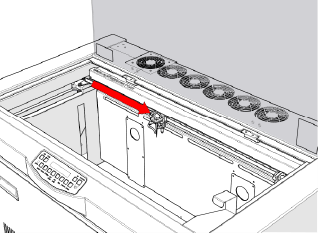
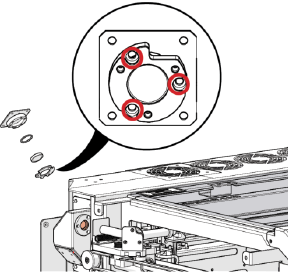
Replacing Carriage Optics
-
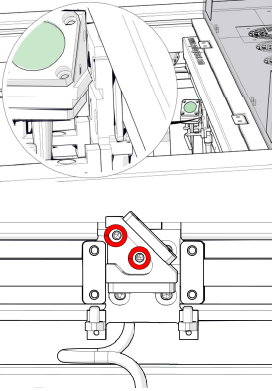
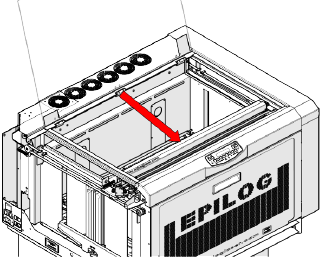
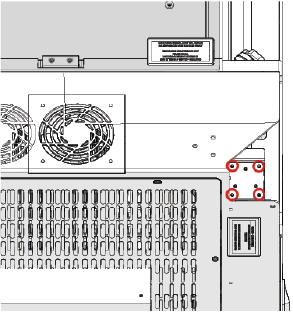
Move carriage to center.
-
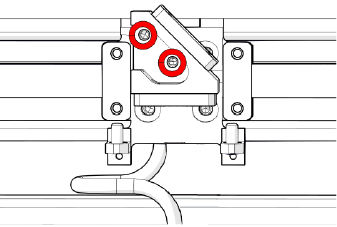
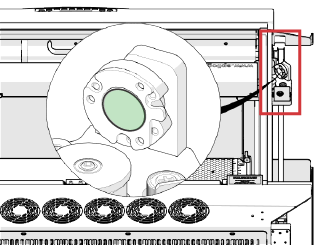
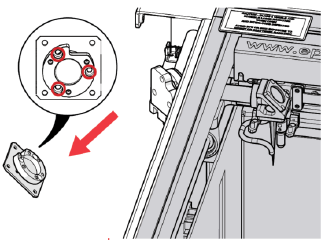
Remove two (2) 3/32" Hex screws.
-
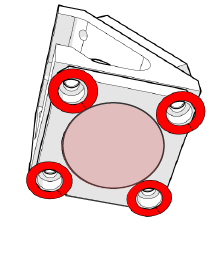
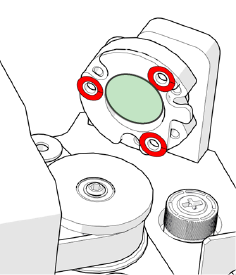
Remove four (4) 5/64” Hex screws.

-
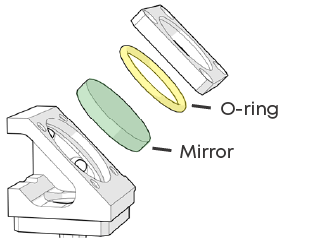
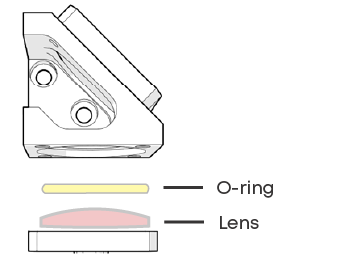
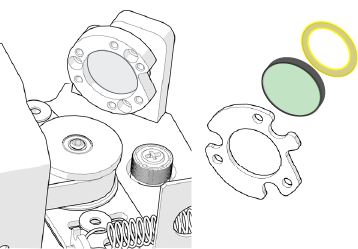
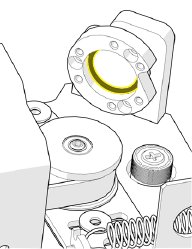
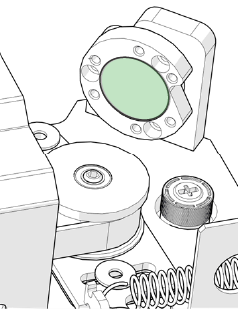
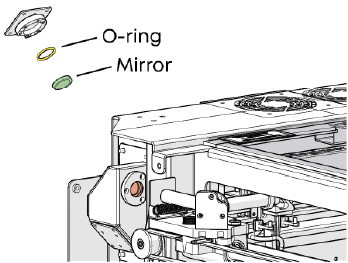
Remove mirror and O-ring.
-
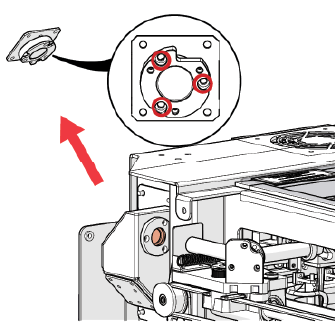
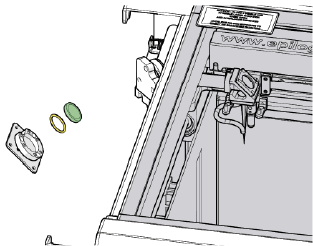
Remove four (4) 5/64” Hex screws.
-
Remove lens and O-ring.
-
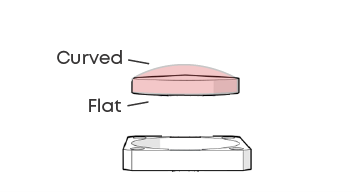
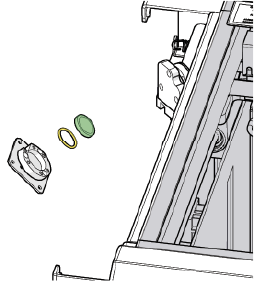
Install replacement lens with curved side facing up.
-
Install O-ring above lens.
-
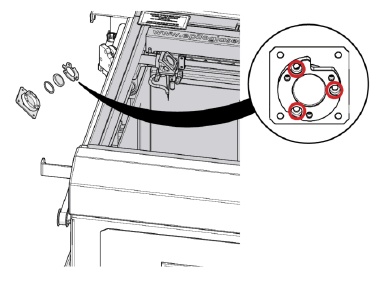
Install four (4) 5/64” Hex screws.
-
Install O-ring above mirror.
-
Install four (4) 5/64” Hex screws.
-
Align lens assembly and install two (2) 3/32” Hex screws.
Replacing Steering Optic
Note: For Fibermark machines, the steering mirror simply unscrews from the mirror mount.
-
Remove left-side cover.
-
Move rail to front of machine.
-
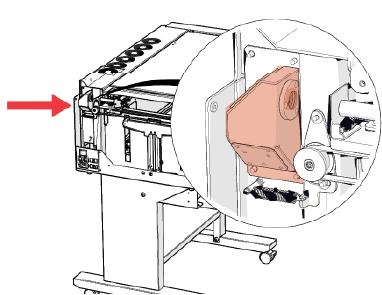
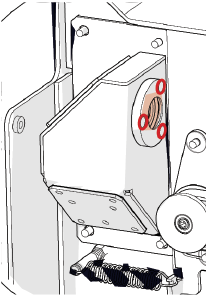
Locate mirror on end of X-Axis rail.
-
Remove three (3) Phillips head screws.
Note: To help access these screws, use a right-angle screwdriver. You can also remove the black pulley with a 3/32” Hex wrench.
-
Remove O-ring and mirror.
-
Install replacement O-ring.
-
Install replacement mirror.
-
Install three (3) Phillips head screws.
Periscope Optics
Note: There are adhesive gaskets between the mirror plates and orange periscope. To remove these, you may need to gently pry the plate away from the periscope. Before removing these, label the top of each plate.
-
Locate the orange periscope.
-
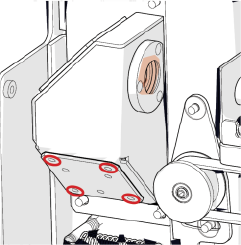
Remove the three (3) 3/32" Hex screws to access the windown optic.
-
Remove four (4) Phillips head screws on mirror plate.
-
Remove three (3) Phillips head screws.
-
Remove mirror and O-ring.
-
Remove four (4) Phillips head screws on mirror plate.
-
Remove three (3) Phillips head screws.
-
Remove mirror and O-ring.
-
Install replacement mirror and O-ring.
-
Install three (3) Phillips head screws.
-
Install four (4) Phillips head screws on mirror plate.
-
Install replacement mirror and O-ring.
-
Install three (3) Phillips head screws.
-
Install four (4) Phillips head screws on mirror plate.
-
Install window optic with three (3) 3/32" Hex screws.
Important: After replacing the periscope optics you will need to realign the laser. Please follow the link below for alignment instructions.