18000 - Fusion Galvo - SD Card Installation
How do I install an SD card into my Fusion Galvo.
Required Tools
- 5/32" Hex Wrench
- T10 Torx Wrench
- Anti-static Bracelet
Getting Started
-
Turn OFF engraver.
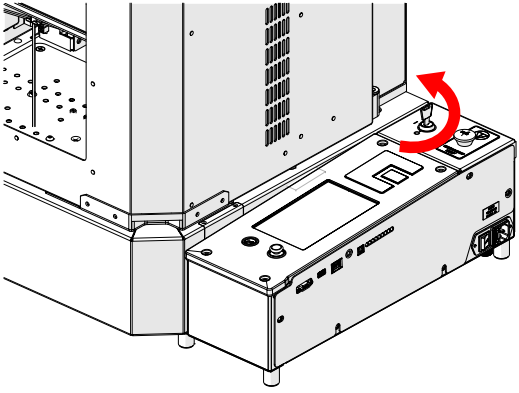

-
Disconnect from power.

-
Locate door handles.
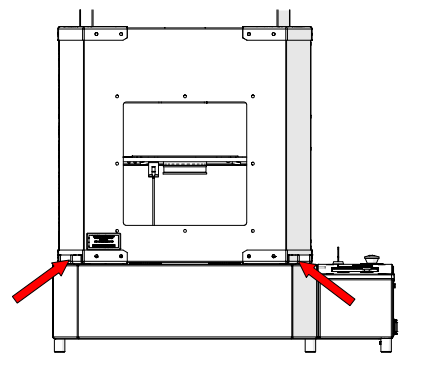
-
Open door.
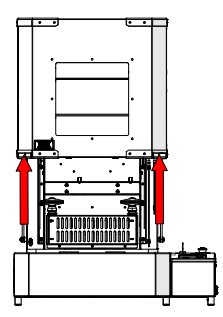
-
Loosen and remove.
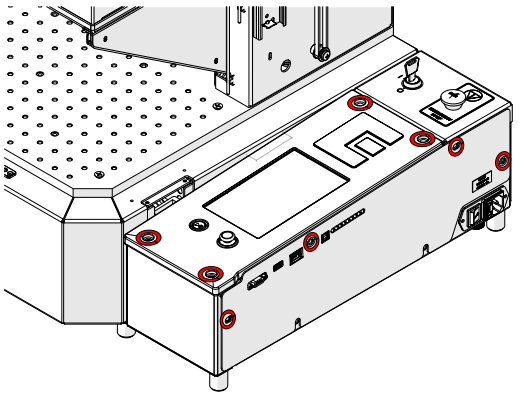
Note: Two (2) of the control module mounting screws are longer than the others. These longer screws secure the top side of the control module to the rear mounting locations.
-
Loosen, but do not remove.
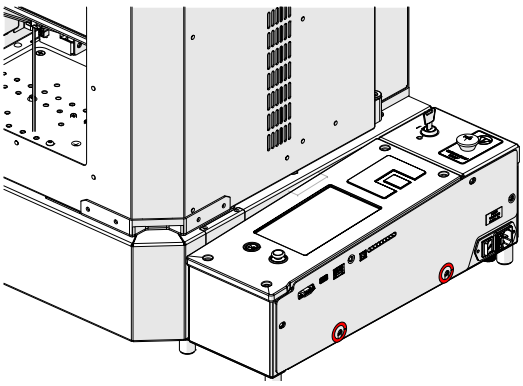
-
Loosen and remove.
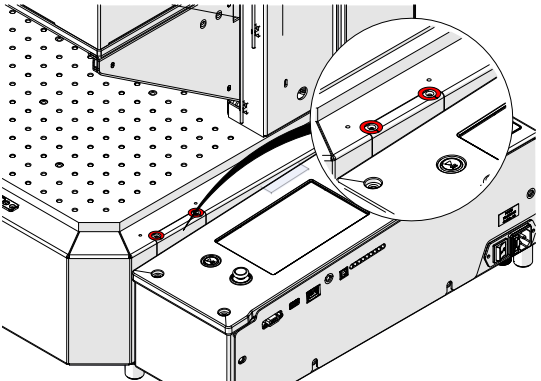
-
Remove cover.
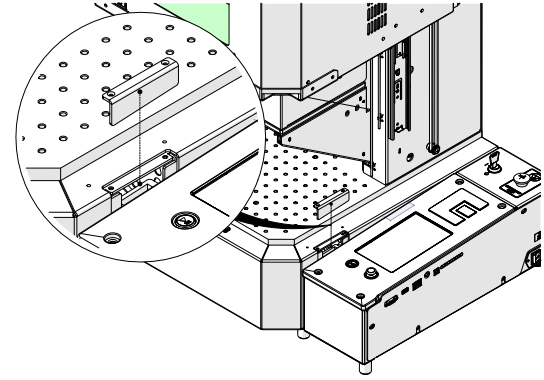
-
Tilt away from engraver.
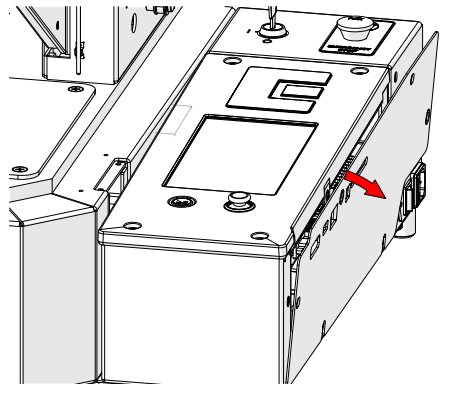
-
Place anti-static strap on wrist.
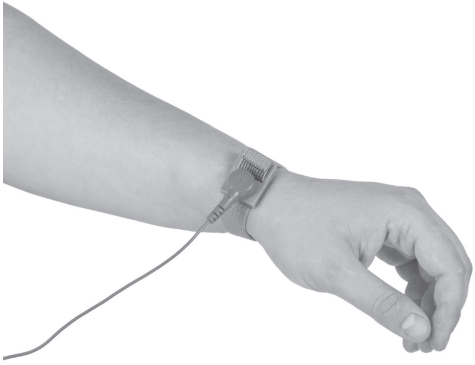
-
Attach anti-static strap clamp on side panel screw.
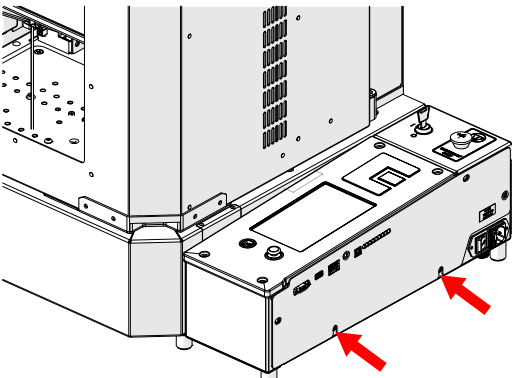
-
Gently lift control board and remove.
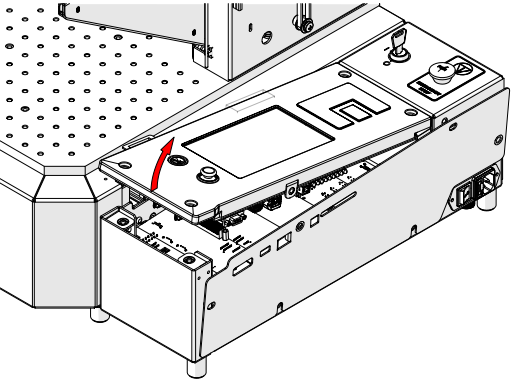
-
Flip control board over and locate SD card.
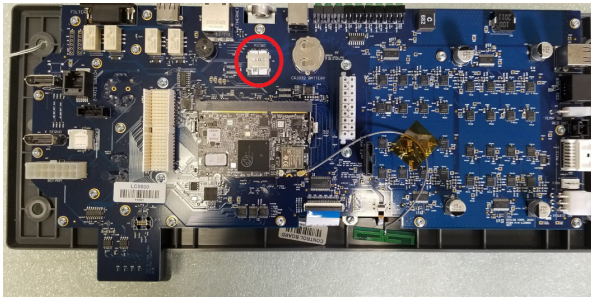
-
Slide SD card latch down to unlock. Carefully lift and remove SD card.
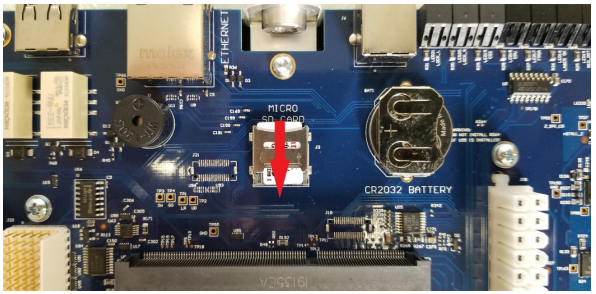
Installation
-
Insert replacement SD card.
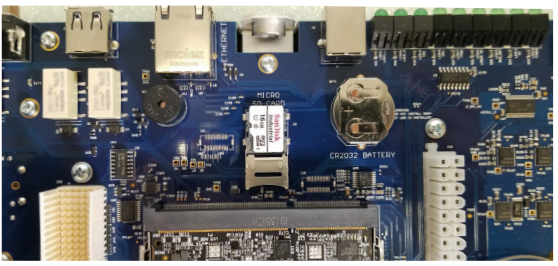
Note: Ensure the orientation of the SD card is correct. Copper terminals should face down.
-
Press down on the SD card latch and slide up to lock.
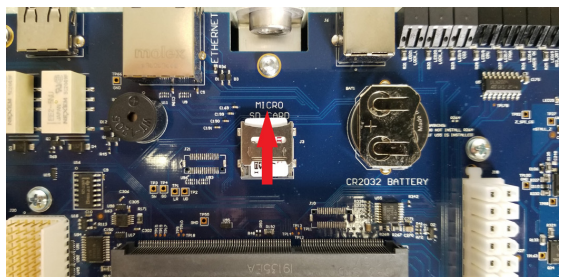
-
Align control board with engraver chassis.
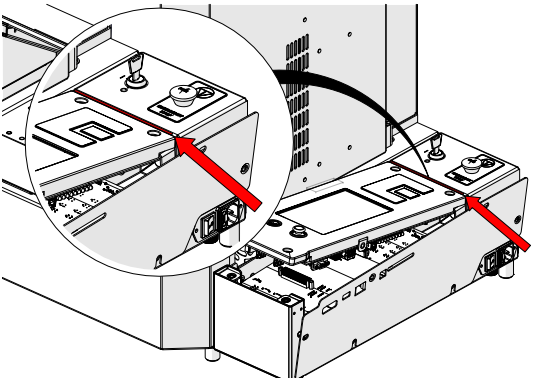
-
Slowly press down to seat the control board connector.
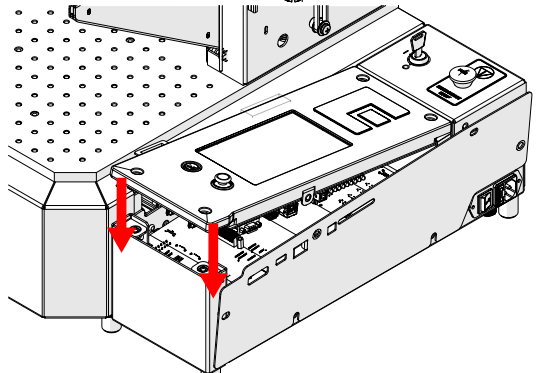
-
Install with the two longer screws towards the rear and tighten.
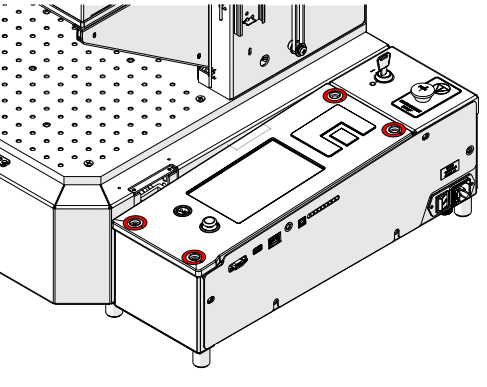
-
Install and tighten.
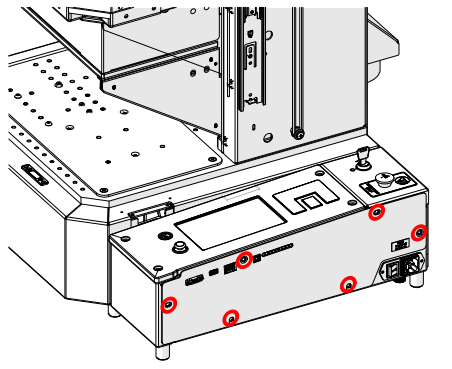
-
Install cover.

-
Install and tighten.

-
Reconnect, and power ON.


Programming the SD Card
-
At the display panel, press the gear icon in the upper right-hand corner of the display to open the Settings menu.

-
Press Update.

-
Press Peripheral Update.

-
Once in the Peripheral Update menu, select all available components and press Update.
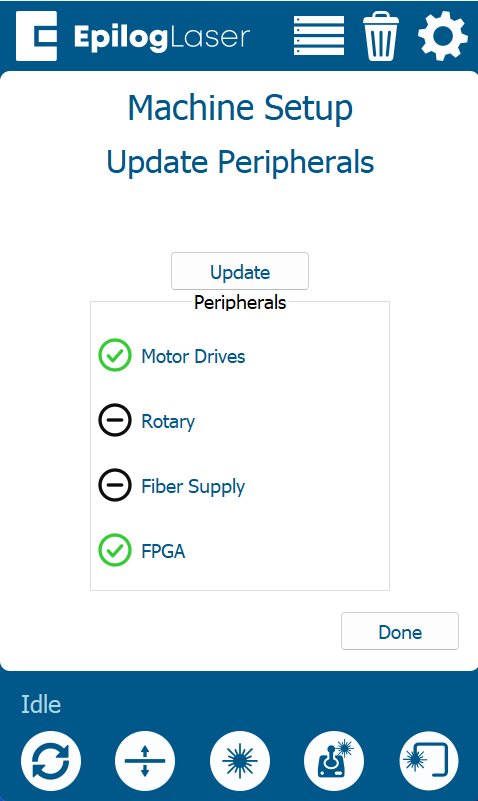
Warning: When running a peripheral update, do not power off the engraver. During a peripheral update it is common for the display to power off. Once the update has been applied, the engraver will prompt to restart.
-
Once the engraver prompts you to restart, power cycle the engraver.
If further assistance is required, please visit www.epiloglaser.com/support to contact Epilog Laser Technical Support.