Job Generator
How do I use the "Generate" feature in the Epilog Software Suite?
Overview
The Job Generator is a new feature available in version 2.2.14 of the Epilog Software Suite. It generates a grid of diverse settings and parameters to assist in finding the ideal settings for a specific material. This document will walk you through the setup and basic functionality of this powerful tool.
The job generator is especially valuable for testing new materials when the exact settings are unknown. It allows for experimenting with a range of parameters, making it an effective tool for testing and identifing how materials respond to changes in laser settings.
Requirements
- Software Suite version 2.2.14 or higher.
- Fusion Edge, Maker, Pro, or Galvo.
Getting Started
-
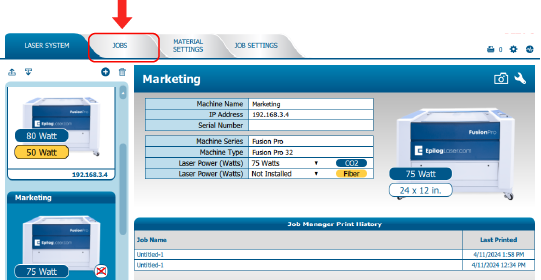
Open the Software Suite, and select the Jobs tab.
-
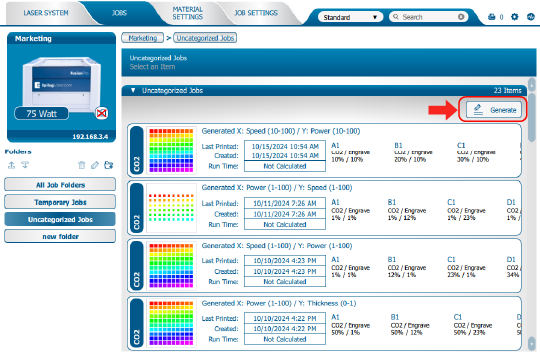
Click the Generate icon.
-
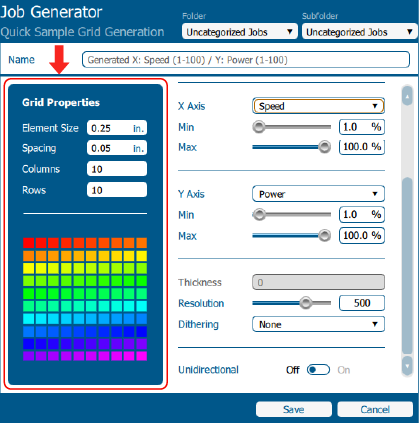
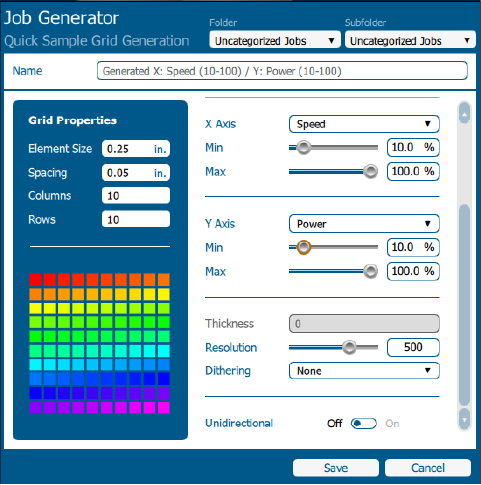
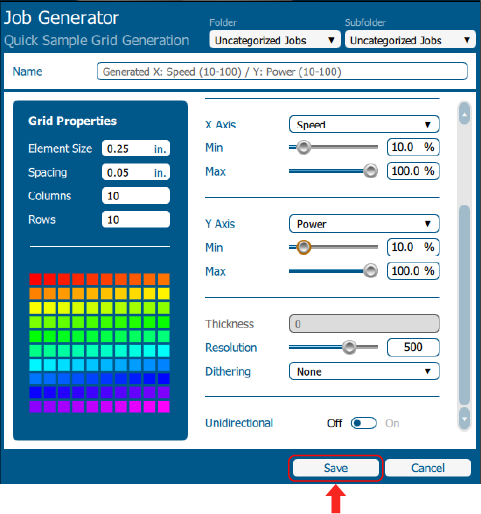
On the left side of the Job Generator are the grid properties.
- Element Size - Size of each square in the grid
- Spacing - Distance between the squares
- Columns - Number of columns (X-Axis)
- Rows - Number of rows (Y-Axis)
-
On the right side of the Job Generator are your parameter selection options. These options will vary between machine models.
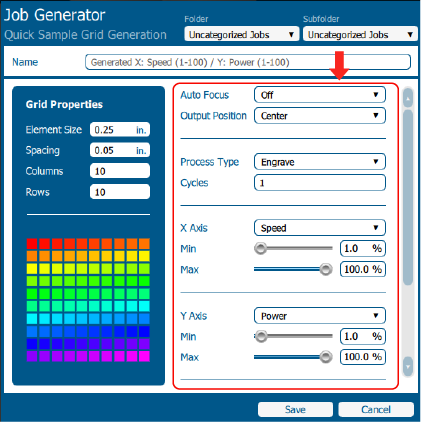
- Auto Focus - Material focusing options
- Output Position - Where the grid is placed on the artboard
- Process Type - Raster or Vector options
- Cycles - How many times the entire job will run
- Laser - CO2 or Fiber options on dual source machines
- X-Axis - Parameter assigned to the X-Axis
- Y-Axis - Parameter assigned to the Y-Axis
- Resolution - The DPI or resolution quality of the job
- Dithering - Adds dithering pattern to entire job
- Unidirectional - Only fires the laser on passes in one direction
-
Select the parameter(s) you would like to test from the X or Y-Axis drop down menu. A useful test is to have Speed on one Axis and Power on the other Axis as shown below.
-
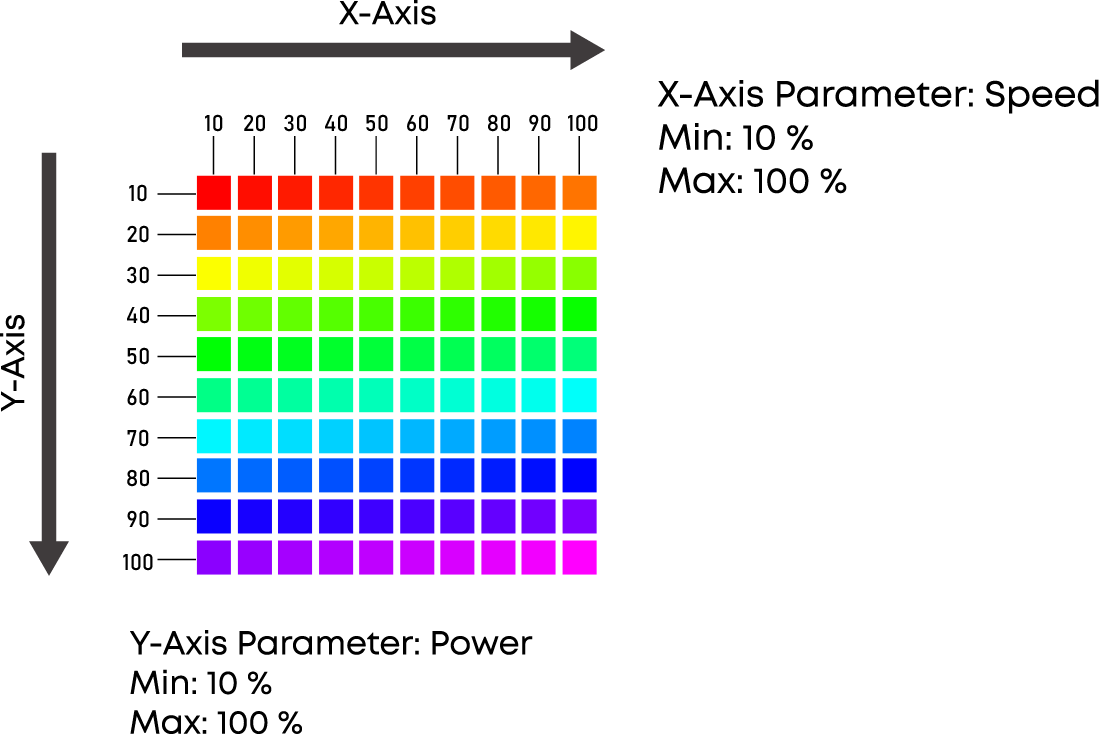
Under the X-Axis and Y-Axis parameters, there are Min and Max sliders. These sliders adjust the range of the selected parameter. These values will be divided up across the grid.
Example: Speed is the X-Axis parameter and the Min and Max values are 10% and 100% respectivly. Power is the Y-Axis parameter and the Min and Max values are 10% and 100% respectively. This will create a grid where the speed and power both start at 10% in the top left square. As the grid squares progress to the right along the X-Axis, the speed is increased by 10% each grid square. As the grid squares progress down in the Y-Axis, the Power will increase by 10% for each square.
-
Once job parameters are set, click save.
-
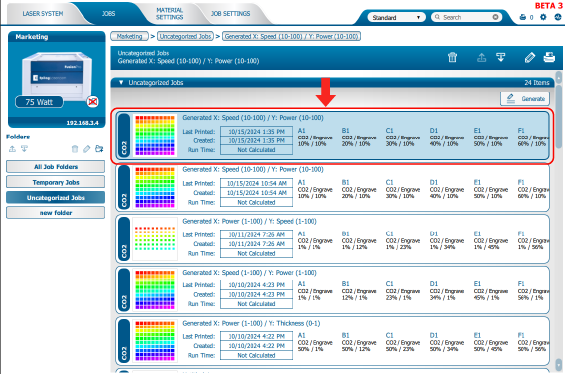
Double click the job to open it.
-
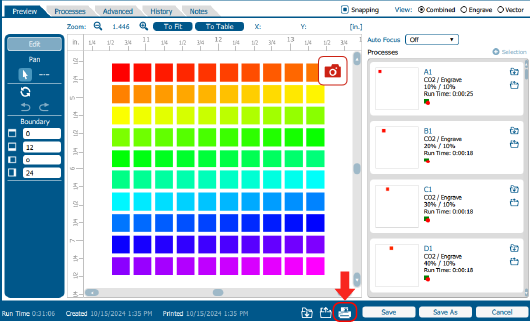
Click print to send the job to the laser.
-
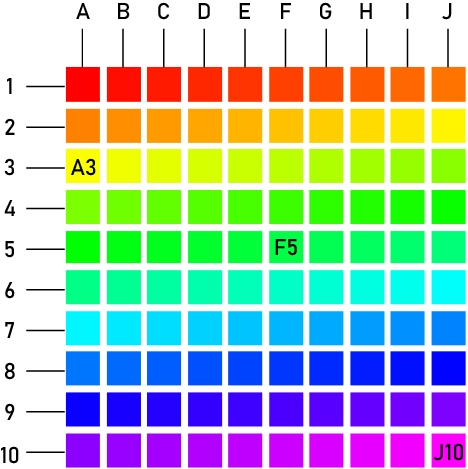
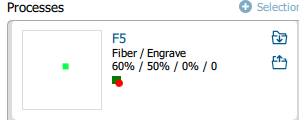
After running the job, examine the engraving to see which grid squares performed best. Then you can go back to the job manager to lookup the settings for those squares.
Example: The Job Generator creates a process for each square. The Columns are labeled with letters and the rows are labeled with numbers.
If further assistance is required, please visit www.epiloglaser.com/support to contact Epilog Laser Technical Support.
Attachments:
No attachments.