8000 - Mini/Helix Auto Focus Plunger Install
How do I replace the auto focus plunger on my mini helix engraver?
Instructions for replacing the Auto Focus Plunger on the Mini and Helix Engravers.
Required Tools / Parts
- TT0960 Auto Focus Plunger
- 5/64" Hex Wrench
- Phillips Head Screwdriver
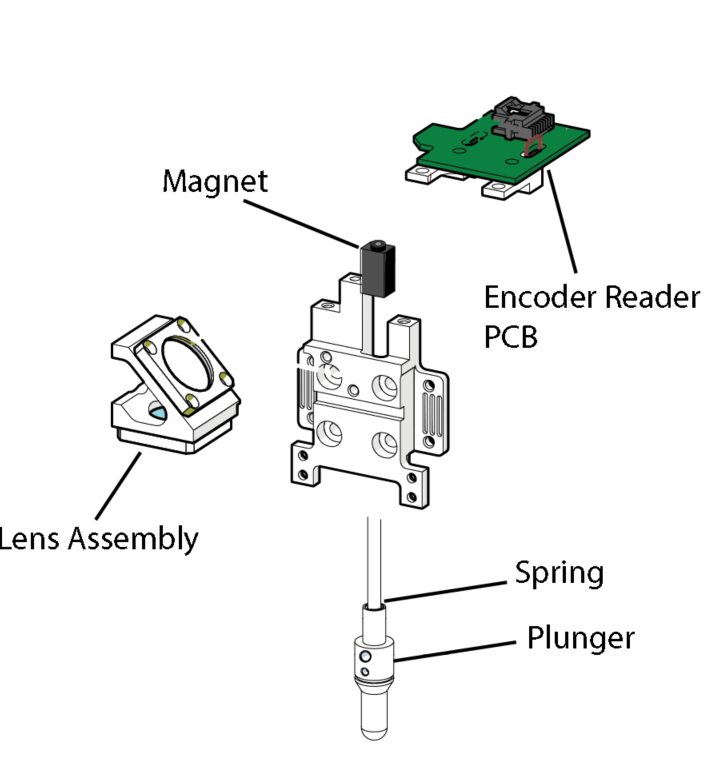
Component View of Carriage
Getting Started
-
Power ON machine.

-
Press Focus.
-
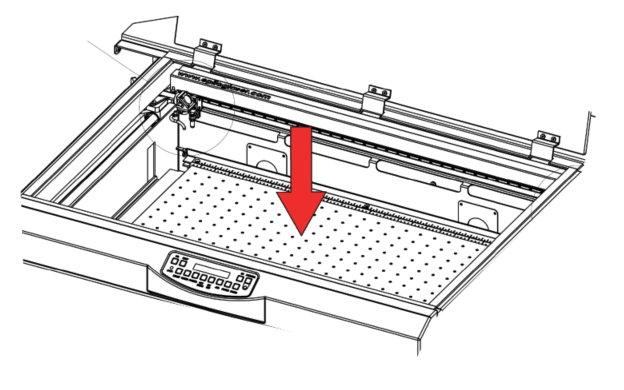
Lower table 2-3 inches.
-
Power OFF machine.

-
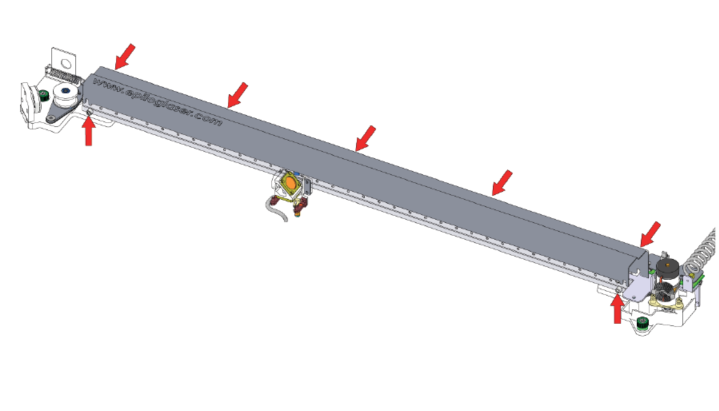
Loosen the seven (7) Phillips screws on rail cover and remove rail cover.
-
Remove 5/64” Hex screw on Auto Focus Plunger magnet. Do NOT discard the magnet.
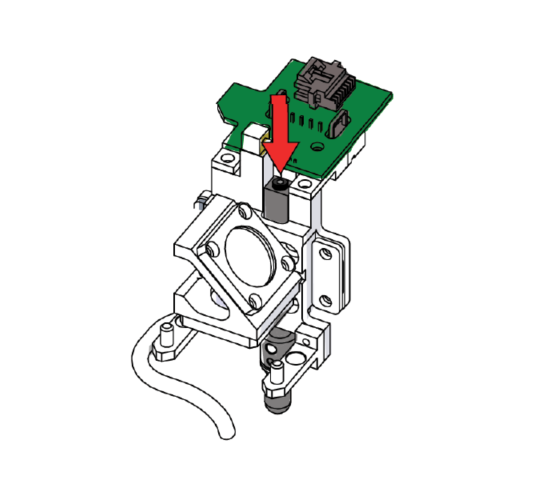
Note: If you received a TT0960 without the magnet block, please reuse the original magnet block when installing the new plunger.
-
Slide Auto Focus Plunger out.
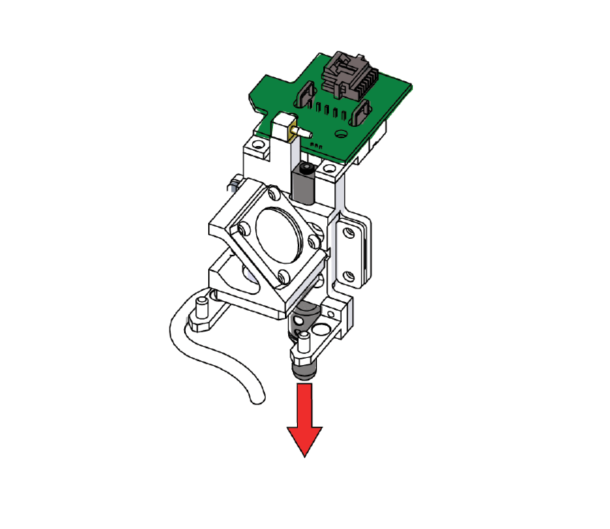
-
Insert replacement Auto Focus Plunger.
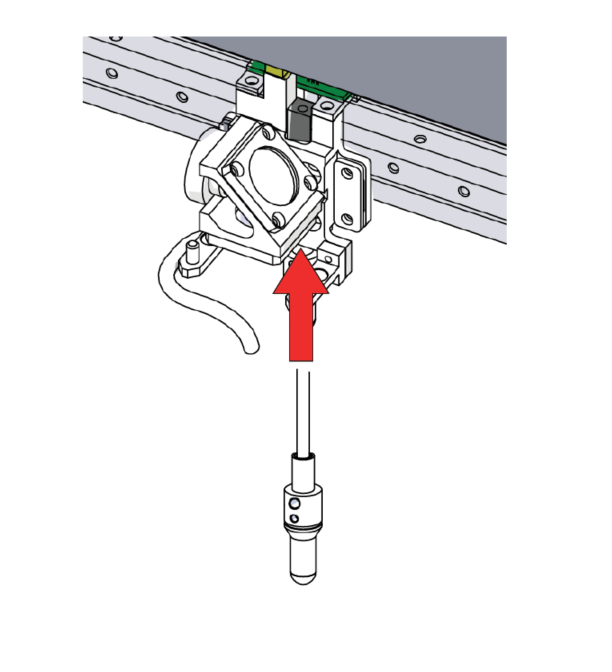
-
While applying light pressure upwards on plunger, reattach the magnet with 5/64” Hex screw. The magnet must face towards the back of the machine.
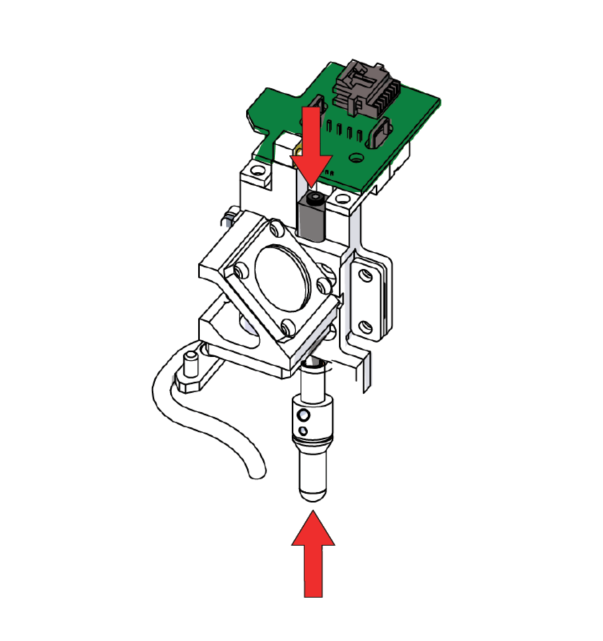
-
Reattach the rail cover.
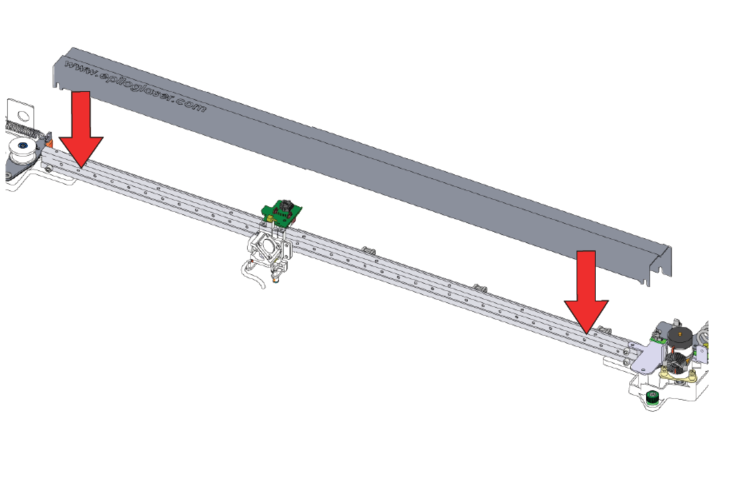
Component View of Carriage

If further assistance is required, please visit www.epiloglaser.com/support to contact Epilog Laser Technical Support.