メインコンテンツへスキップ

X軸減速機ベルト交換 –Fusion Edge、Pro 24 & 36

Fusion Edge Pro 24 と 36 の X 軸減速機ベルトを交換するにはどうすればよいですか?

X-Axis :


はじめに

X軸減速ベルトは、彫刻機の滑らかで精密な動作を確保する上で重要な部品です。 経年劣化により交換が必要となる場合がありますが、これにより彫刻機の最適な効率を維持できます。本ガイドでは、Epilog Laser Edge 12、24、36 および Pro 24、36 における X軸減速ベルトの安全な取り外しと取り付け手順を段階的に説明します。彫刻機の信頼性と性能を維持するため、これらの手順を厳守してください。

X軸減速機ベルトの取り付け・取り外し

  1. 彫刻機をオフにしてください。
  2. 彫刻機を電源から切り離してください。
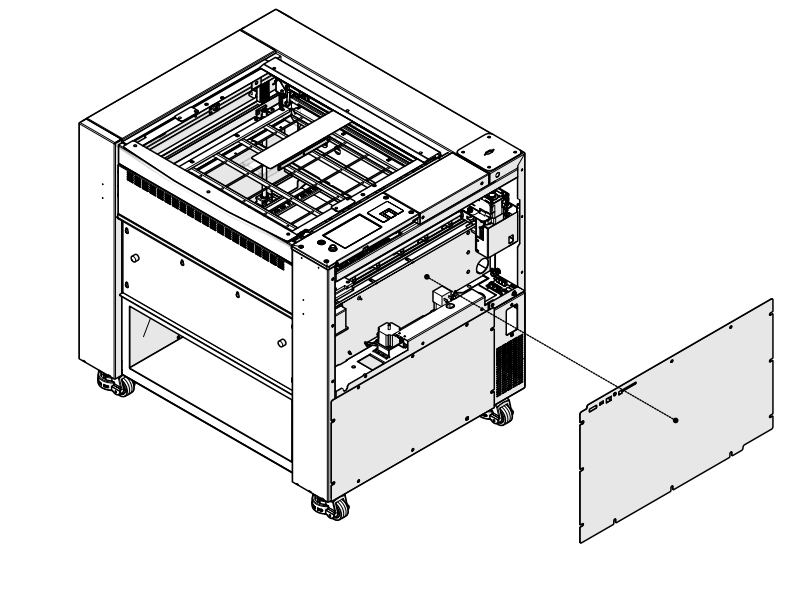
  3. 彫刻機の右側パネルを取り外してください。

    スクリーンショット

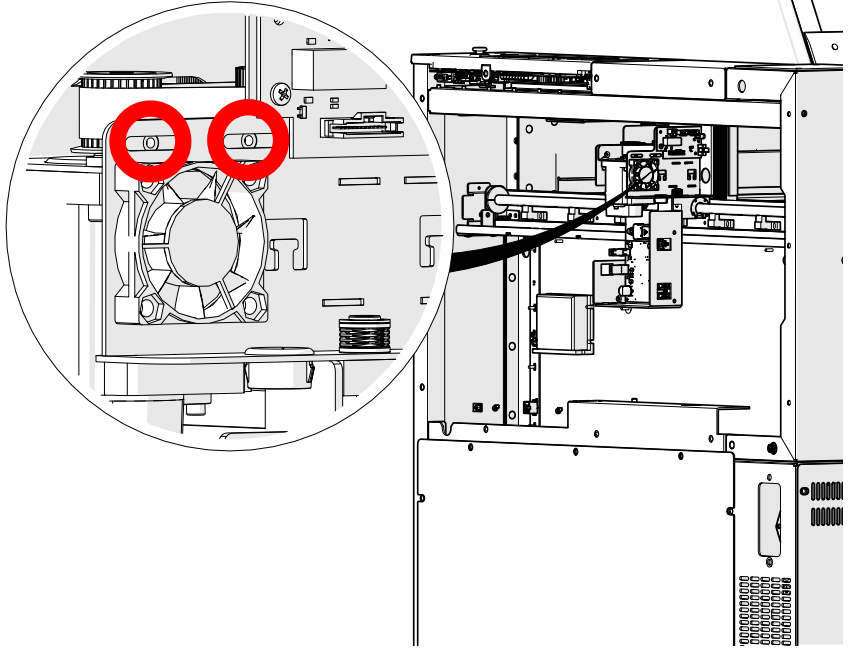
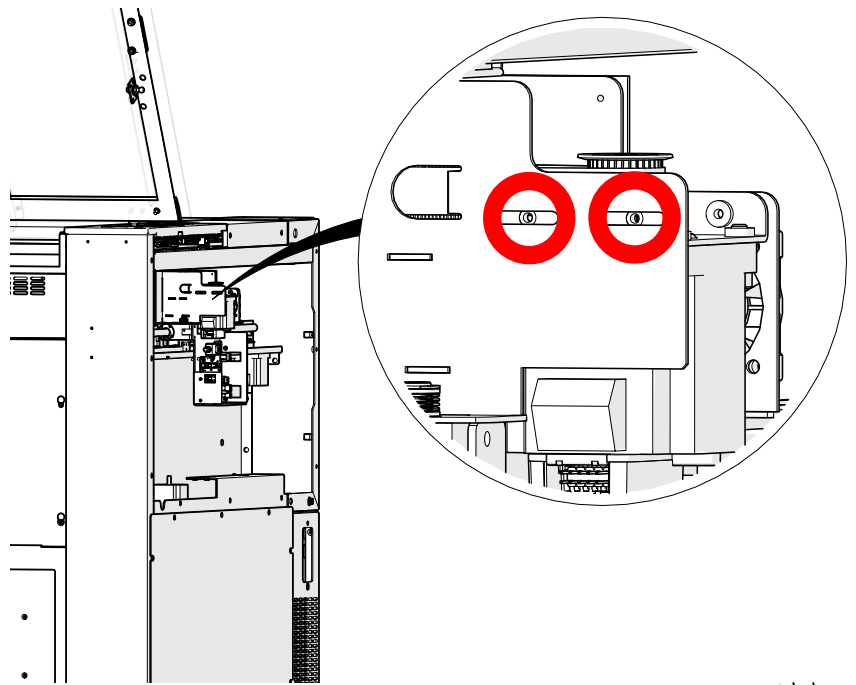
  4. X軸モーターをX軸アセンブリに固定している4本の7/64インチ六角穴付きボルトを緩めますが、取り外さないでください。
    スクリーンショット
    スクリーンショット

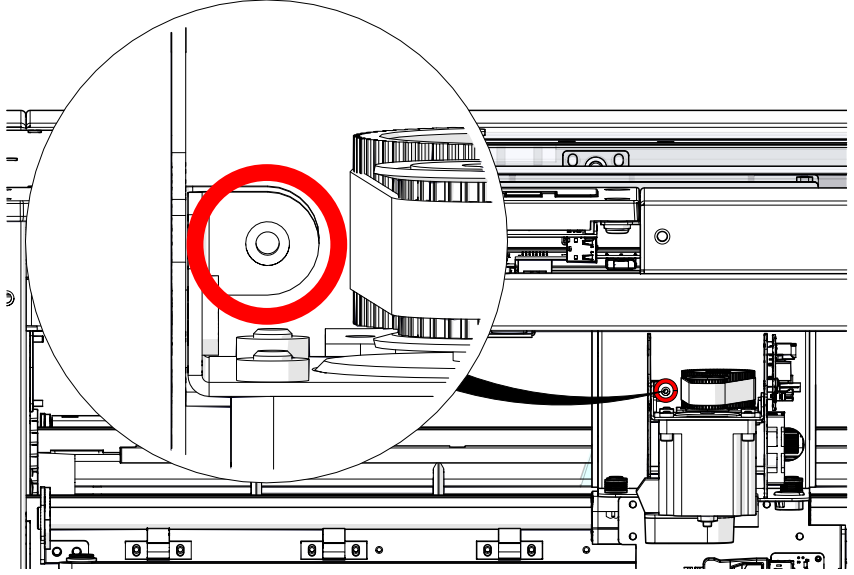
  5. 減速機ドライブベルトテンショナーの7/64インチ六角ネジを緩めてください。

    スクリーンショット

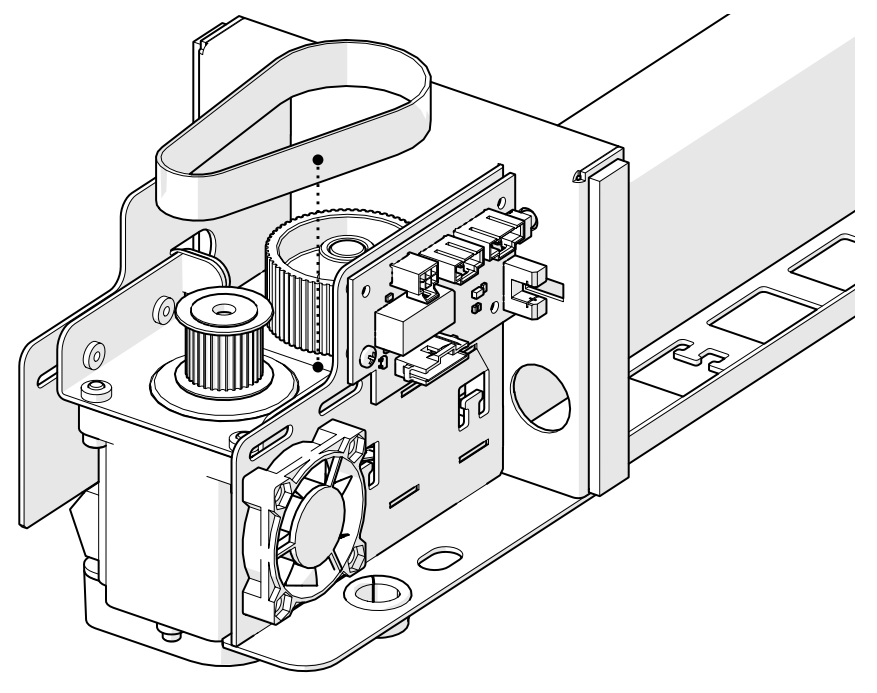
  6. 減速機の駆動ベルトを取り外す。

    スクリーンショット

X軸減速機ベルトの取り付け

  1. 減速機駆動ベルトを取り付けます。

    スクリーンショット

  2. 減速機ドライブベルトテンショナーの7/64インチ六角ネジを、減速機ベルトのたるみがなくなるまで締め付けます。

    スクリーンショット

  3. X軸モーターをX軸アセンブリに固定している4本の7/64インチ六角ネジを締めてください。

    スクリーンショット
    スクリーンショット

  4. 彫刻機の右側パネルを取り付けます。

    スクリーンショット

[helpful]
  • ID:
    KA-01560
  • 日付:
    2025年4月9日

ツール:

  • 5/32インチ六角レンチ
  • 7/64インチ六角レンチ

部品とリソース:

/* === Aggressive removal of PrintFriendly injected header elements === */ #printfriendly #pf-title, #printfriendly #pf-src, #printfriendly .pf-header, #printfriendly header, #printfriendly .printfriendly-header, #printfriendly h1:first-of-type, #printfriendly .page-header, #printfriendly [class*="header"], #printfriendly [id*="header"] { display: none !important; visibility: hidden !important; height: 0 !important; margin: 0 !important; padding: 0 !important; } /* Hide any top bar or source URL container */ #printfriendly #pf-src, #printfriendly .pf-src, #printfriendly [class*="src"], #printfriendly [class*="url"] { display: none !important; } /* Force page margins and centered page numbers */ @page { size: letter portrait; margin: 0.7in 0.5in; } @page :left, @page :right { @top-left { content: none !important; } @top-center { content: none !important; } @top-right { content: none !important; } @bottom-center { content: counter(page); font-size: 0.95em; padding-bottom: 25px; } }