メインコンテンツへスキップ

レンズの取り外しと取り付け

レーザーのレンズを取り外し、取り付けするにはどうすればよいですか?

はじめに

Epilog laser メンテナンスと交換は、最適な性能と彫刻品質を確保するための簡単な手順です。このガイドでは、レンズチューブを安全に取り外し、再取り付けするための段階的な手順を、図解付きでご説明します。部品の損傷を防ぐため、各手順を注意深く実行してください。

除去:

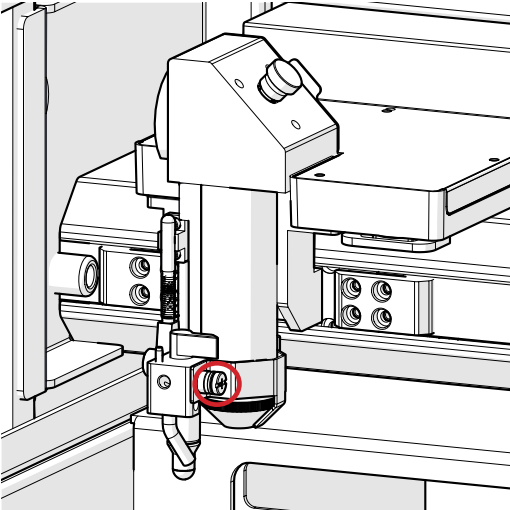
  1. プラスドライバーでレンズクランプを緩めてください。

    レンズクランプの緩み

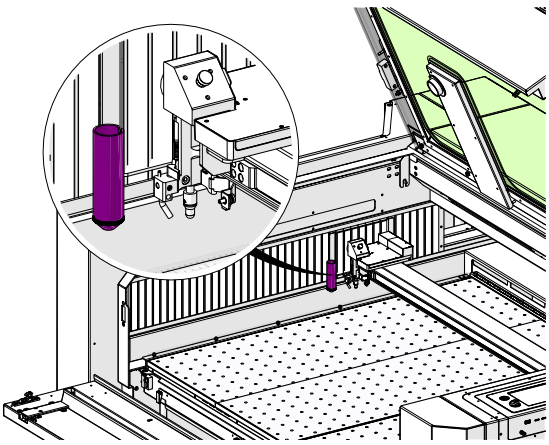
  2. レンズチューブが外れないように固定してください。
  3. レンズチューブを取り外す。

    レンズチューブの取り外し

インストール:

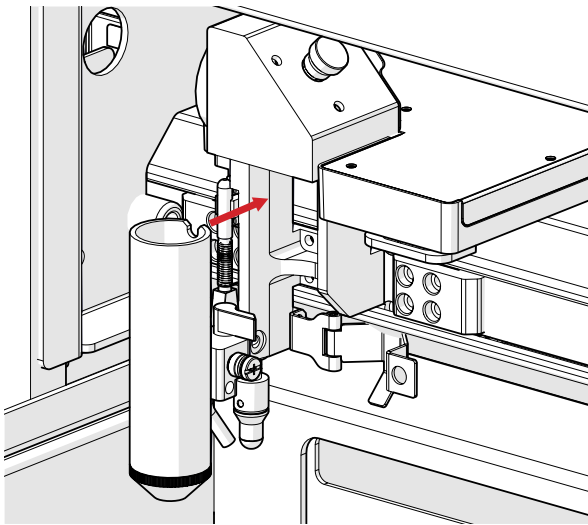
  1. レンズチューブのスロットをレーザーの背面と位置合わせする。

    レンズチューブの位置合わせ

    注意: レンズが正しく装着されていることを確認してください。所定の位置にロックされ、回転しない状態である必要があります。

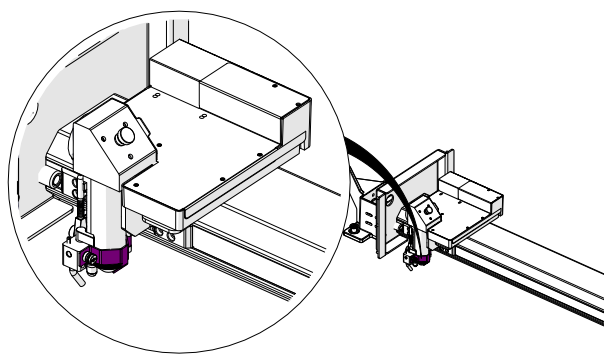
  2. レンズチューブクランプをプラスドライバーで締めてください。

    レンズクランプの締め付け

[helpful]
/* === Aggressive removal of PrintFriendly injected header elements === */ #printfriendly #pf-title, #printfriendly #pf-src, #printfriendly .pf-header, #printfriendly header, #printfriendly .printfriendly-header, #printfriendly h1:first-of-type, #printfriendly .page-header, #printfriendly [class*="header"], #printfriendly [id*="header"] { display: none !important; visibility: hidden !important; height: 0 !important; margin: 0 !important; padding: 0 !important; } /* Hide any top bar or source URL container */ #printfriendly #pf-src, #printfriendly .pf-src, #printfriendly [class*="src"], #printfriendly [class*="url"] { display: none !important; } /* Force page margins and centered page numbers */ @page { size: letter portrait; margin: 0.7in 0.5in; } @page :left, @page :right { @top-left { content: none !important; } @top-center { content: none !important; } @top-right { content: none !important; } @bottom-center { content: counter(page); font-size: 0.95em; padding-bottom: 25px; } }