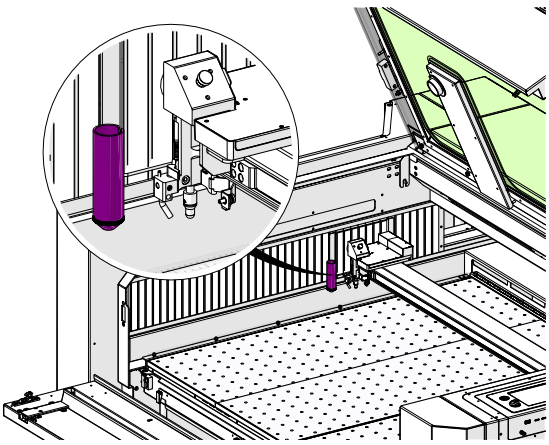
Lens Removal and Installation

How do I remove and install the lens in my laser?

Introduction

Maintaining and replacing the lens tube on your Epilog laser system is a straightforward process that ensures optimal performance and engraving quality. This guide provides step-by-step instructions—with visuals—for safely removing and reinstalling the lens tube. Be sure to follow each step carefully to prevent damage to the components.

Removal:

  1. Loosen the lens clamp with a Phillips head screwdriver.
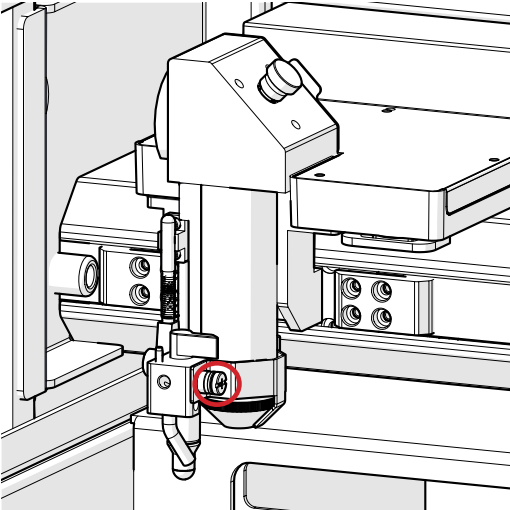
    Loosening lens clamp

  2. Hold the lens tube in place to prevent it from falling out.
  3. Remove lens tube.

    Removing lens tube

Installation:

  1. Align slot on lens tube with rear of laser.
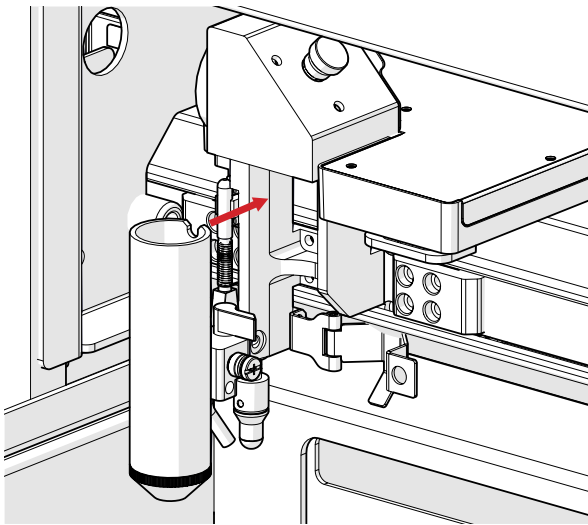
    Aligning lens tube

    Note: Make sure the lens is seated properly. It should lock into place and not spin.

  2. Tighten the lens tube clamp with a Phillips screw driver.
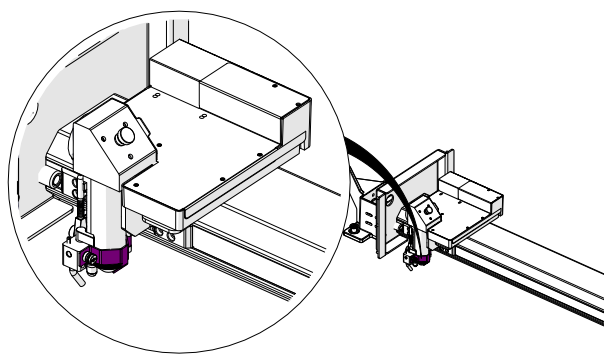
    Tightening lens clamp

[helpful]
  • ID:
    KA-01619
  • Date:
    01/22/2026

Tools:

  • Phillips Head Screwdriver
/* === Aggressive removal of PrintFriendly injected header elements === */ #printfriendly #pf-title, #printfriendly #pf-src, #printfriendly .pf-header, #printfriendly header, #printfriendly .printfriendly-header, #printfriendly h1:first-of-type, #printfriendly .page-header, #printfriendly [class*="header"], #printfriendly [id*="header"] { display: none !important; visibility: hidden !important; height: 0 !important; margin: 0 !important; padding: 0 !important; } /* Hide any top bar or source URL container */ #printfriendly #pf-src, #printfriendly .pf-src, #printfriendly [class*="src"], #printfriendly [class*="url"] { display: none !important; } /* Force page margins and centered page numbers */ @page { size: letter portrait; margin: 0.7in 0.5in; } @page :left, @page :right { @top-left { content: none !important; } @top-center { content: none !important; } @top-right { content: none !important; } @bottom-center { content: counter(page); font-size: 0.95em; padding-bottom: 25px; } }