メインコンテンツへスキップ

彫刻の修正を素早く行う方法

エピログのIRISカメラを使用して、深さを増したり彫刻を改善したり!

はじめに

彫刻を取り出して、一部の部分をもう少し深く彫りたいと思ったことはありませんか?でも、もう作品を動かしてしまった後では?そんな時は、EpilogのIRISカメラを使って二次加工を行うことで、簡単に修正できます!

テキストを分離する

この最初の彫刻は良い出来ですが、文字部分はもっと深く彫れるはずです!文字部分を分離すれば、より良い結果が得られます。
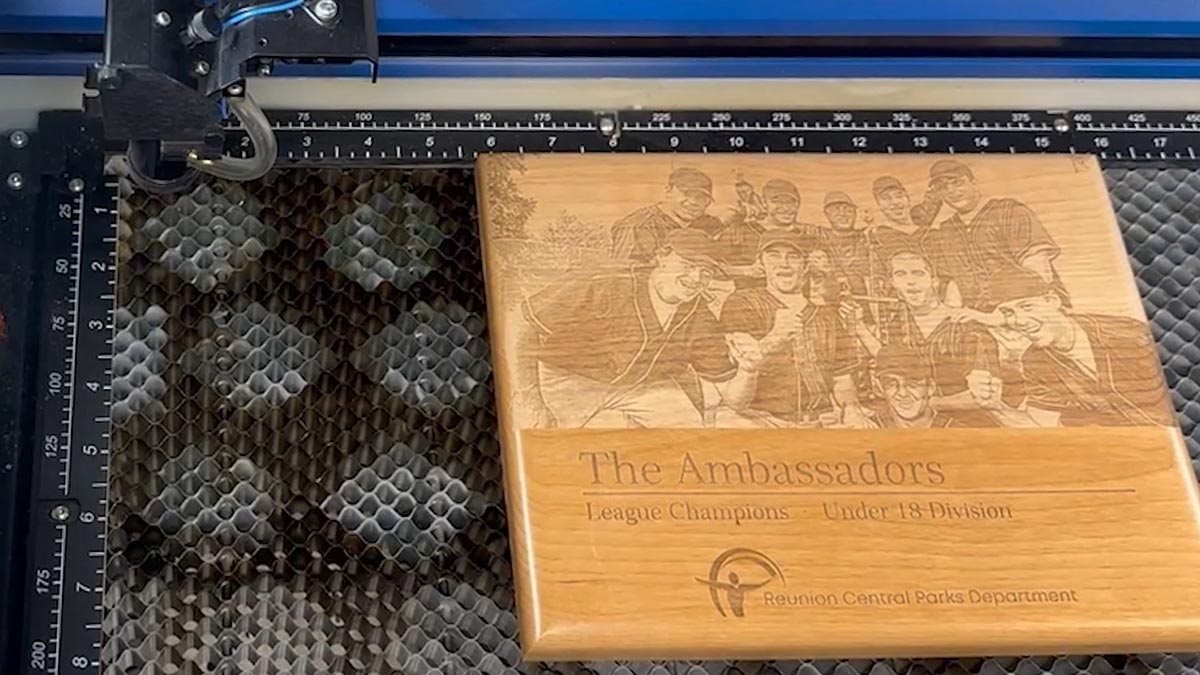
アイソレートテキスト技術を使用しないレーザー彫刻プレート

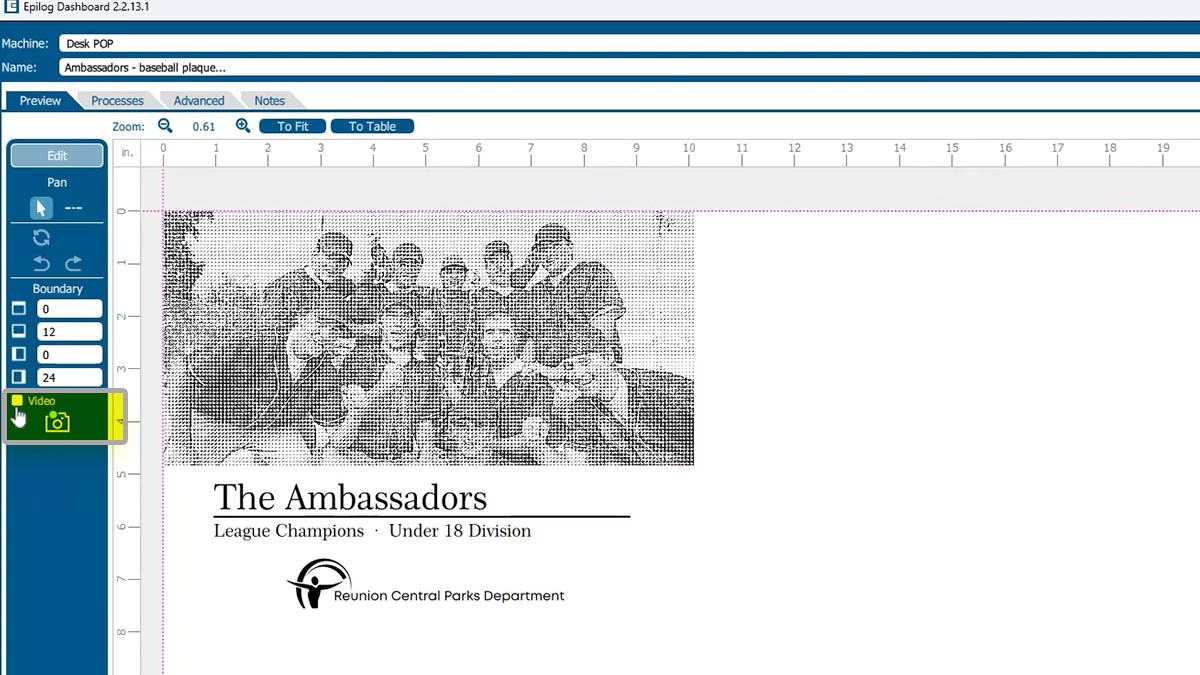
カメラをオフにしてください。

laser dashboard の映像

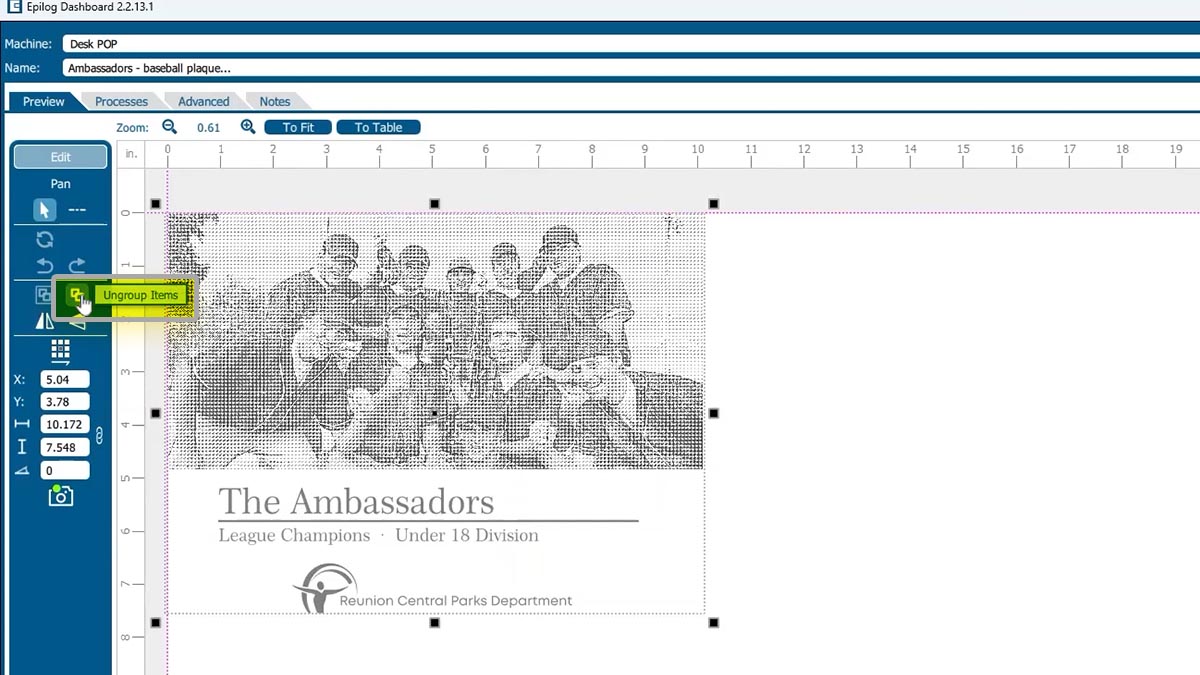
アートワークのグループ化を解除してください。

ダッシュボード内のグループ化されていないアートワーク

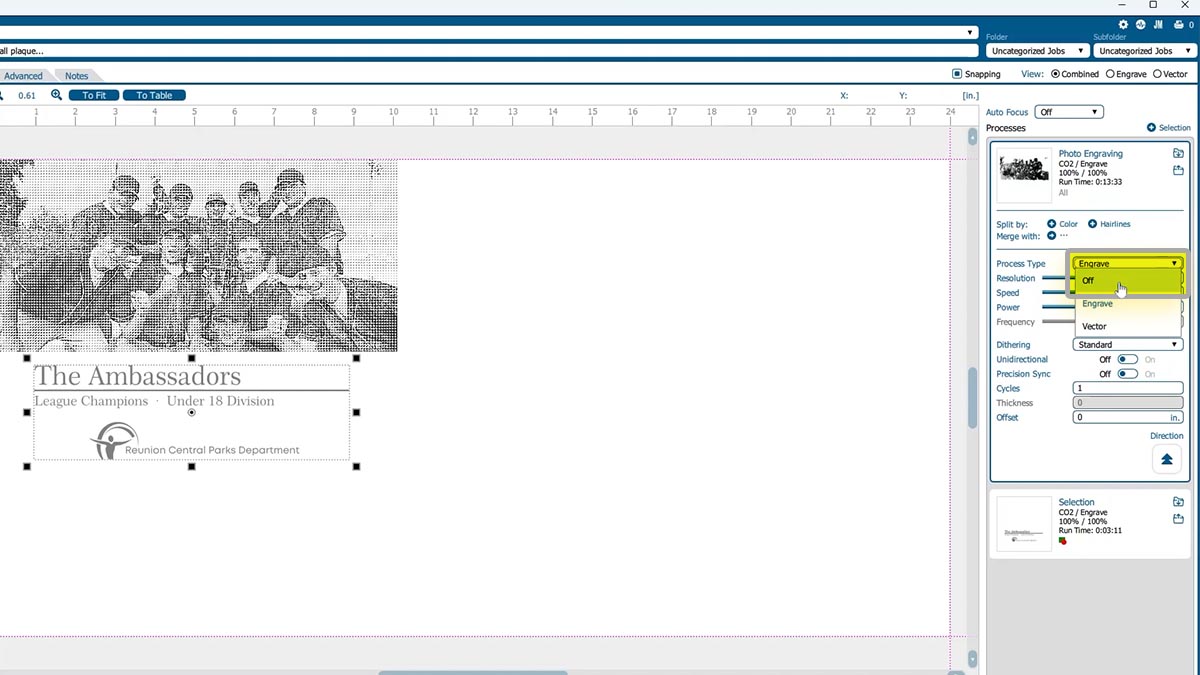
テキストを選択し、「選択範囲で分割」を実行します。すると、2つのプロセスが表示されます。
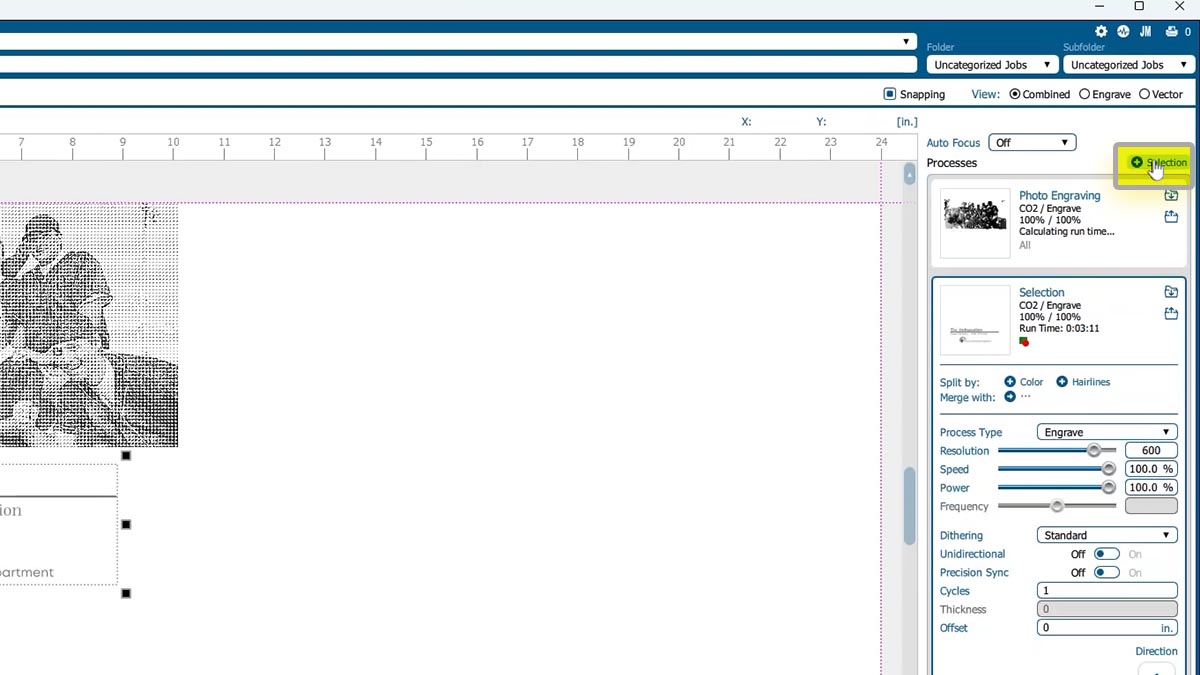
テキストを選択し、選択範囲で分割する

写真処理を停止する。

アートワークの写真部分をオフにする

設定を調整する


より深い彫刻のため、設定を調整してください。


動画表示を再びオンにし、アートワークを彫刻位置に合わせます。
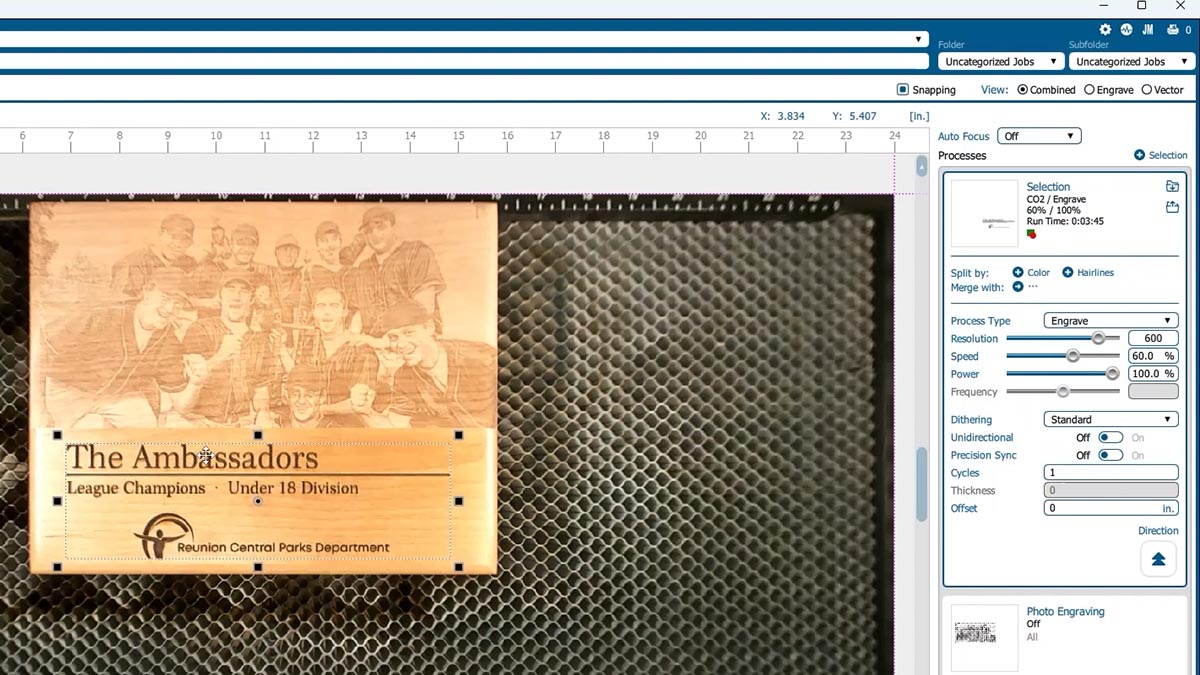
テキスト分離技術用のレーザーパラメータを入力する

そしてファイルをレーザープリンターに印刷する。

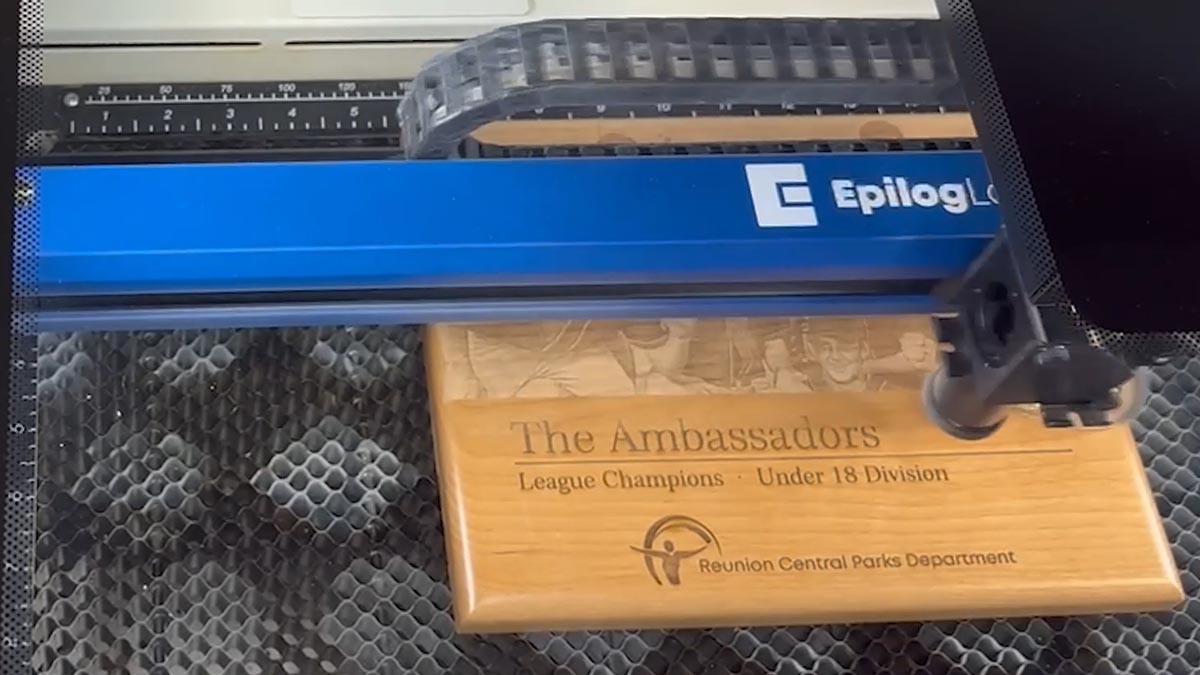
レーザー彫刻プレート(アイソレート文字技法)

今や完璧に整列し、販売準備が整ったように見えます!

[helpful]
  • ID:
    TA-71
  • 日付:
    2025年3月31日
/* === Aggressive removal of PrintFriendly injected header elements === */ #printfriendly #pf-title, #printfriendly #pf-src, #printfriendly .pf-header, #printfriendly header, #printfriendly .printfriendly-header, #printfriendly h1:first-of-type, #printfriendly .page-header, #printfriendly [class*="header"], #printfriendly [id*="header"] { display: none !important; visibility: hidden !important; height: 0 !important; margin: 0 !important; padding: 0 !important; } /* Hide any top bar or source URL container */ #printfriendly #pf-src, #printfriendly .pf-src, #printfriendly [class*="src"], #printfriendly [class*="url"] { display: none !important; } /* Force page margins and centered page numbers */ @page { size: letter portrait; margin: 0.7in 0.5in; } @page :left, @page :right { @top-left { content: none !important; } @top-center { content: none !important; } @top-right { content: none !important; } @bottom-center { content: counter(page); font-size: 0.95em; padding-bottom: 25px; } }