メインコンテンツへスキップ

エピログソフトウェアスイートにおけるカラーマッピングの使用

異なる設定で複数のパスを設定することで時間を節約できます。

Software Techniques :


はじめに

カラーマッピングにより、異なる設定でレーザー加工を複数回行うことが可能です。この場合、各パーツに番号を刻印しながら同時に切り出すことが可能です。これにより大幅な時間短縮が図れます。

注:カラーマッピングは.pngまたは.jpgファイル形式では機能しません。カラーマッピングはベクターベースのアートワークとのみ互換性があります。

Epilogダッシュボードを使えば、カラーマップの作成が簡単です。

カラーマッピング用のアートワークを準備する

このファイルでは、赤い数字にスコアリングを施し、青い輪郭部分を切り抜きます。
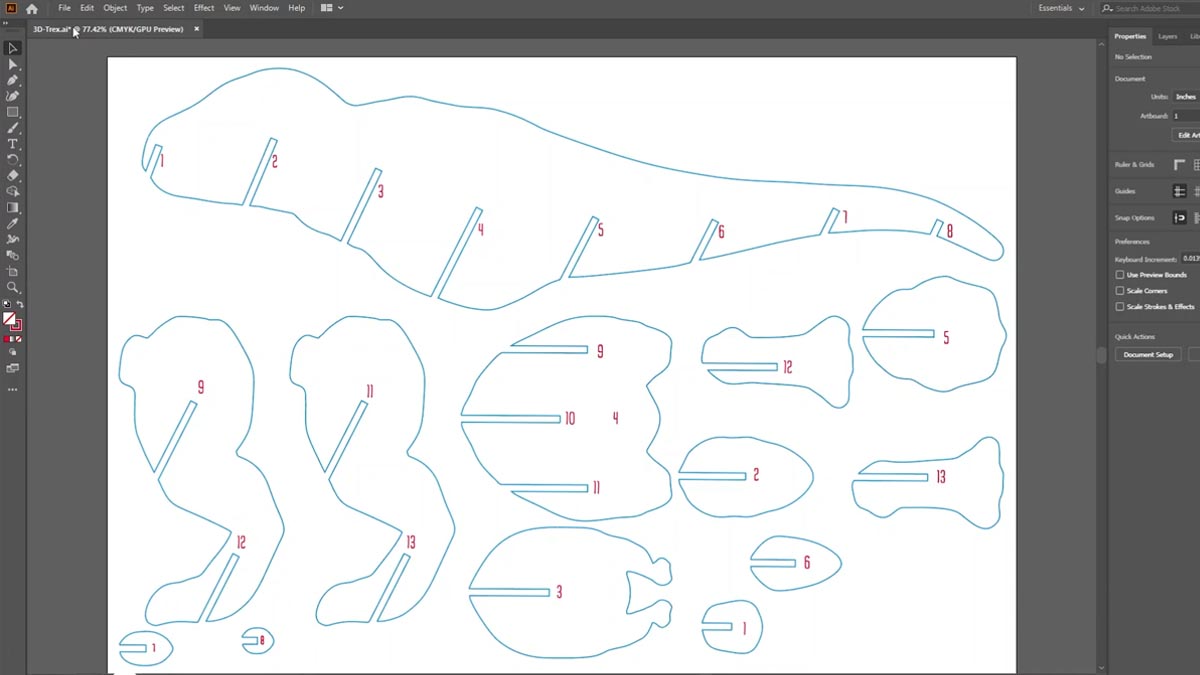
異なるパスごとに異なる色を使用してアートファイルを設定する

アートワークの準備が整ったら、ファイルをレーザープリンターで印刷してください。

すべてが一つのプロセスでソフトウェアに移行した。

まず、プロセスを「彫刻」から「ベクター」に変更してください。
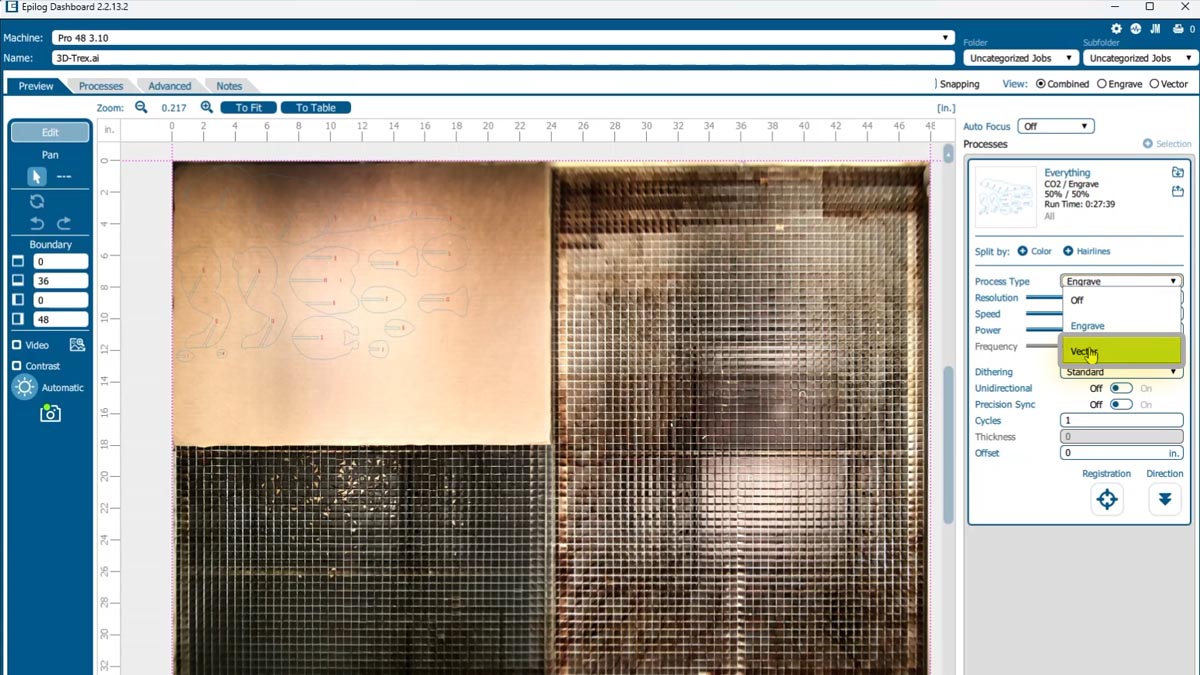
プロセスをベクトルに変換する

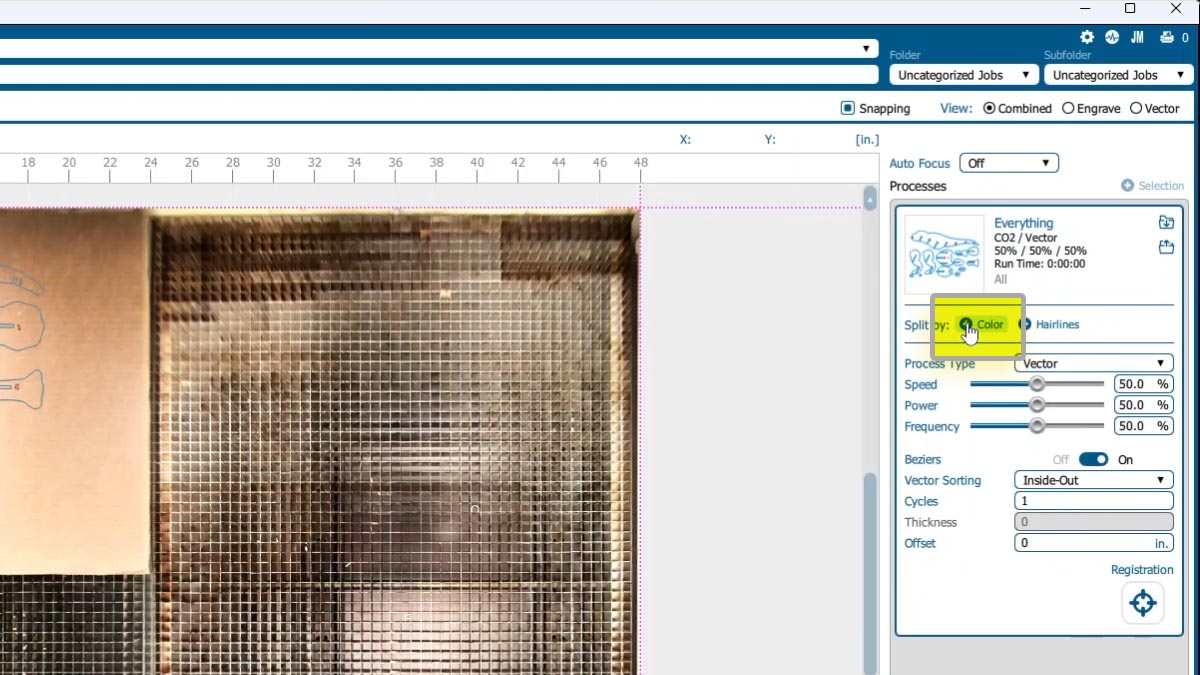
カラーマップを作成するには、[色で分割]をクリックするだけです

クリックで色別に分割

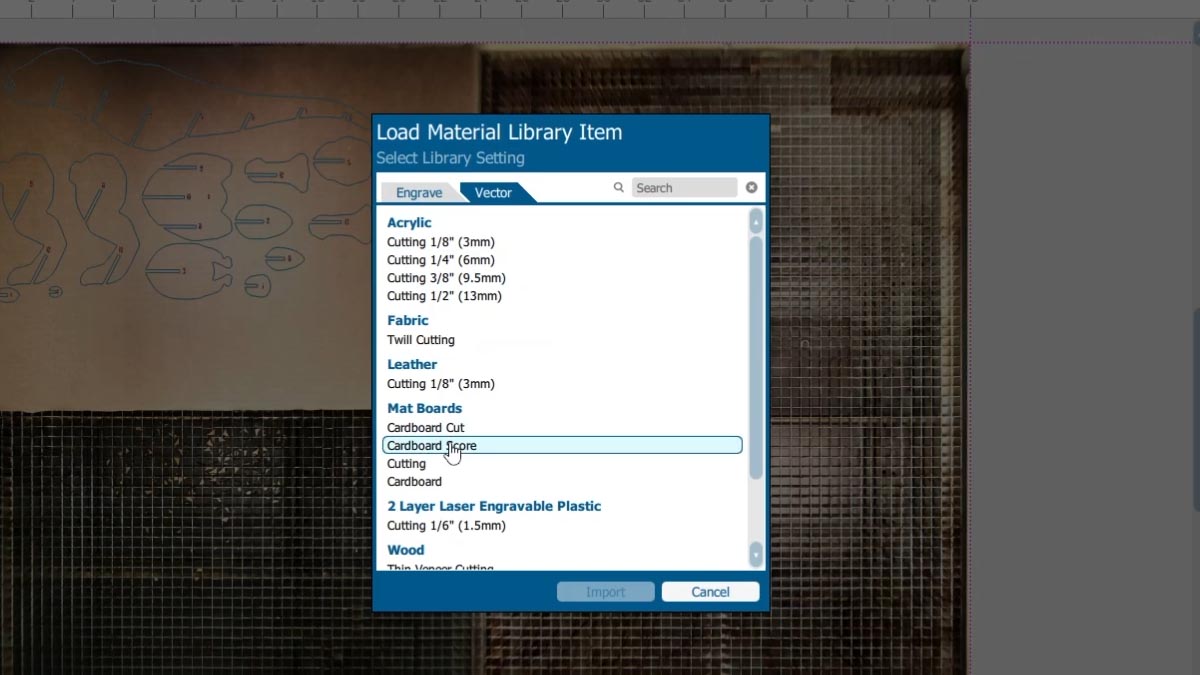
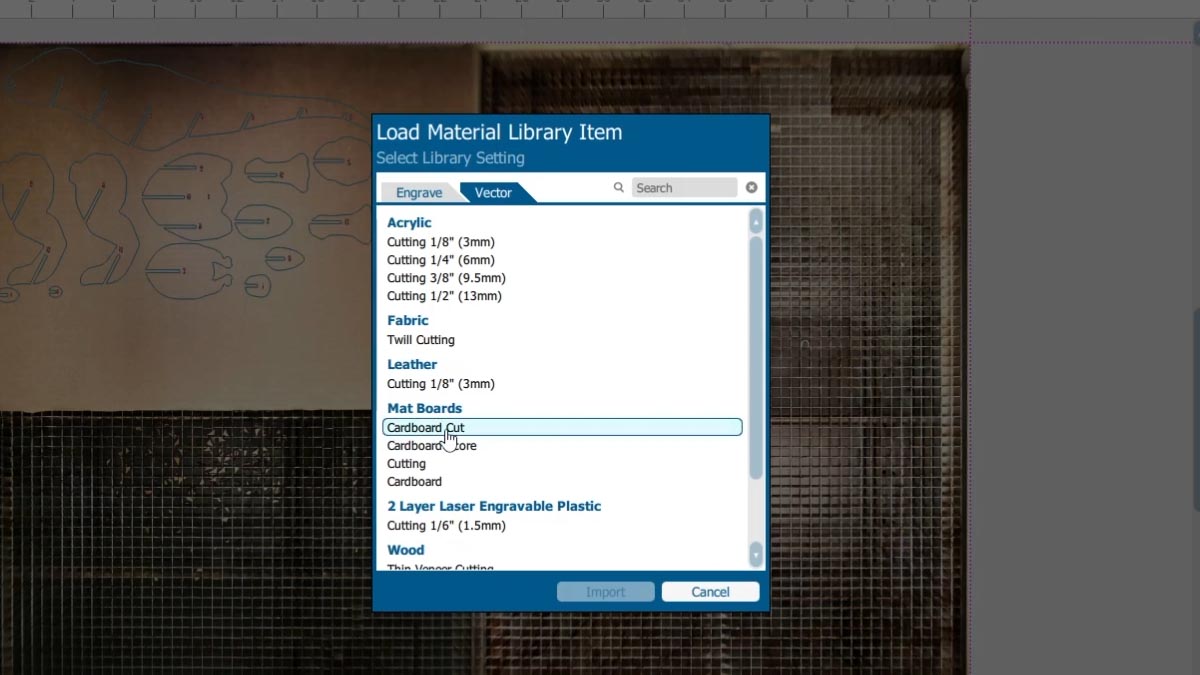
各工程における段ボールのスコアリングとカッティングの設定をインポートする。
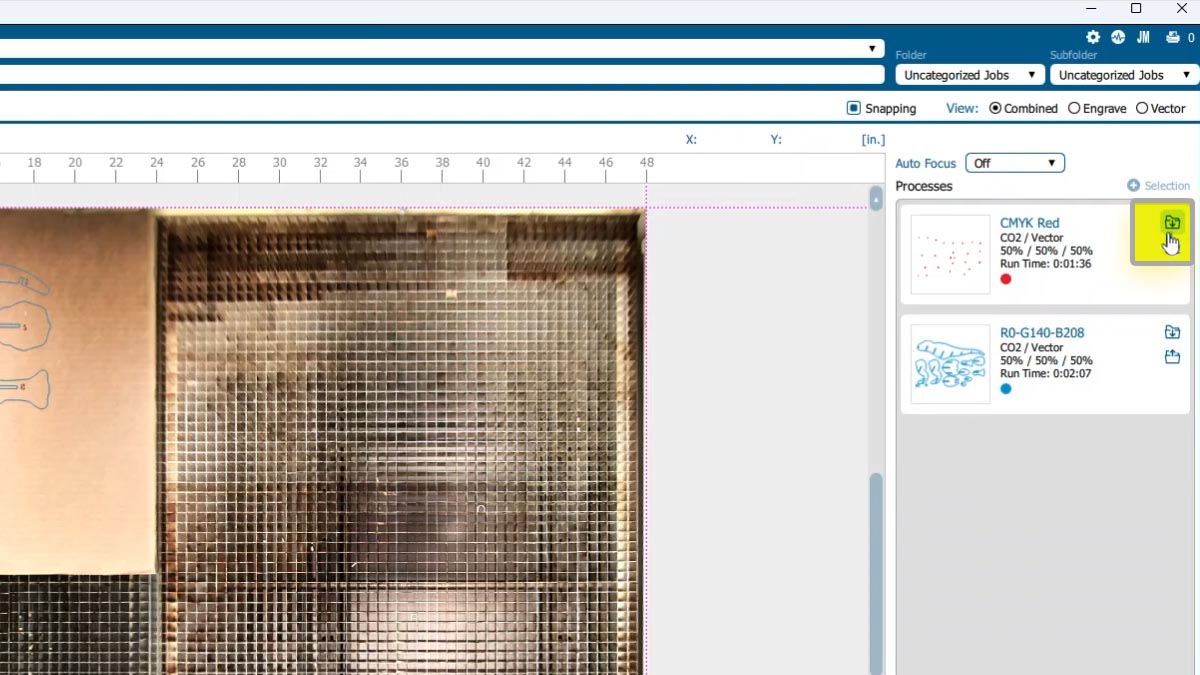
マテリアルプリセットアイコンをクリックして設定をインポートします
プリセットを段ボールのスコアに設定
プリセットを段ボールカットに設定

必要に応じて設定を調整することもできます。


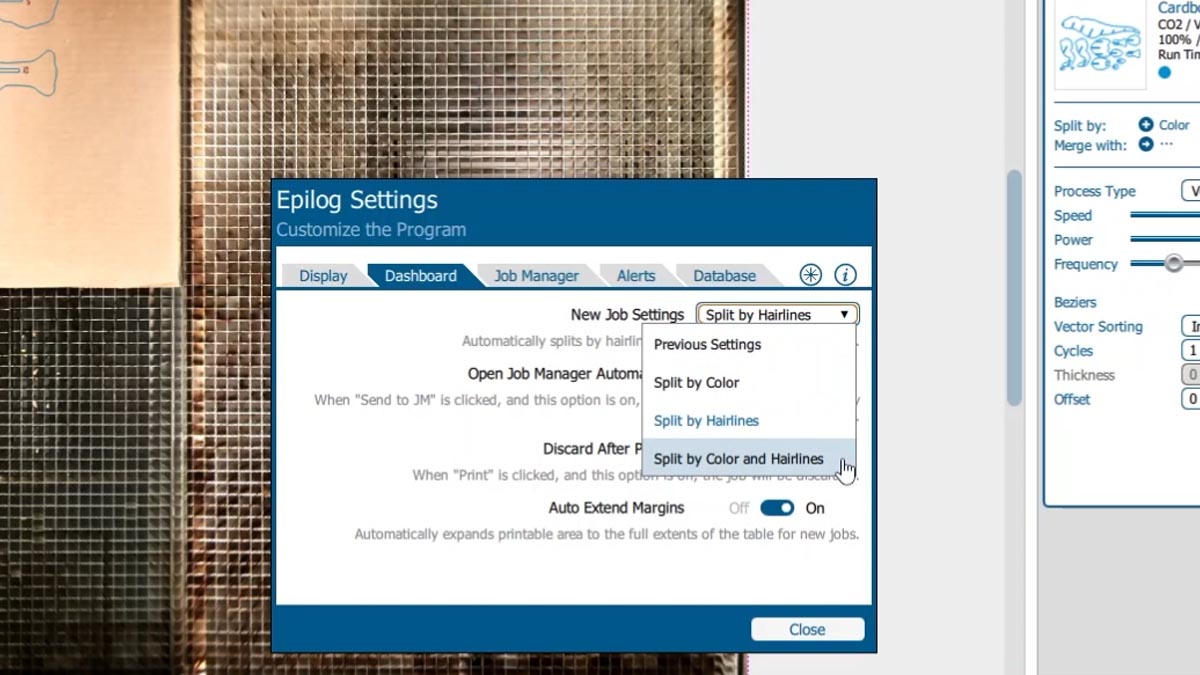
プロのコツ!設定を変更して、デフォルトで色分け、前回の設定を使用、ヘアラインで分割、あるいは色とヘアラインの両方で分割することも可能です。
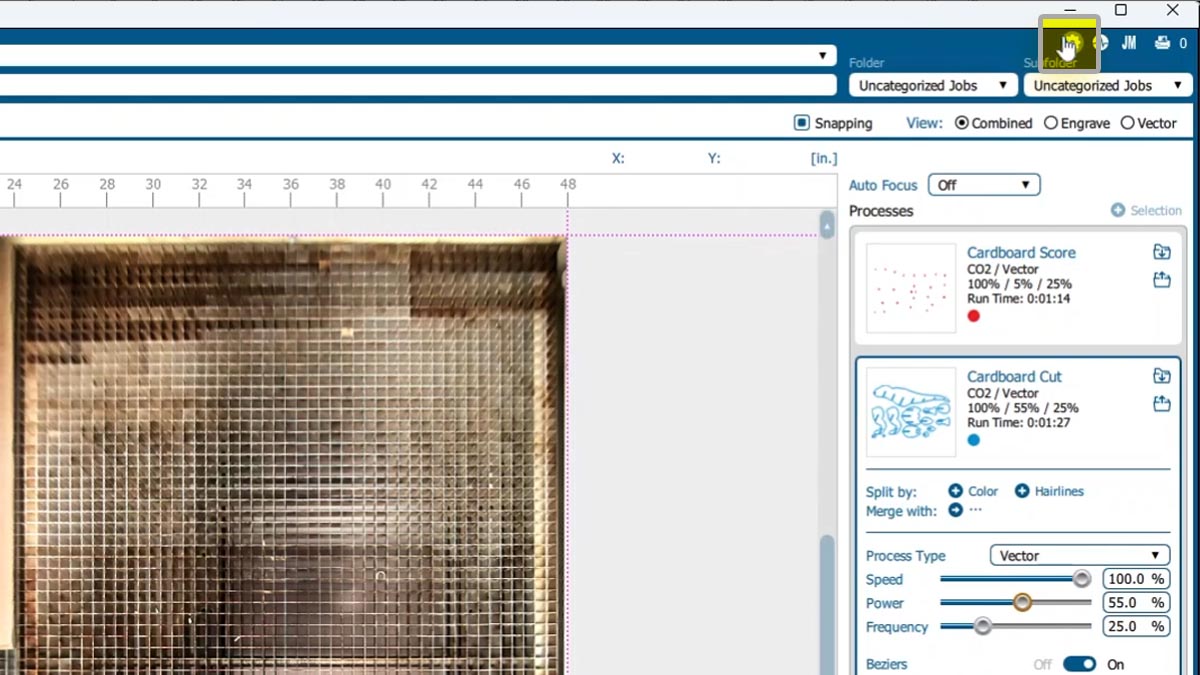
プリセットを段ボールカットに設定
プリセットを段ボールカットに設定

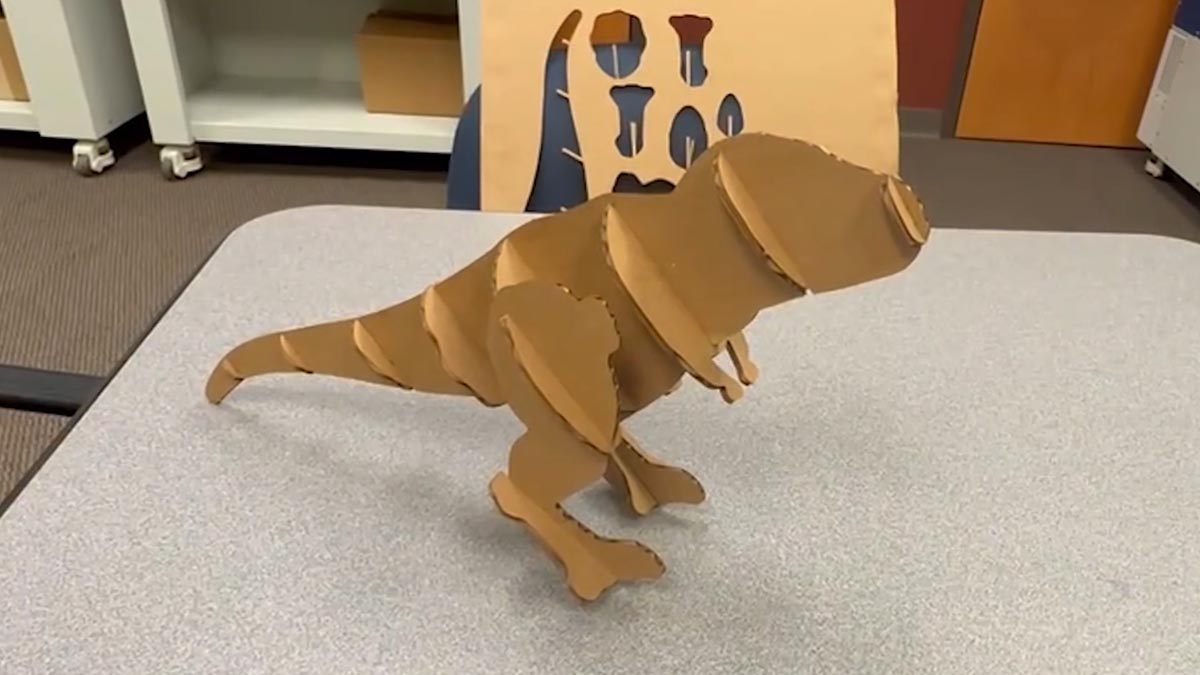
ファイルをレーザープリンターで印刷し、組み立てれば完成です!

完成品は組み立てられた恐竜の完成品である

[helpful]
  • ID:
    TA-65
  • 日付:
    2025年11月11日

部品とリソース:

  • エピログ ソフトウェア スイート
  • 段ボール
/* === Aggressive removal of PrintFriendly injected header elements === */ #printfriendly #pf-title, #printfriendly #pf-src, #printfriendly .pf-header, #printfriendly header, #printfriendly .printfriendly-header, #printfriendly h1:first-of-type, #printfriendly .page-header, #printfriendly [class*="header"], #printfriendly [id*="header"] { display: none !important; visibility: hidden !important; height: 0 !important; margin: 0 !important; padding: 0 !important; } /* Hide any top bar or source URL container */ #printfriendly #pf-src, #printfriendly .pf-src, #printfriendly [class*="src"], #printfriendly [class*="url"] { display: none !important; } /* Force page margins and centered page numbers */ @page { size: letter portrait; margin: 0.7in 0.5in; } @page :left, @page :right { @top-left { content: none !important; } @top-center { content: none !important; } @top-right { content: none !important; } @bottom-center { content: counter(page); font-size: 0.95em; padding-bottom: 25px; } }