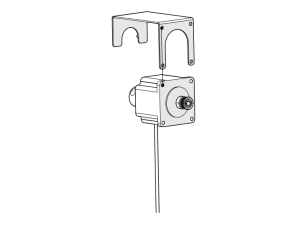
This guide covers replacing a door damper on the Fusion Galvo G100. It shows the right-side damper (GC0233); the left-side damper (GC0232) is replaced the same way.
Parts Required
- GC0233 – Damper, Rotary, 500gfcm, CW (right side)
- GC0232 – Damper, Rotary, 500gfcm, CCW (left side)
Tools Required
- T30 and T10 Torx Drivers
- 9/64″ Allen Wrench
Safety First: Ensure the engraver is completely powered off and the power cord is disconnected before removing any panels. This procedure requires laying the engraver on its back, so have a second person available to help.
Note: Side is determined looking at the engraver from the front. Check the part number on the damper you received and replace the matching side.
Door Damper Removal
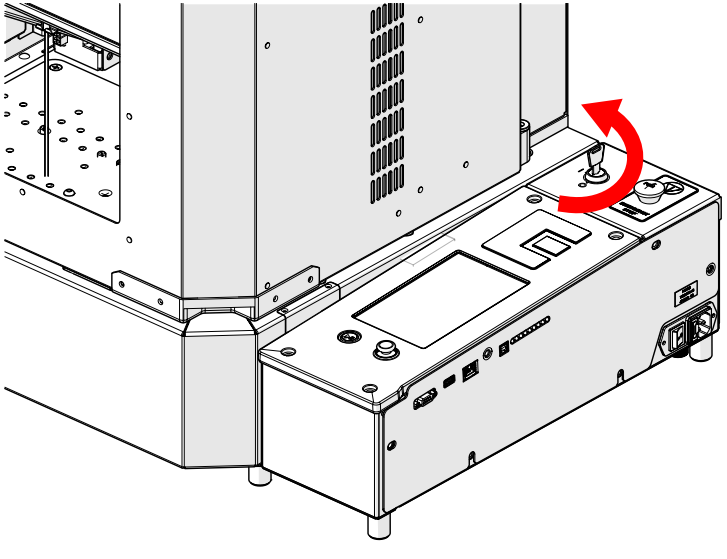
Turn Off Engraver
Turn the key switch to the off position to power down the engraver.

Disconnect from Power
Unplug the power cord from the back of the engraver.
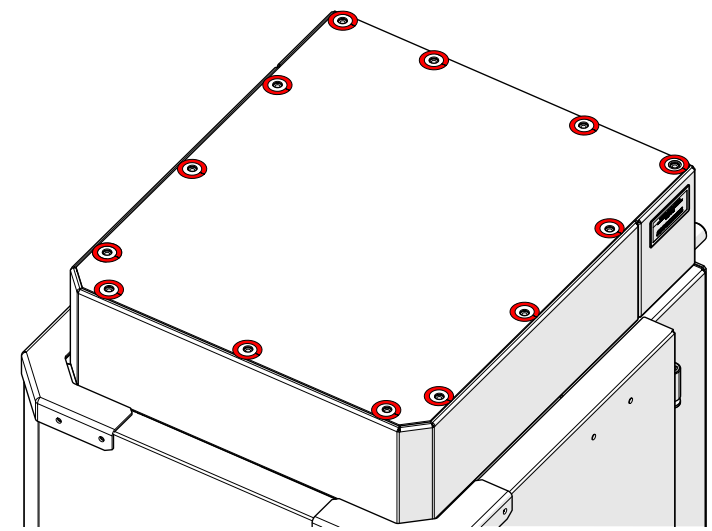
Remove Top Panel Screws
Loosen and remove the screws around the edge of the top panel (highlighted in red).
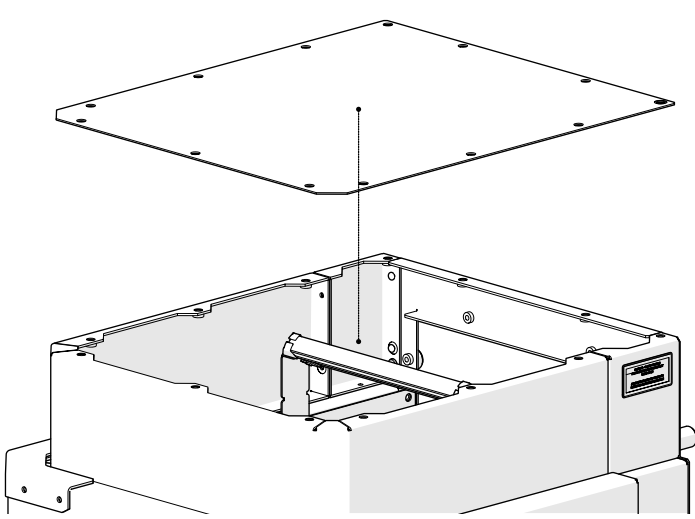
Remove Top Panel
Lift the top panel off the engraver and set it aside.
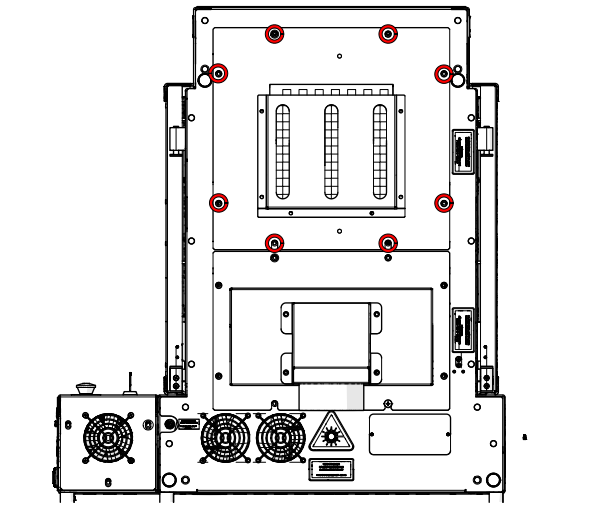
Remove Upper Rear Panel Screws
At the back of the engraver, loosen and remove the eight screws securing the upper rear panel (highlighted in red).
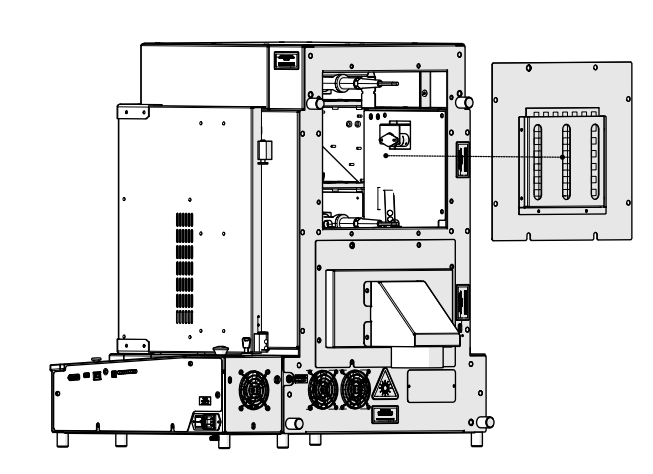
Remove Upper Rear Panel
Remove the upper rear panel.
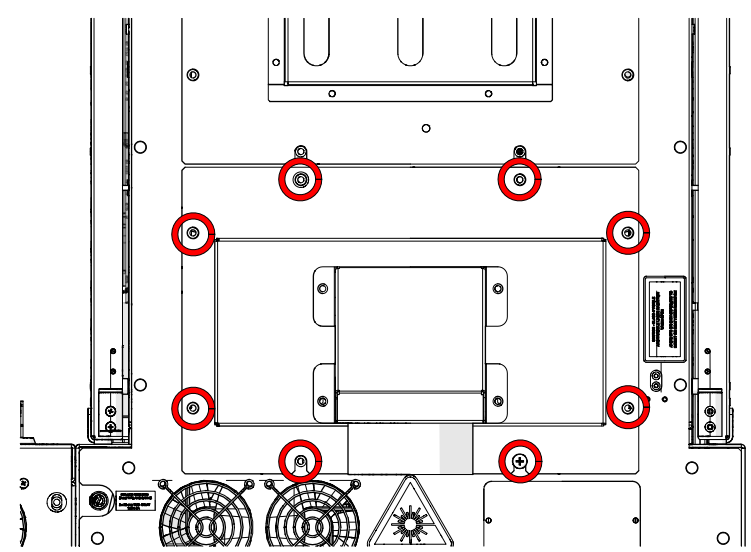
Remove Lower Rear Panel Screws
Loosen and remove the eight screws securing the lower rear panel (highlighted in red).
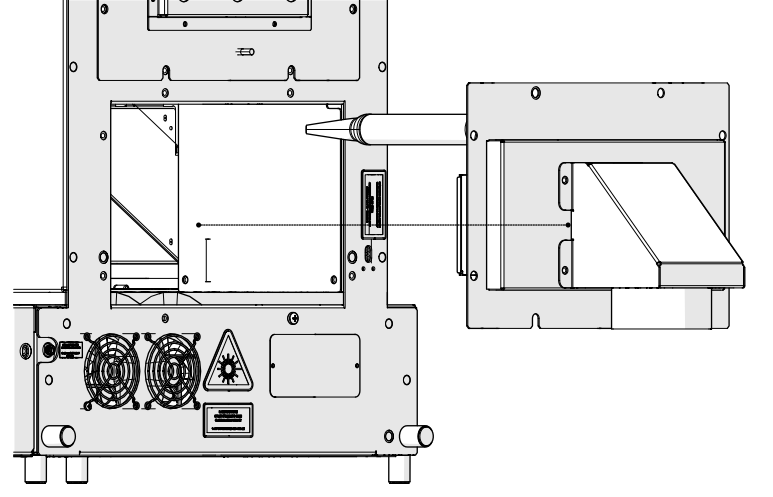
Remove Lower Rear Panel
Pull the lower rear panel and its exhaust duct straight back off the engraver.
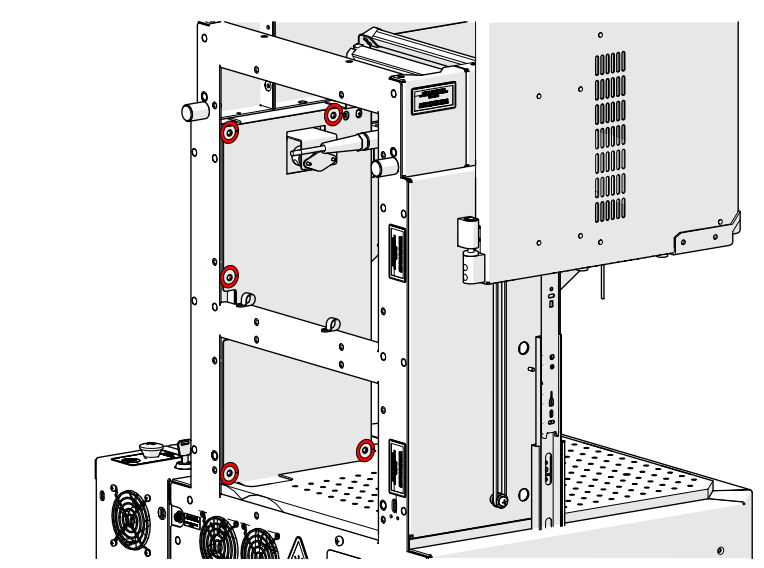
Remove Side Panel Screws
Loosen and remove the five screws securing the side panel (highlighted in red).
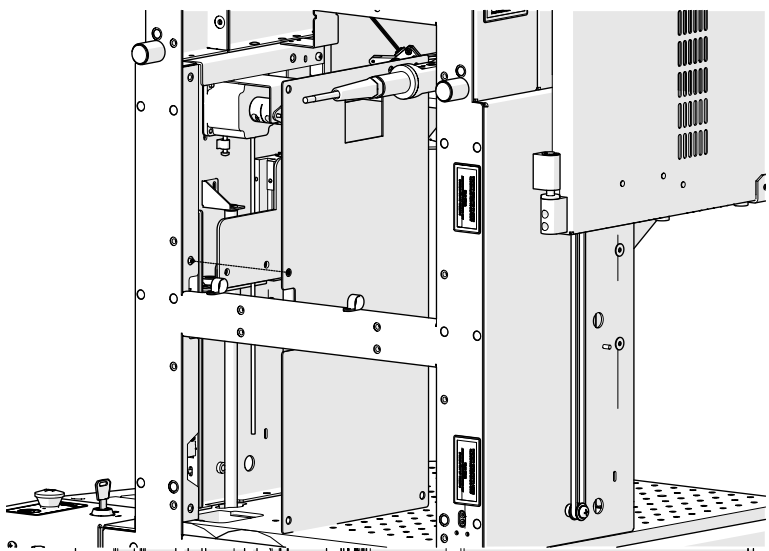
Remove Side Panel
Remove the side panel.
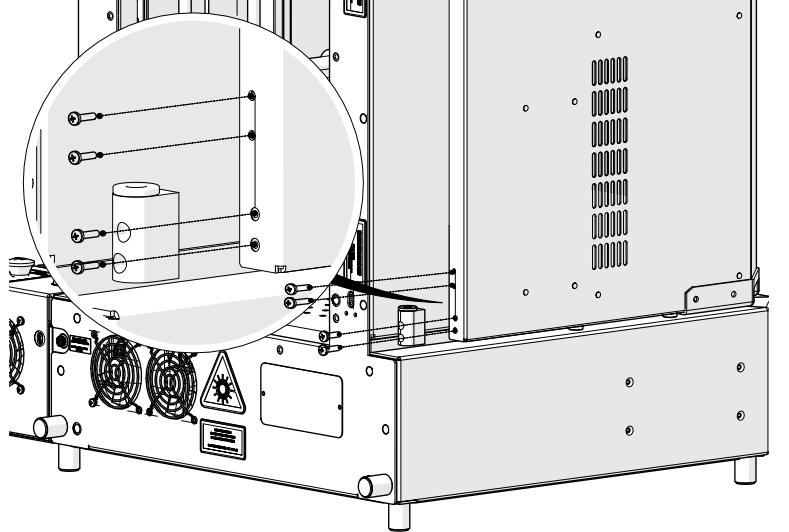
Remove Rear Corner Screws
Loosen and remove the four screws at the rear corner, shown in the detail view.
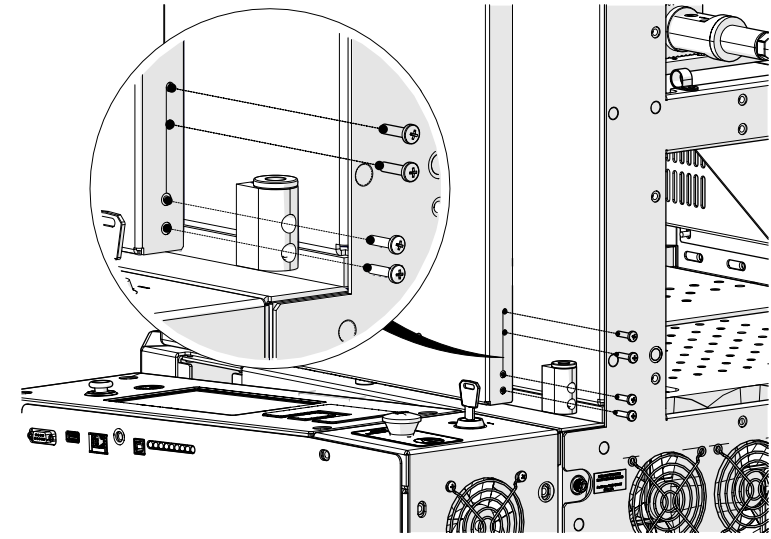
Remove Front Corner Screws
Loosen and remove the four screws at the front corner, shown in the detail view.
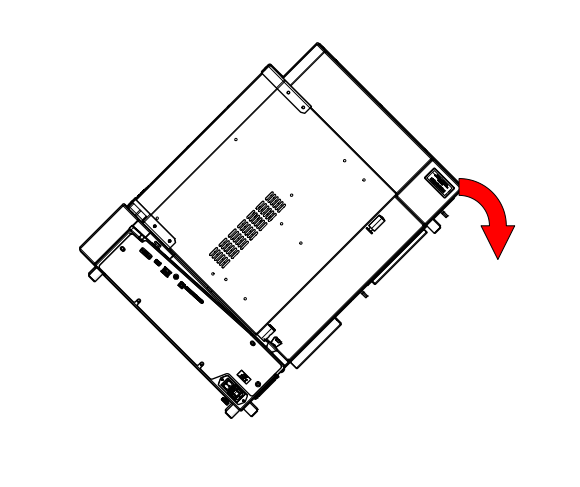
Tilt Engraver
Carefully tilt the engraver backward.
Note: The engraver is heavy. Use two people to tilt it and lower it onto its back.
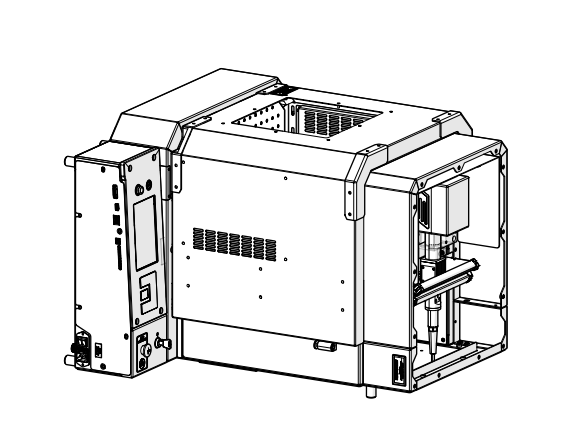
Lay Engraver on Its Back
Lower the engraver until it rests on its back.
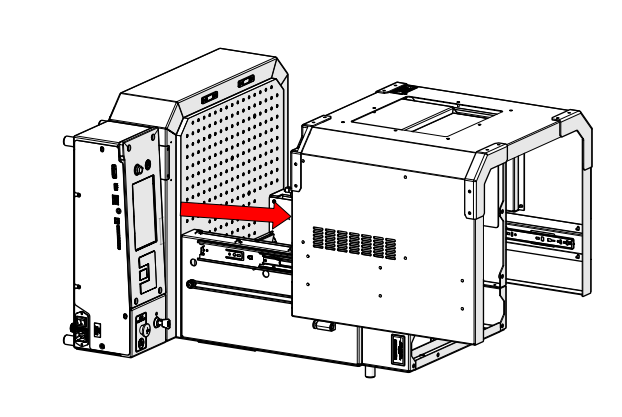
Open the Door
Slide the door fully open.
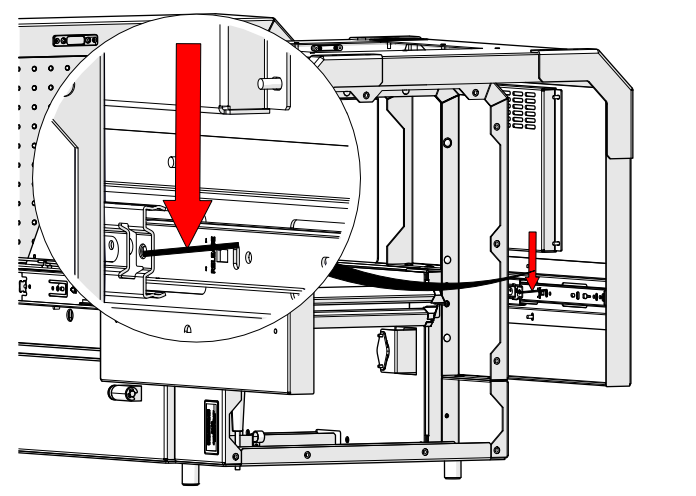
Depress First Slide Lever
Press down on the release lever on the first door slide, shown in the detail view.
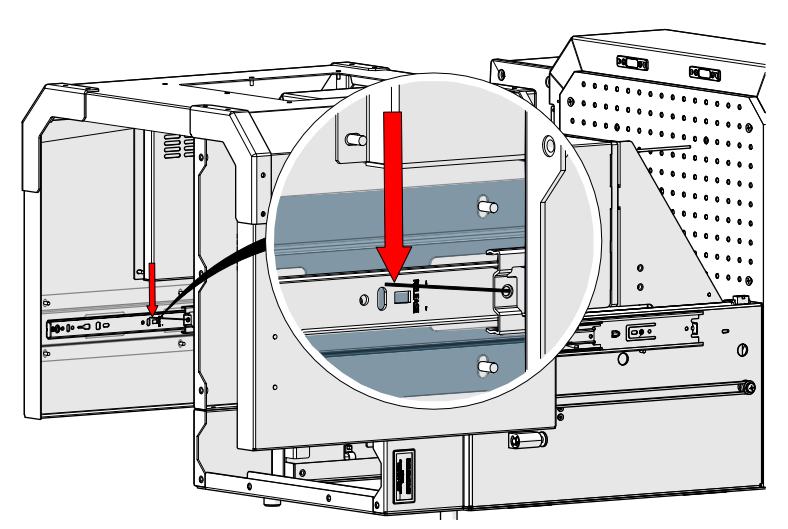
Depress Second Slide Lever
Press down on the release lever on the second door slide.
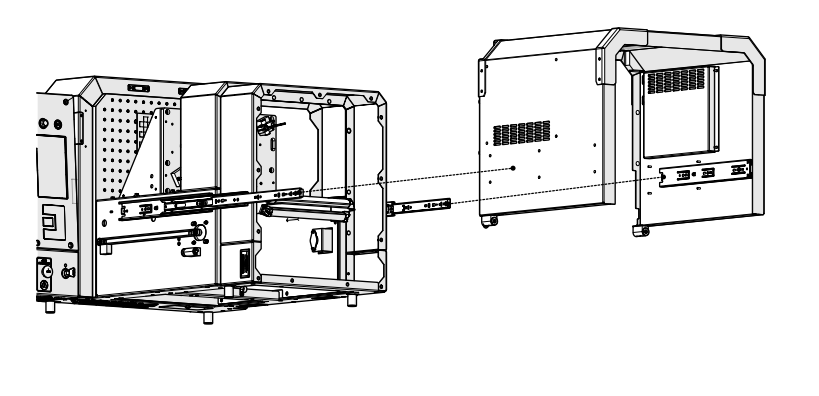
Remove the Door
With both levers released, slide the door off its slides and set it aside.
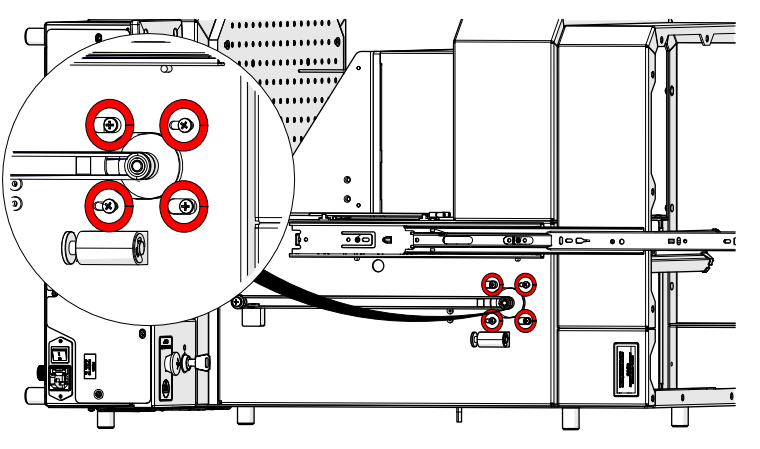
Loosen Motor Mounting Screws
Loosen the four door motor mounting screws (highlighted in red), but do not remove them.
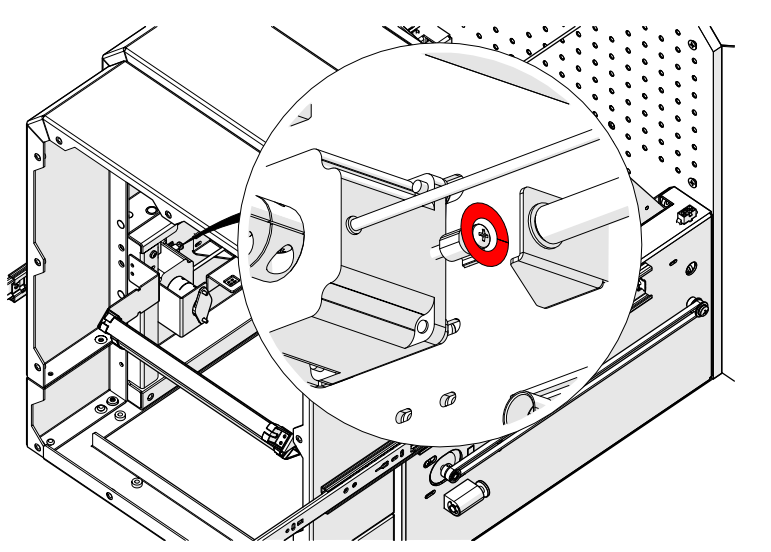
Loosen Tension Screw
Loosen the screw highlighted in red, but do not remove it.
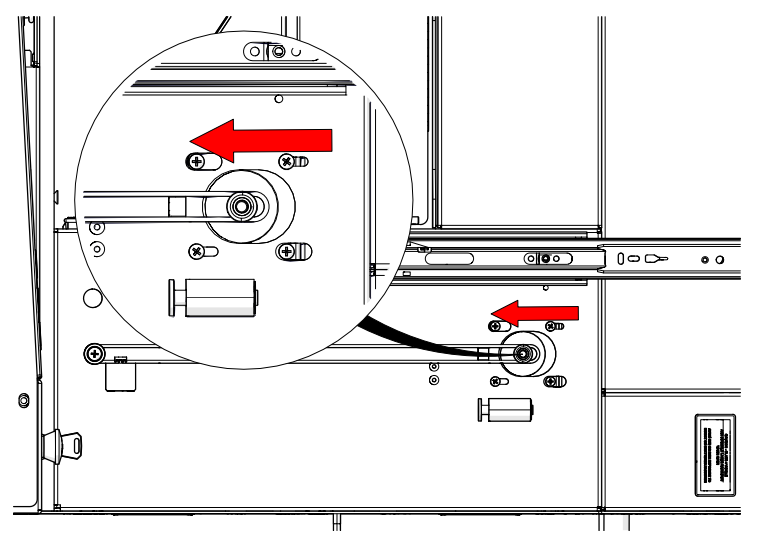
Slide Motor
Slide the motor in the direction of the arrow to relieve tension on the belt.
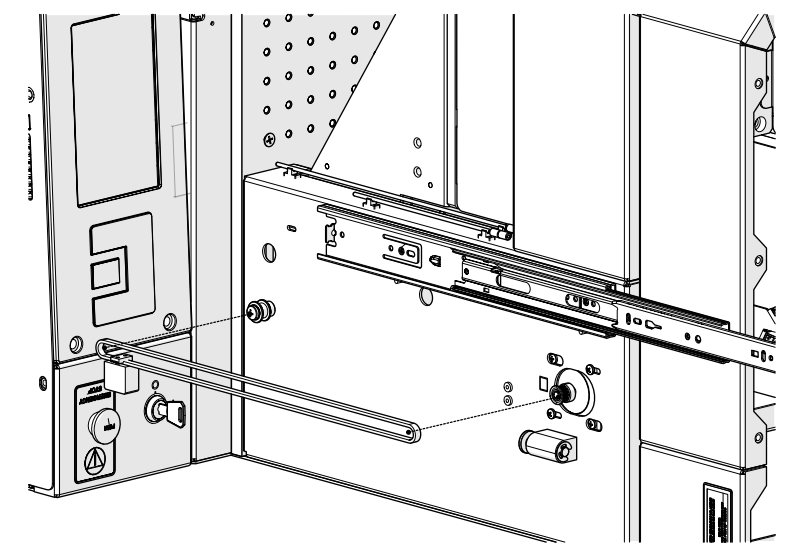
Remove Belt
Slip the belt off the motor pulley and the idler, and remove it.
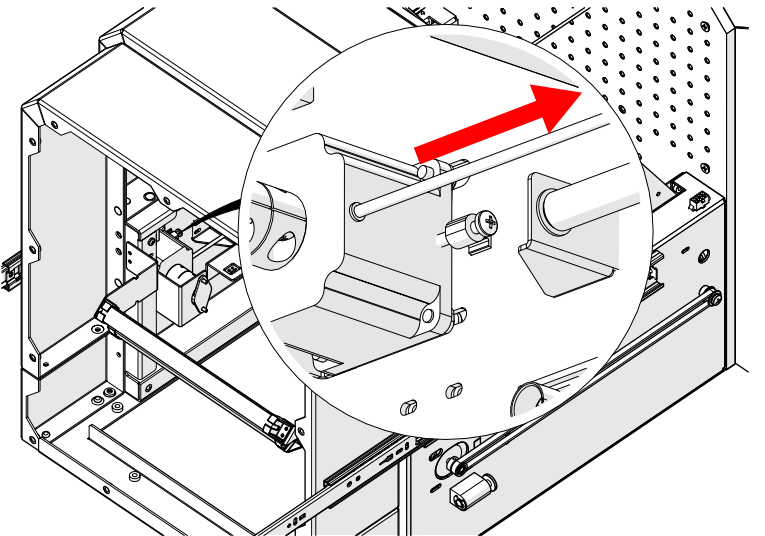
Disconnect Motor Harness
Follow the door motor harness to its connector and disconnect it, as shown in the detail view.
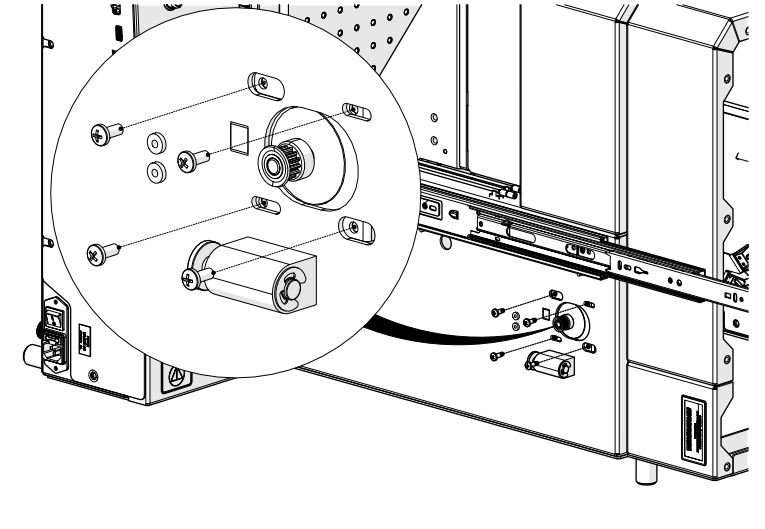
Remove Motor Mounting Screws
Loosen and remove the motor mounting screws and washers shown in the detail view.
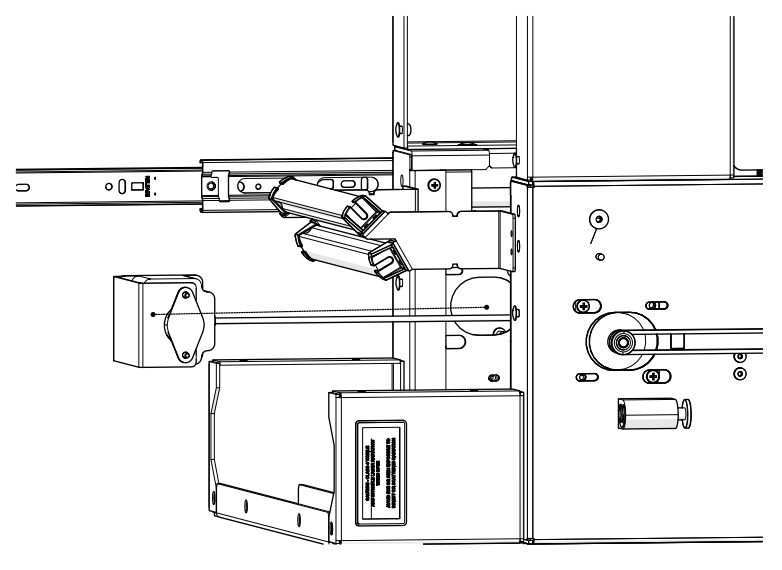
Remove Door Motor
Pull the motor, with the damper attached, out from the inside of the engraver.
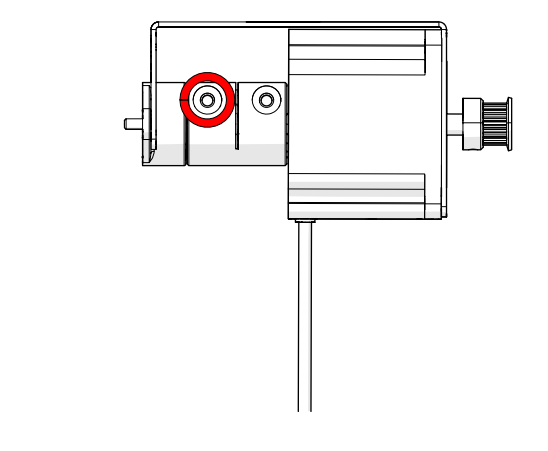
Loosen Damper Set Screw
Loosen the set screw highlighted in red, but do not remove it.
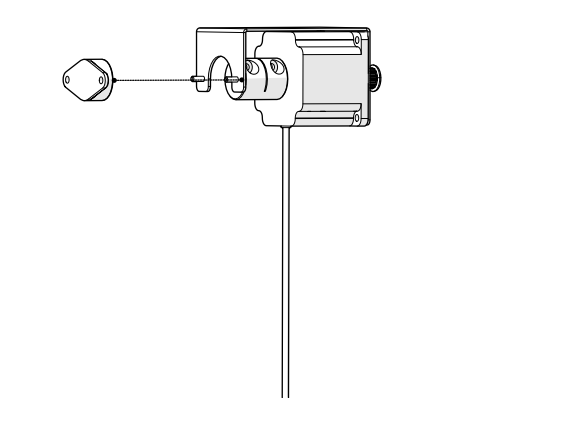
Remove Damper
Slide the old damper off the end of the motor shaft.
Door Damper Installation
Install New Damper
Slide the new damper onto the end of the motor shaft.
Tighten Damper Set Screw
Tighten the set screw highlighted in red.
Install Door Motor
Place the motor back into its mounting position from the inside of the engraver.
Reconnect Motor Harness
Reconnect the door motor harness connector.
Install Motor Mounting Screws
Install the motor mounting screws and washers, but do not fully tighten them yet.
Install Belt
Loop the belt over the idler and the motor pulley.
Tension the Motor
Slide the motor to take up the slack in the belt, then tighten the screw highlighted in red.
Tighten Motor Mounting Screws
Tighten the four door motor mounting screws (highlighted in red).
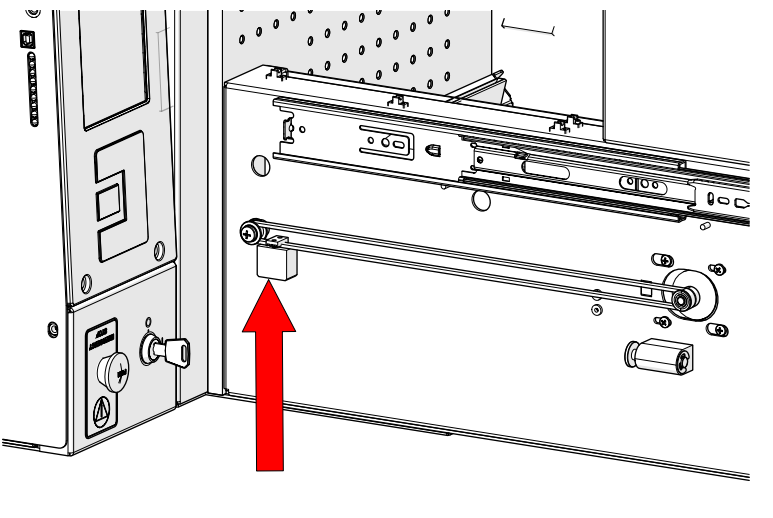
Position Belt Block
Move the belt block to the bottom of its travel.
Place Door on Engraver
Line the door up with the slides and slide it back onto the engraver.
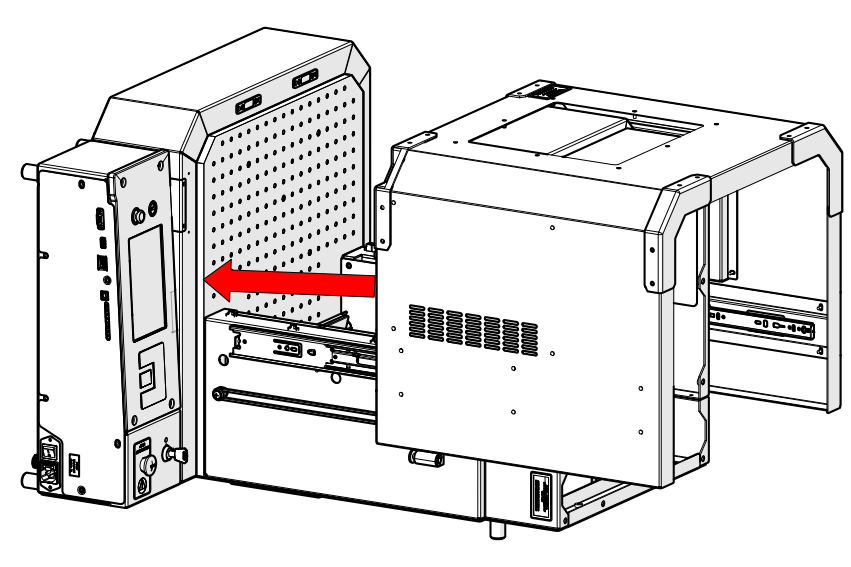
Ensure Door Is on Slides
Check that the door is seated correctly on both slides.
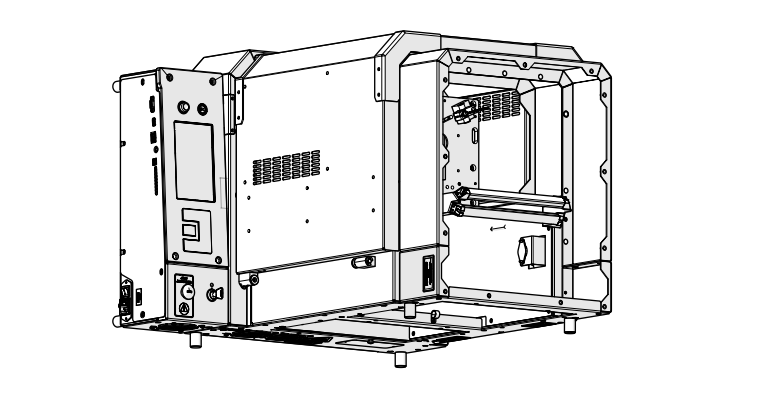
Close the Door
Slide the door closed.
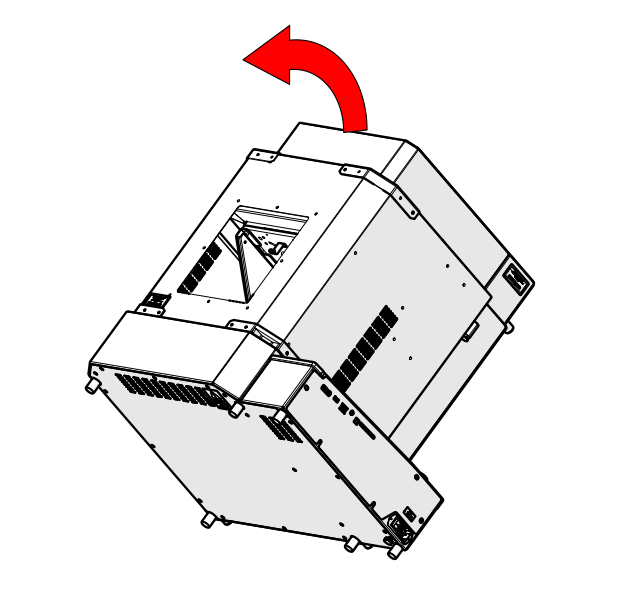
Return Engraver Upright
With a second person, tilt the engraver back to its upright position.
Reassembly
Install Front Corner Screws
Install and tighten the four screws at the front corner.
Install Rear Corner Screws
Install and tighten the four screws at the rear corner.
Install Side Panel
Place the side panel back on the engraver.
Install Side Panel Screws
Install and tighten the five side panel screws.
Install Lower Rear Panel
Slide the lower rear panel and exhaust duct back into place.
Install Lower Rear Panel Screws
Install and tighten the eight lower rear panel screws.
Install Upper Rear Panel
Place the upper rear panel back on the engraver.
Install Upper Rear Panel Screws
Install and tighten the eight upper rear panel screws.
Install Top Panel
Set the top panel back on the engraver.
Install Top Panel Screws
Install and tighten the screws around the edge of the top panel.

Connect to Power
Plug the power cord back into the engraver.