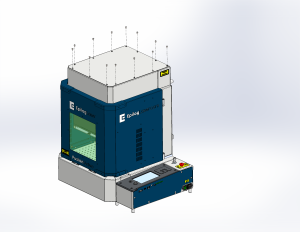
This guide covers the removal of the overhead camera assembly from the Fusion Galvo G100 and the installation of the replacement assembly.
Parts Required
- GC0200 – Assy, Camera, Overhead, Galvo, F254
- GC0150 – Assy, Camera, Overhead, Galvo, F163
Tools Required
- T30 Torx Driver
- T10 Torx Driver
Safety First: Ensure the engraver is completely powered off and the power cord is disconnected before removing any panels or touching internal electronics.
Camera Removal
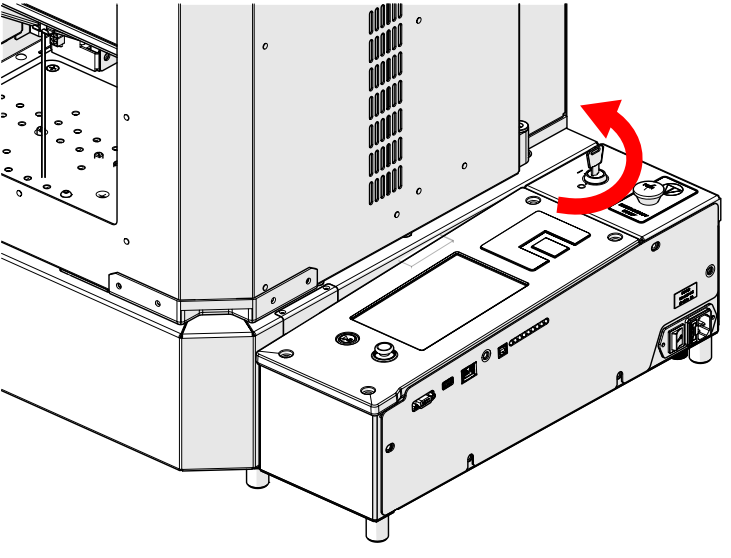
Power Off Engraver
Turn off the engraver.

Disconnect From Power
Unplug the power cord from the engraver.
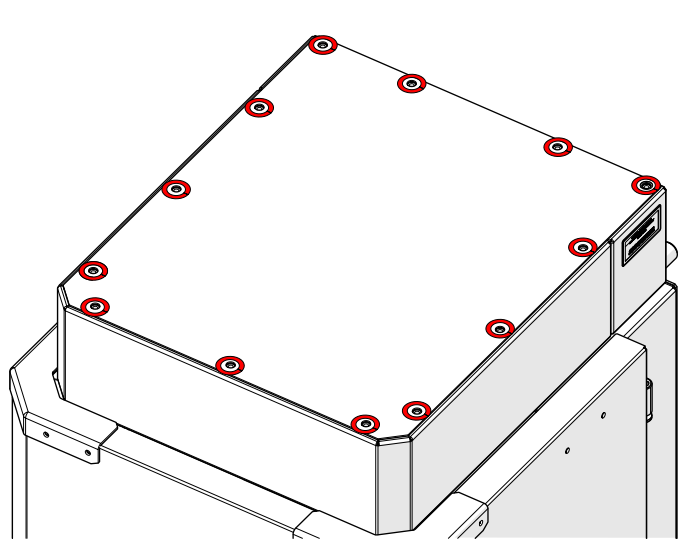
Remove Top Panel Screws
Loosen and remove the screws securing the top panel (highlighted in red).
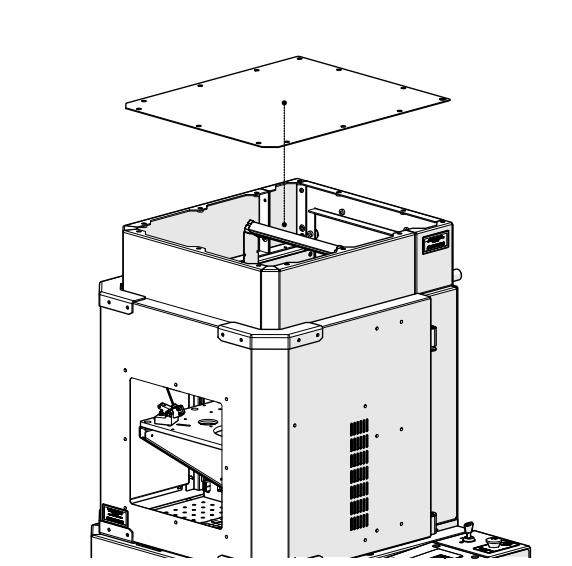
Remove Top Panel
Lift the top panel off the engraver.
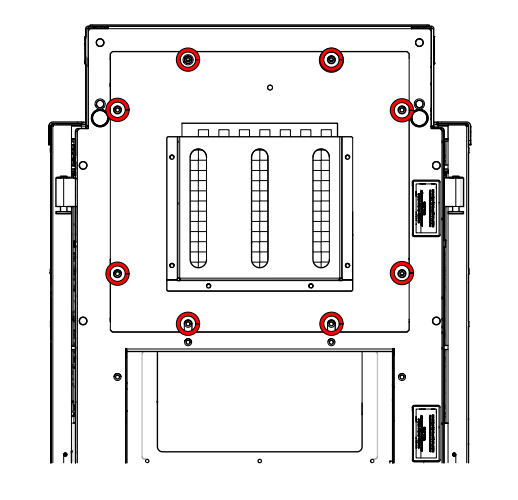
Remove Rear Panel Screws
Loosen and remove the eight screws securing the rear panel (highlighted in red).
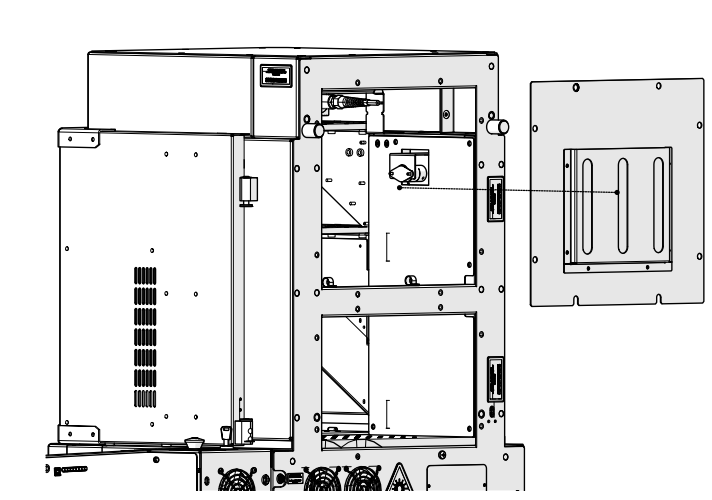
Remove Rear Panel
Remove the rear panel to access the camera assembly.
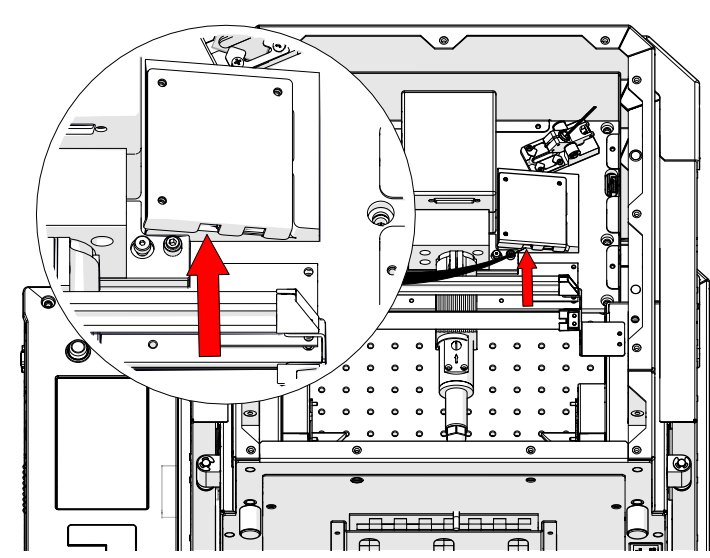
Disconnect USB Cable
Disconnect the USB cable from the bottom of the camera assembly.
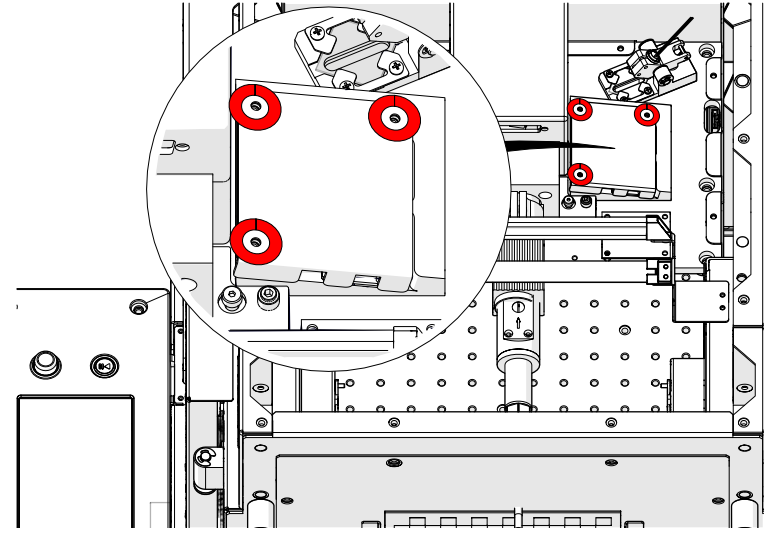
Remove Camera Cover Screws
Loosen and remove the three screws securing the camera cover (highlighted in red).
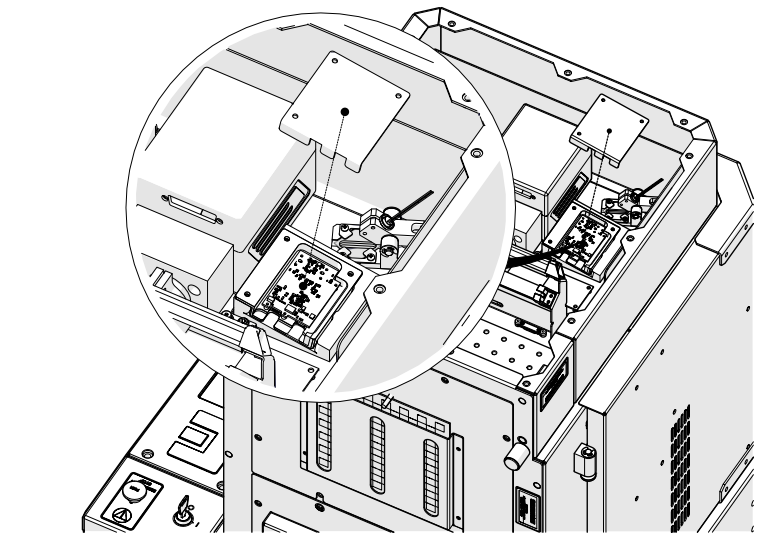
Remove Camera Cover
Remove the camera cover.
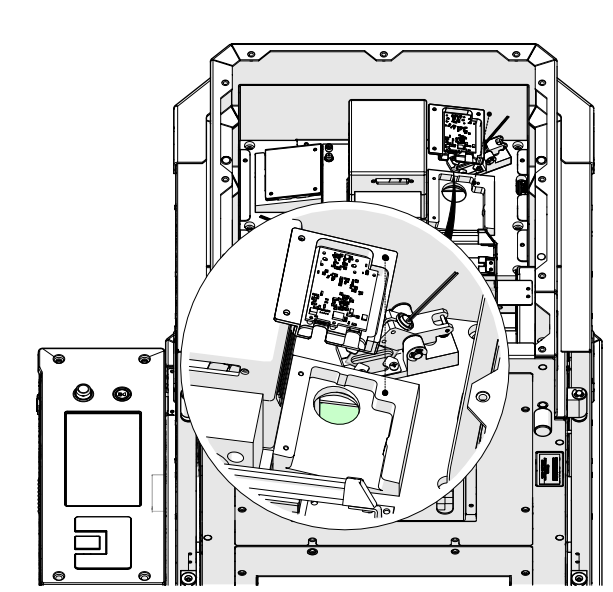
Remove Camera Assembly
Carefully remove the existing camera assembly.
Camera Installation
Now that the old camera assembly is removed, proceed with the installation of the replacement assembly.
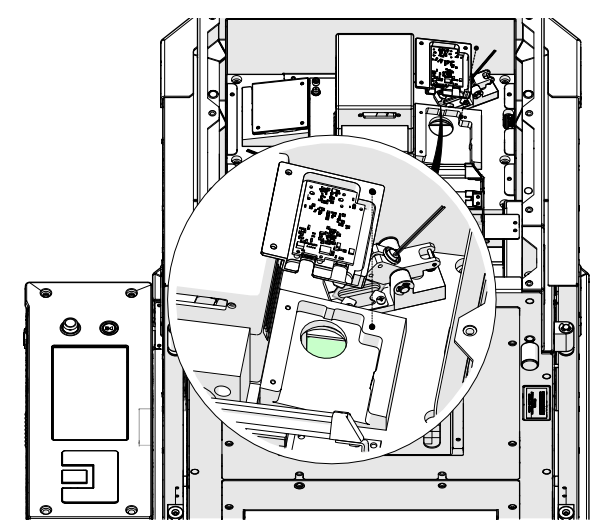
Install Camera Assembly
Install the new camera assembly in place.
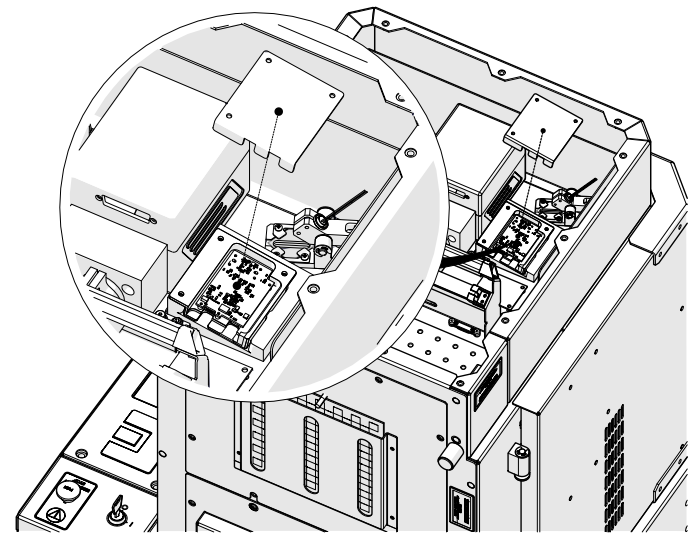
Install Camera Cover
Place the camera cover back over the camera assembly.
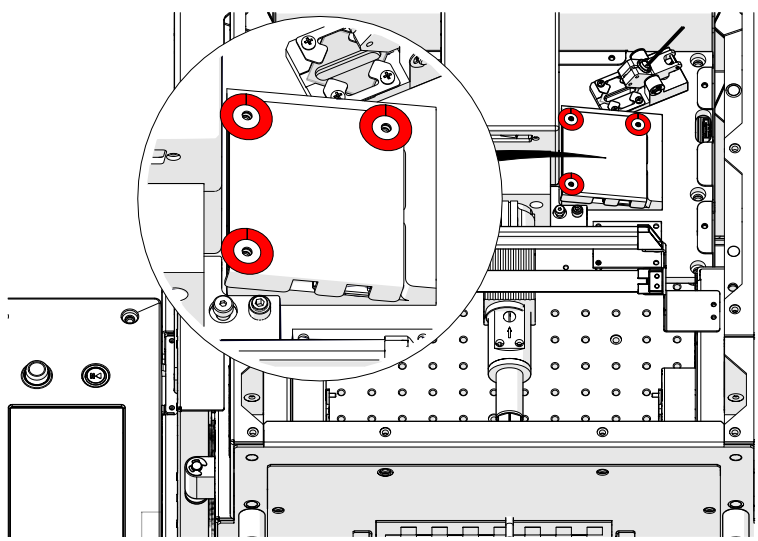
Secure Camera Cover
Install and tighten the three screws securing the camera cover.
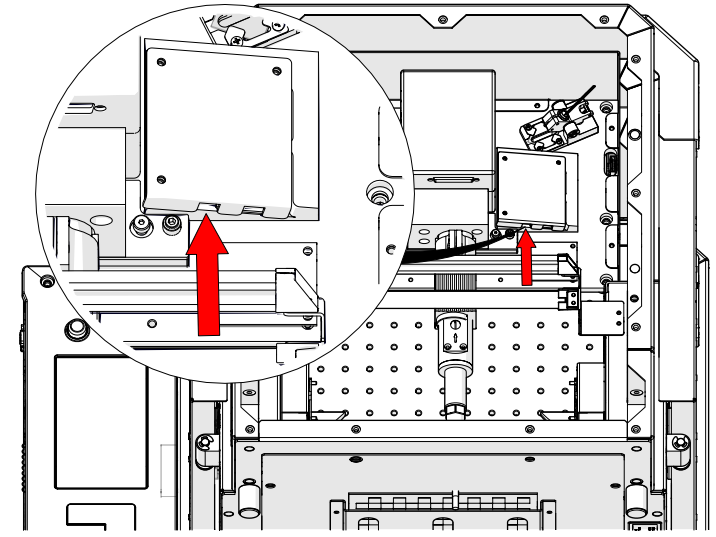
Reconnect USB Cable
Reconnect the USB cable to the camera assembly.
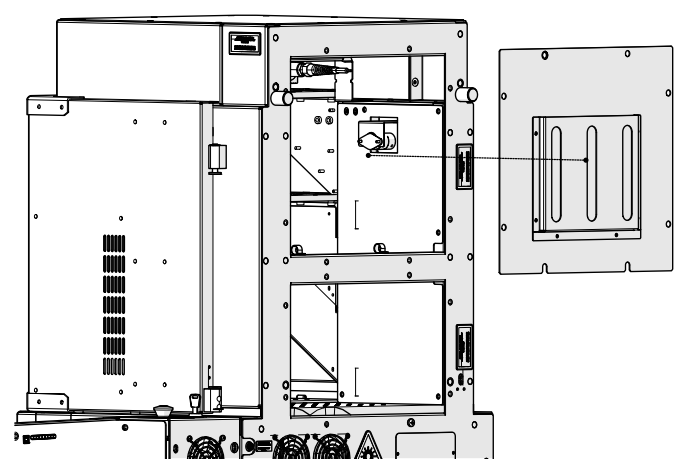
Install Rear Panel
Place the rear panel back onto the engraver.
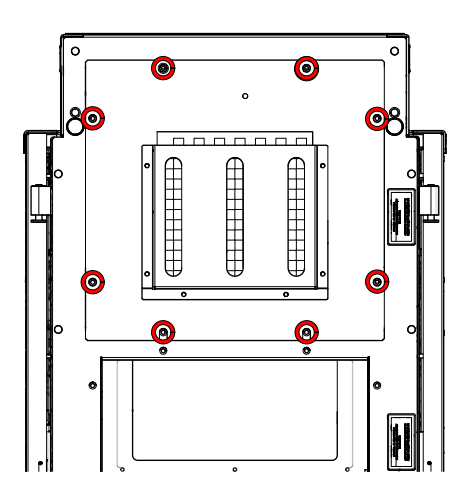
Secure Rear Panel
Install and tighten the eight rear panel screws.
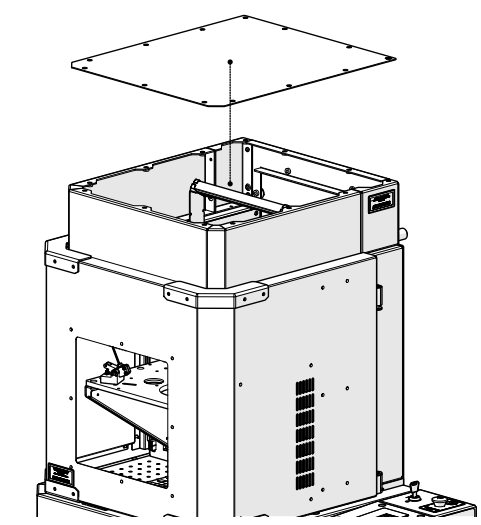
Install Top Panel
Place the top panel back onto the engraver.
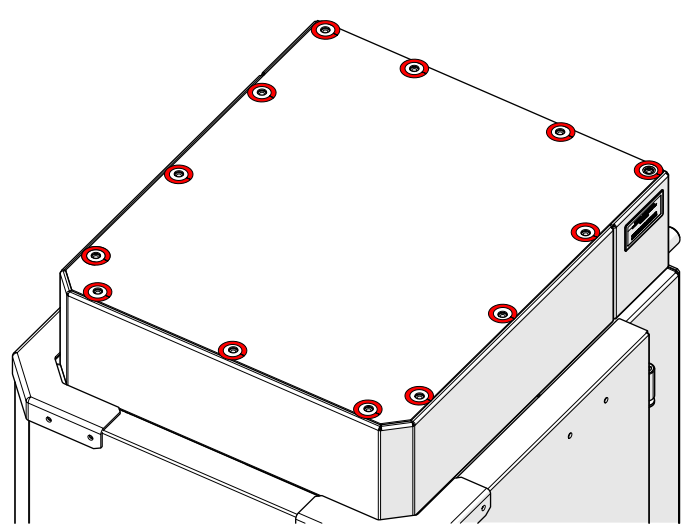
Secure Top Panel
Install and tighten the top panel screws.

Connect to Power
Plug the power cord back into the engraver.
Complete the Calibrations
After replacing the camera assembly, both the focus and camera calibrations must be completed. See Focus and Camera Calibrations – Fusion Galvo.