Replacement X-axis motors for the Mini and Helix (8000 model) now ship without a mounting bracket. This guide covers moving the mounting bracket and Delrin shim from your old motor onto the replacement motor.
Parts Required
- TT0953 – X-Axis Motor (ships without mounting bracket)
Tools Required
- 1.5 mm Hex Key
- #1 Phillips Screwdriver
- Flat Head Screwdriver
Safety First: Ensure the engraver is completely powered off and the power cord is disconnected before removing any panels or touching internal components.
Before You Start
Follow the X-Motor Replacement article to remove the old motor from the engraver. Stop once the old motor is out, swap the bracket using the steps below, then go back to that article to install the new motor.
Remove the Old Motor
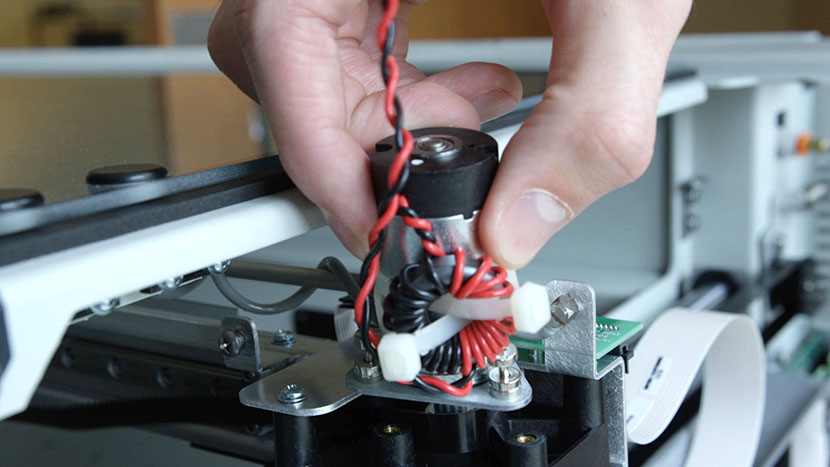
Remove the Old X-Motor
Turn off and unplug the engraver, then remove the old X-motor as described in the X-Motor Replacement article.
Remove the Bracket From the Old Motor
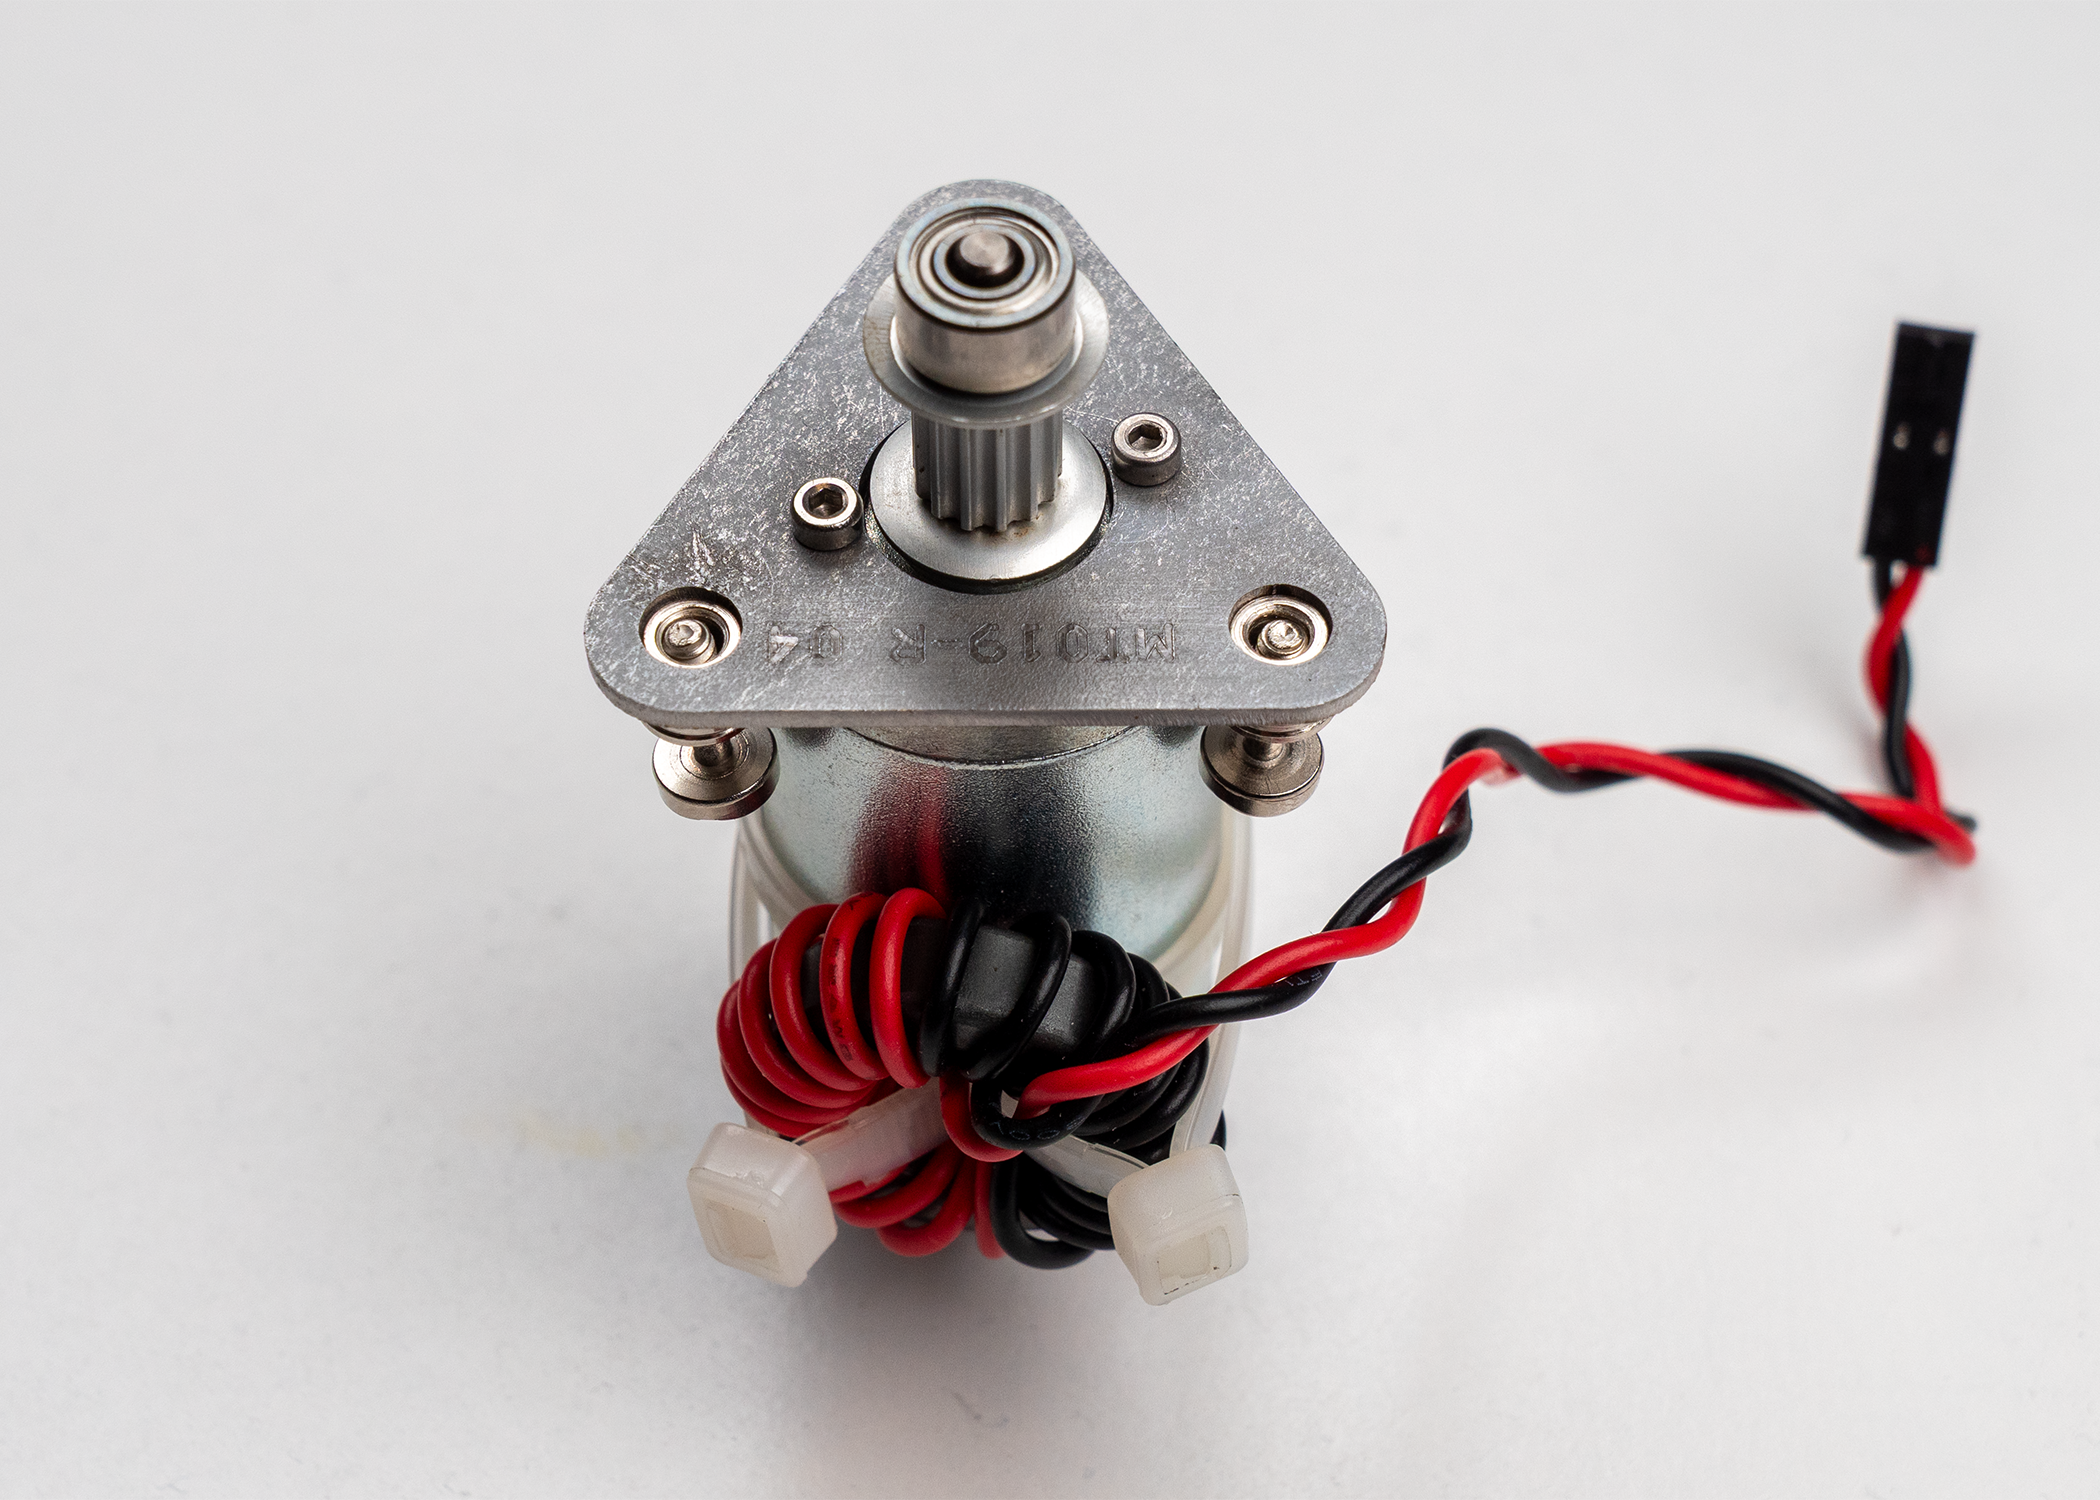
Note the Bracket Orientation
Before taking anything apart, note which side of the bracket plate the printing is on. It is on the same side as the coiled magnet, and the bracket must go onto the new motor the same way.
Note: A quick photo of the old motor makes this easy to match later.
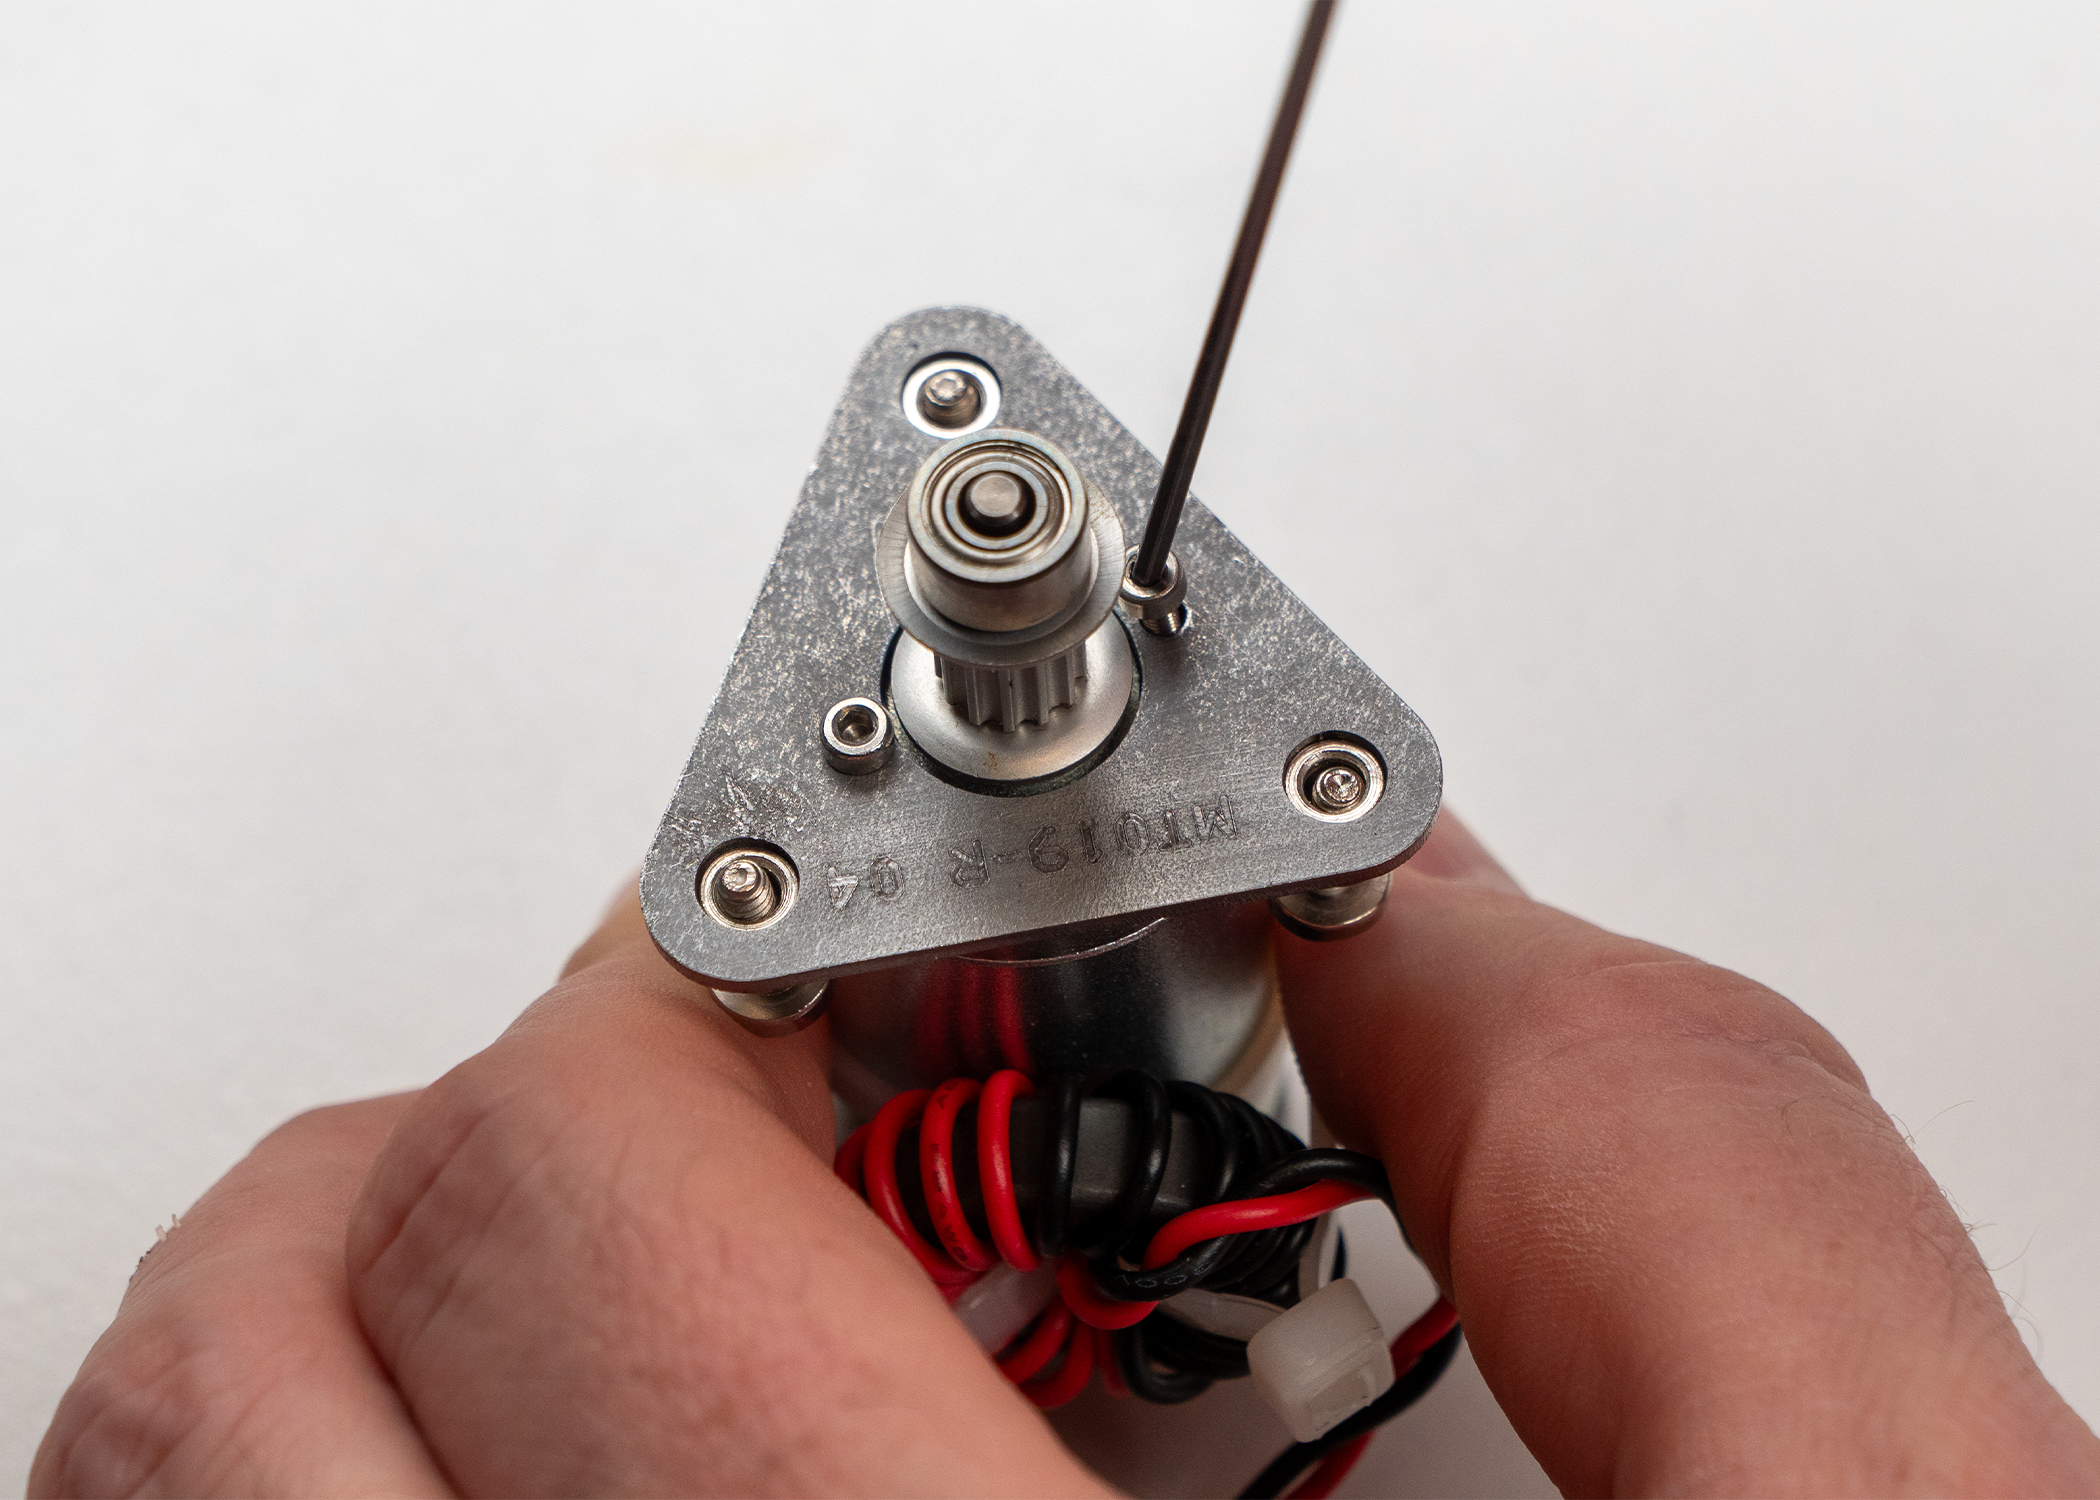
Remove the Bracket Screws
Remove the two 1.5 mm hex screws on the bottom of the motor bracket, next to the motor shaft.
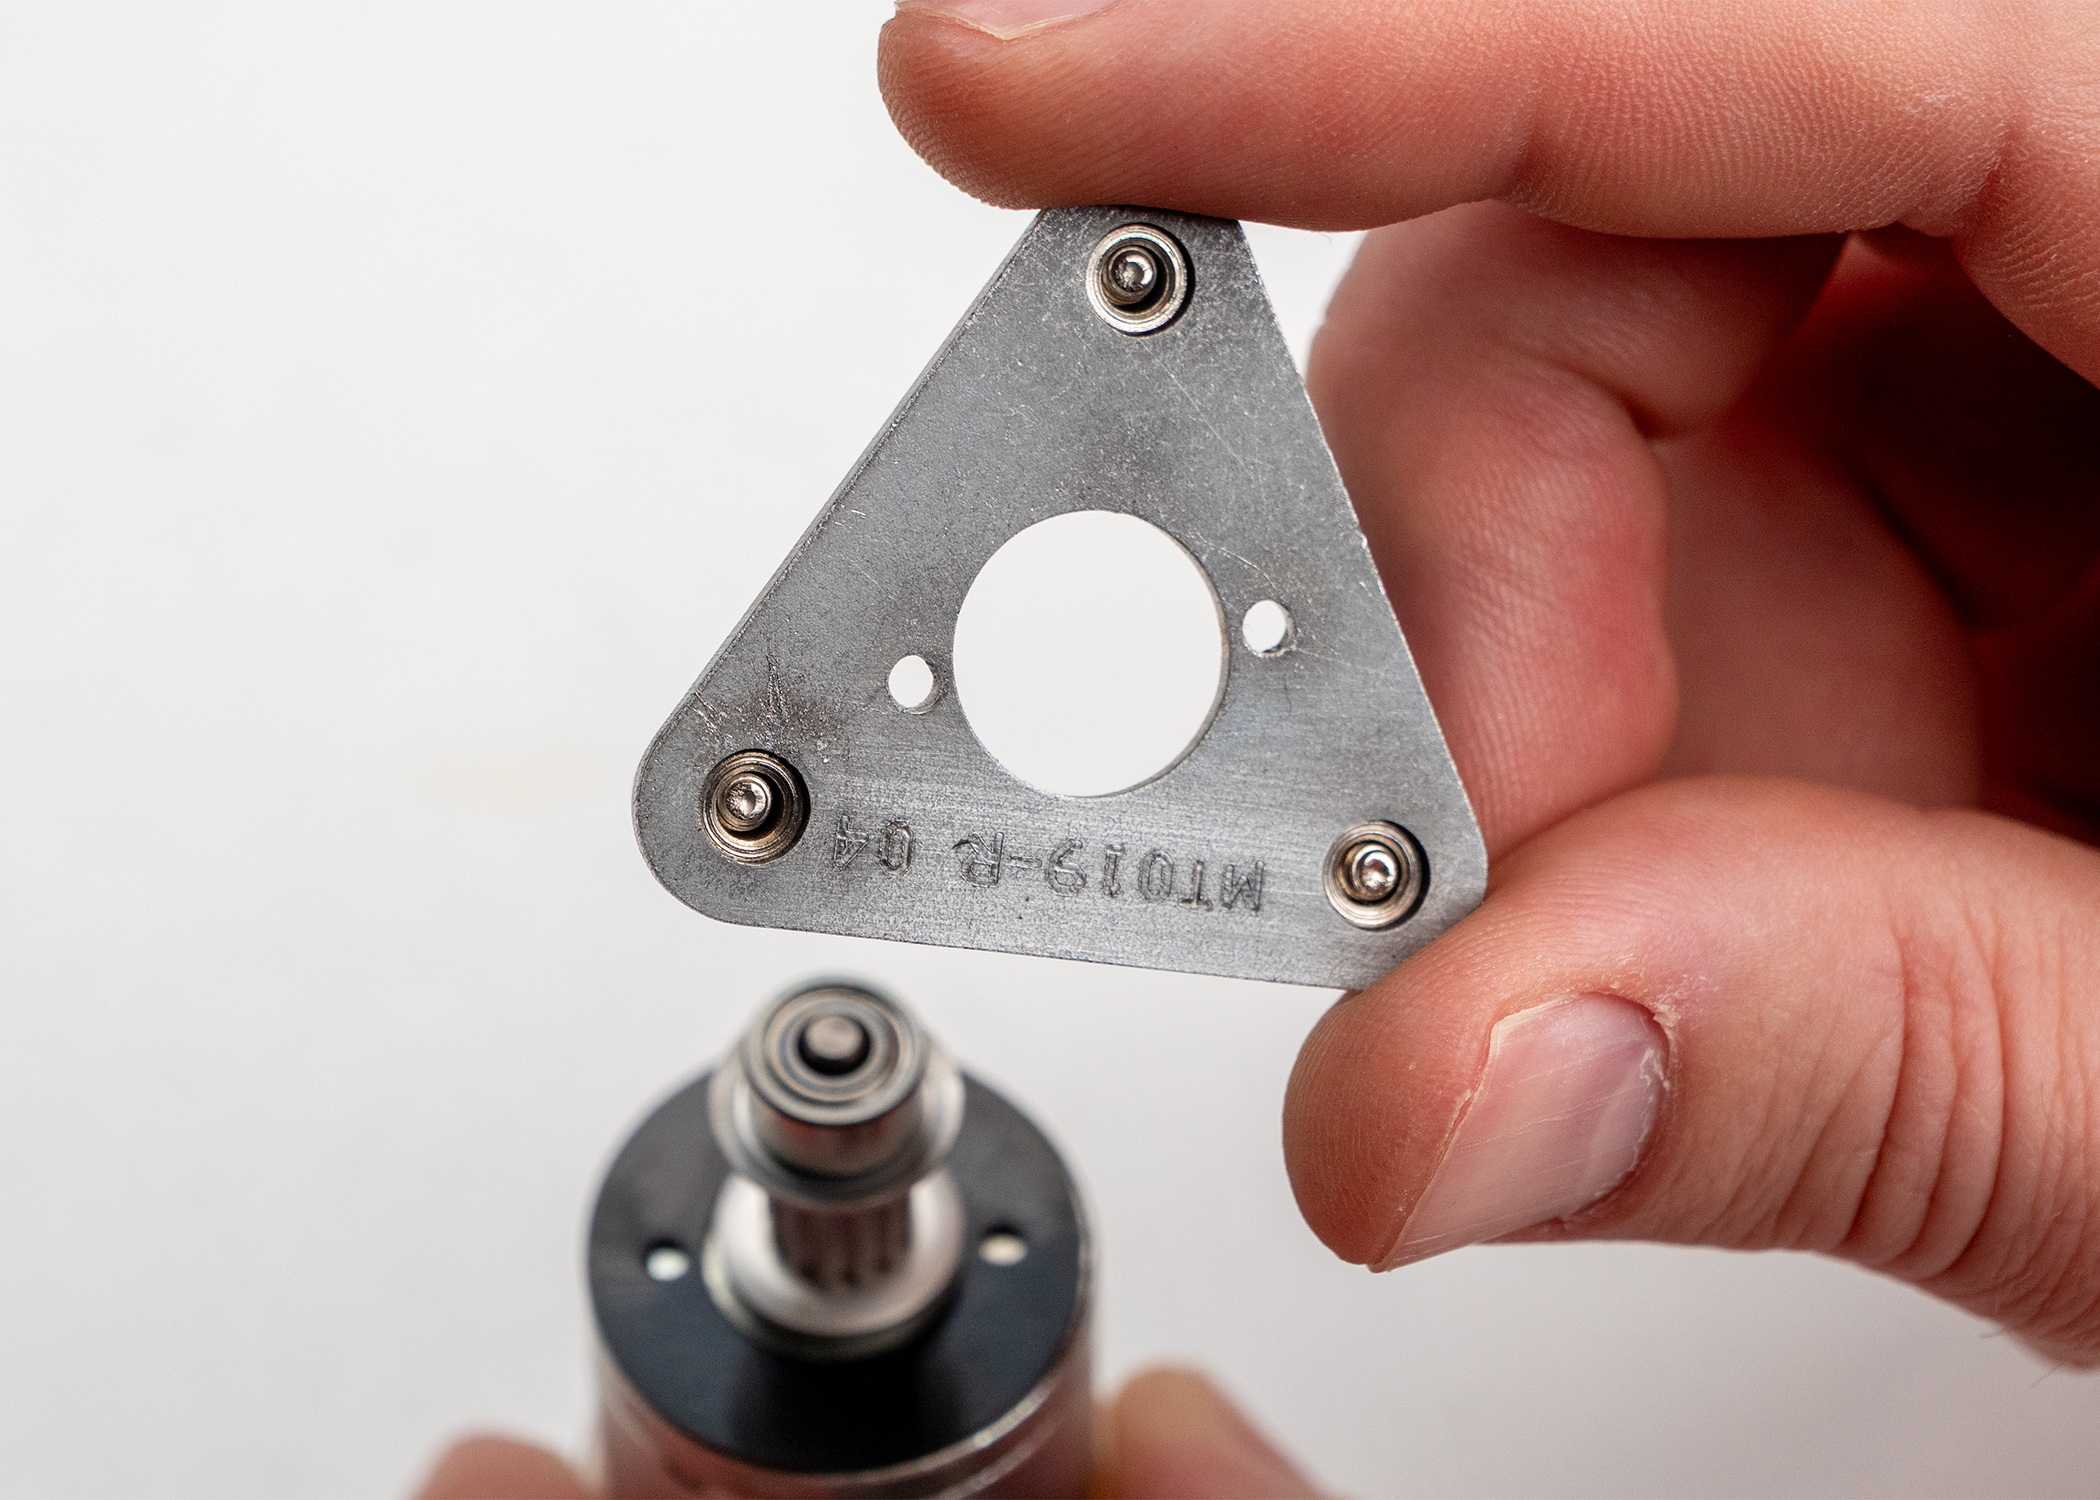
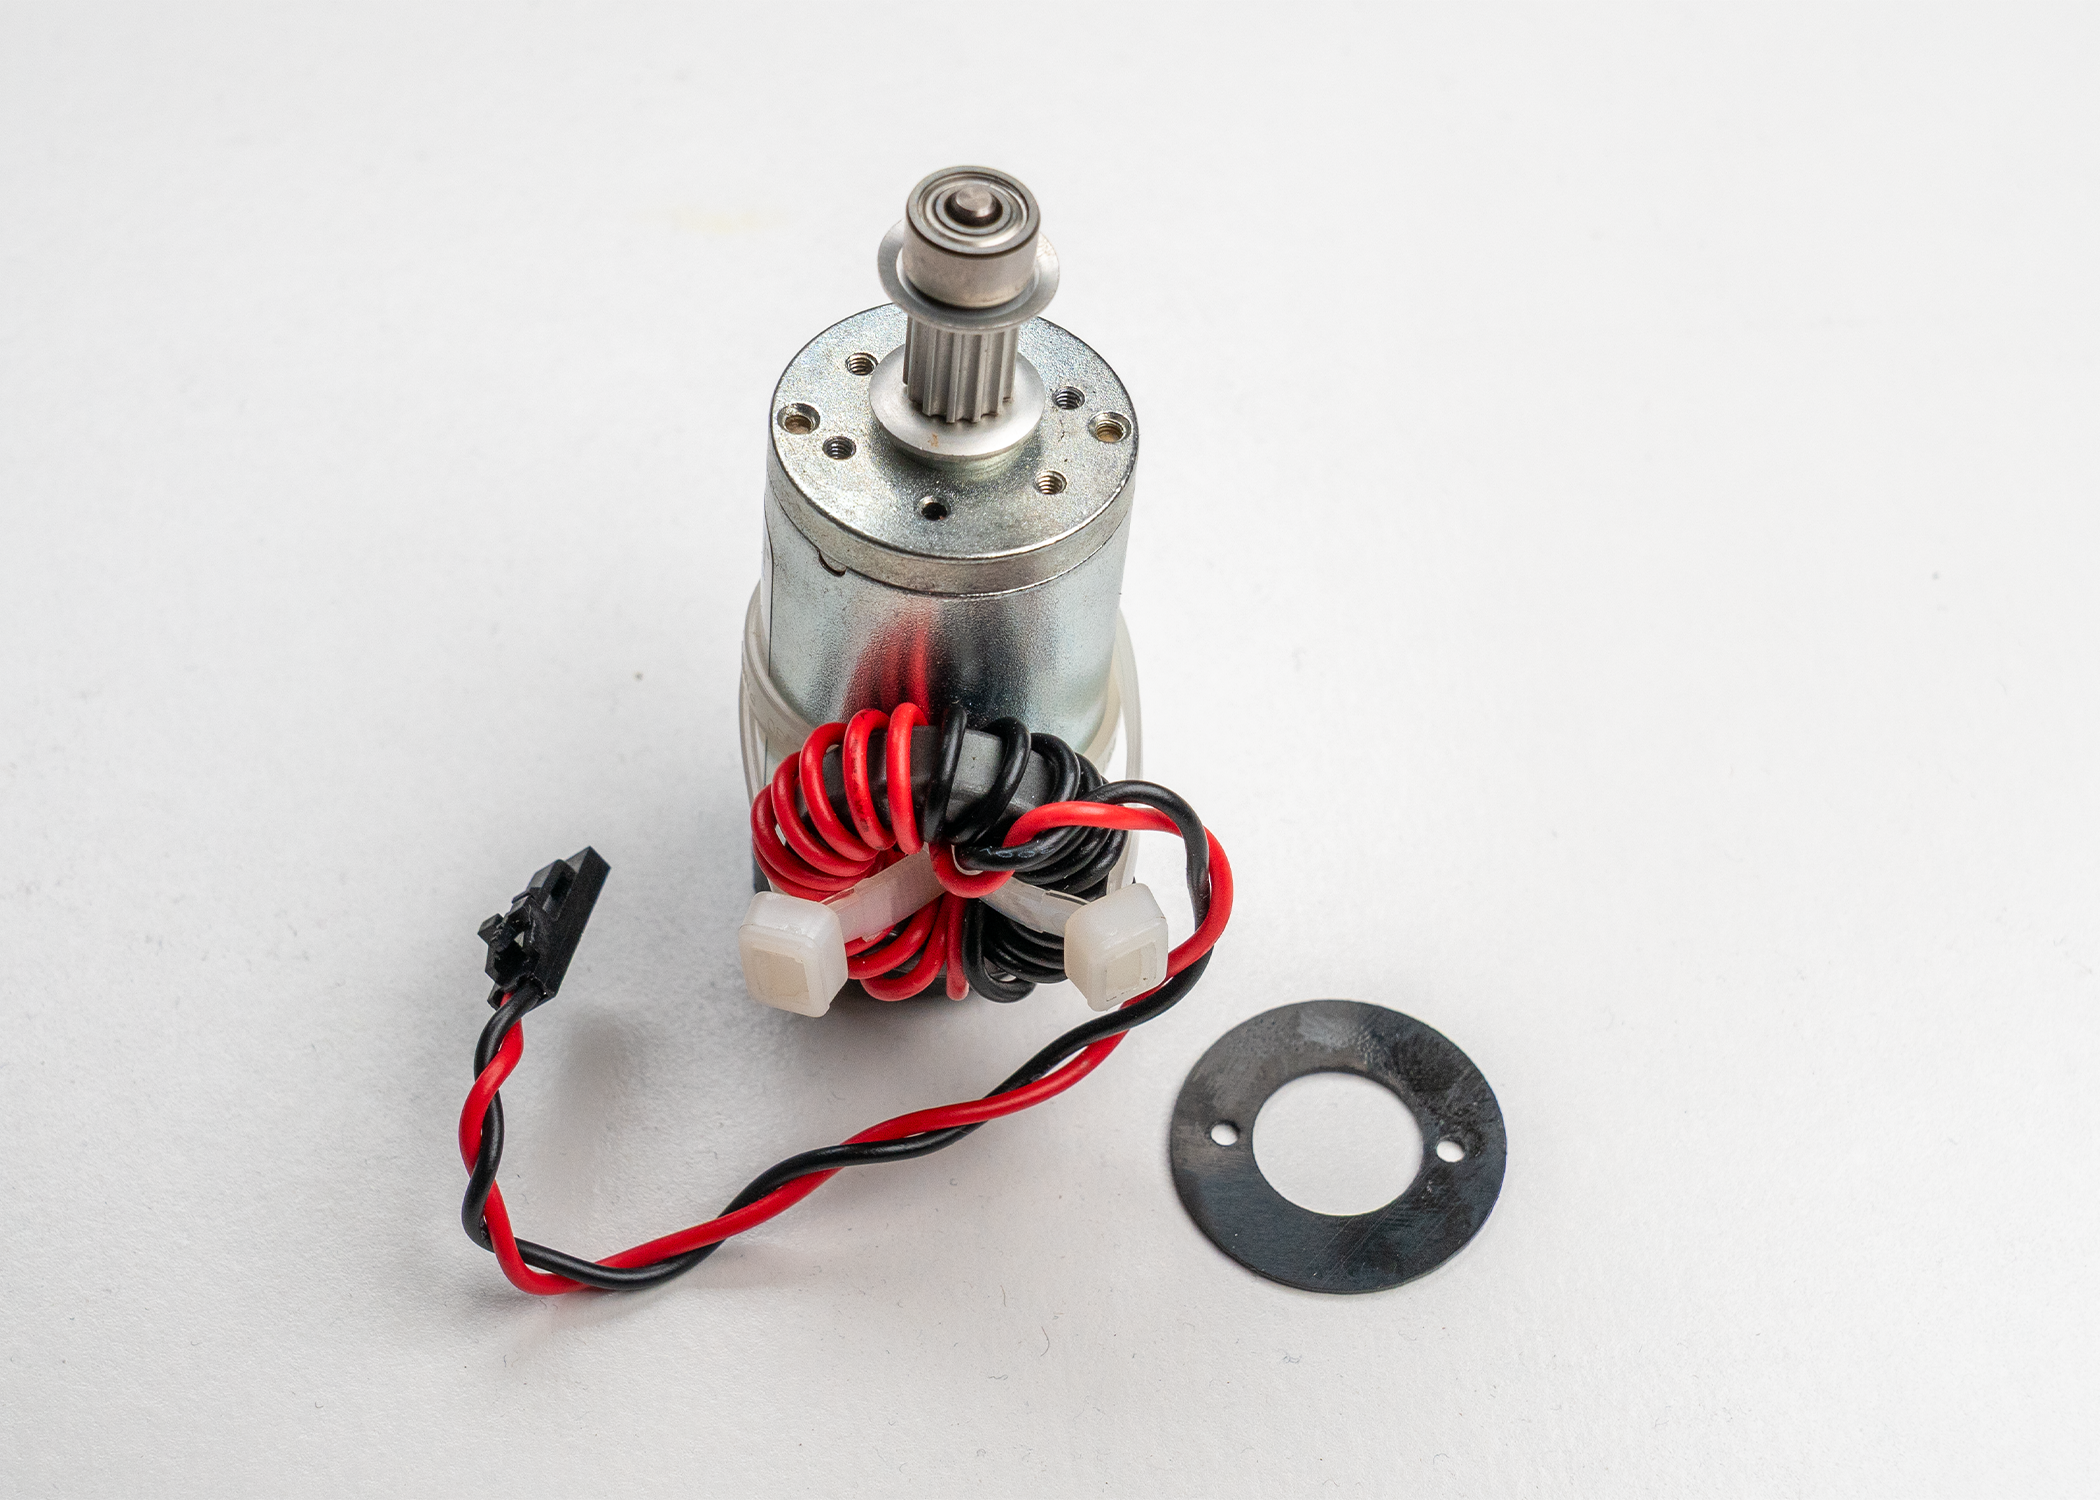
Remove the Bracket and Shim
Lift off the mounting bracket, then remove the Delrin shim underneath it. Keep the screws, bracket and shim together.
Install the Bracket on the New Motor
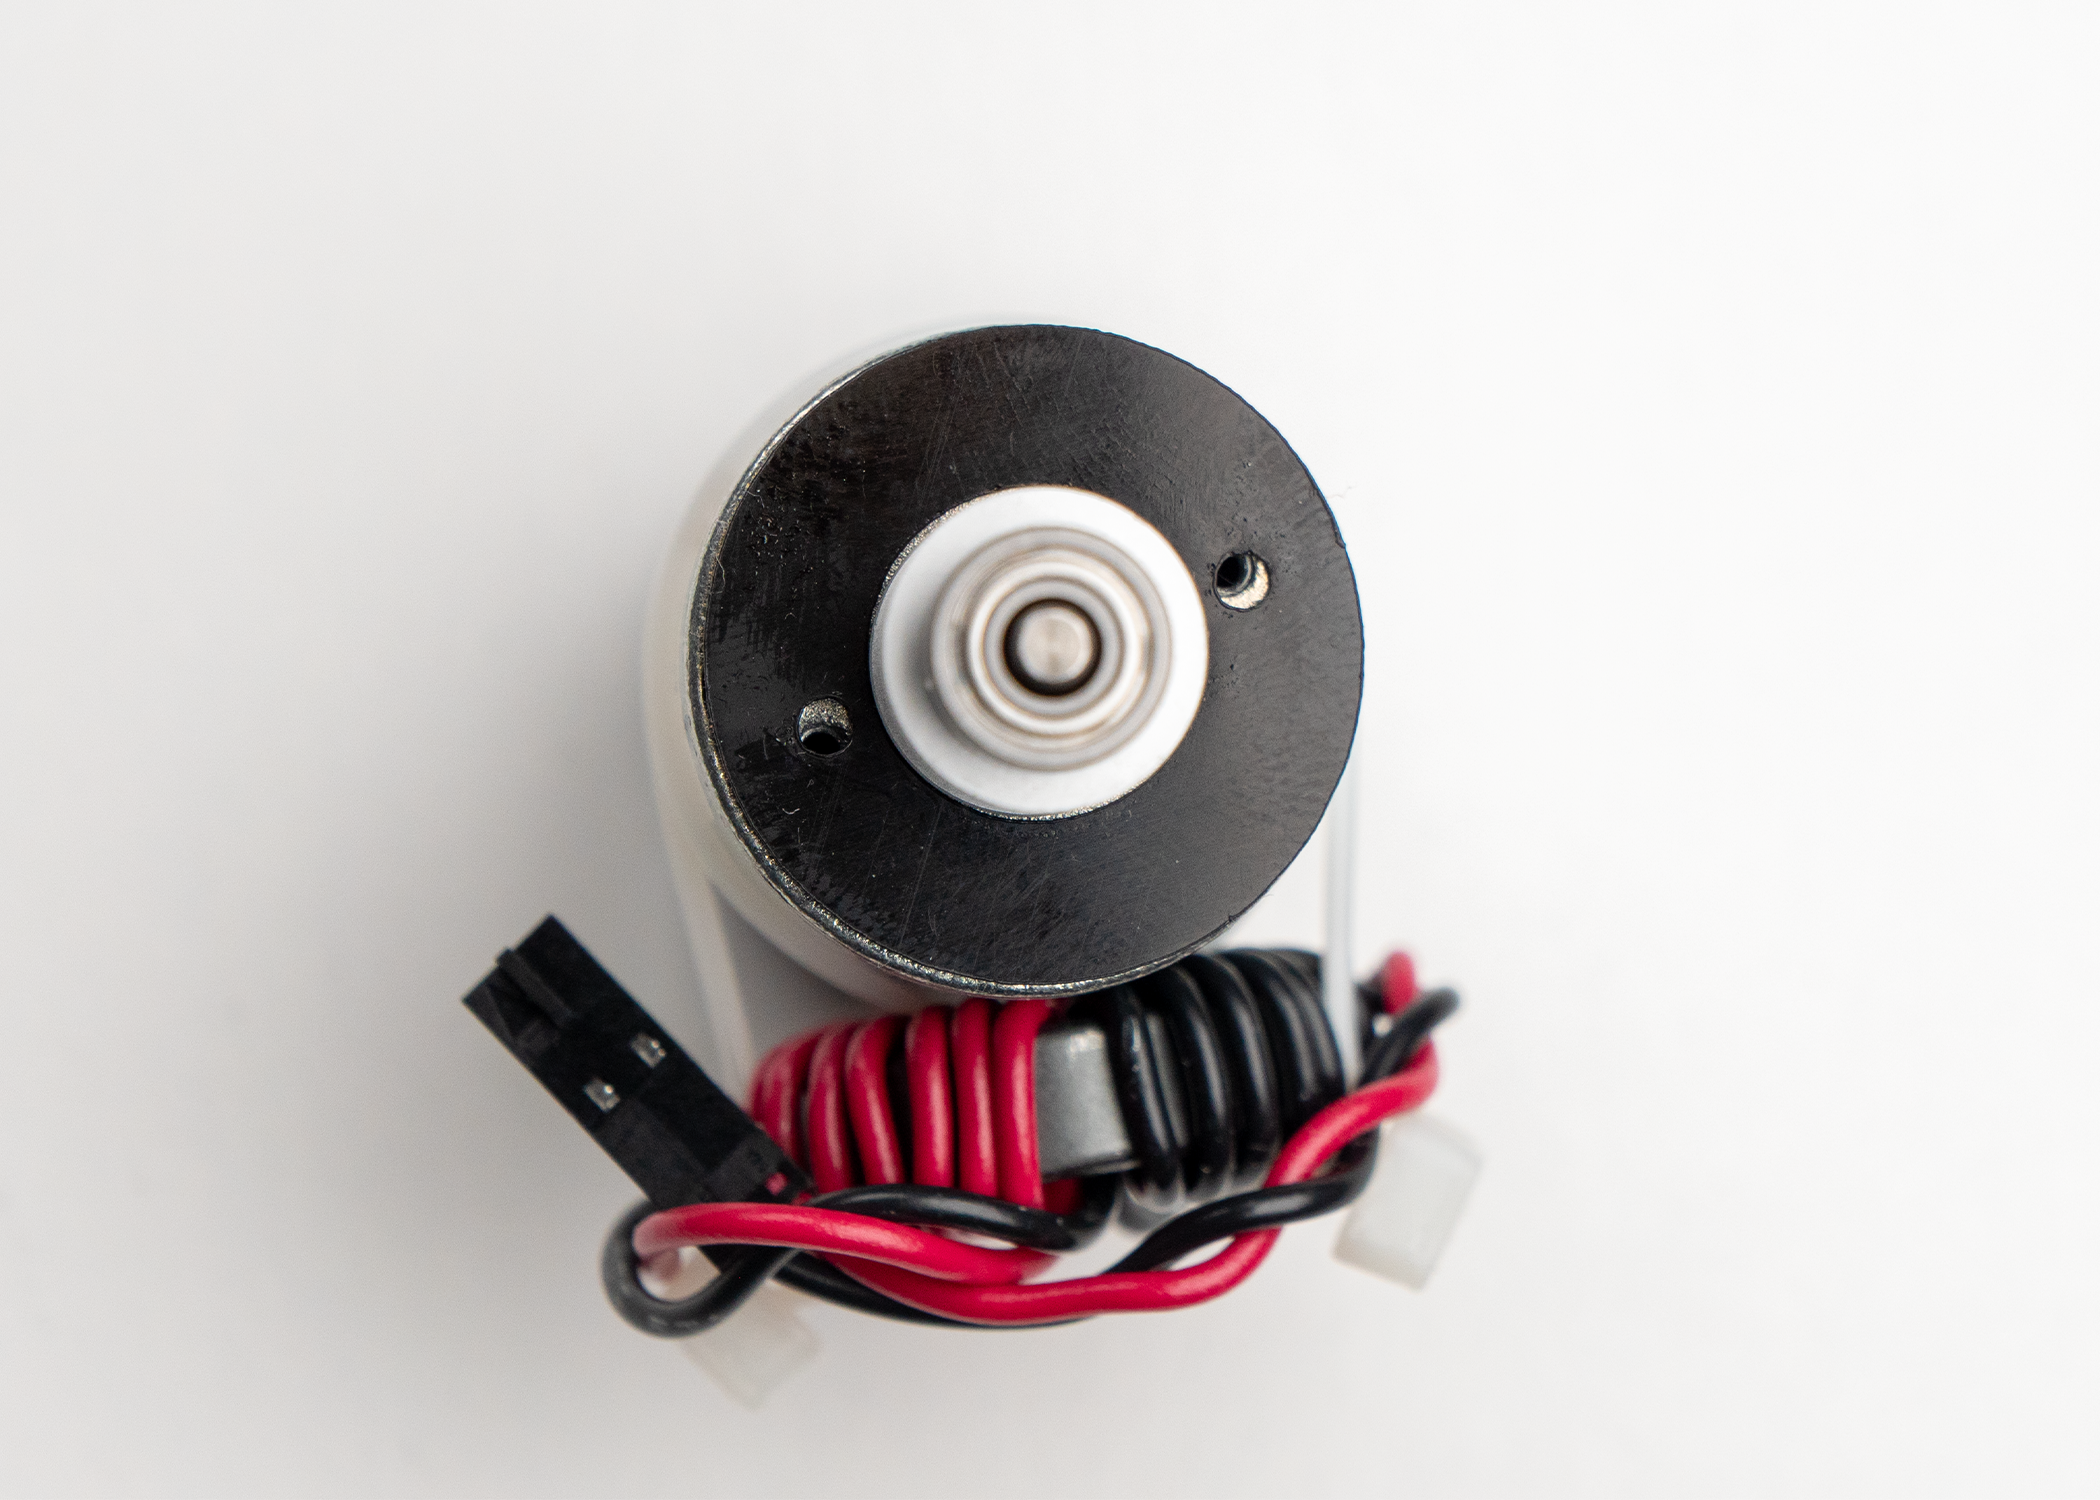
Place the Delrin Shim
Place the Delrin shim on the bottom of the new motor, lining up its two holes with the screw holes in the motor. The shim goes between the motor and the mounting bracket.
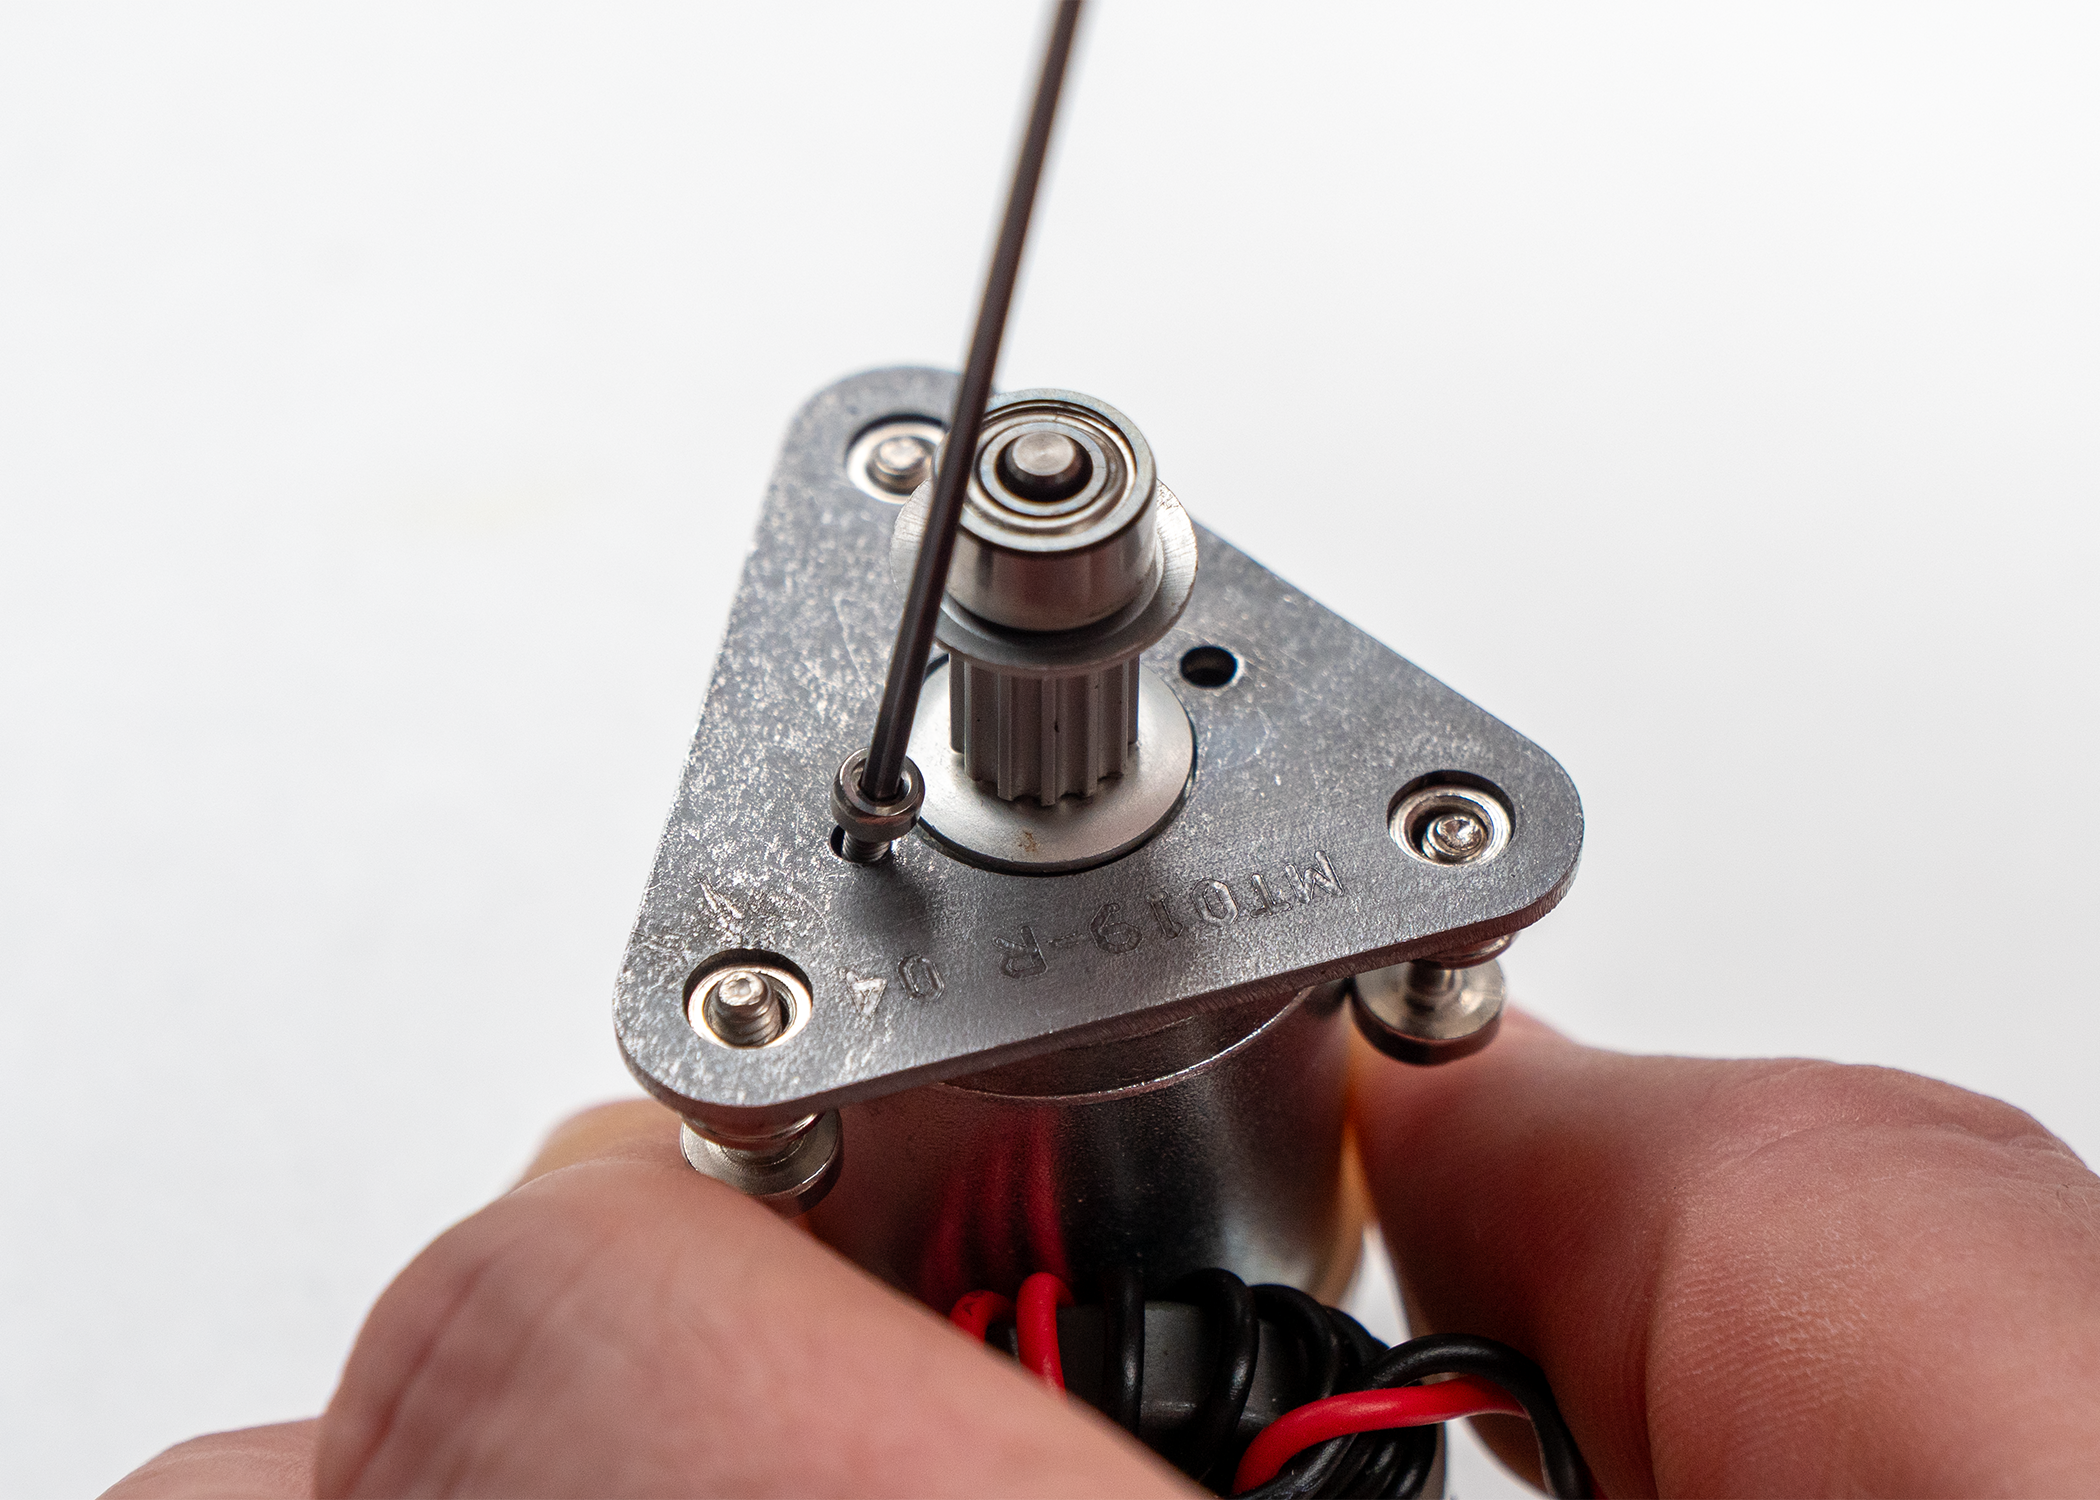
Install the Bracket
Set the mounting bracket on top of the shim with the printing on the plate on the same side as the coiled magnet. Install the two 1.5 mm hex screws through the bracket and shim into the motor, and tighten them.
Important: Orientation is important. The printing on the bracket plate must be on the same side as the coiled magnet.
Check the Assembly
Check that the shim is seated flat between the motor and bracket, and that the bracket matches the old motor.
Install the New Motor

Install the New X-Motor
Continue with the installation steps in the X-Motor Replacement article: loop the belt around the silver pulley, align the captive screws with the mounting posts and tighten them, then reconnect, re-tension the belt and reinstall the panels.
Bracket Swap Complete
Finish the remaining steps in the X-Motor Replacement article, then plug the engraver in and turn it on.