16000 - 17000 Ethernet Connection Setup
How do I connect my machine with an Ethernet cable?
There are two types of Ethernet connections.
- Direct connection: laser is connected directly to the computer.
- Network connection: laser is connected to the network.
Direct Connection:
- Power the machine on.
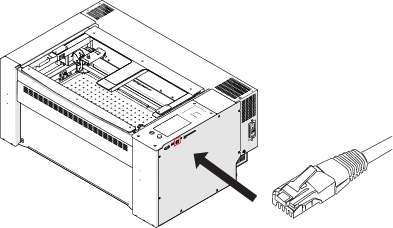
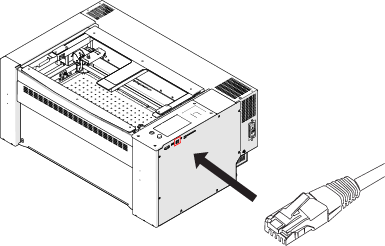
- Connect the laser to the computer with an Ethernet cable.
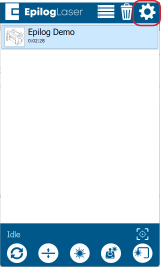
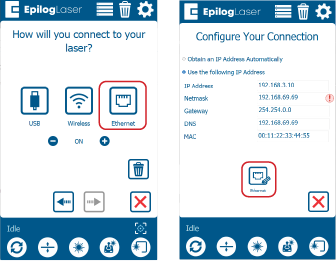
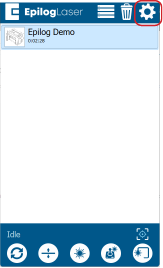
- Click the gear icon in the top right corner of the display panel.
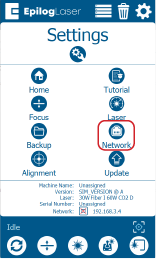
- Select Network.
- Select Ethernet.
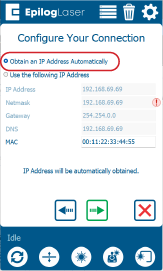
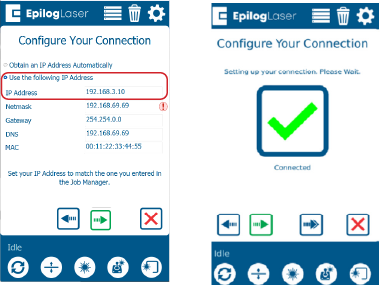
- Select Use the following IP Address. In the IP Address field enter 192.168.3.10
- Configure you TCP/IP Port settings.
- TCP/IP Port setup is only required for direct connections.
- If you haven’t set up the TCP/IP port on the computer you will need to follow the instructions below.
Note: If you don’t see that option, you may need to click the edit button at bottom center of the screen.
Note: This is the standard IP address for direct connection.
Network Connection:
- Connect the laser to the network with an Ethernet cable.
- Click the gear icon in the top right corner of the display panel on the laser.
- Select Network.
- Select Ethernet.
- Select Obtain IP Address Automatically.
- Click the green arrow to complete set up.

Note: If you don’t see that option, you may need to click the edit button in the bottom center of the screen.