
This guide covers the removal of the main power supply (PSU) assembly from the Fusion Galvo G100 and the installation of the replacement assembly.
Parts Required
- GC0149 – Assy, Power Supply, 600W, ±15VDC
Tools Required
- T30 and T20 Torx Drivers
Safety First: Ensure the engraver is completely powered off and the power cord is disconnected before removing any panels or touching internal electronics.
PSU Removal
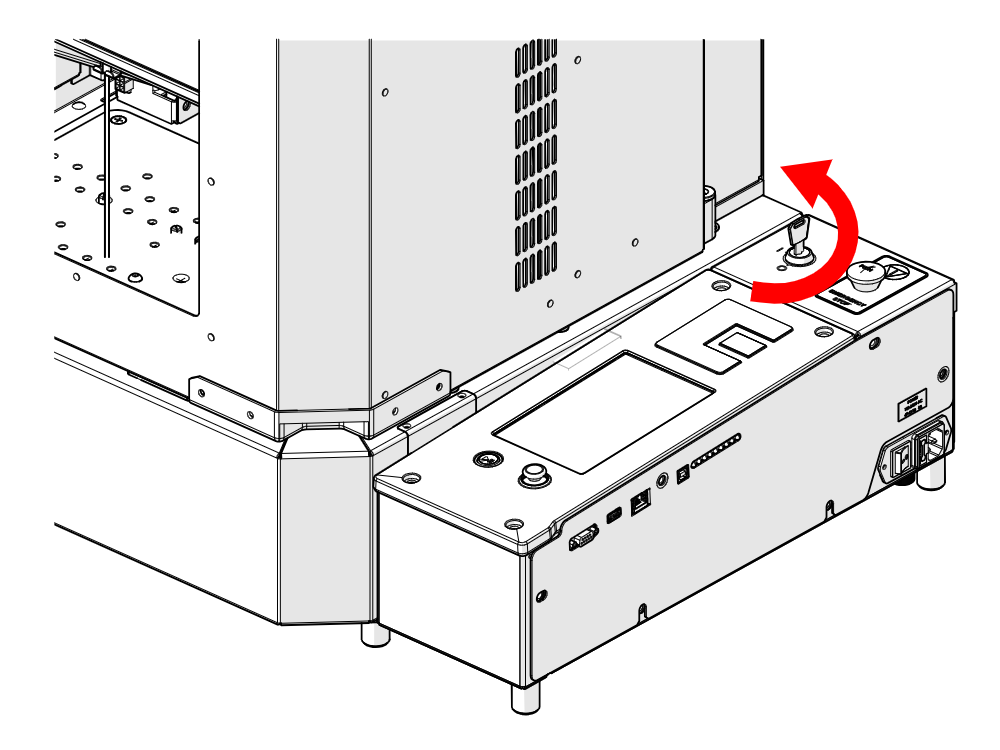
Power Off Engraver
Turn off the engraver.

Disconnect From Power
Unplug the power cord from the engraver.
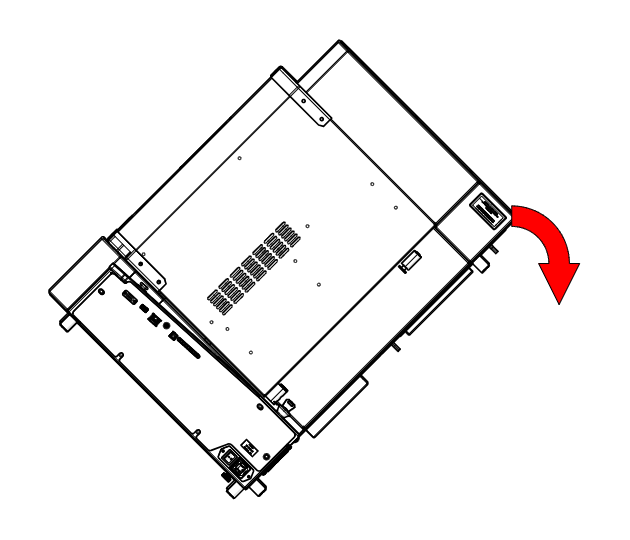
Tilt Engraver
Carefully tilt the engraver backward.
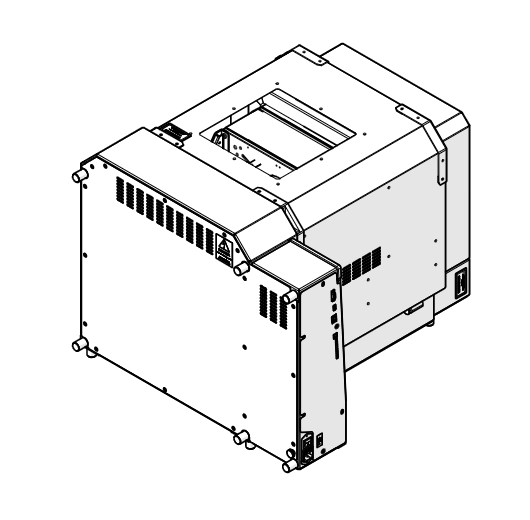
Place Engraver on Its Back
Lay the engraver on its back so the bottom panel is facing you.
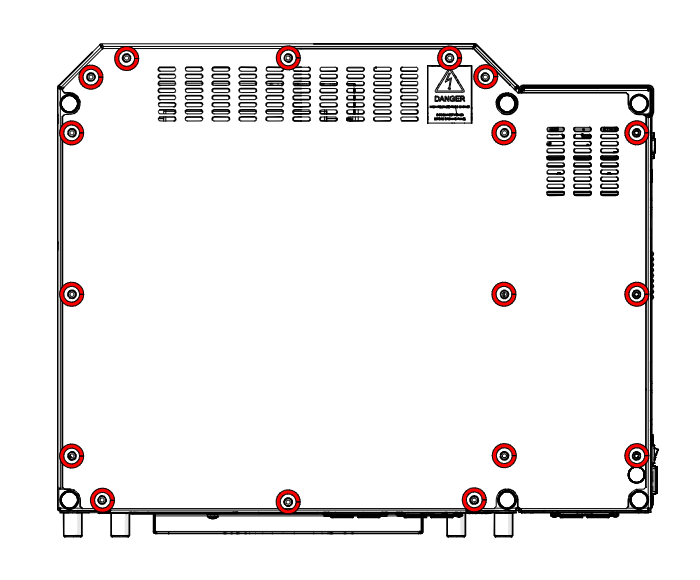
Remove Panel Screws
Loosen and remove the screws securing the bottom panel (highlighted in red).
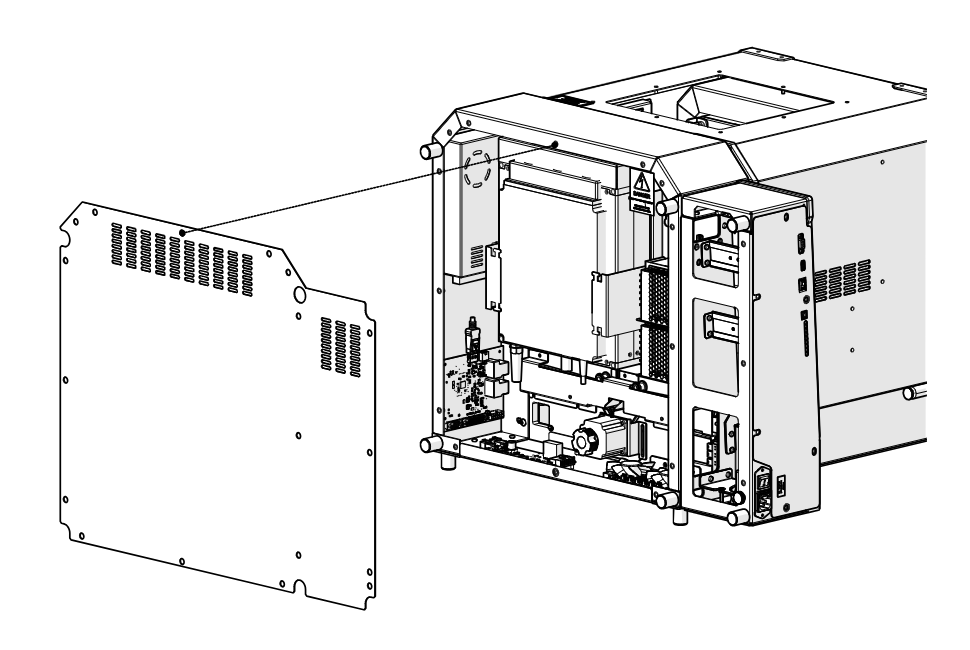
Remove Bottom Panel
Lift the bottom panel off the engraver to access the power supply.
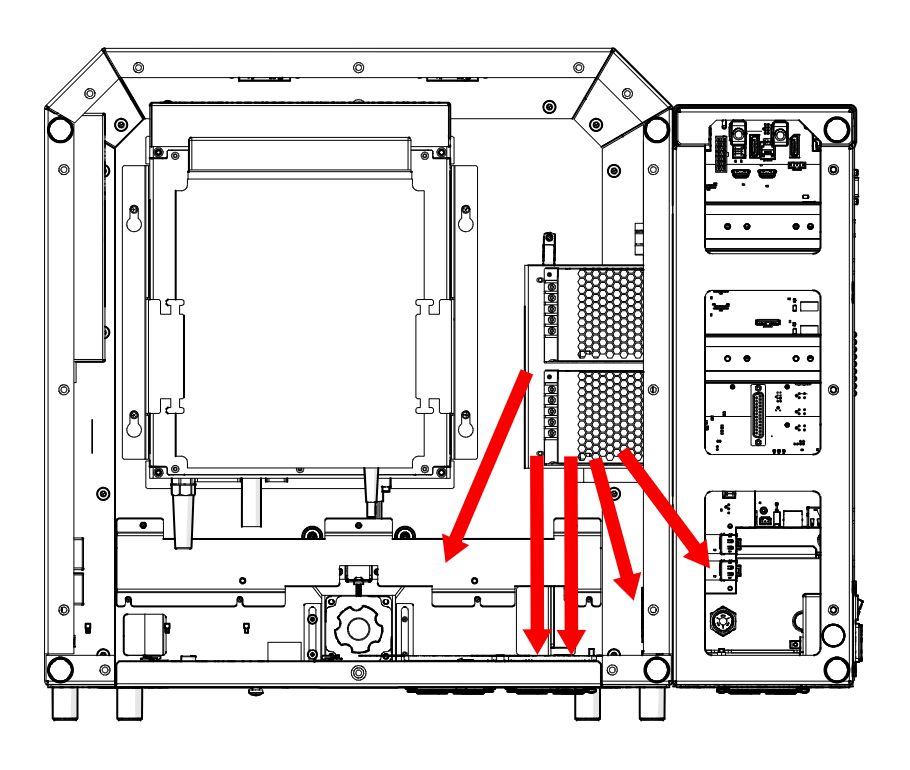
Disconnect Harnesses
Follow the wiring harnesses from the power supply and disconnect them at their connectors.
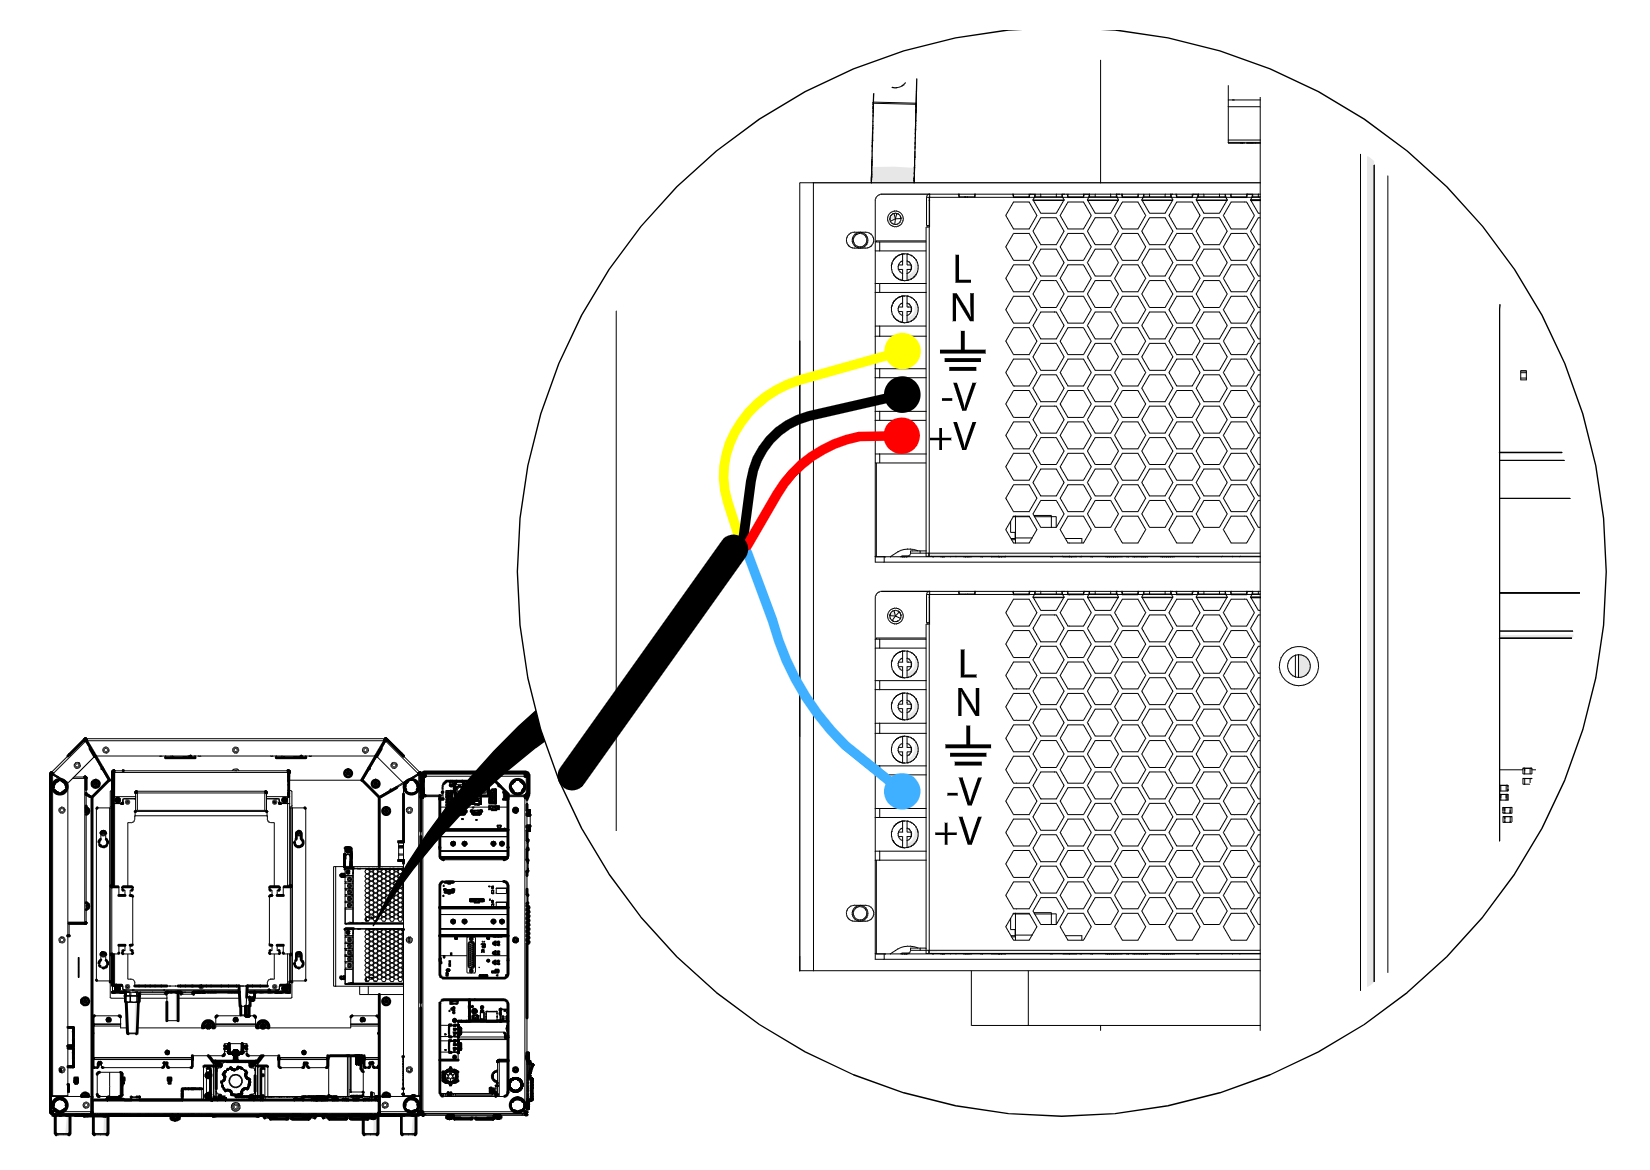
Disconnect PSU Wiring
Loosen the terminal screws and disconnect the yellow (ground), black (-V), and red (+V) wires from the upper supply, and the blue wire from the -V terminal of the lower supply.
Note: Take note of each wire’s terminal position before disconnecting. The wires must be reconnected to the same terminals on the new power supply.
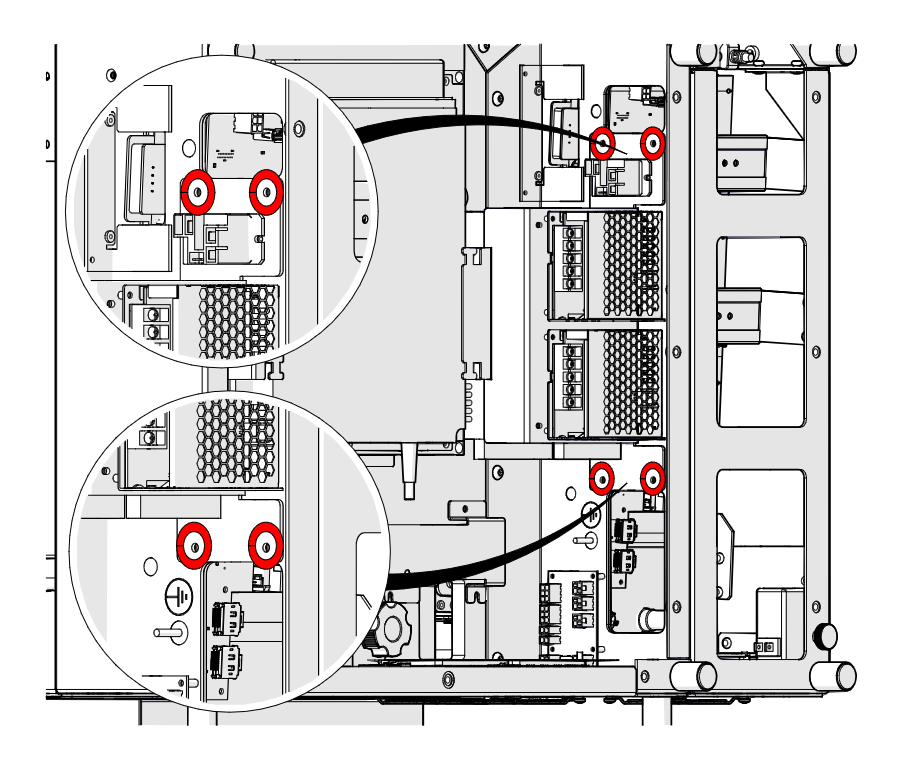
Remove PSU Screws
Loosen and remove the four screws securing the power supply assembly: two at the top and two at the bottom.
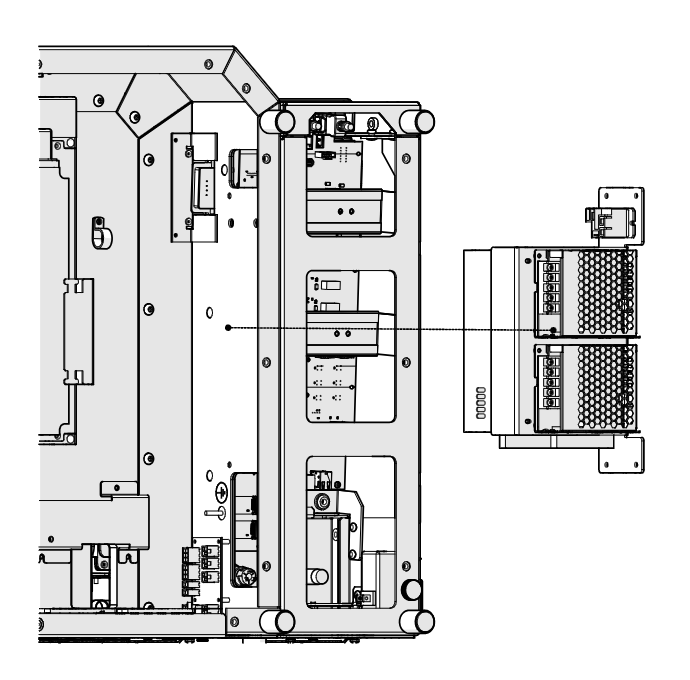
Remove PSU
Remove the power supply assembly from the engraver.
PSU Installation
Now that the old power supply is removed, proceed with the installation of the replacement assembly.
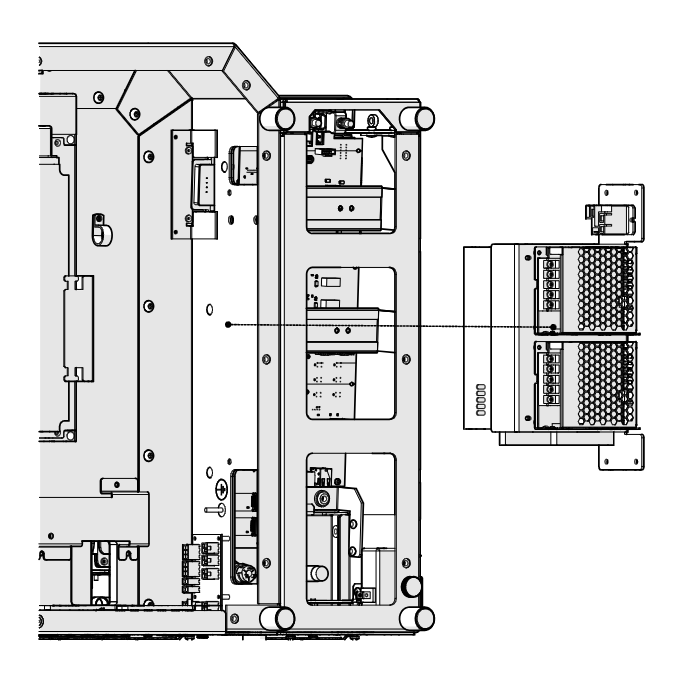
Install PSU
Position the new power supply assembly (GC0149) in the engraver.
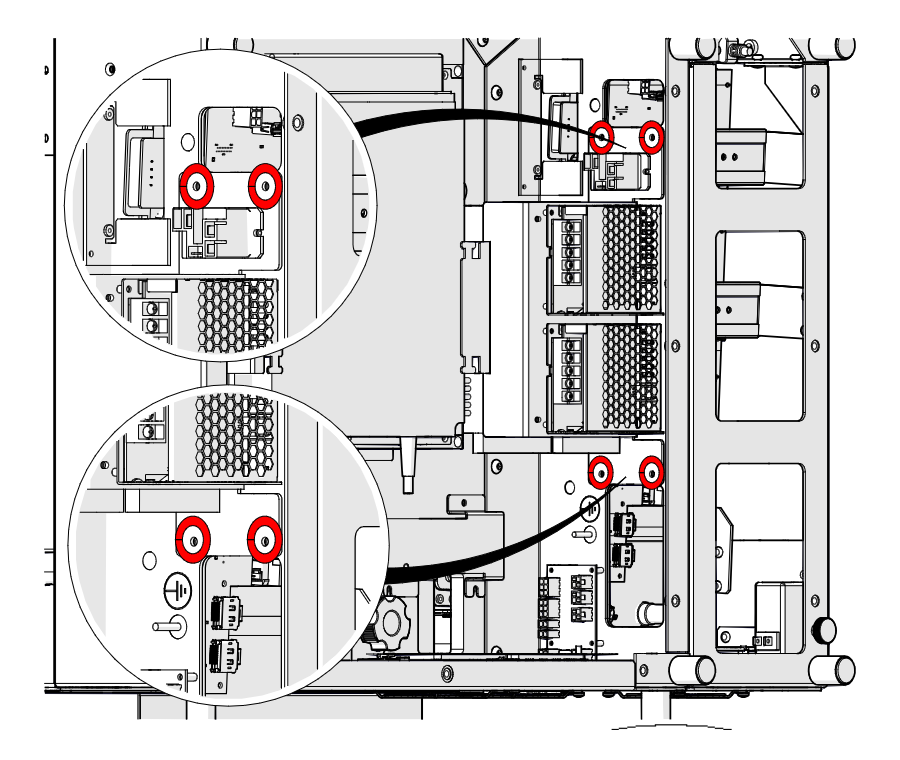
Secure PSU
Install and tighten the four screws securing the power supply assembly.
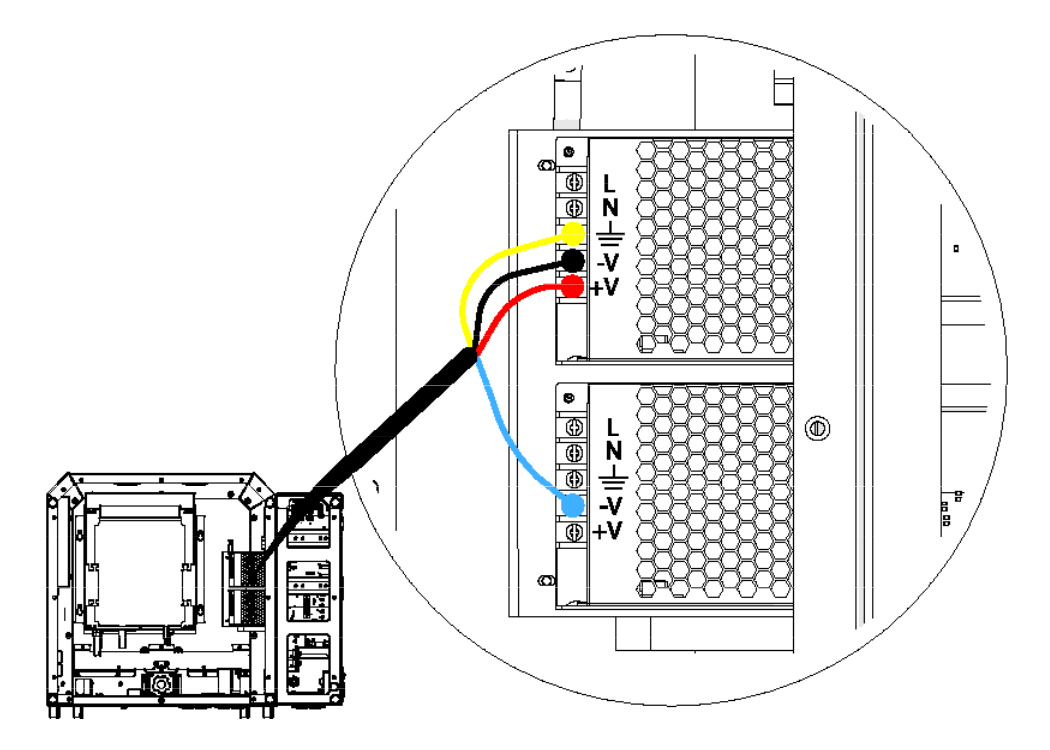
Connect PSU Wiring
Connect the yellow (ground), black (-V), and red (+V) wires to the upper supply and the blue wire to the -V terminal of the lower supply, then tighten the terminal screws.
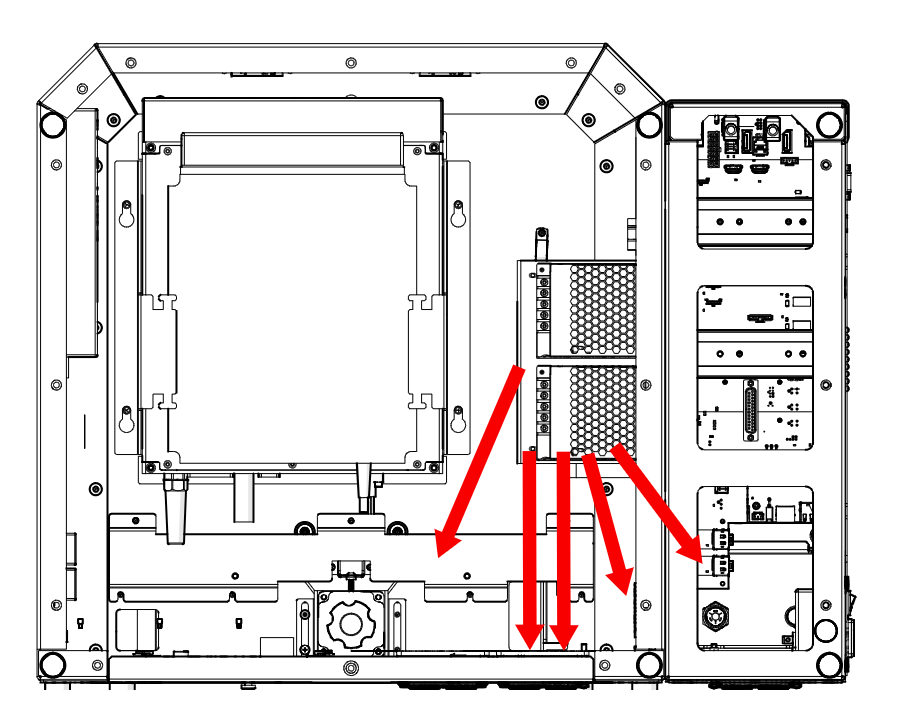
Connect Harnesses
Follow the wiring harnesses from the power supply and reconnect them at their connectors.
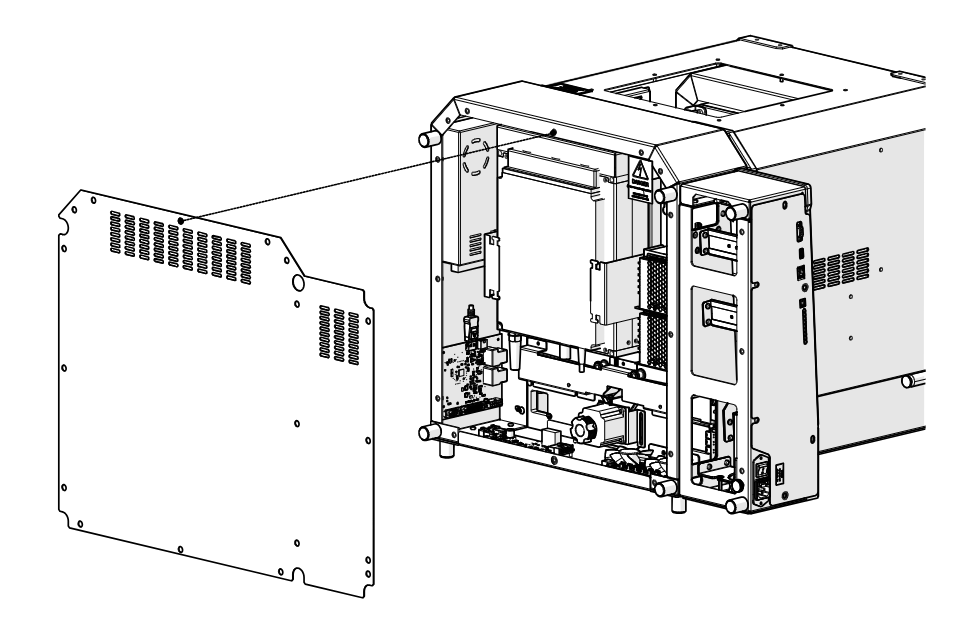
Install Bottom Panel
Place the bottom panel back onto the engraver.
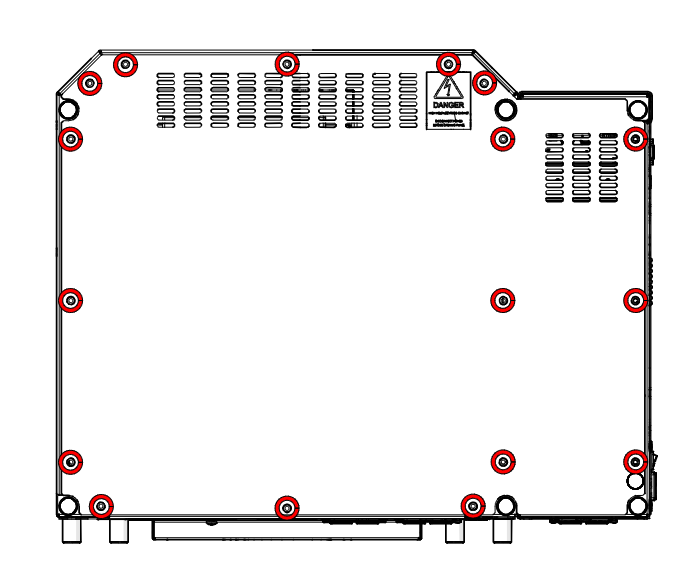
Secure Bottom Panel
Install and tighten the bottom panel screws (highlighted in red).
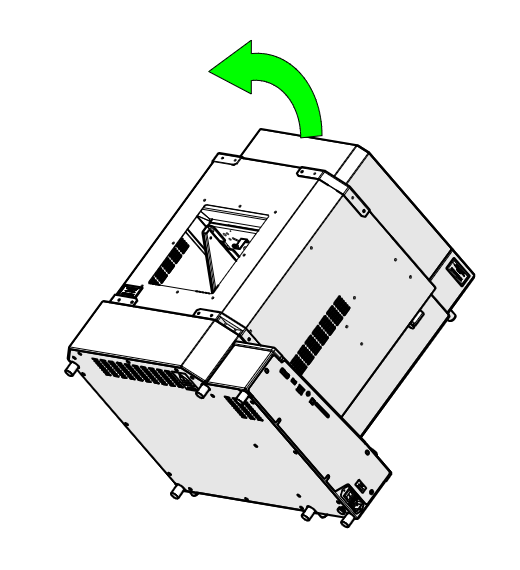
Tilt Engraver
Carefully tilt the engraver forward off its back.
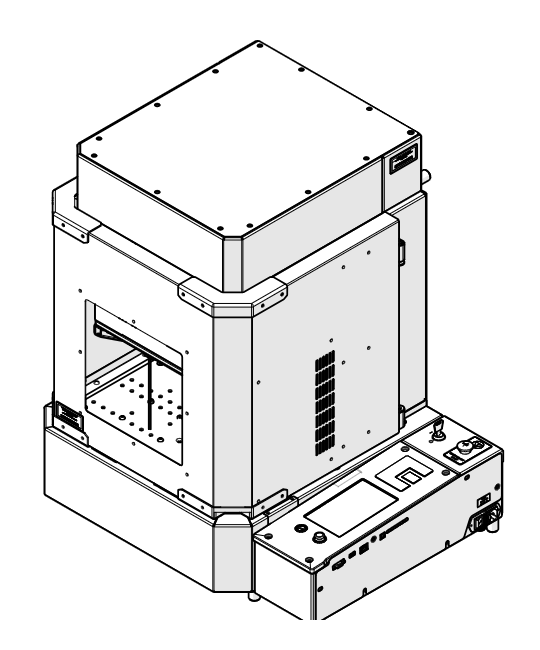
Return Engraver Upright
Return the engraver to its upright position.

Connect to Power
Plug the power cord back into the engraver.