Table / Grid

Filters


Getting Started (47)
Usage and Operation (128)
Service and Repair (274)

Filters


Getting Started (47)
Usage and Operation (128)
Service and Repair (274)

Setting Manual Focus and Auto Focus on the Mini/Helix

How do I set manual and auto focus on my Epilog Mini or Helix?

Introduction

If your engravings look soft or inconsistent, your autofocus may not match your manual focus gauge. This guide shows you how to find true focus on your Epilog Mini 18/24 or Helix, set the manual gauge to it, and then adjust autofocus so both agree.

Applies to

  • Epilog Mini 18
  • Epilog Mini 24
  • Epilog Helix

What you need

  • 4″ × 4″ piece of anodized aluminum
  • #1 Phillips screwdriver
  • Manual focus gauge (the V-shaped tool)
  • CorelDRAW or other graphics software, with an Epilog print driver

Part 1: Set up the test job
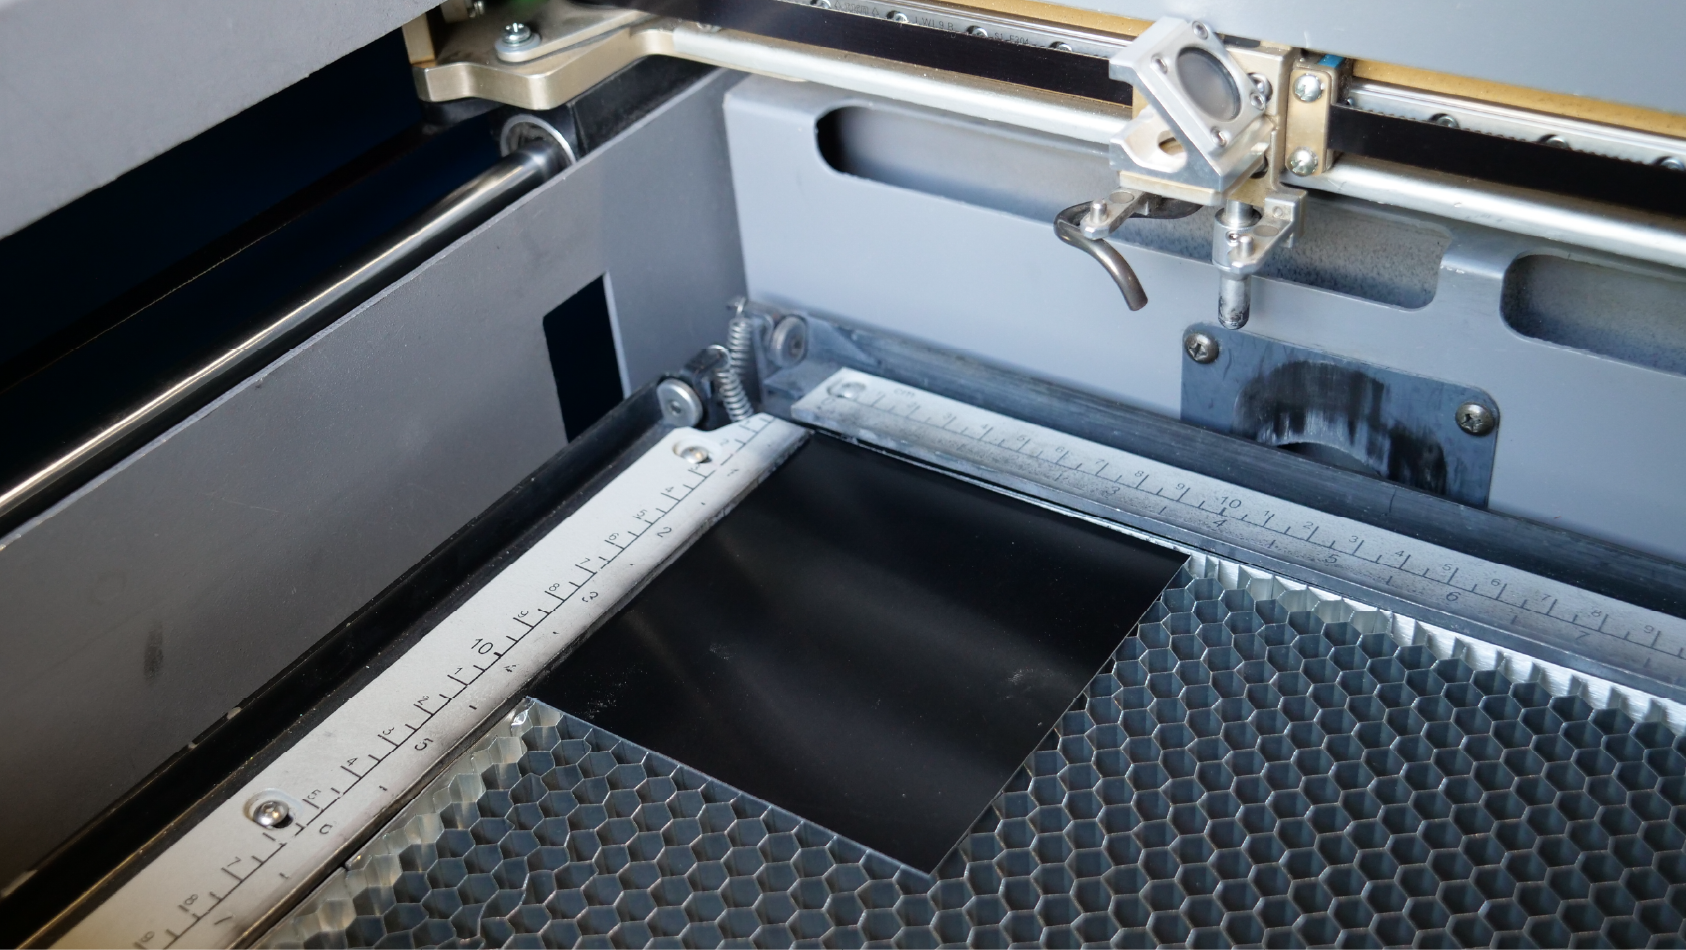
Anodized aluminum placed flush against the ruler guide

1. Load the aluminum

Place the 4″ × 4″ anodized aluminum in the machine, pushed flush against the ruler guide. Turn on the engraver.

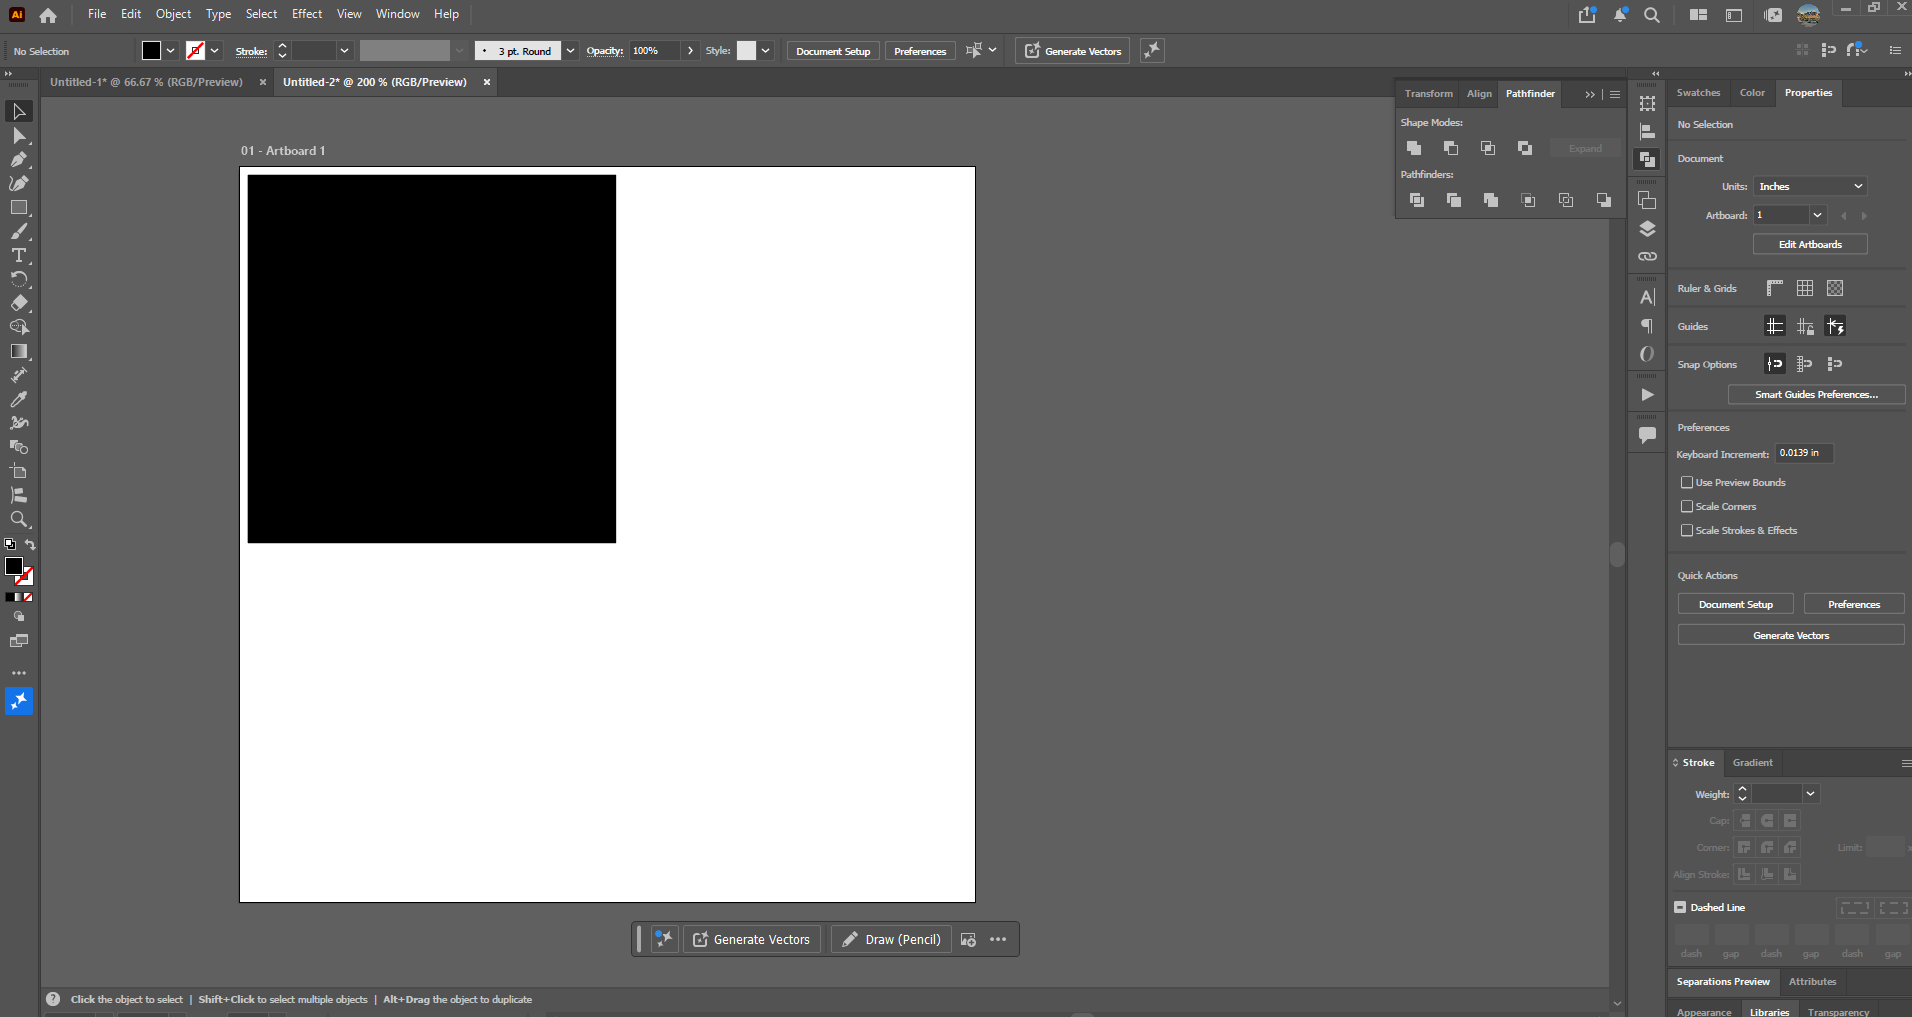
Graphics software page with a black 2 by 2 inch box near the top-left corner

2. Create the test file

In your graphics software, create a 4″ × 4″ page. Draw a 2″ × 2″ box, fill it black, and move it near the top-left corner. It doesn’t need to touch the edges.

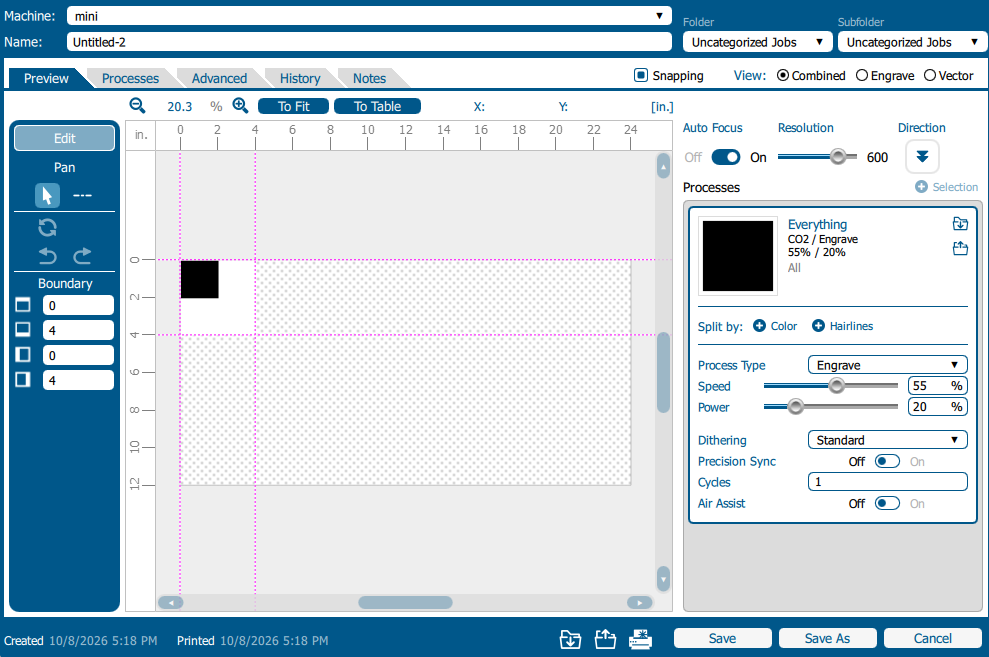
  • Job settings in Epilog Job Manager
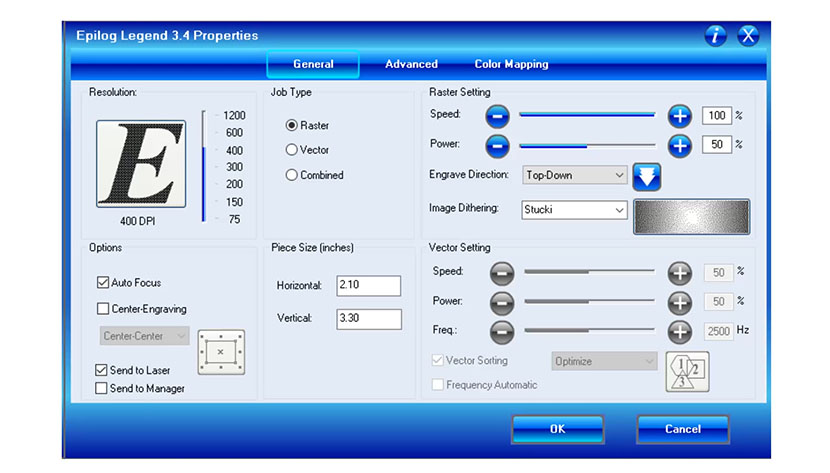
  • Job settings in the Mini/Helix print driver


    3. Set job settings

    • Job Type: Raster
    • Speed: 50%
    • Power: 10–20% (low power makes it easier to see the exact focal height)
    • Auto Focus: Yes

    Part 2: Find true focus and set the manual gauge
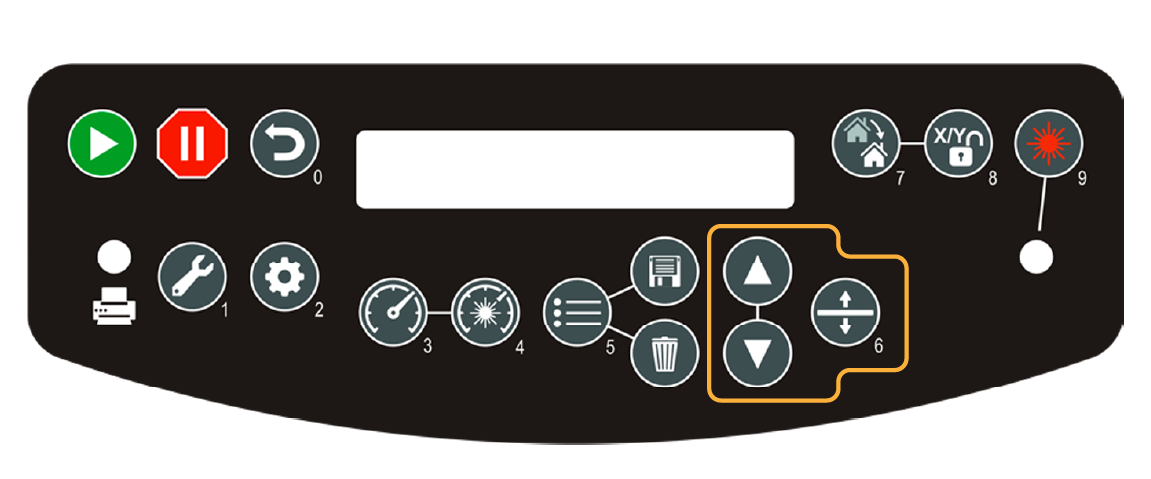
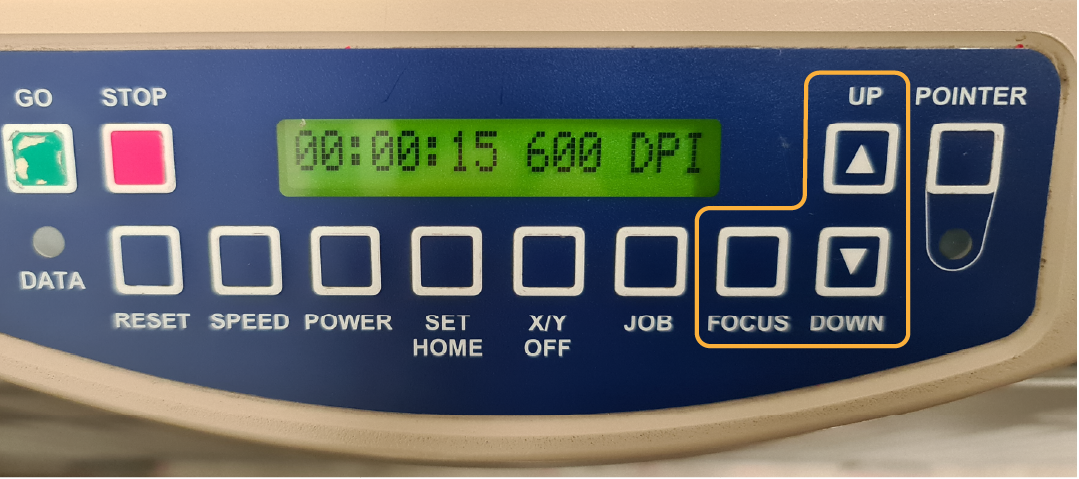
    • Black keypad with the Focus and arrow keys
    • Blue keypad with the Focus and arrow keys


      4. Find the brightest point

      Send the job and press Go to start it. While it runs, press Focus, then use the Up and Down arrows to move the table until the laser mark is at its brightest. That height is true focus.

      5. Stop the job

      Press Stop.

      Don’t press Reset. Reset moves the table and you’ll lose the focus height you just found.
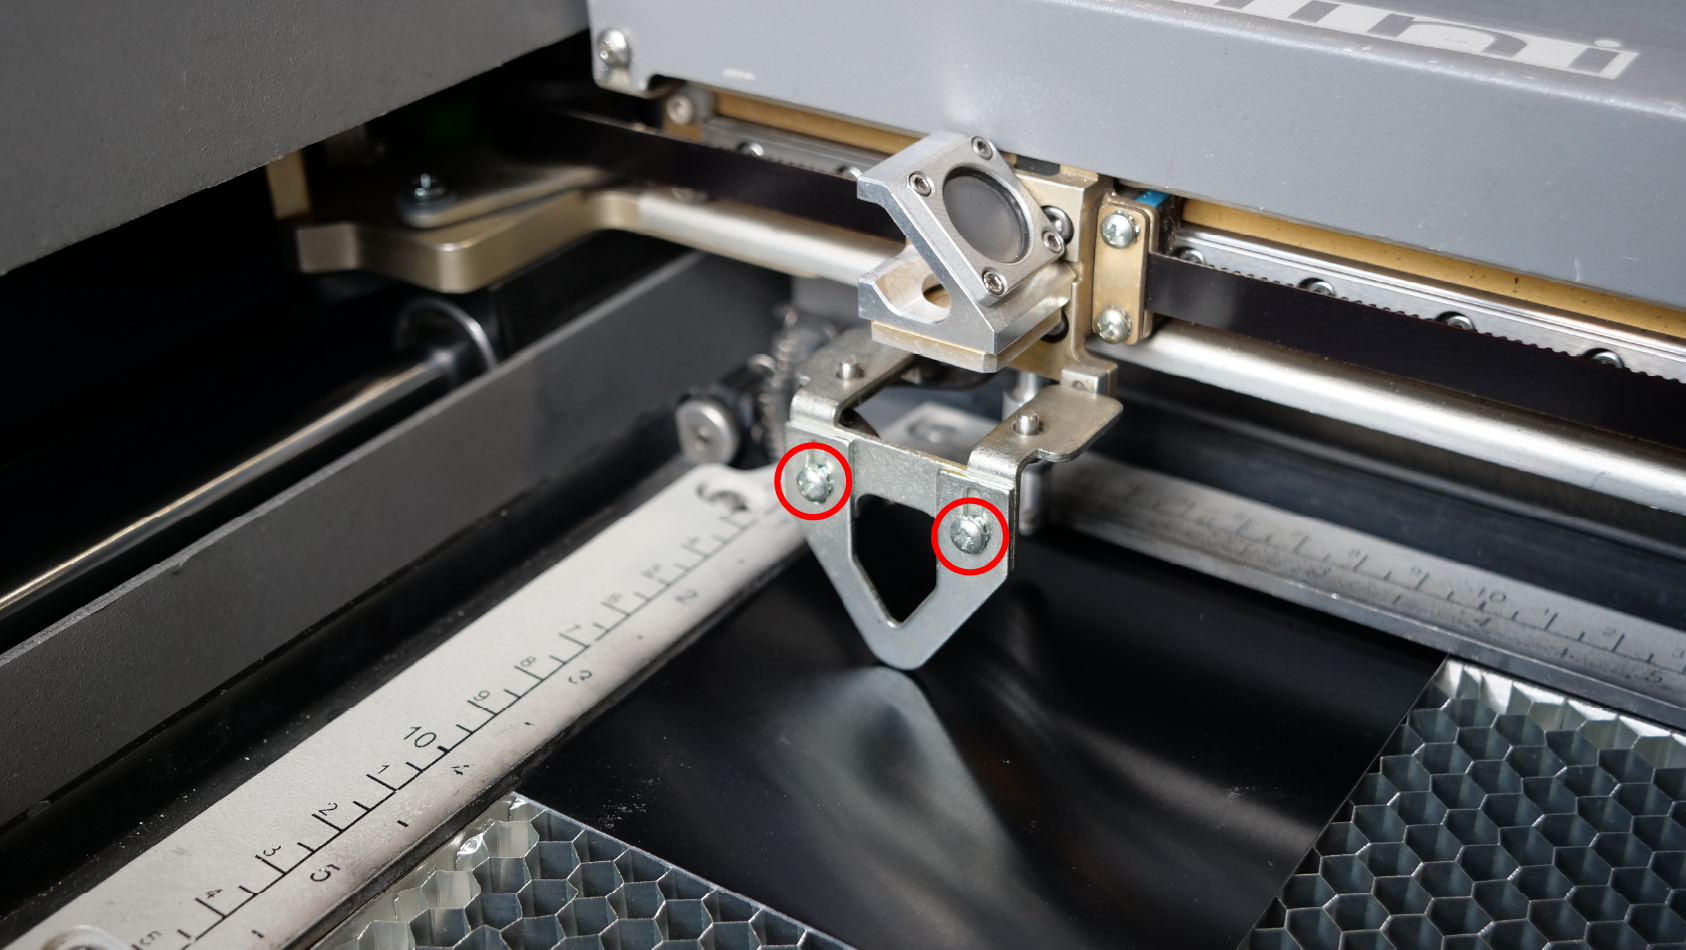
      Focus tool with its two adjustment screws

      6. Set the manual gauge

      Hang the manual focus gauge in place. Loosen its two Phillips screws, slide the gauge until its tip just touches the top of the aluminum, then tighten the screws.

      Part 3: Match autofocus to the manual gauge
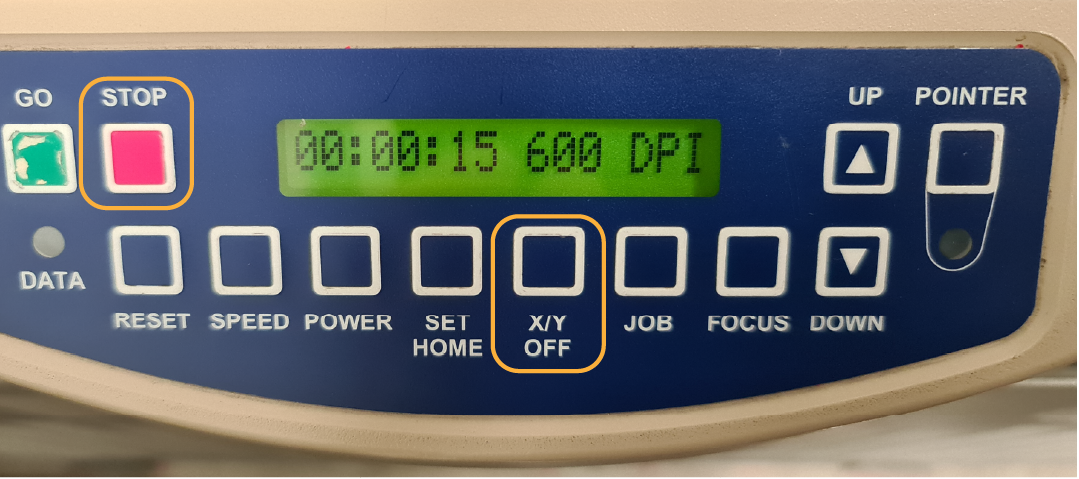
      • Blue keypad
      • Black keypad

      7. Open the autofocus setting

      How you get there depends on your keypad. Pick the one that matches your machine:

      • Press Stop and X/Y Off at the same time. This opens a hidden menu showing the autofocus value.

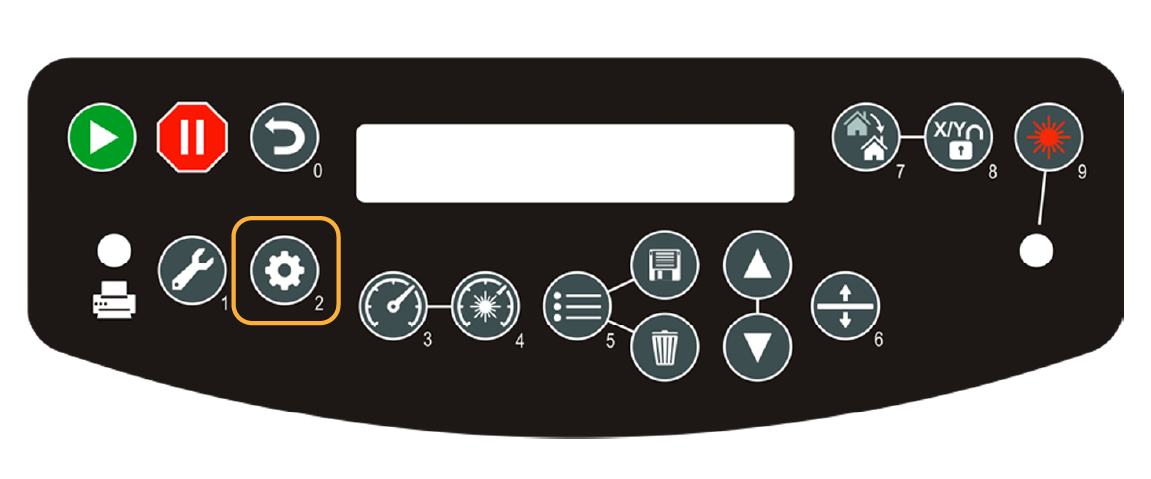
      • Press the Config key, then press the Right arrow until you reach Autofocus.

      8. Adjust the value and save

      Use the arrows to change the value, then press Go to save it.

      • Range: −200 to +300
      • More negative: the table sits higher
      • More positive: the table sits lower
      • 40 units: about 1/16″ of table movement

      9. Run the job again

      Run the job and press Stop partway through, so the table stays at the autofocus height.

      10. Check against the gauge

      Hang the manual gauge in place and look at the tip:

      • Just touching the aluminum: you’re done. Autofocus and manual focus now match.
      • Gap under the tip: the table is too low. Make the value more negative.
      • Pressing into the aluminum: the table is too high. Make the value more positive.

      Repeat steps 7–10 until it’s right. Leave the gauge screws alone during this part; you’re matching autofocus to the gauge, not the other way around.

      Was this helpful?

      Yes
      No
      Thanks for your feedback!
      • ID:
        KA-01020
      • Date:
        10/08/2026

      Tools:

      • #1 Phillips Head Screwdriver
      • Anodized Aluminum