This guide provides detailed instructions for cleaning and greasing the linear guide rail on your Epilog Laser system. Over time, debris and buildup can affect motion smoothness and engraving accuracy. Performing regular maintenance helps ensure optimal performance and extends the life of your equipment. Follow each step carefully, and refer to the notes for differences between machine revisions.
Cleaning the Linear Guide Rail
-
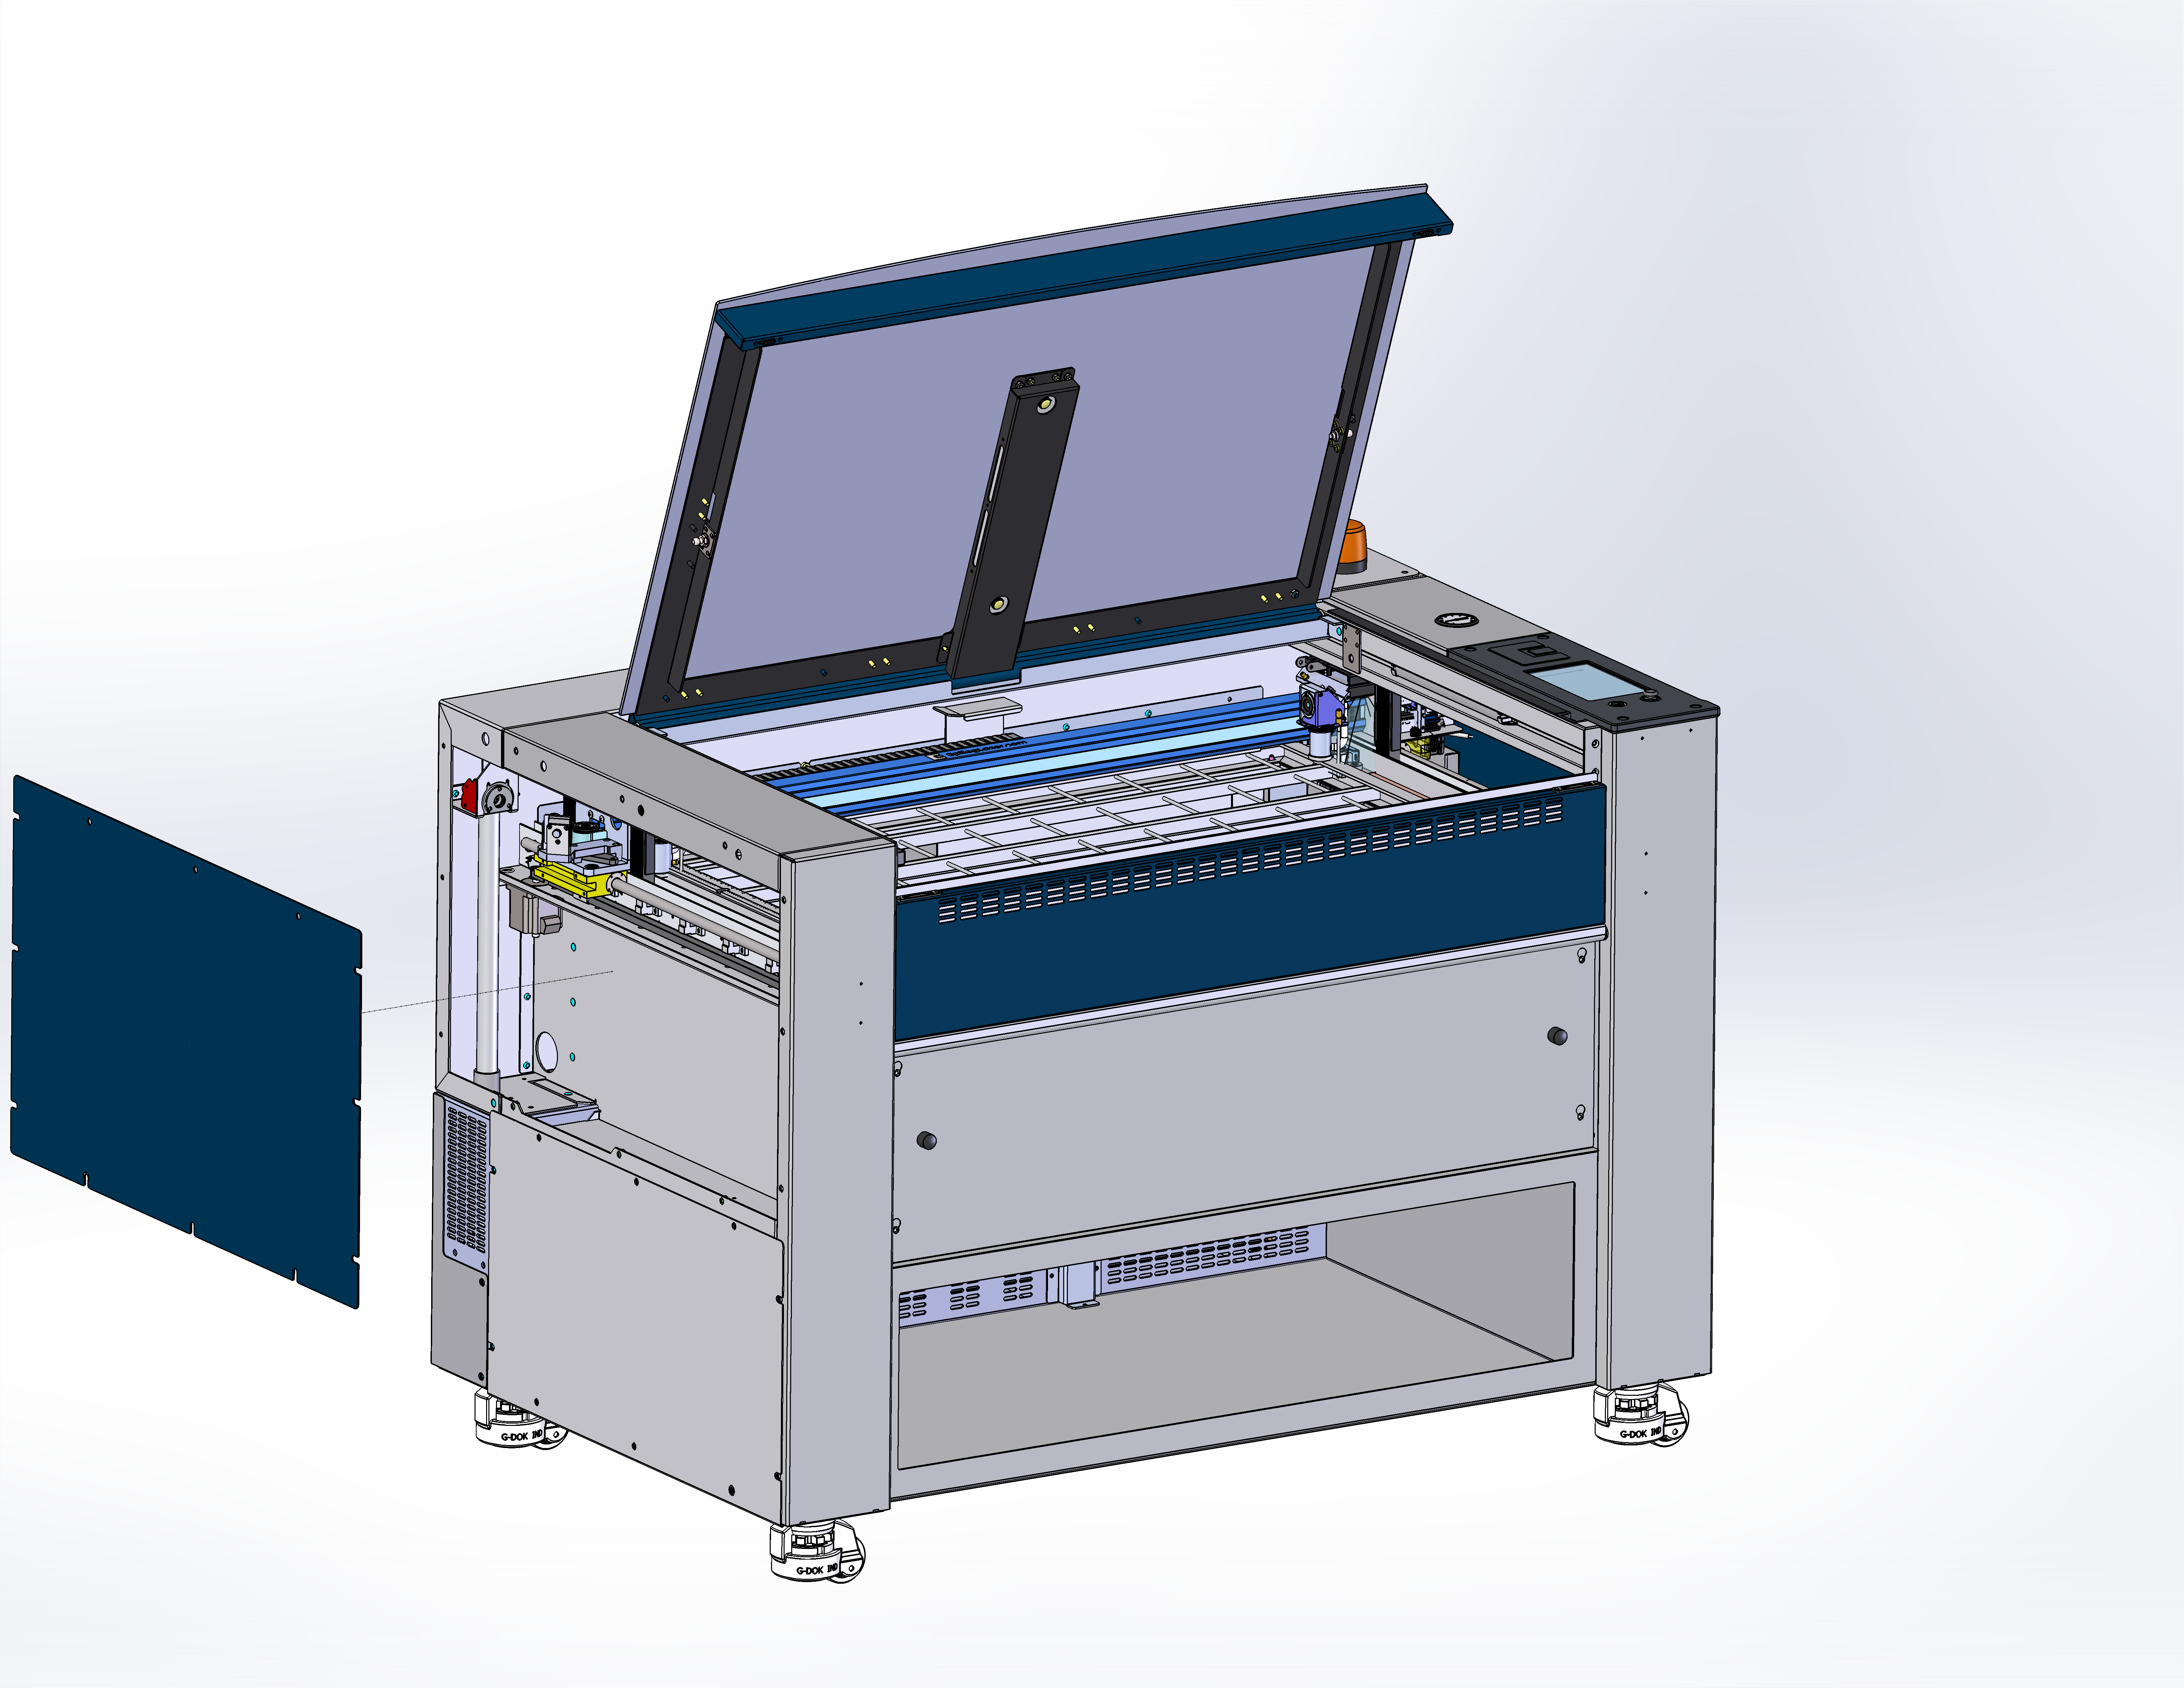
Power OFF the machine.

-
Remove the left-side panel.
-
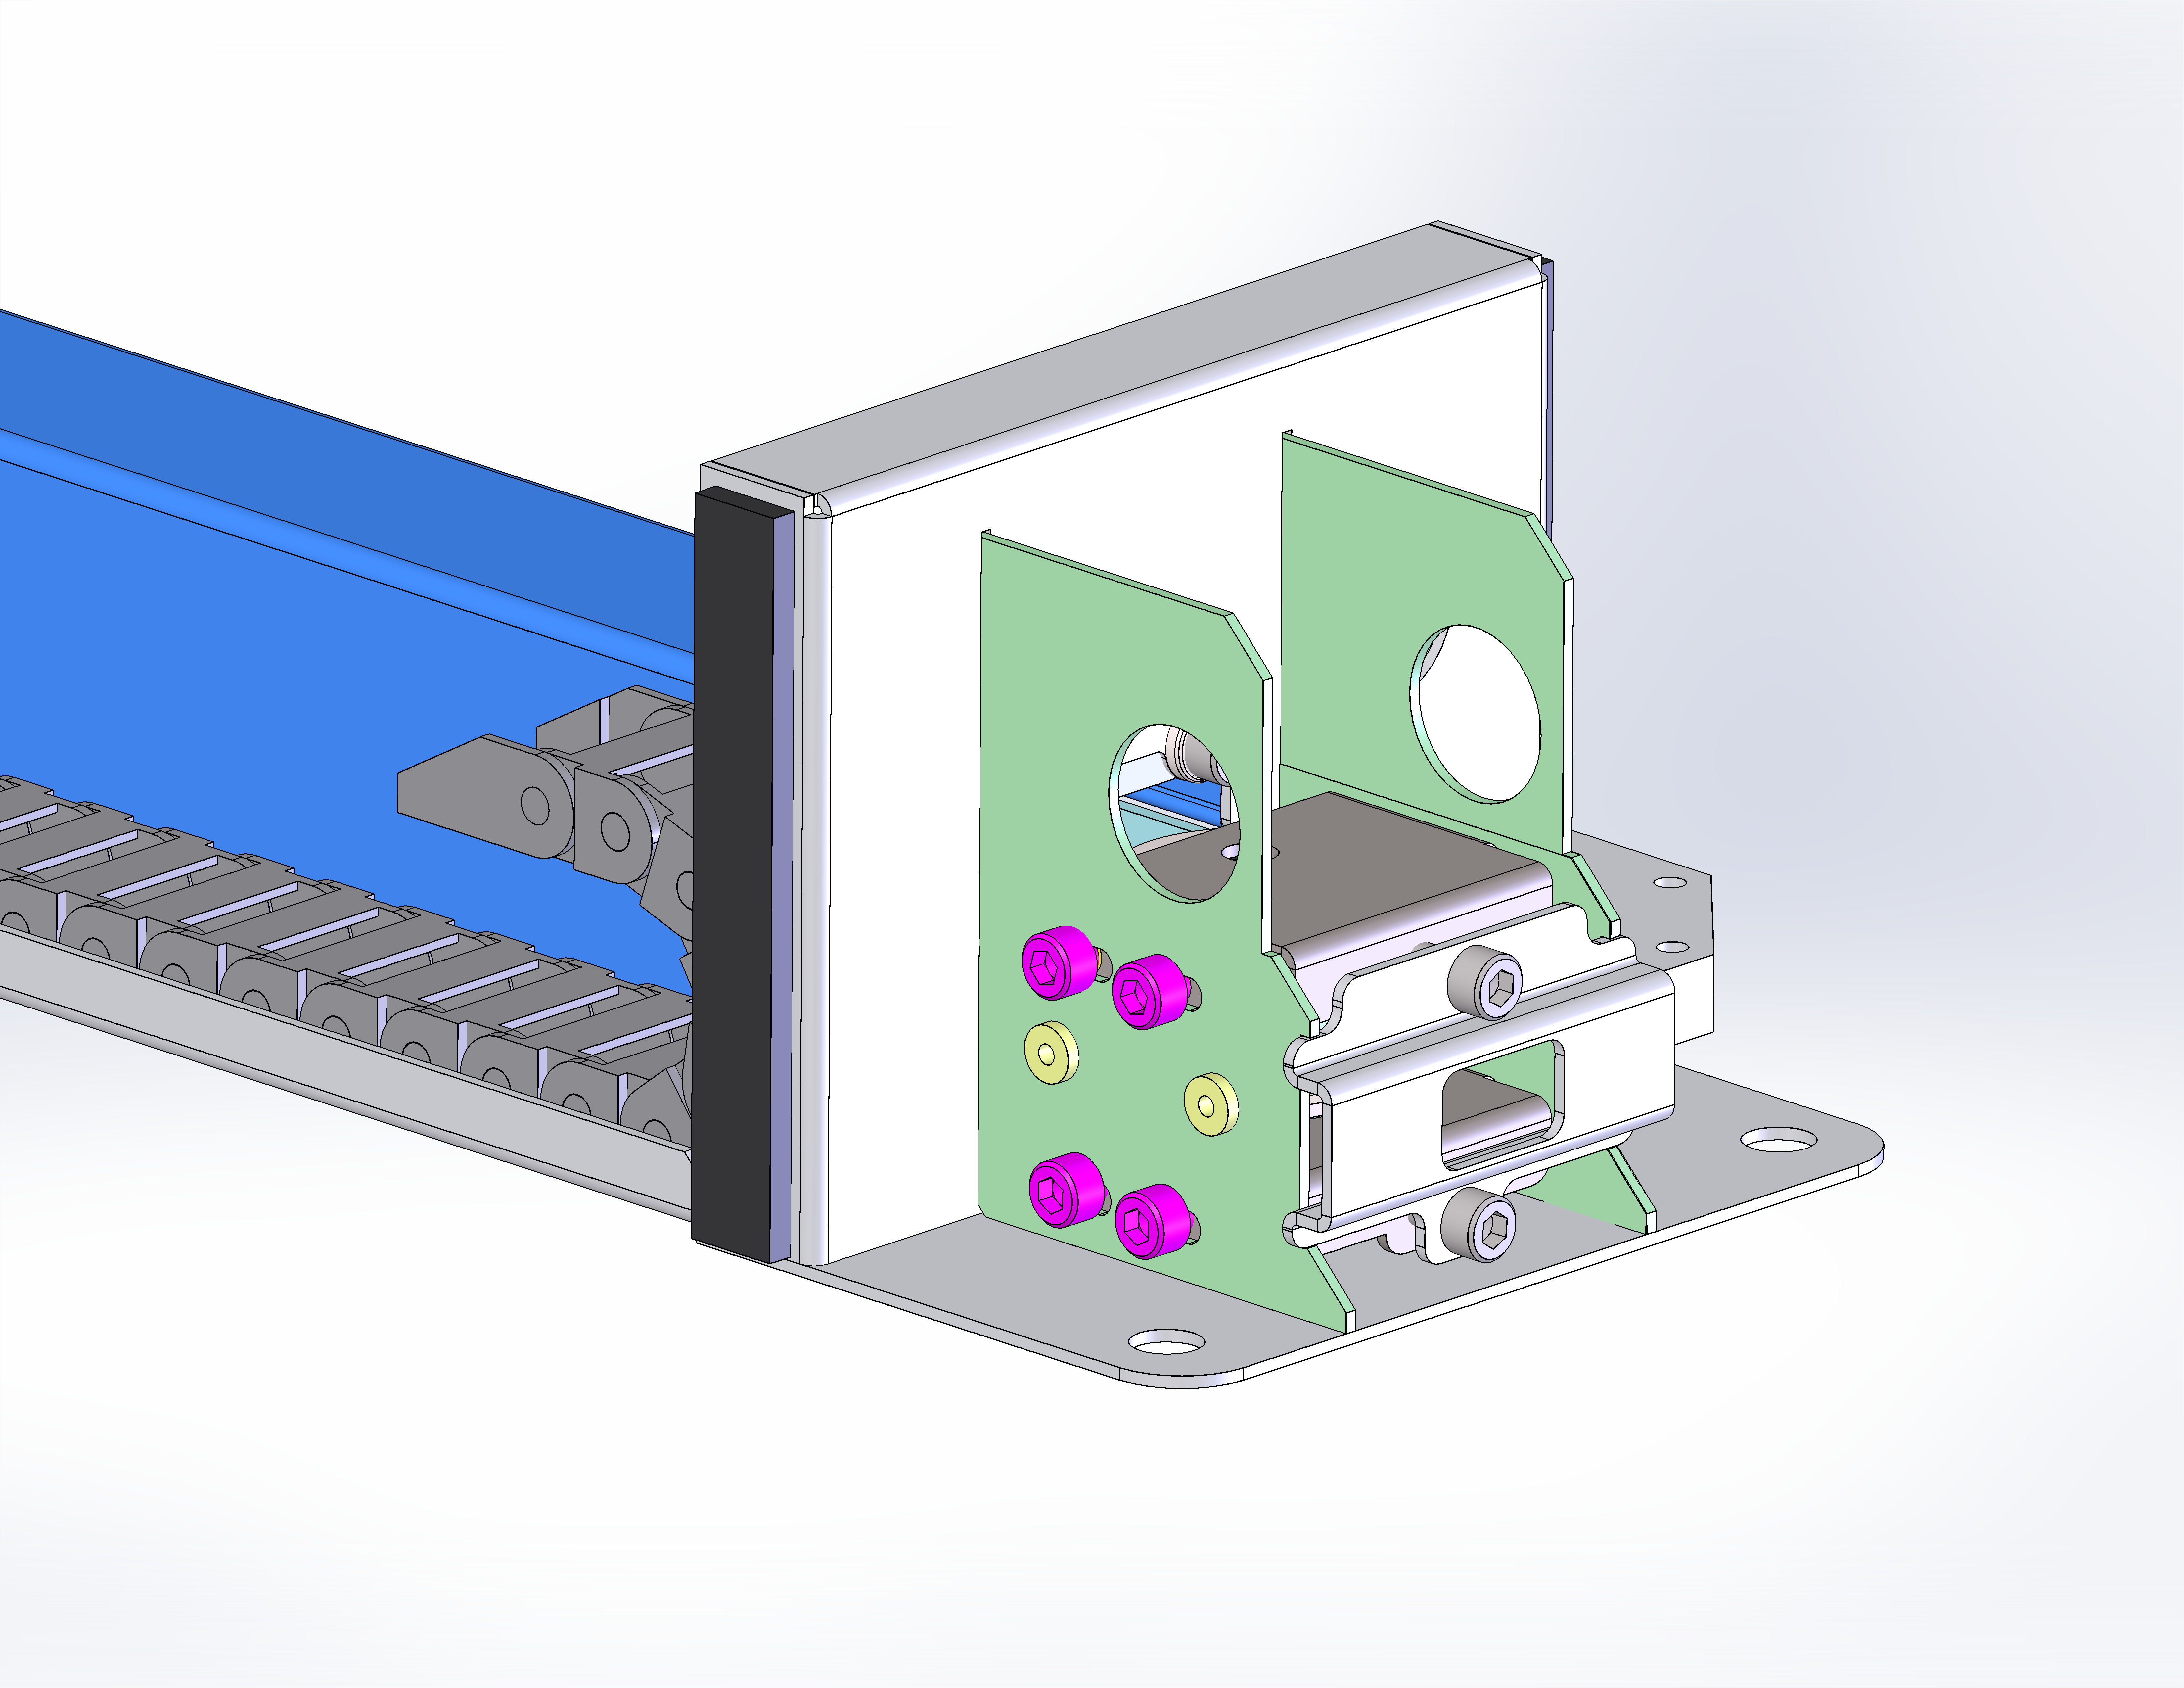
Loosen the tensioner mounting screws.
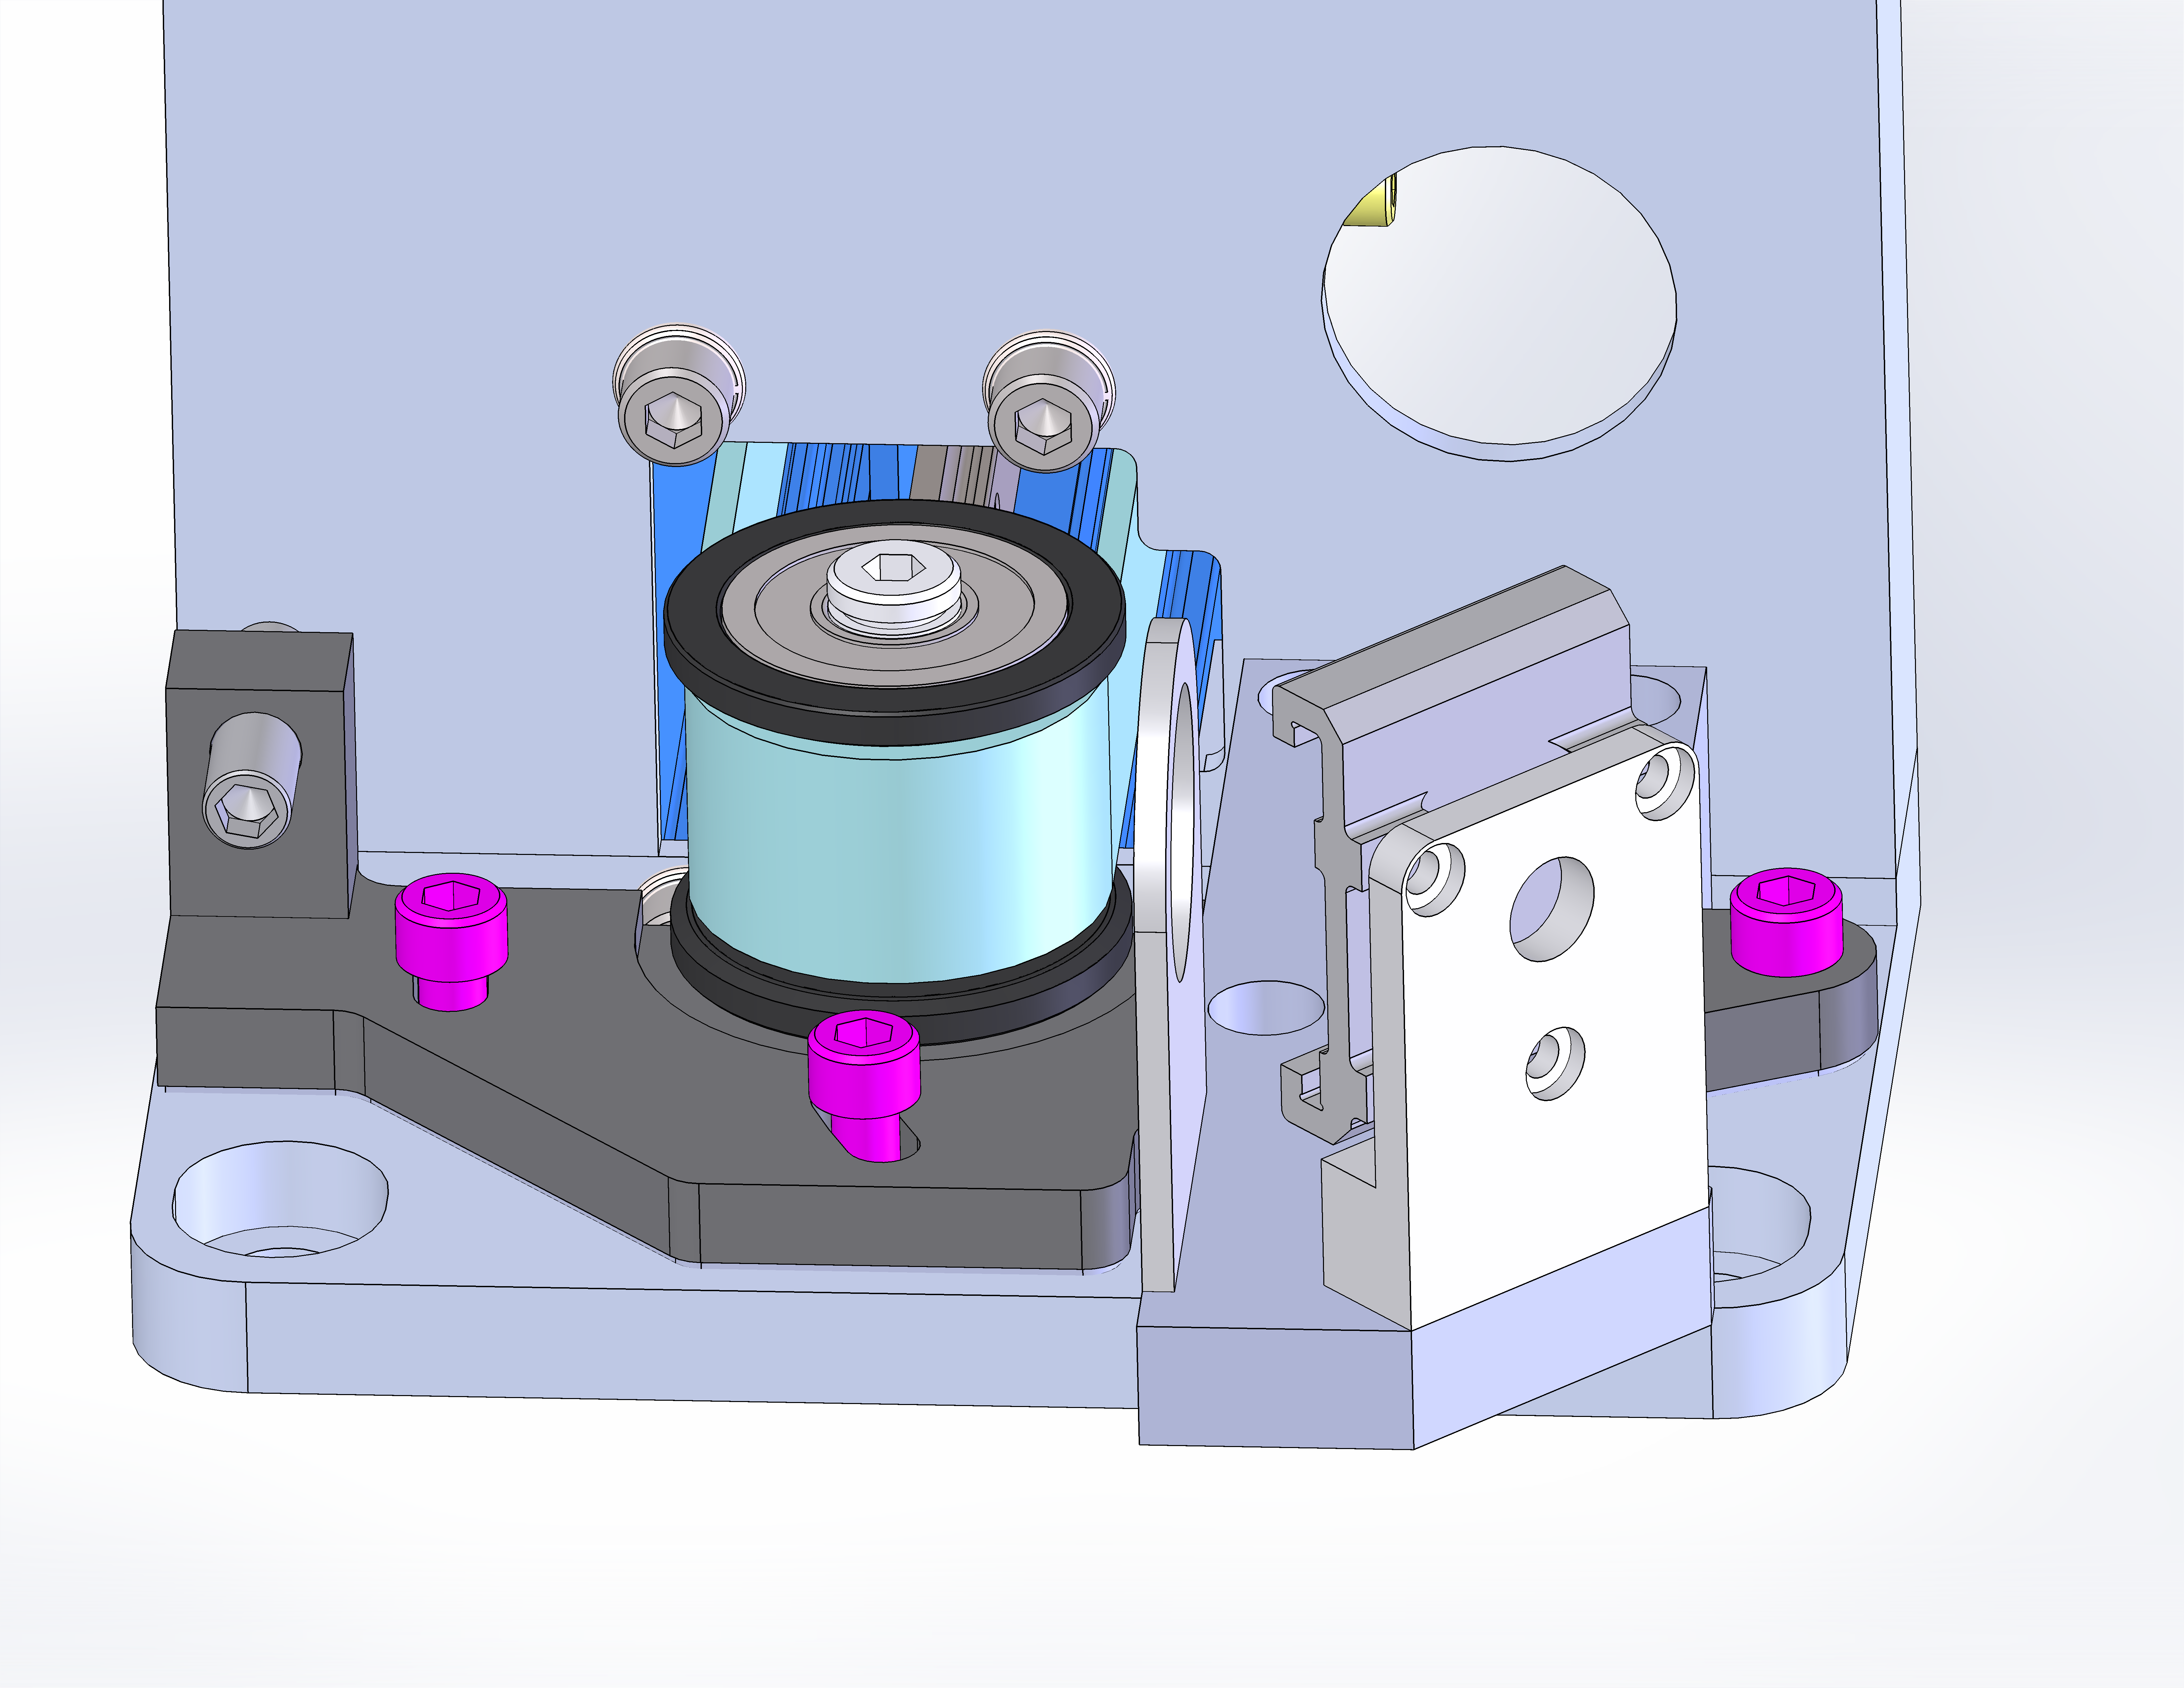 Note: If the tensioner bracket in your machine doesn’t match the image above, it may be an earlier revision. Click below to view Rev 1 images.
 -
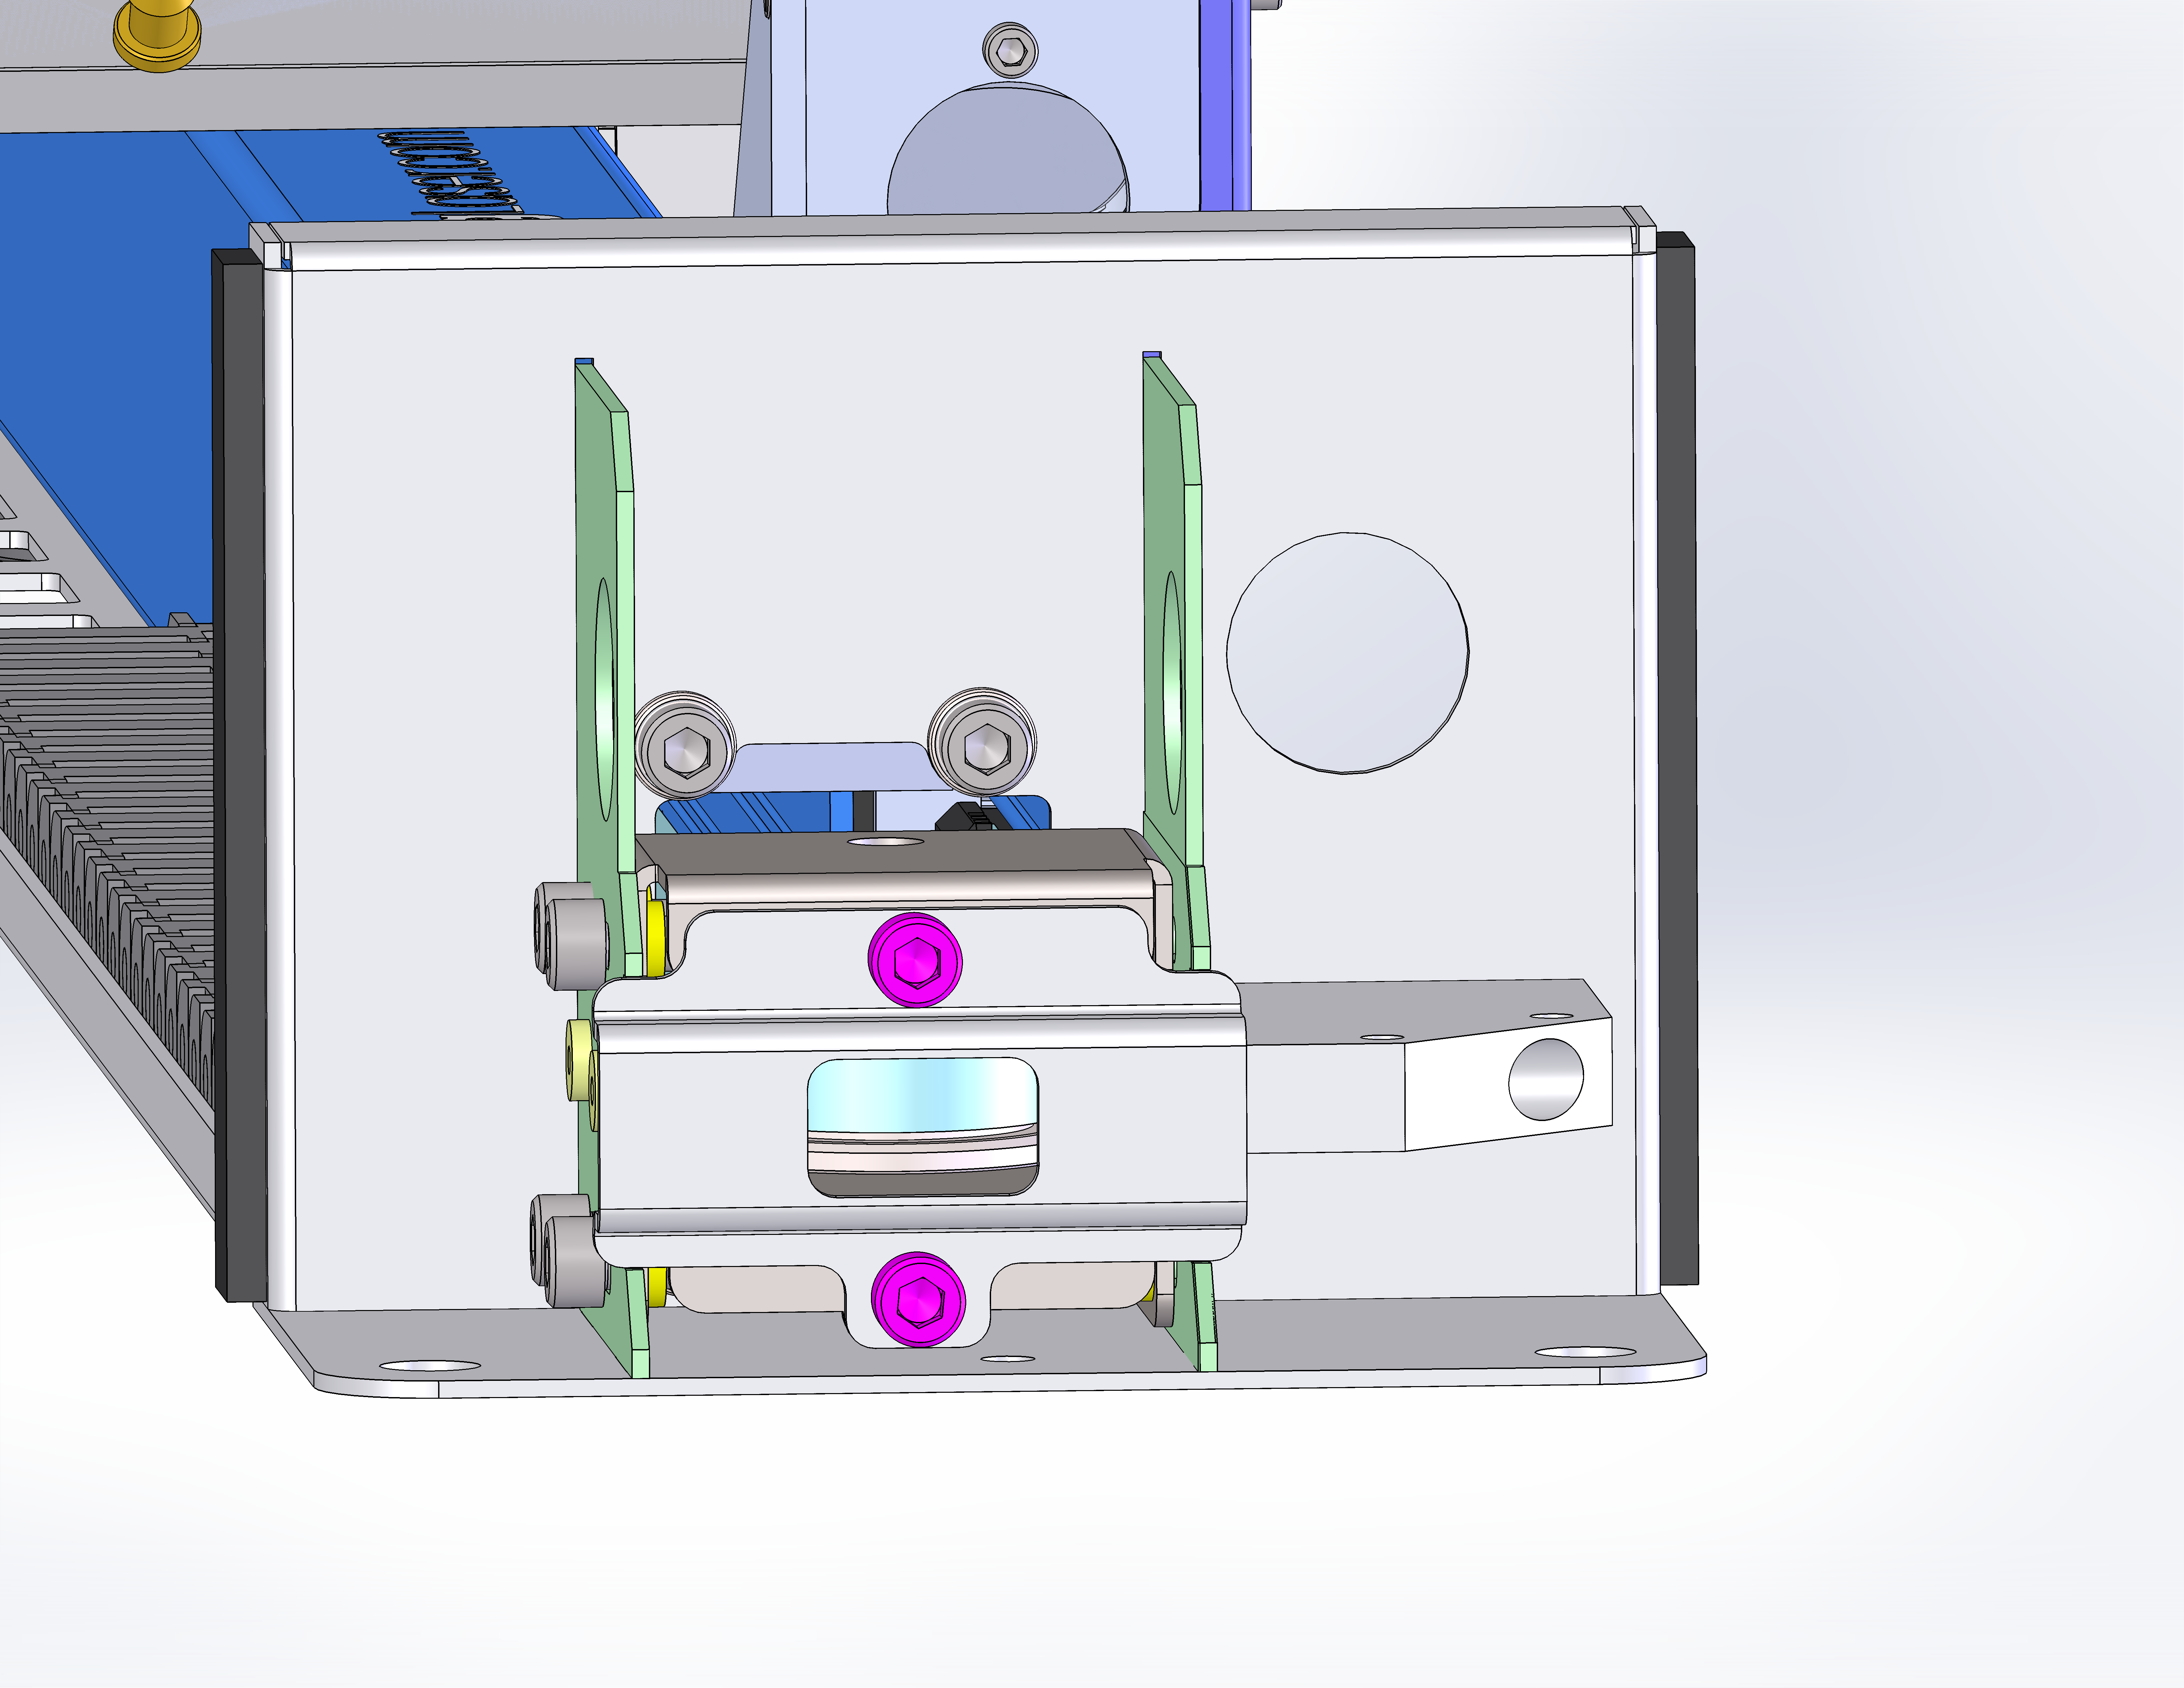
Loosen the tensioner screw(s).
 Note: If the tensioner screw in your machine doesn’t match the image above, it may be an earlier revision. Click below to view Rev 1 images.
 -
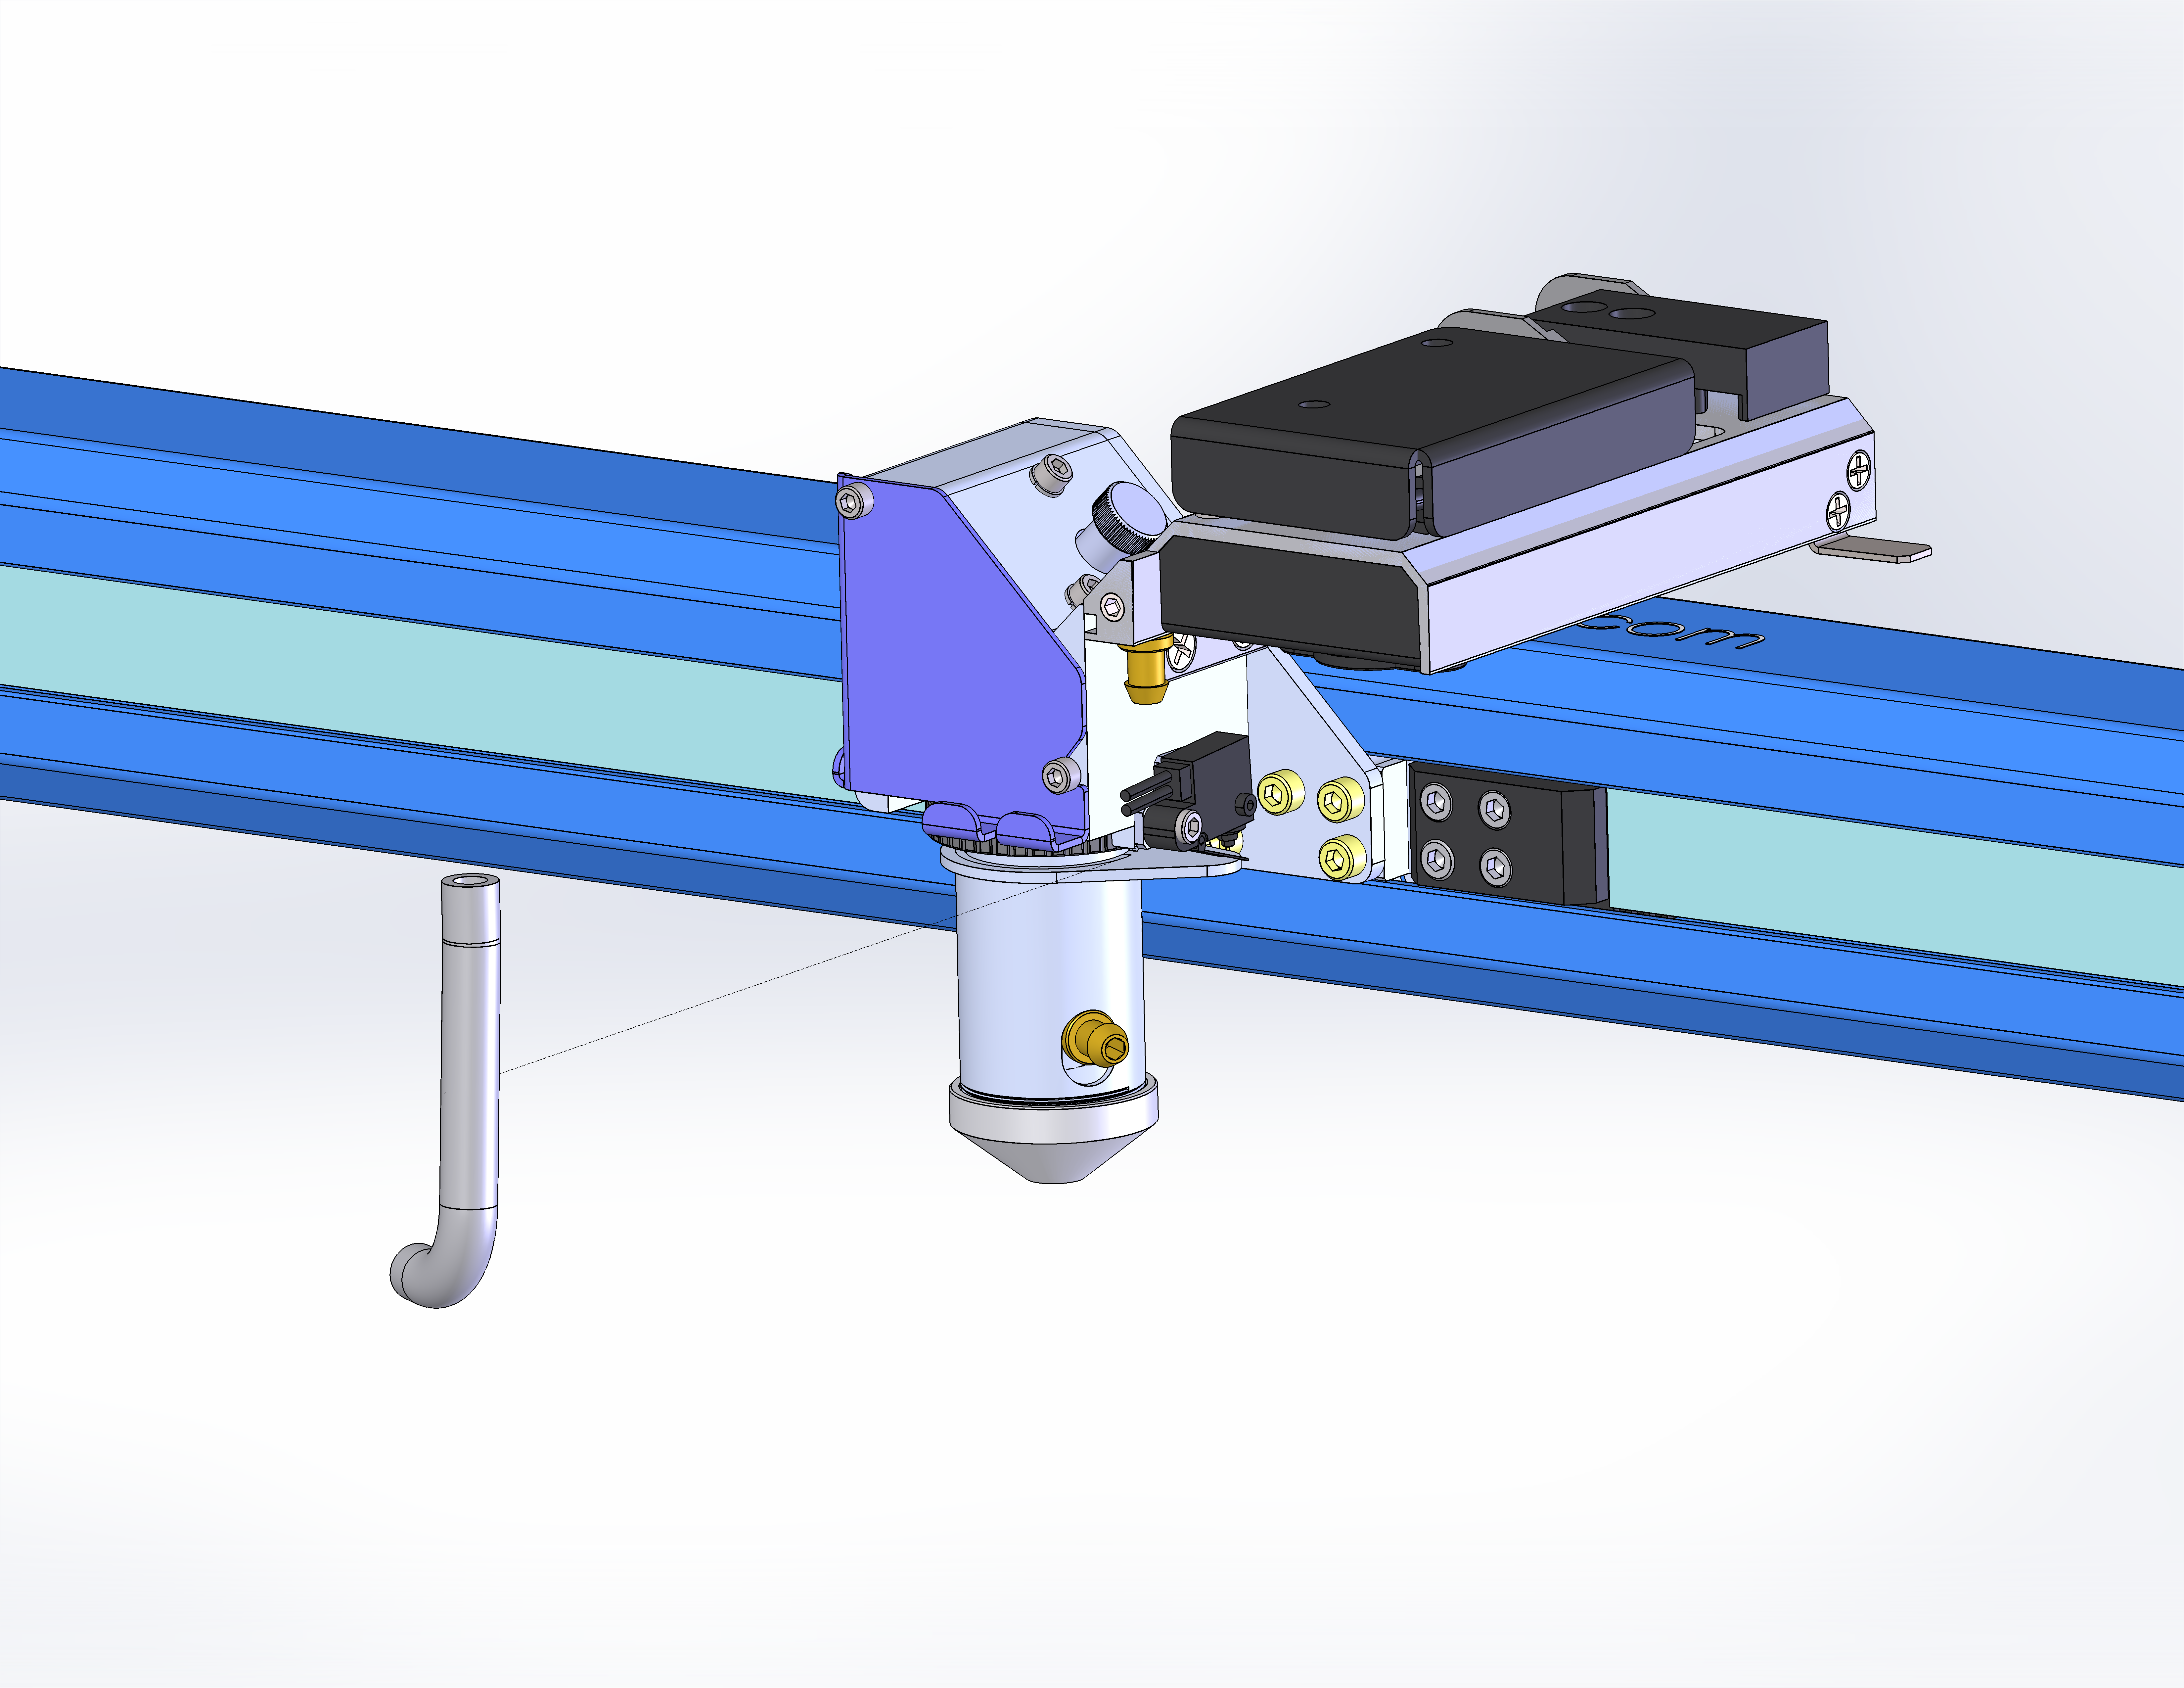
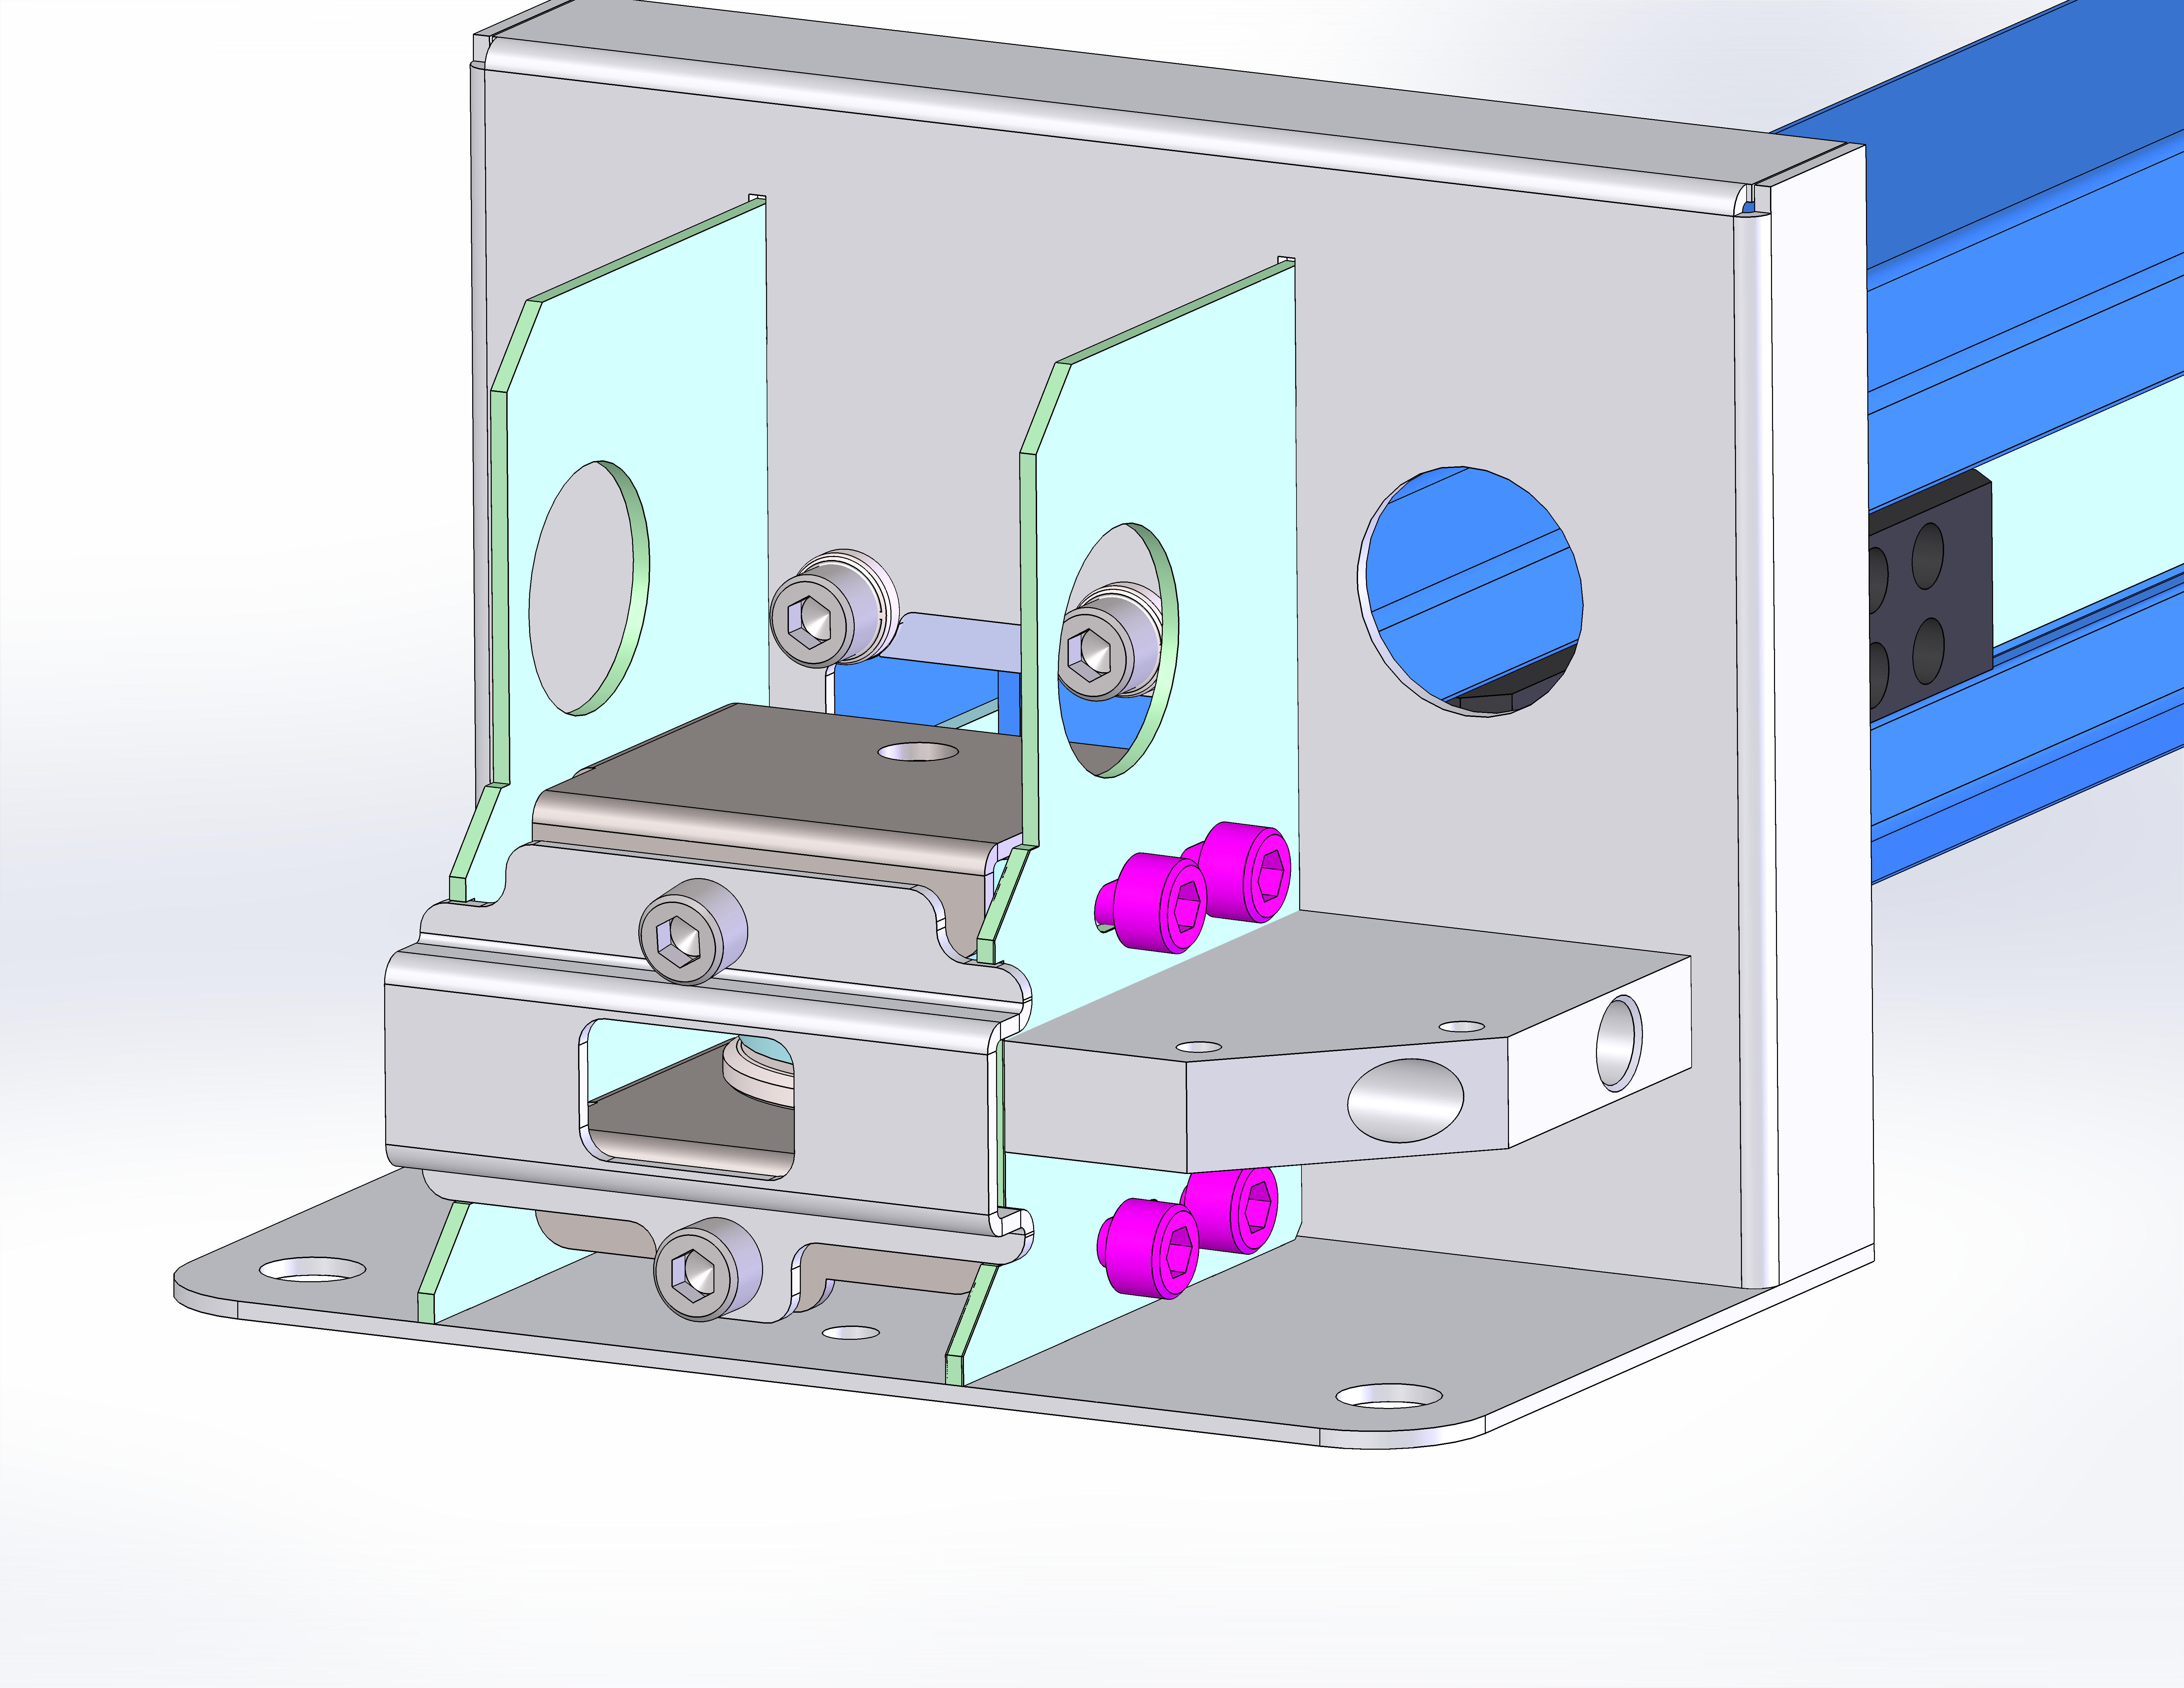
Remove the air assist tubing.
-
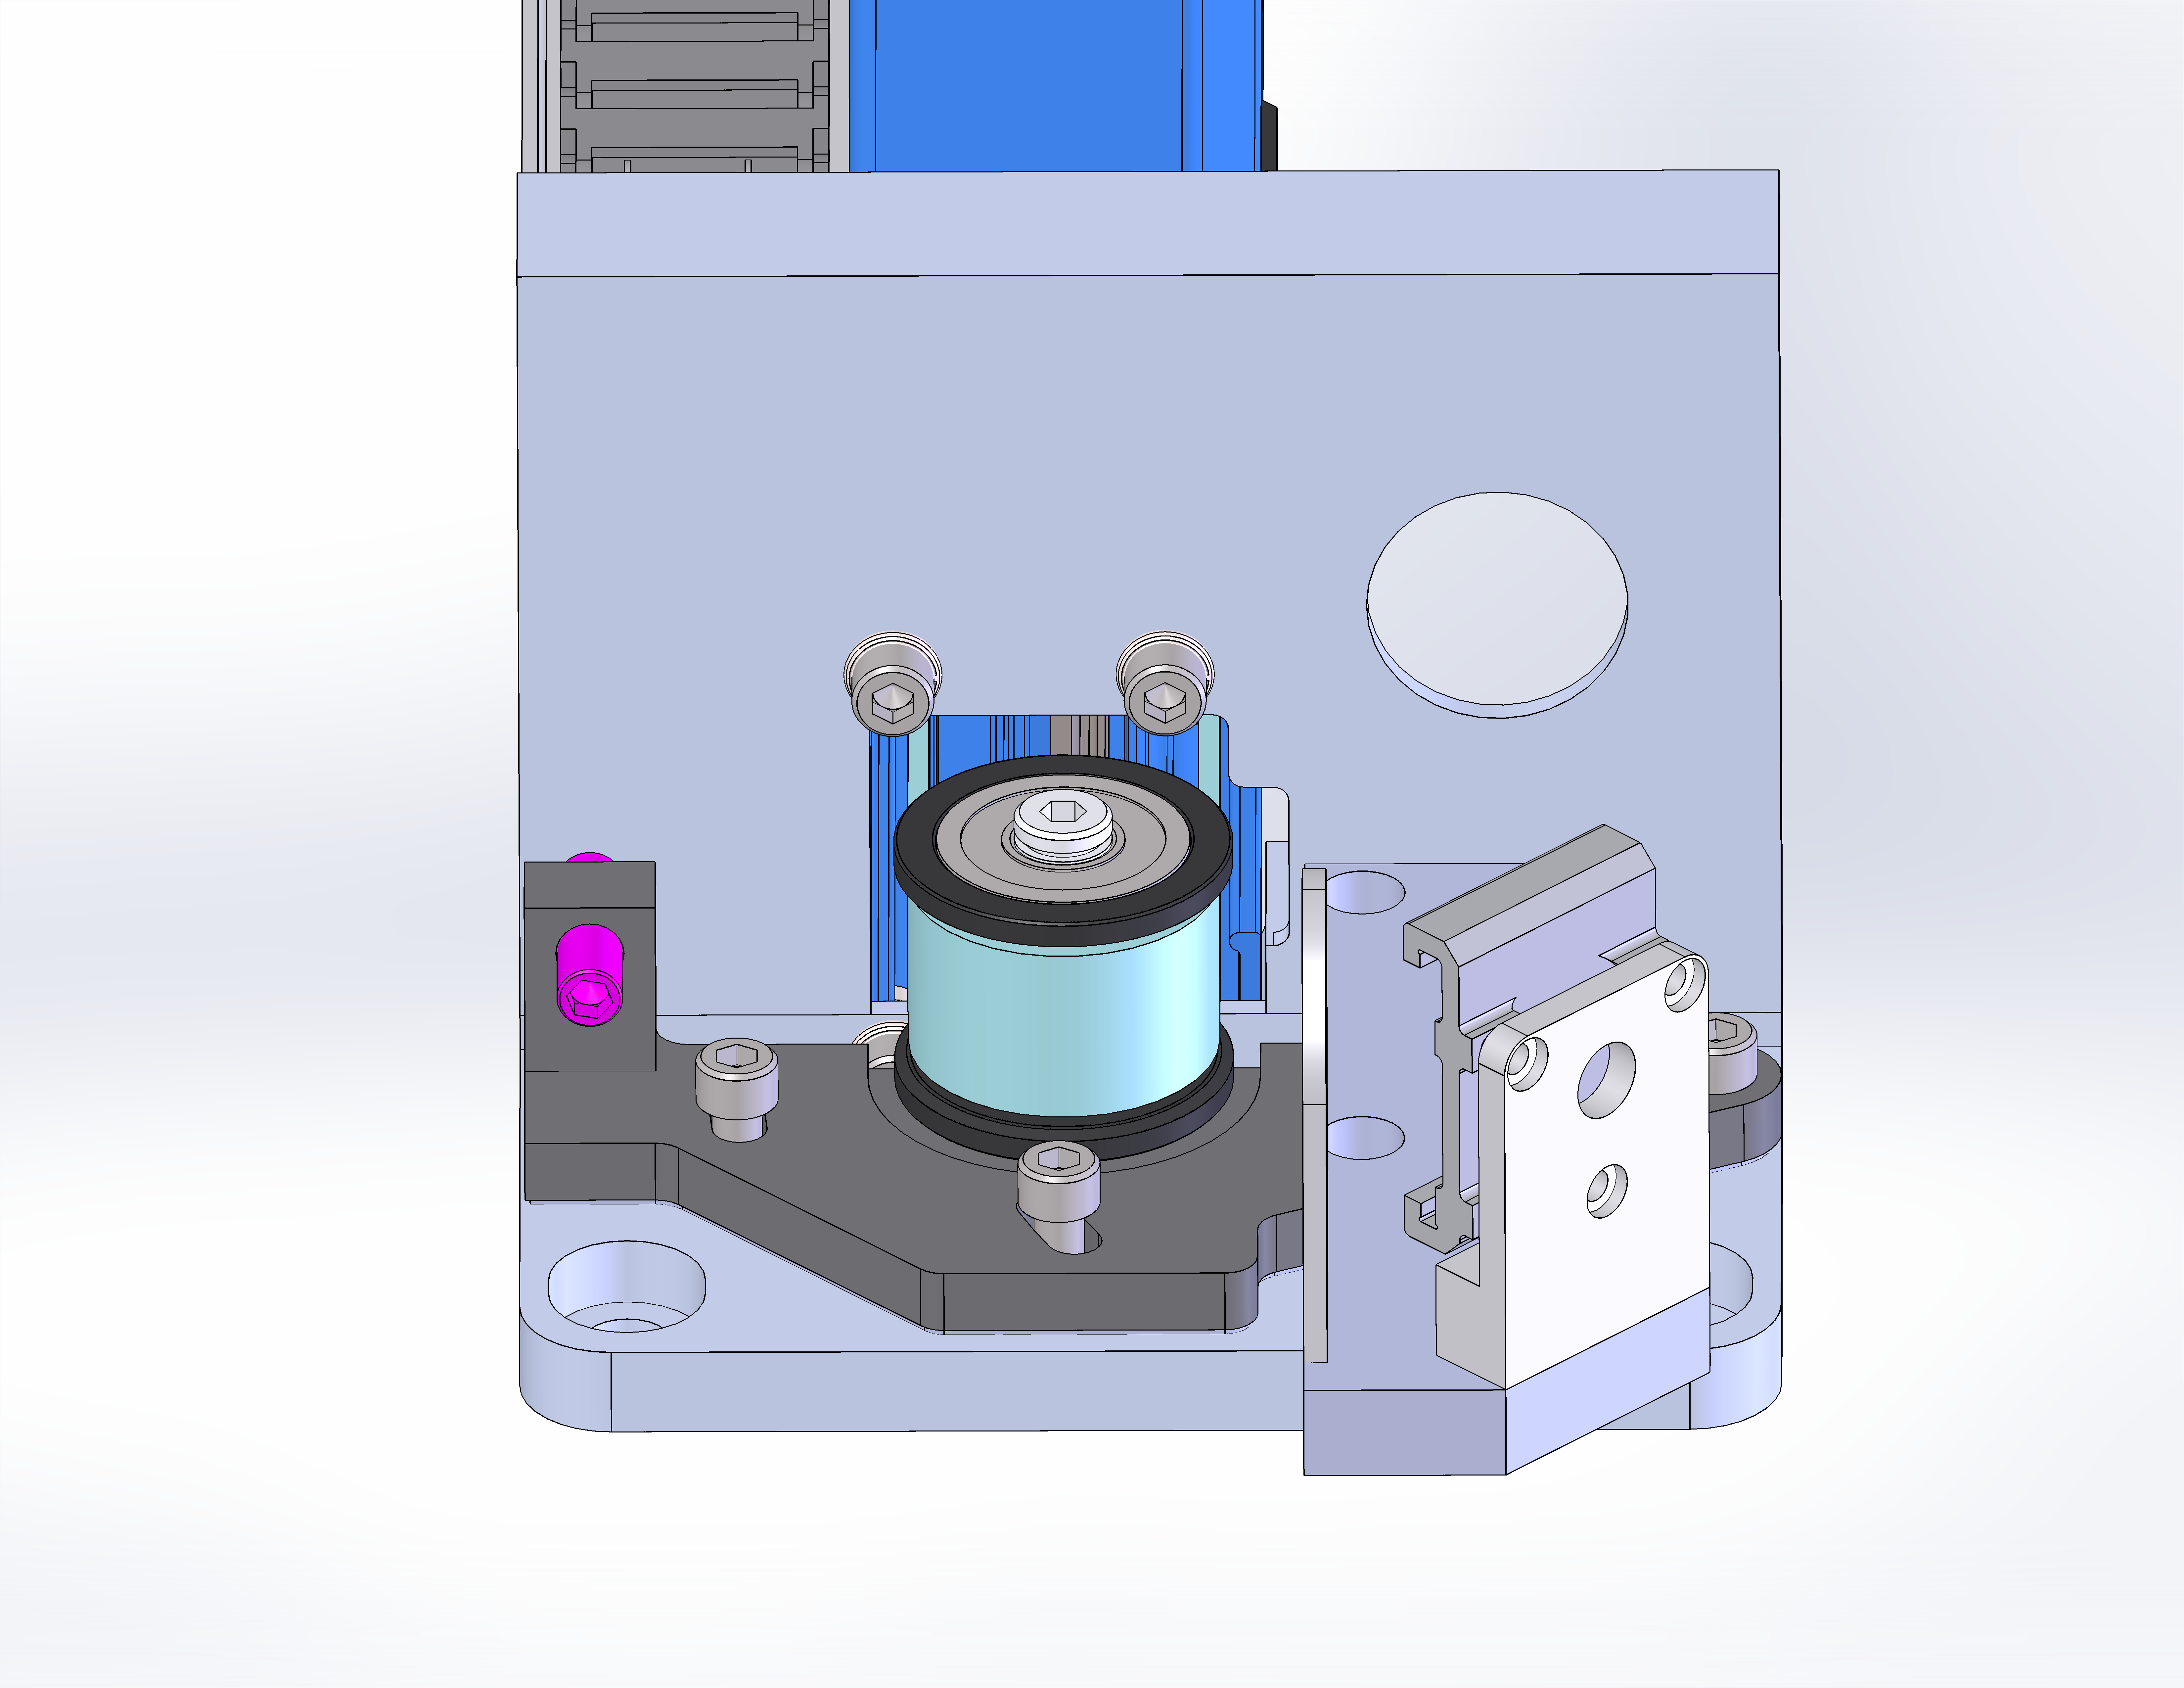
Remove the lens.
-
Remove the screw securing the autofocus switch.
Note: Some machines will have a small spacer between the autofocus switch and the carriage. Ensure you do not lose this spacer when removing the screw.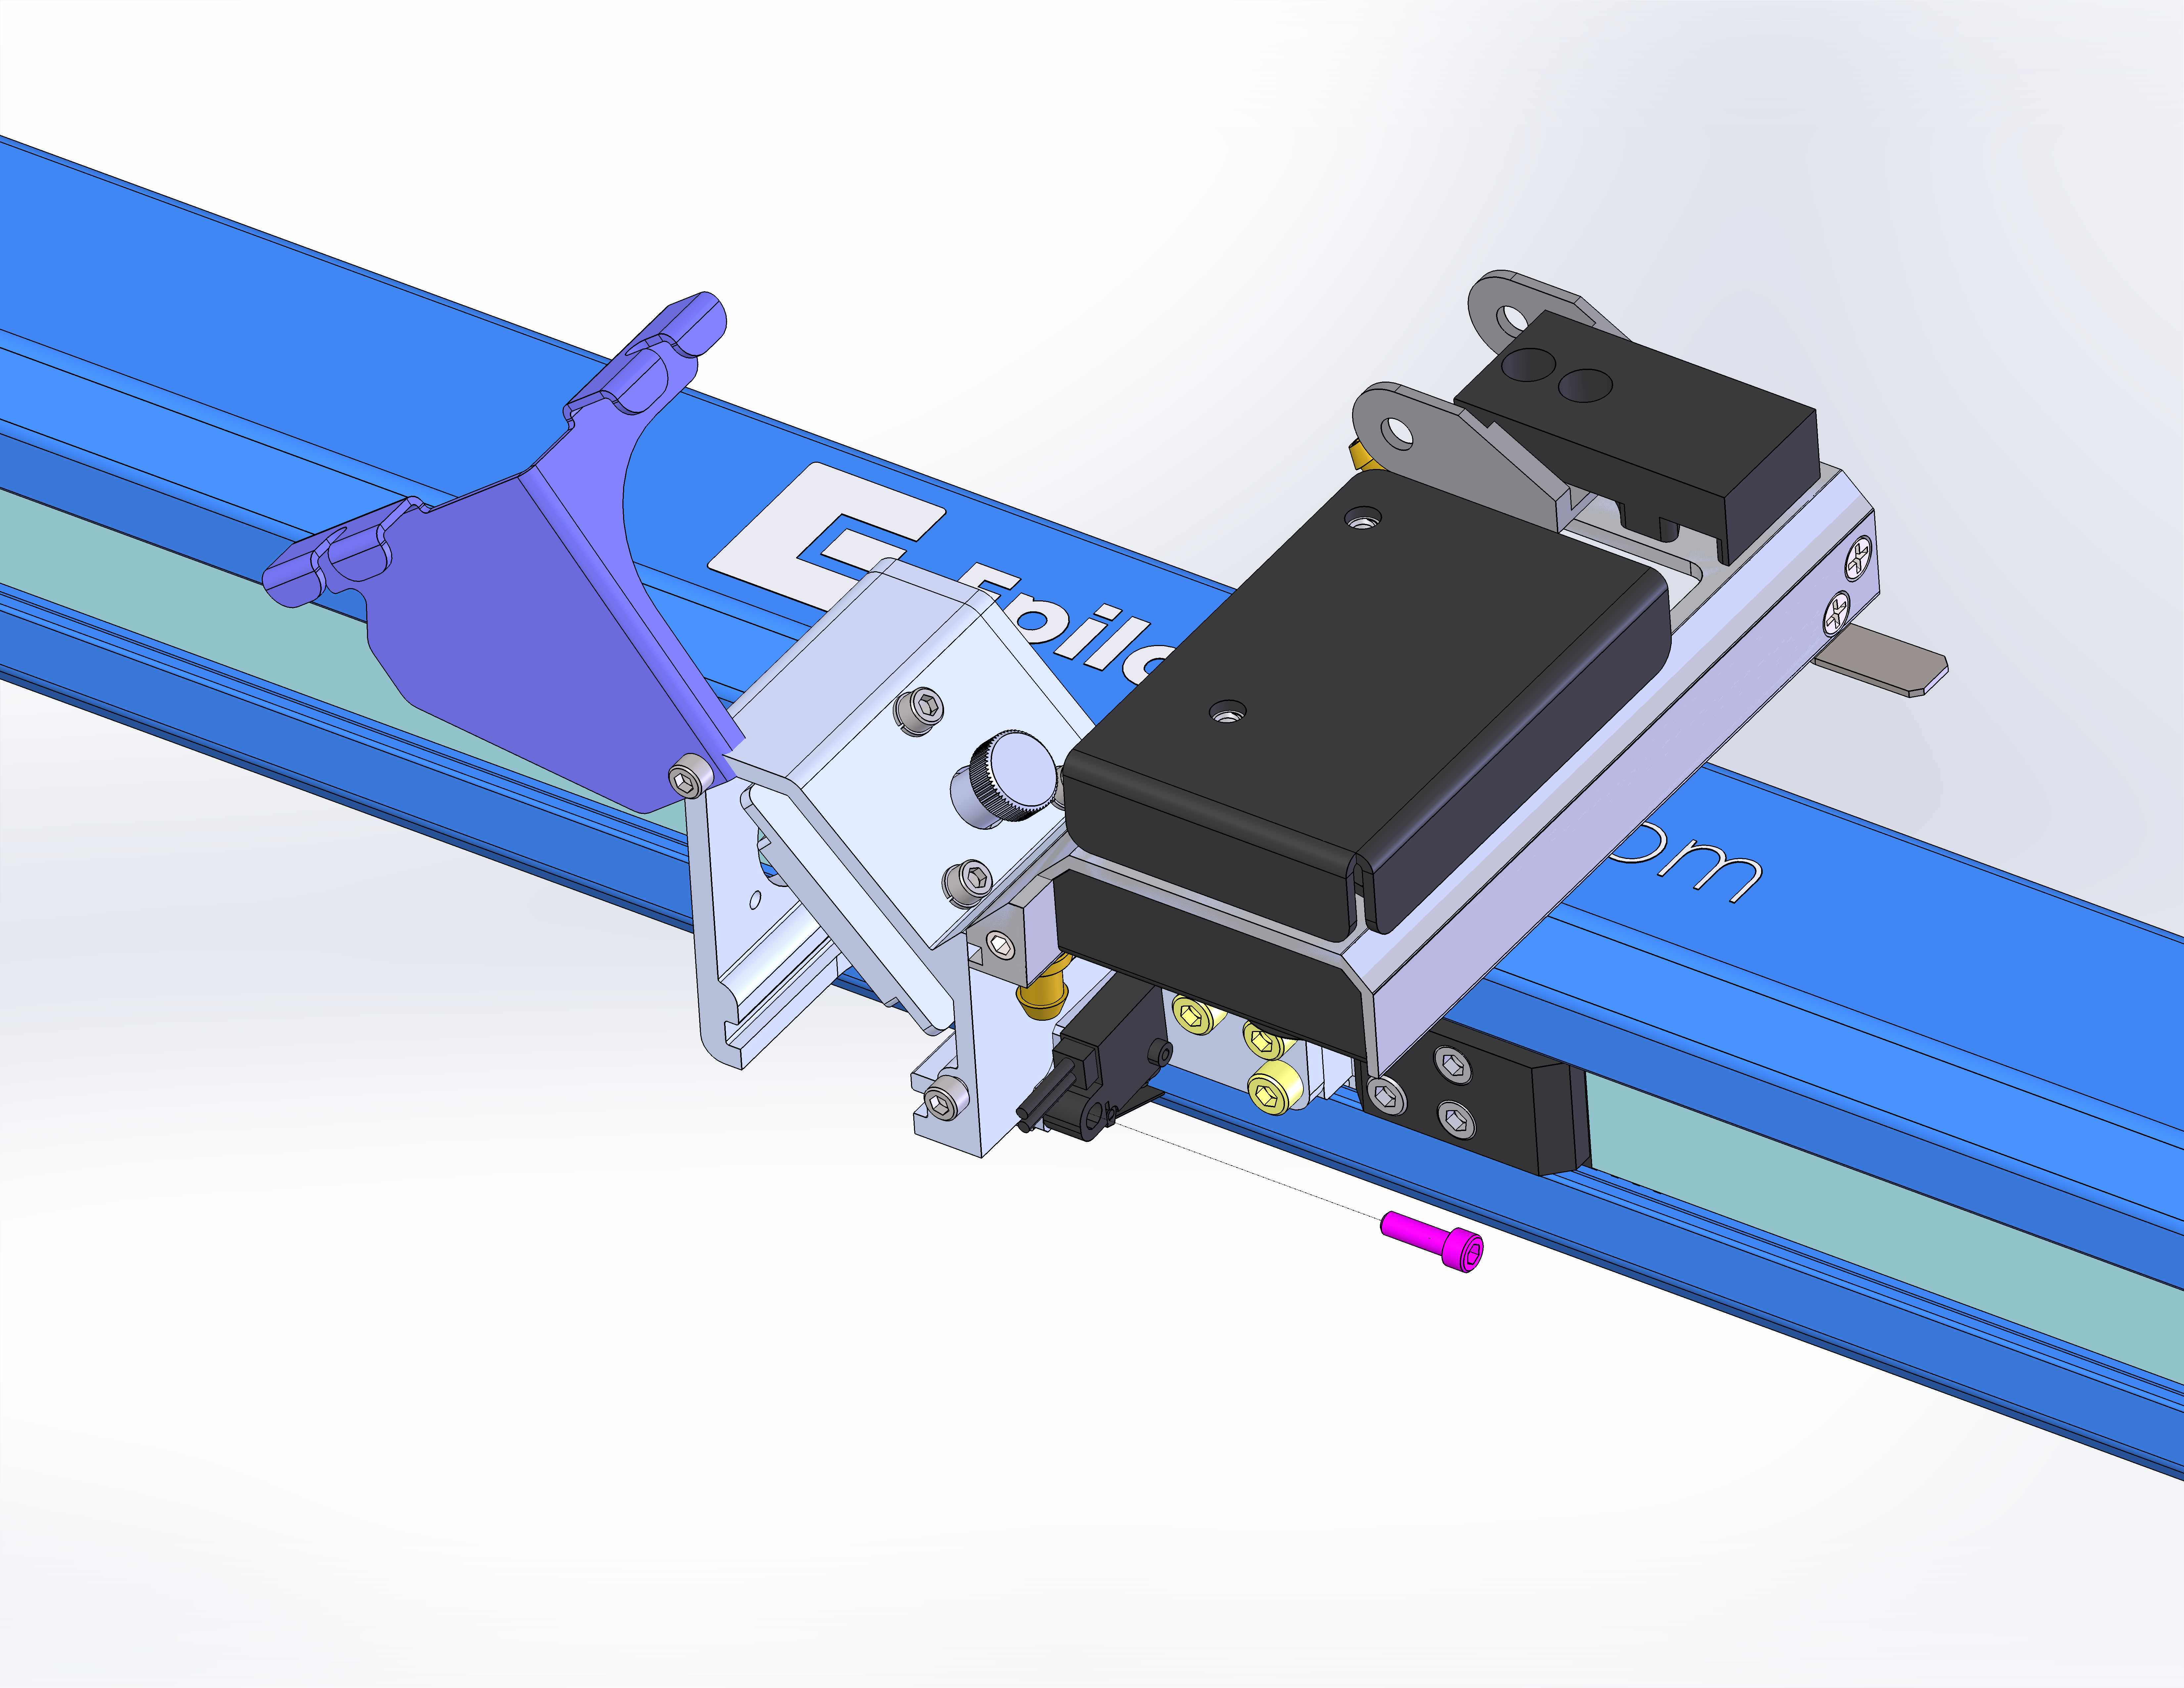
-
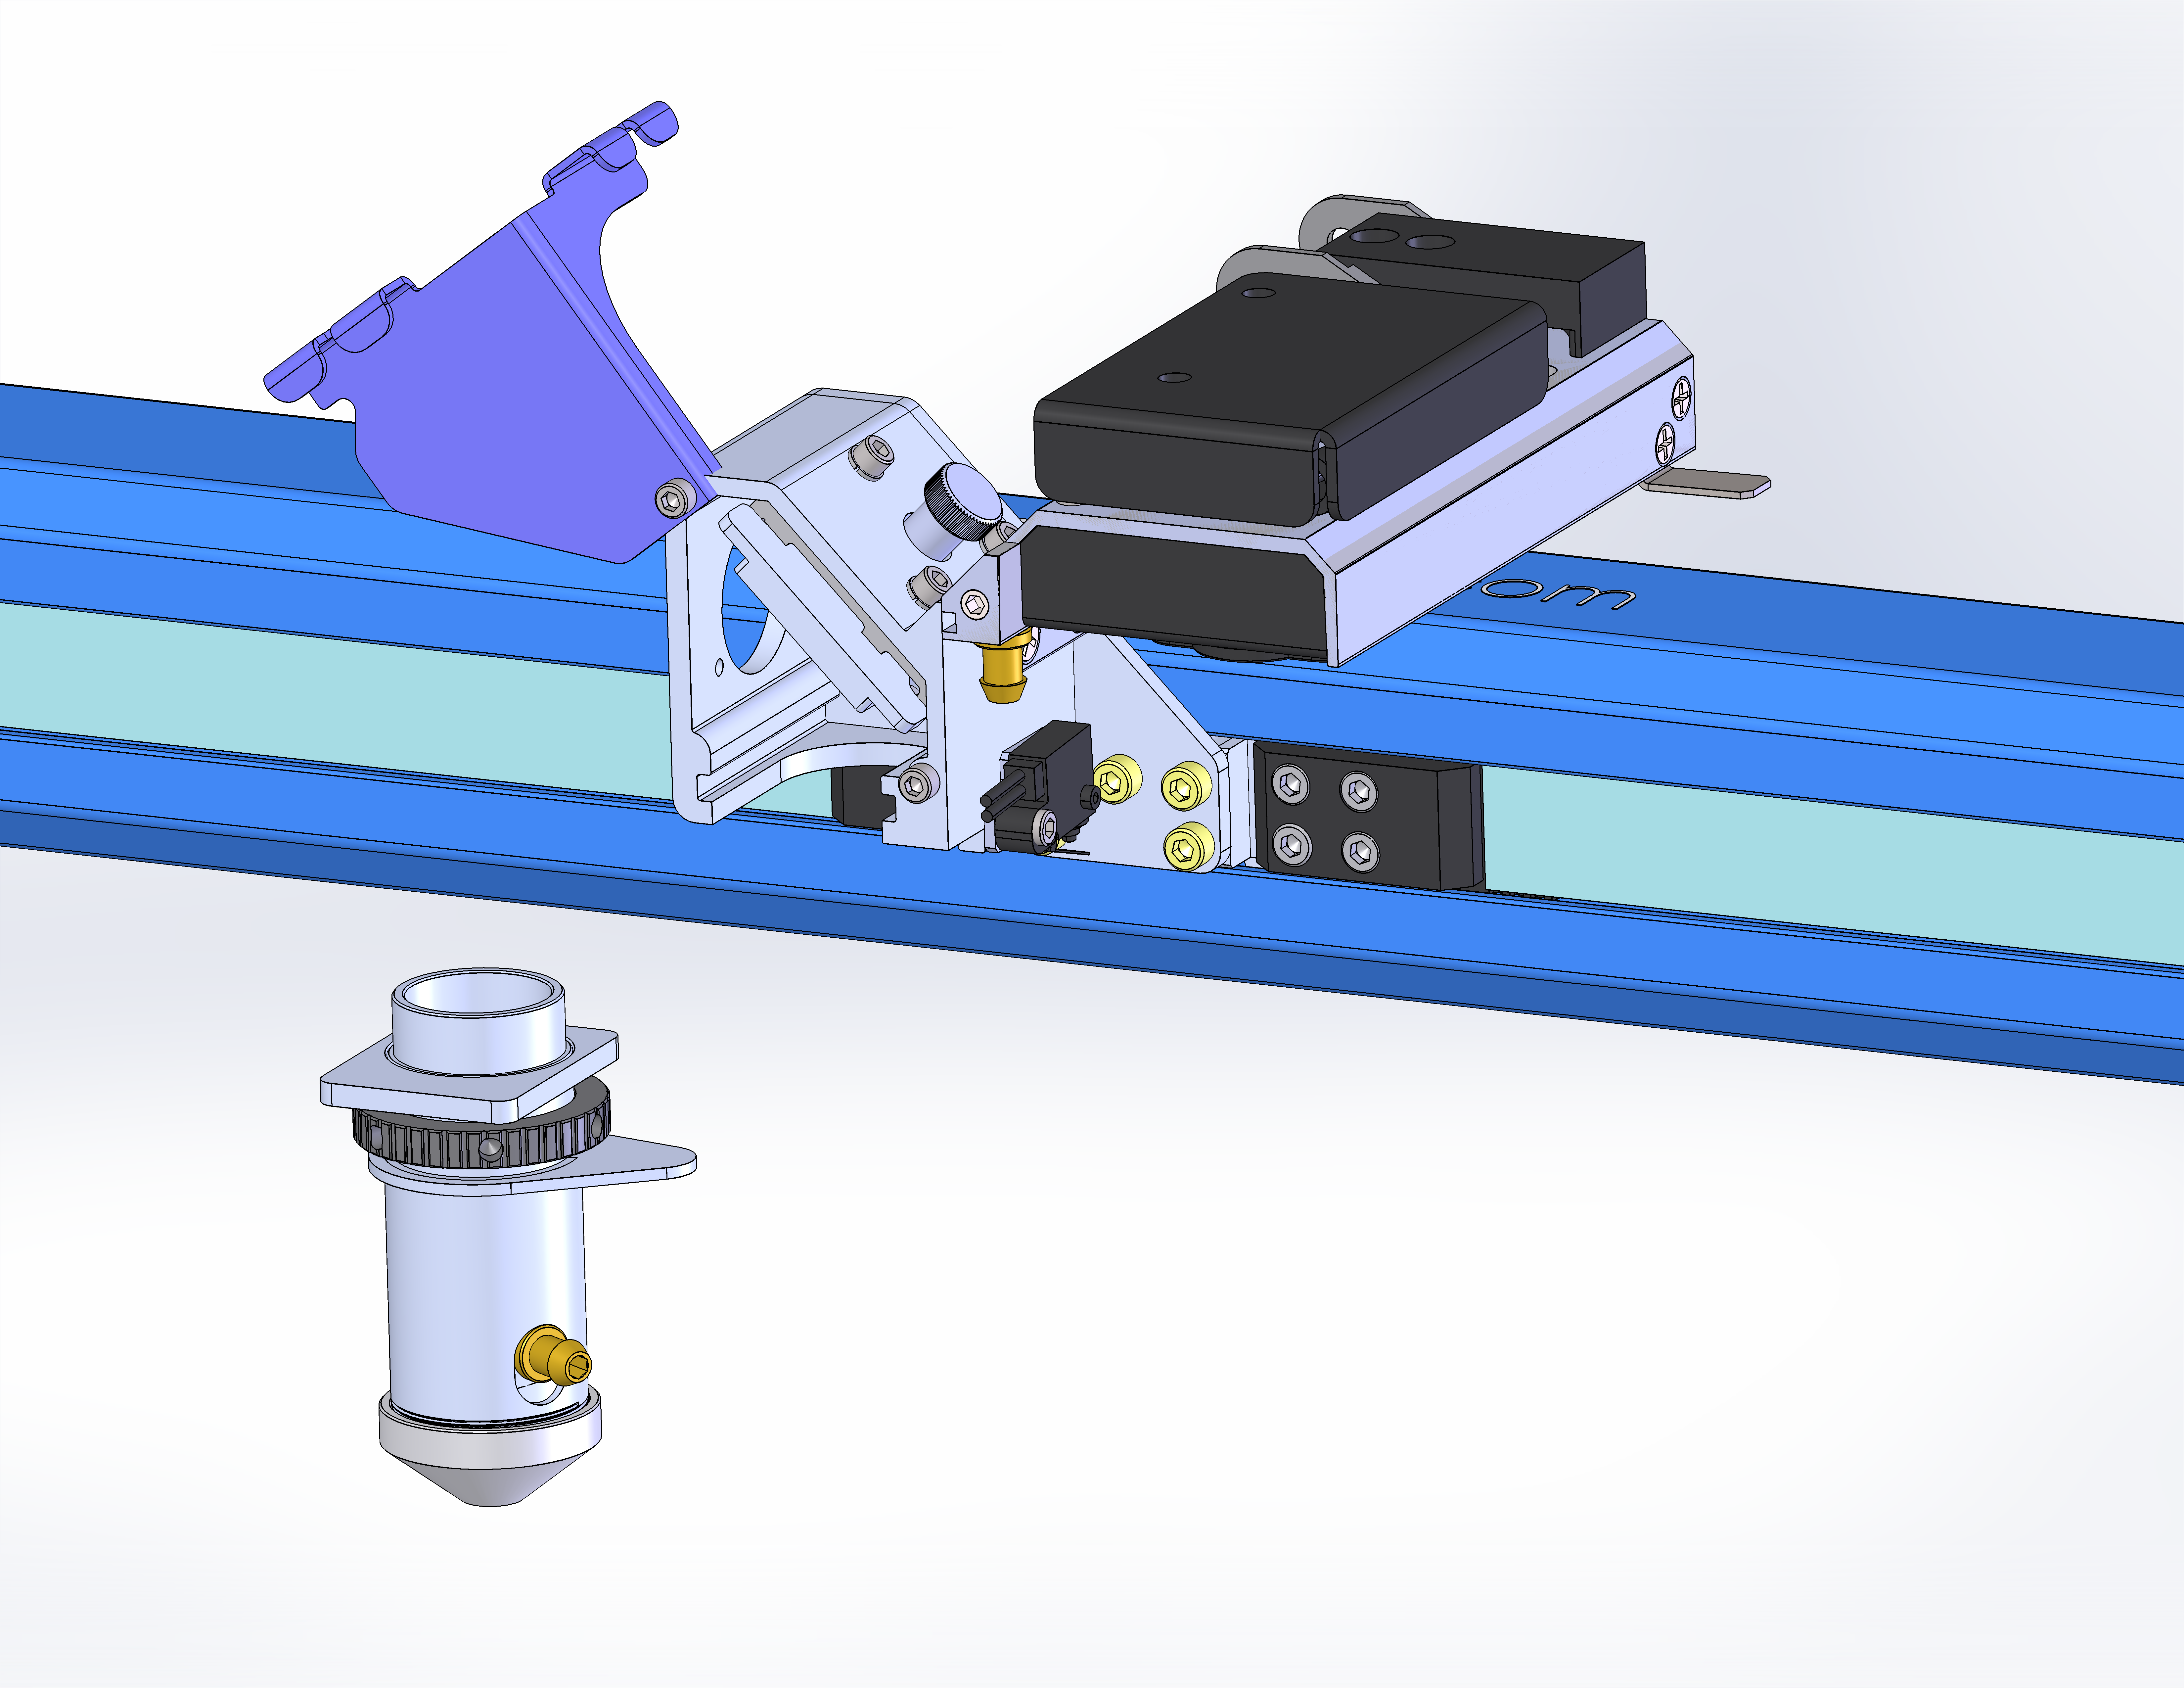
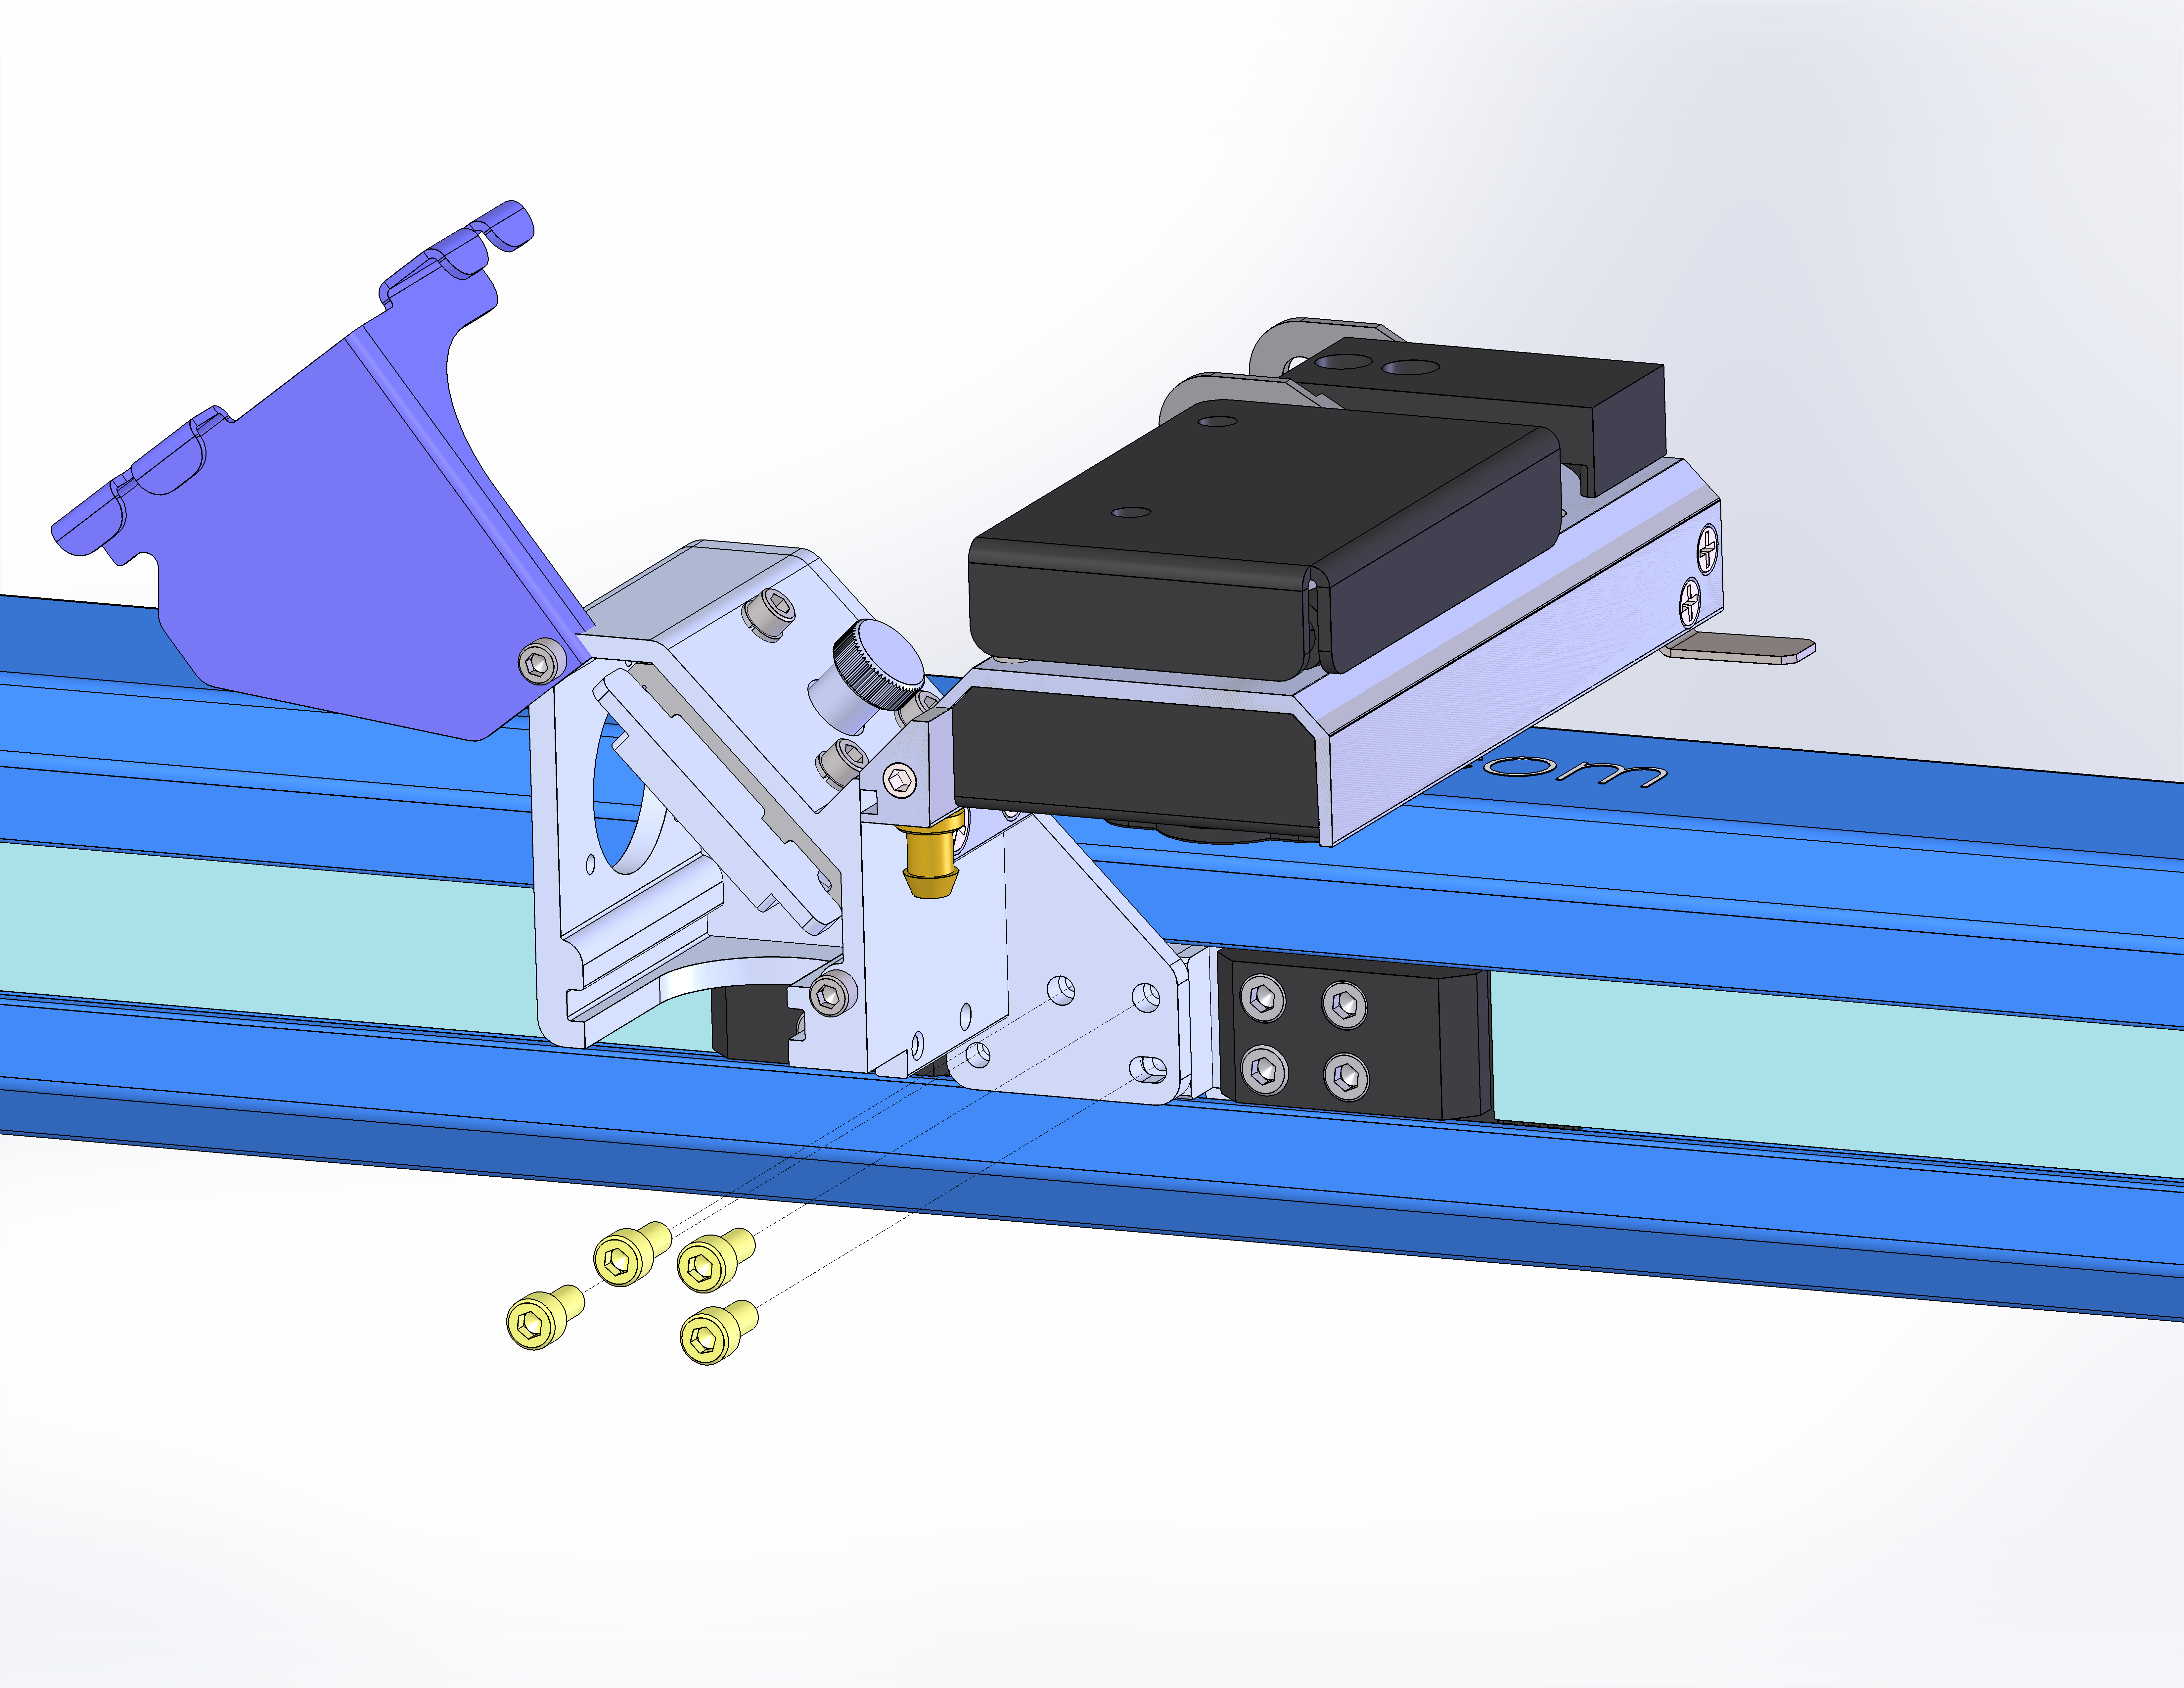
Remove the four (4) carriage screws.
-
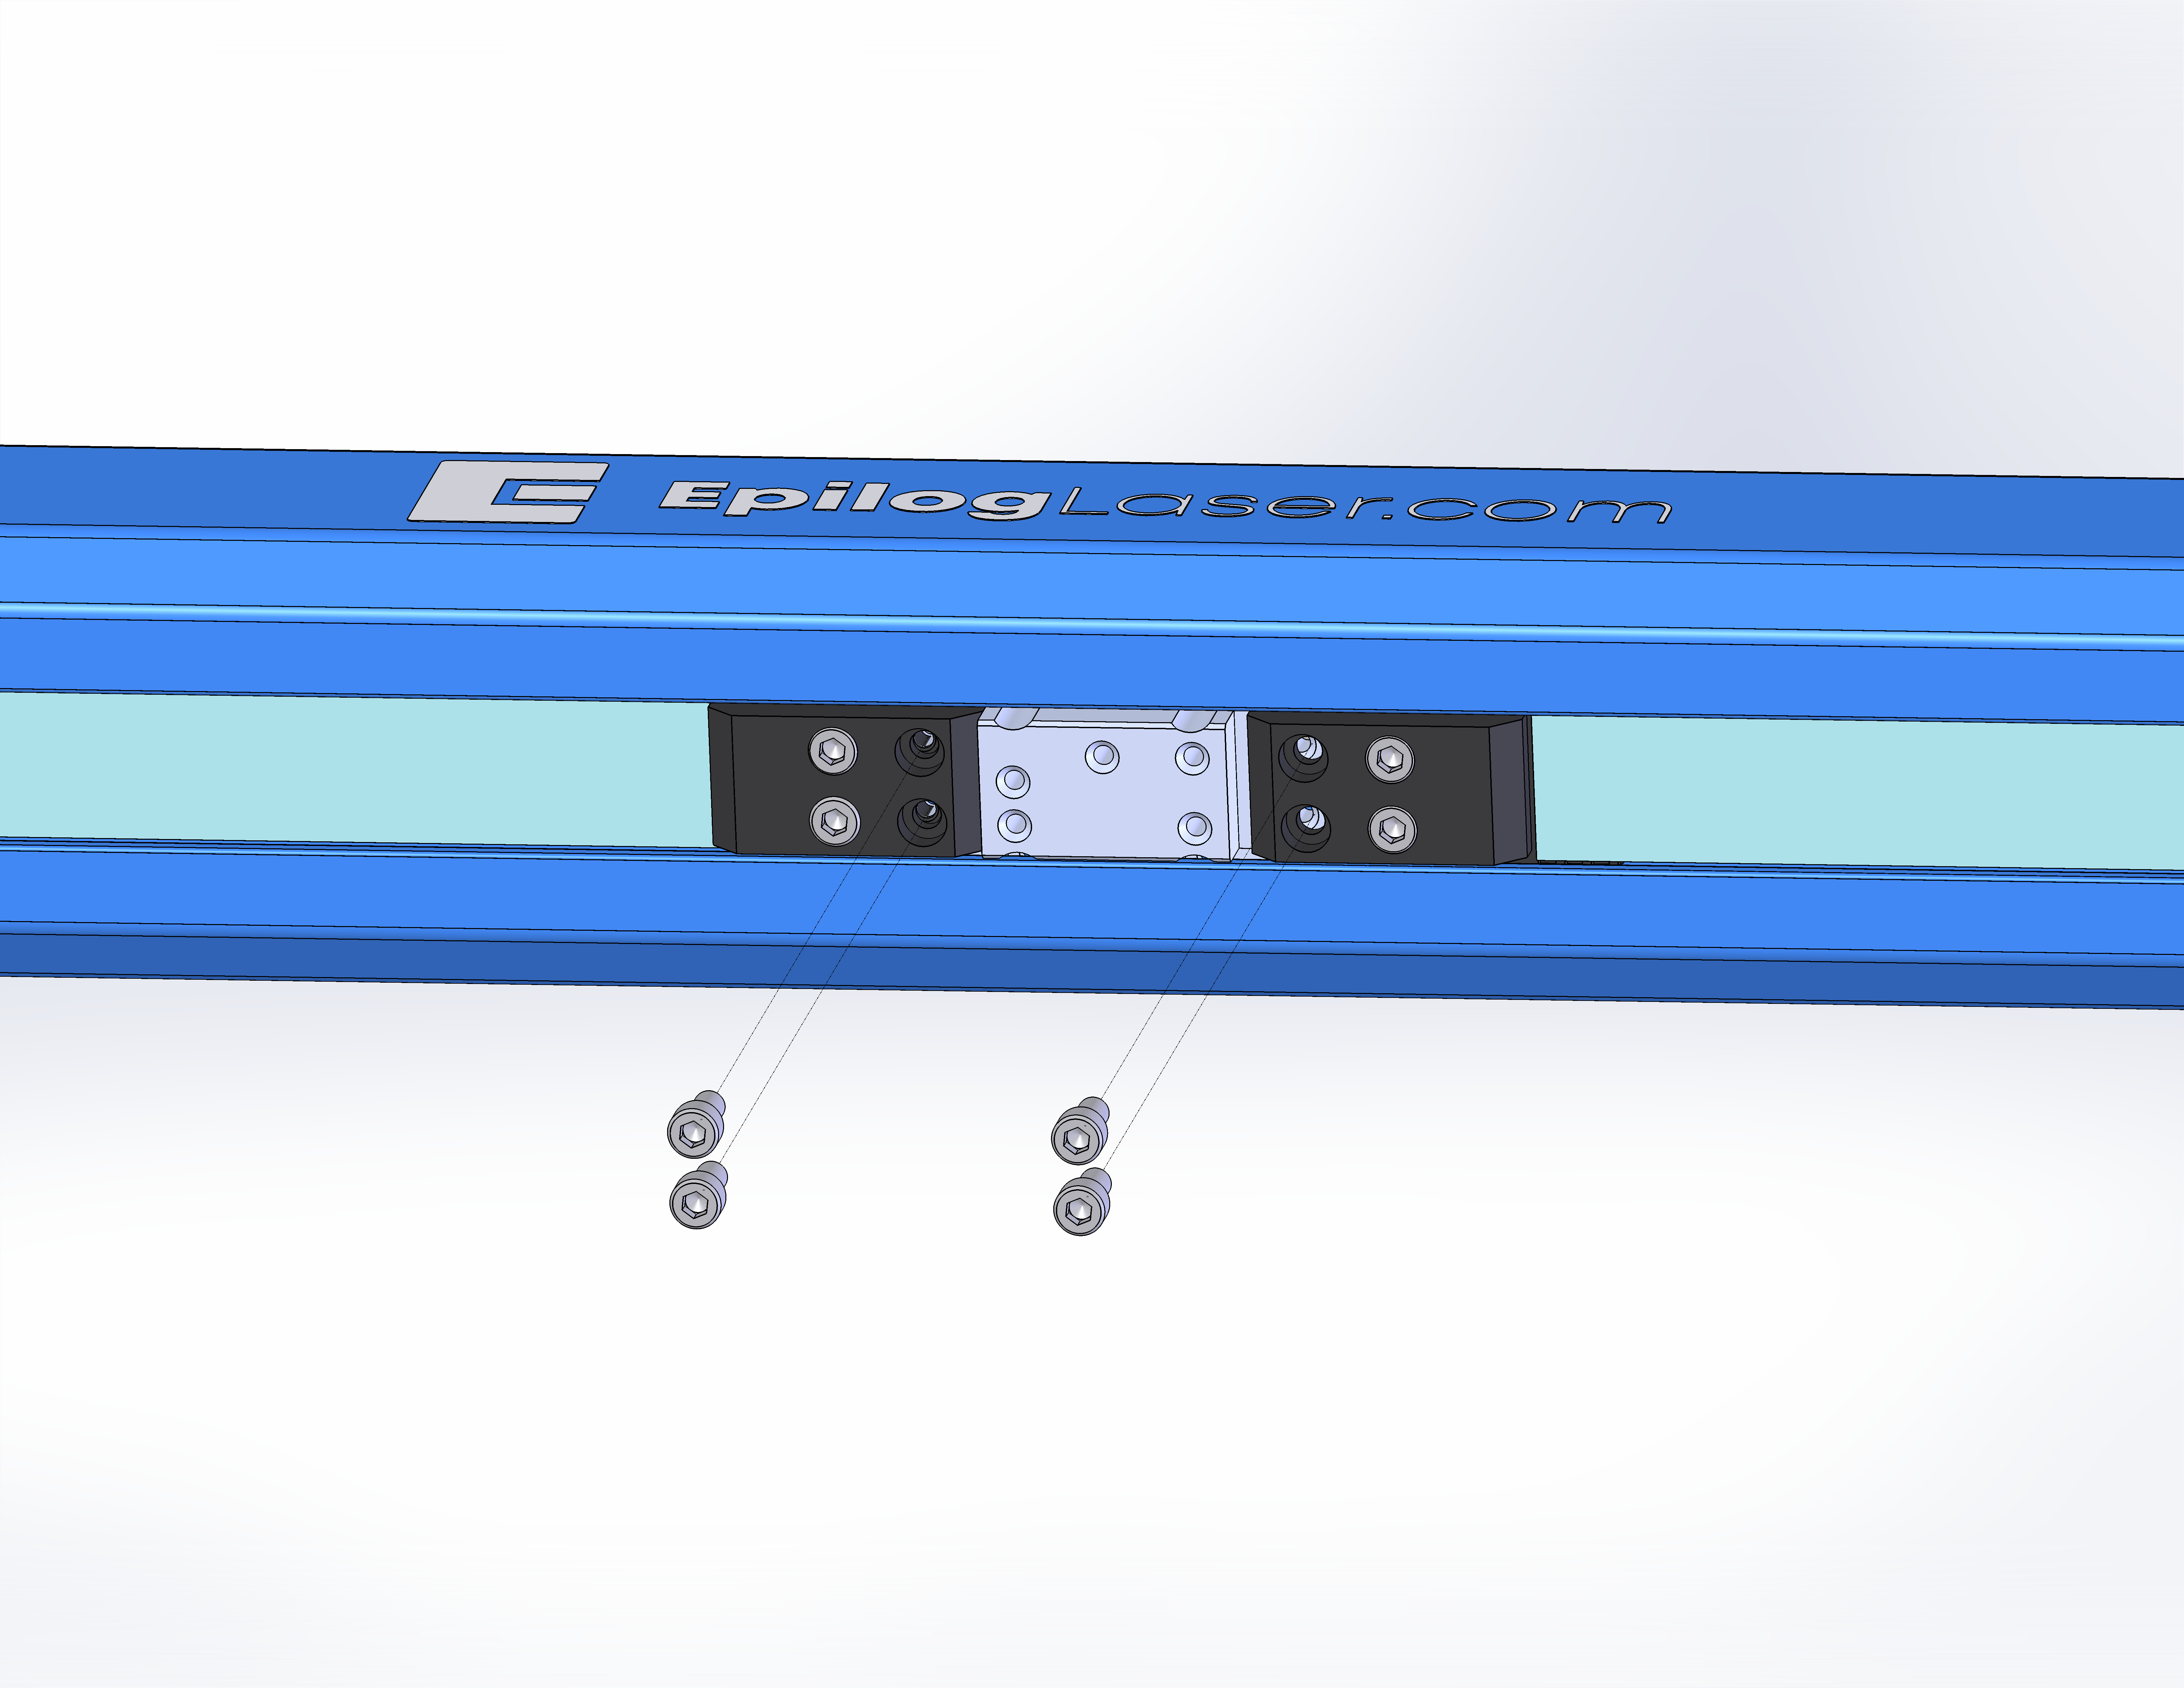
Set the carriage aside and remove the four (4) inner belt clamp screws.
-
Pull the ends of the belt out to access the linear guide.
-
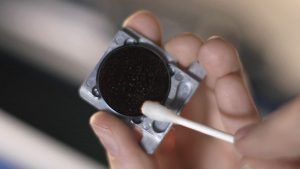
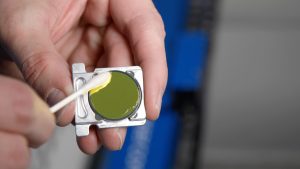
Thoroughly clean the rail using isopropyl alcohol or acetone.
-
Use a clean, lint-free cloth to dry the rail.
Greasing the Rail
-
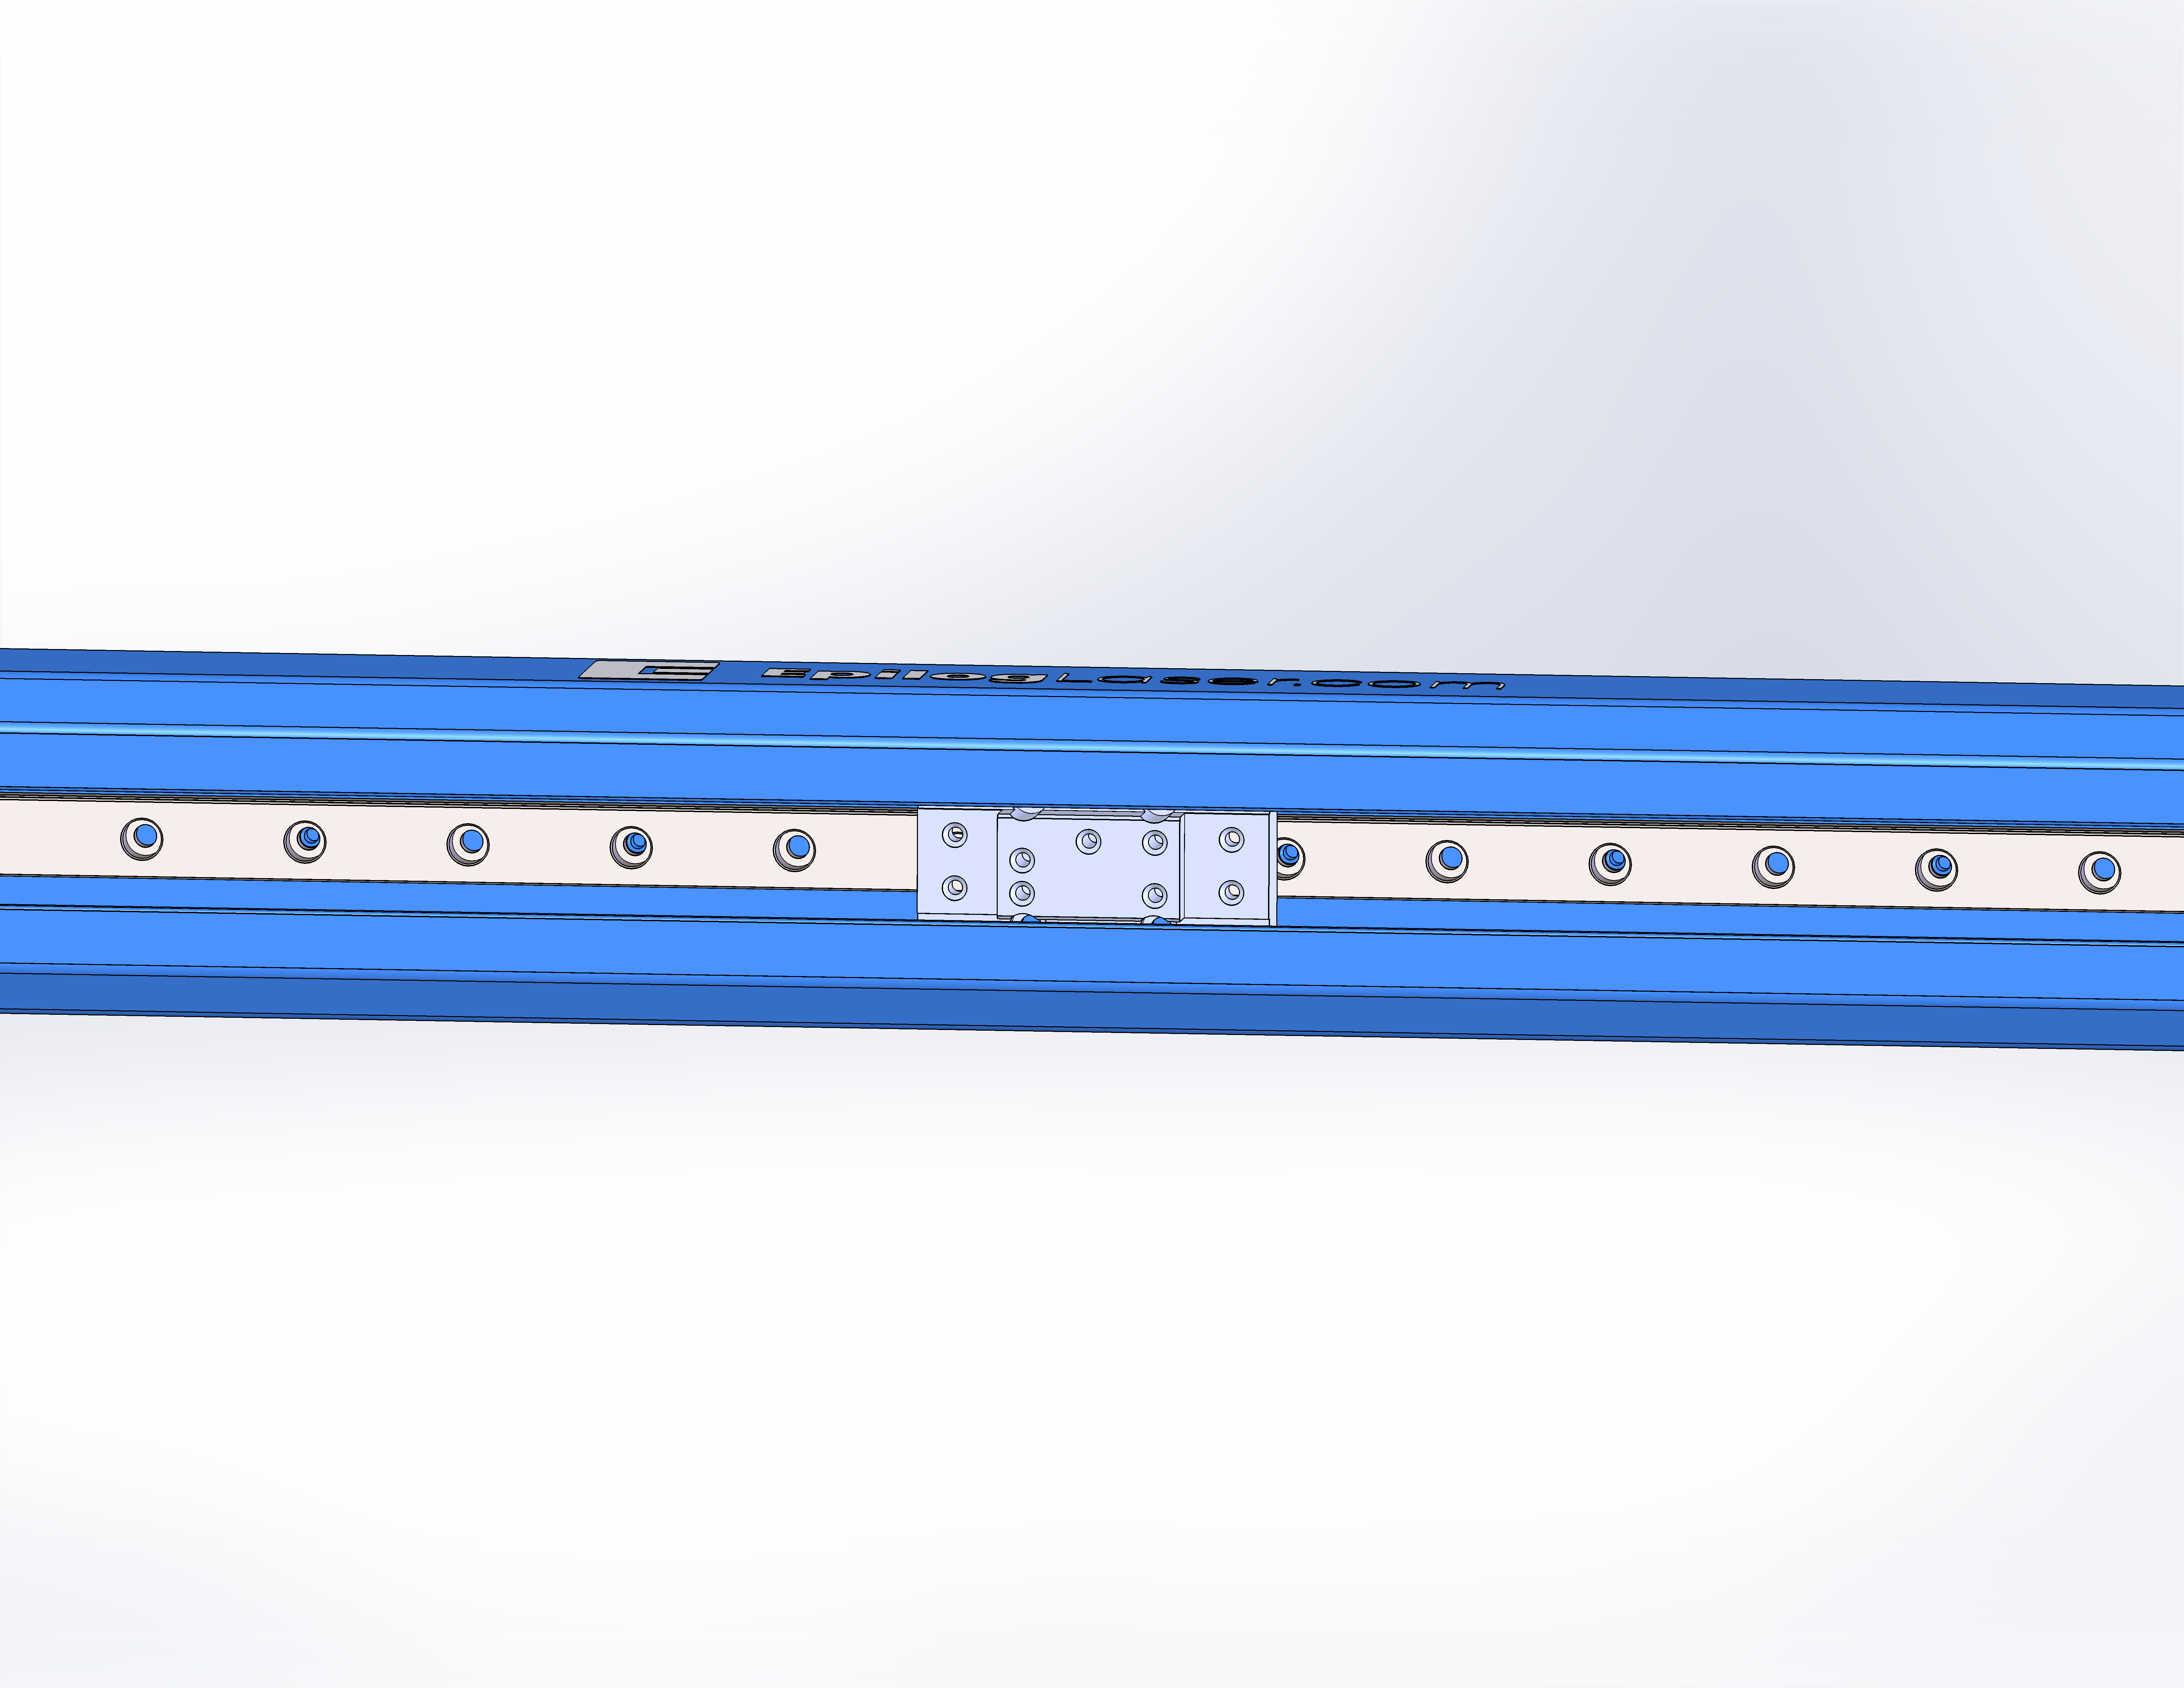
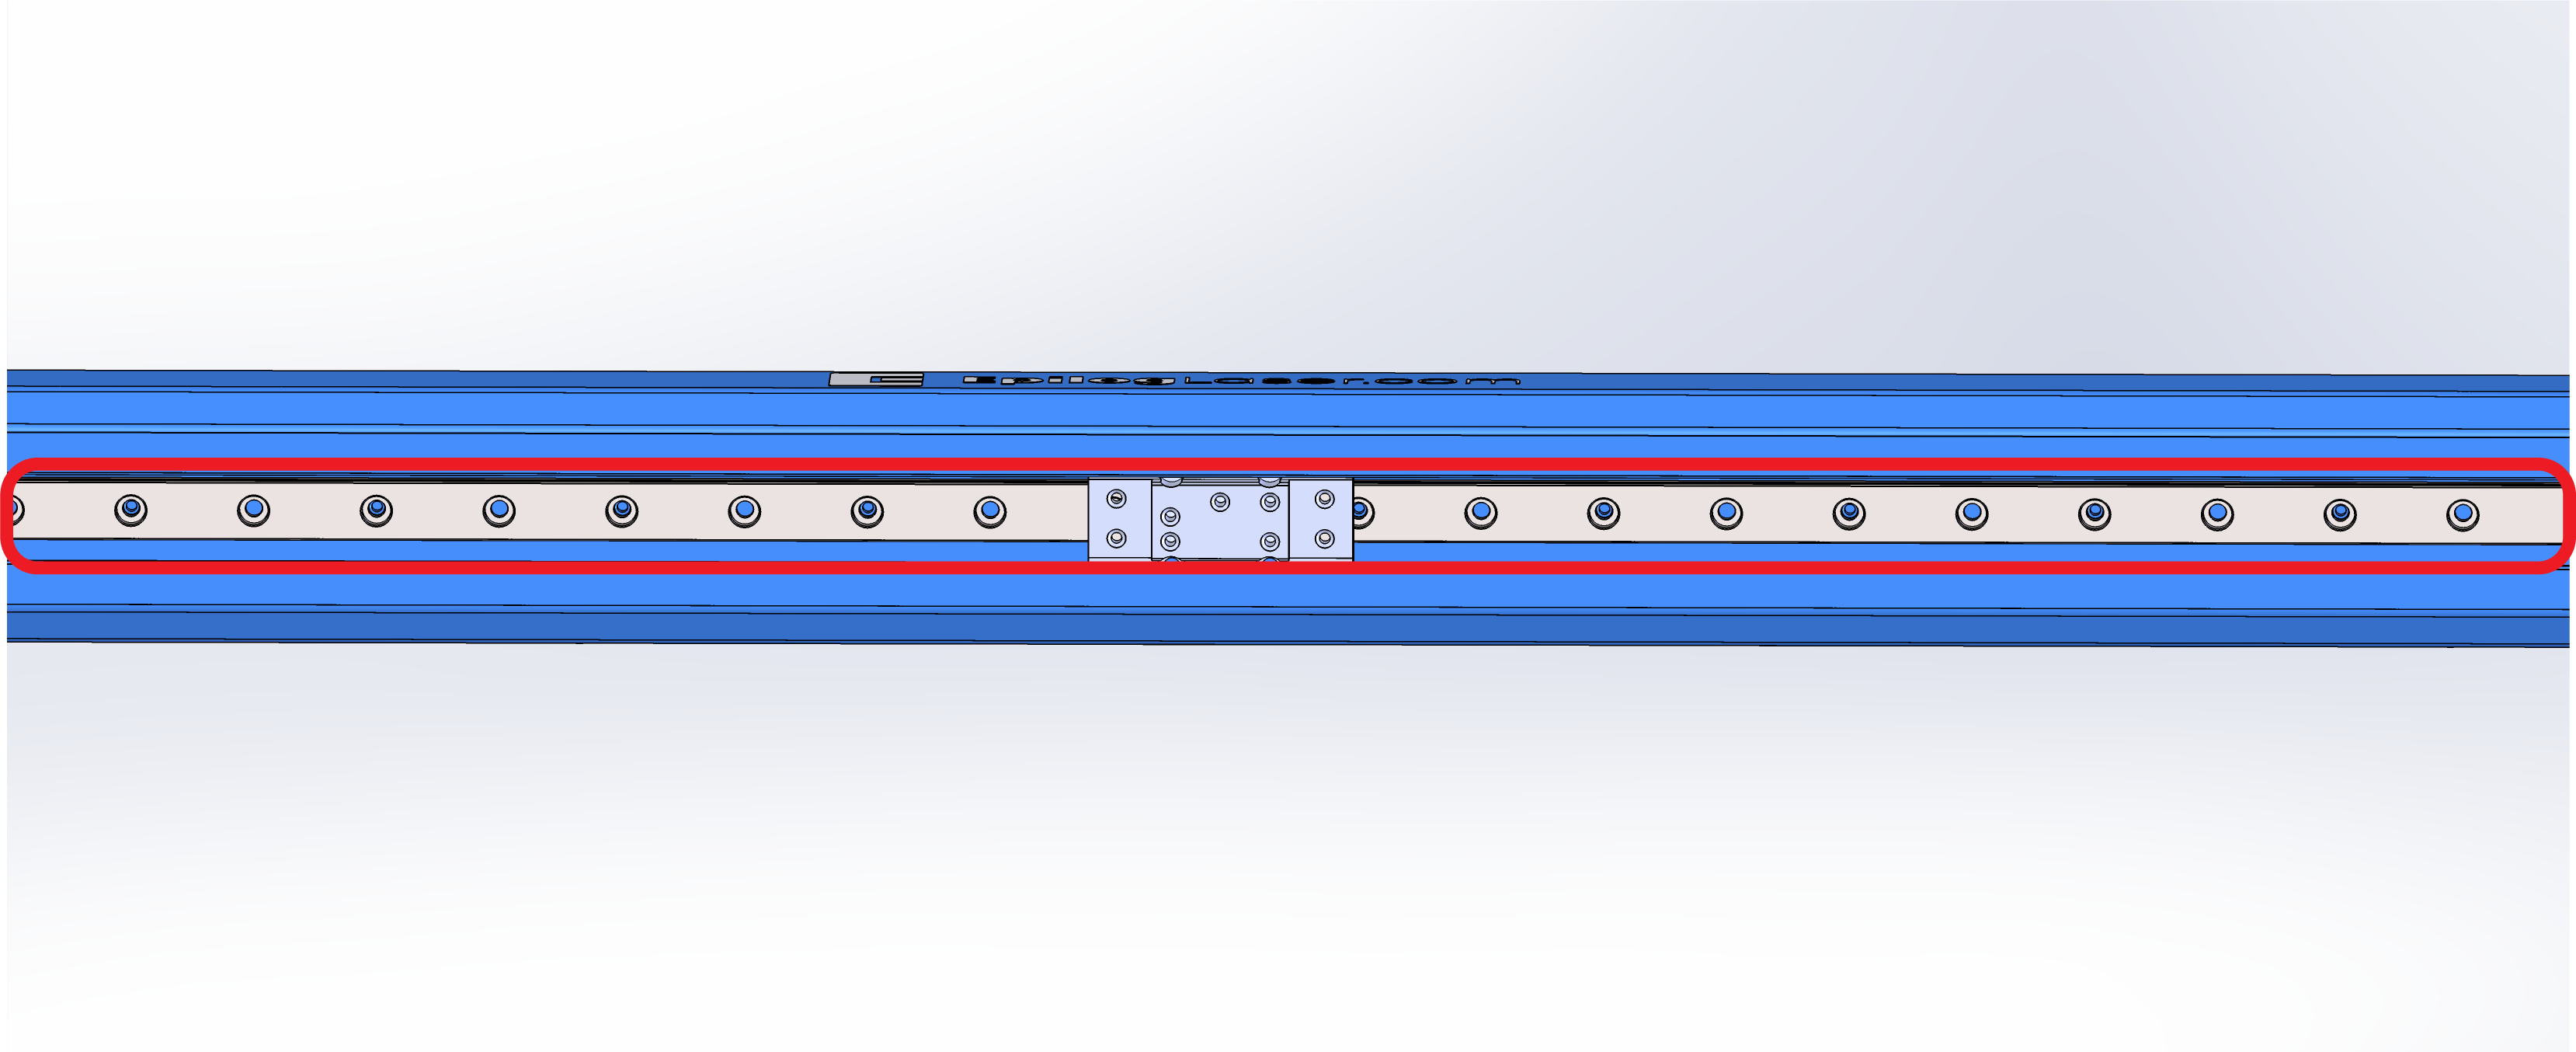
Apply four 0.5-inch beads of grease in the following locations.

-
Move the bearing block left to right over the grease.
Note: The goal of this step is to apply sufficient grease to the bearings inside the bearing block. This will ensure smooth operation and longevity of the rail.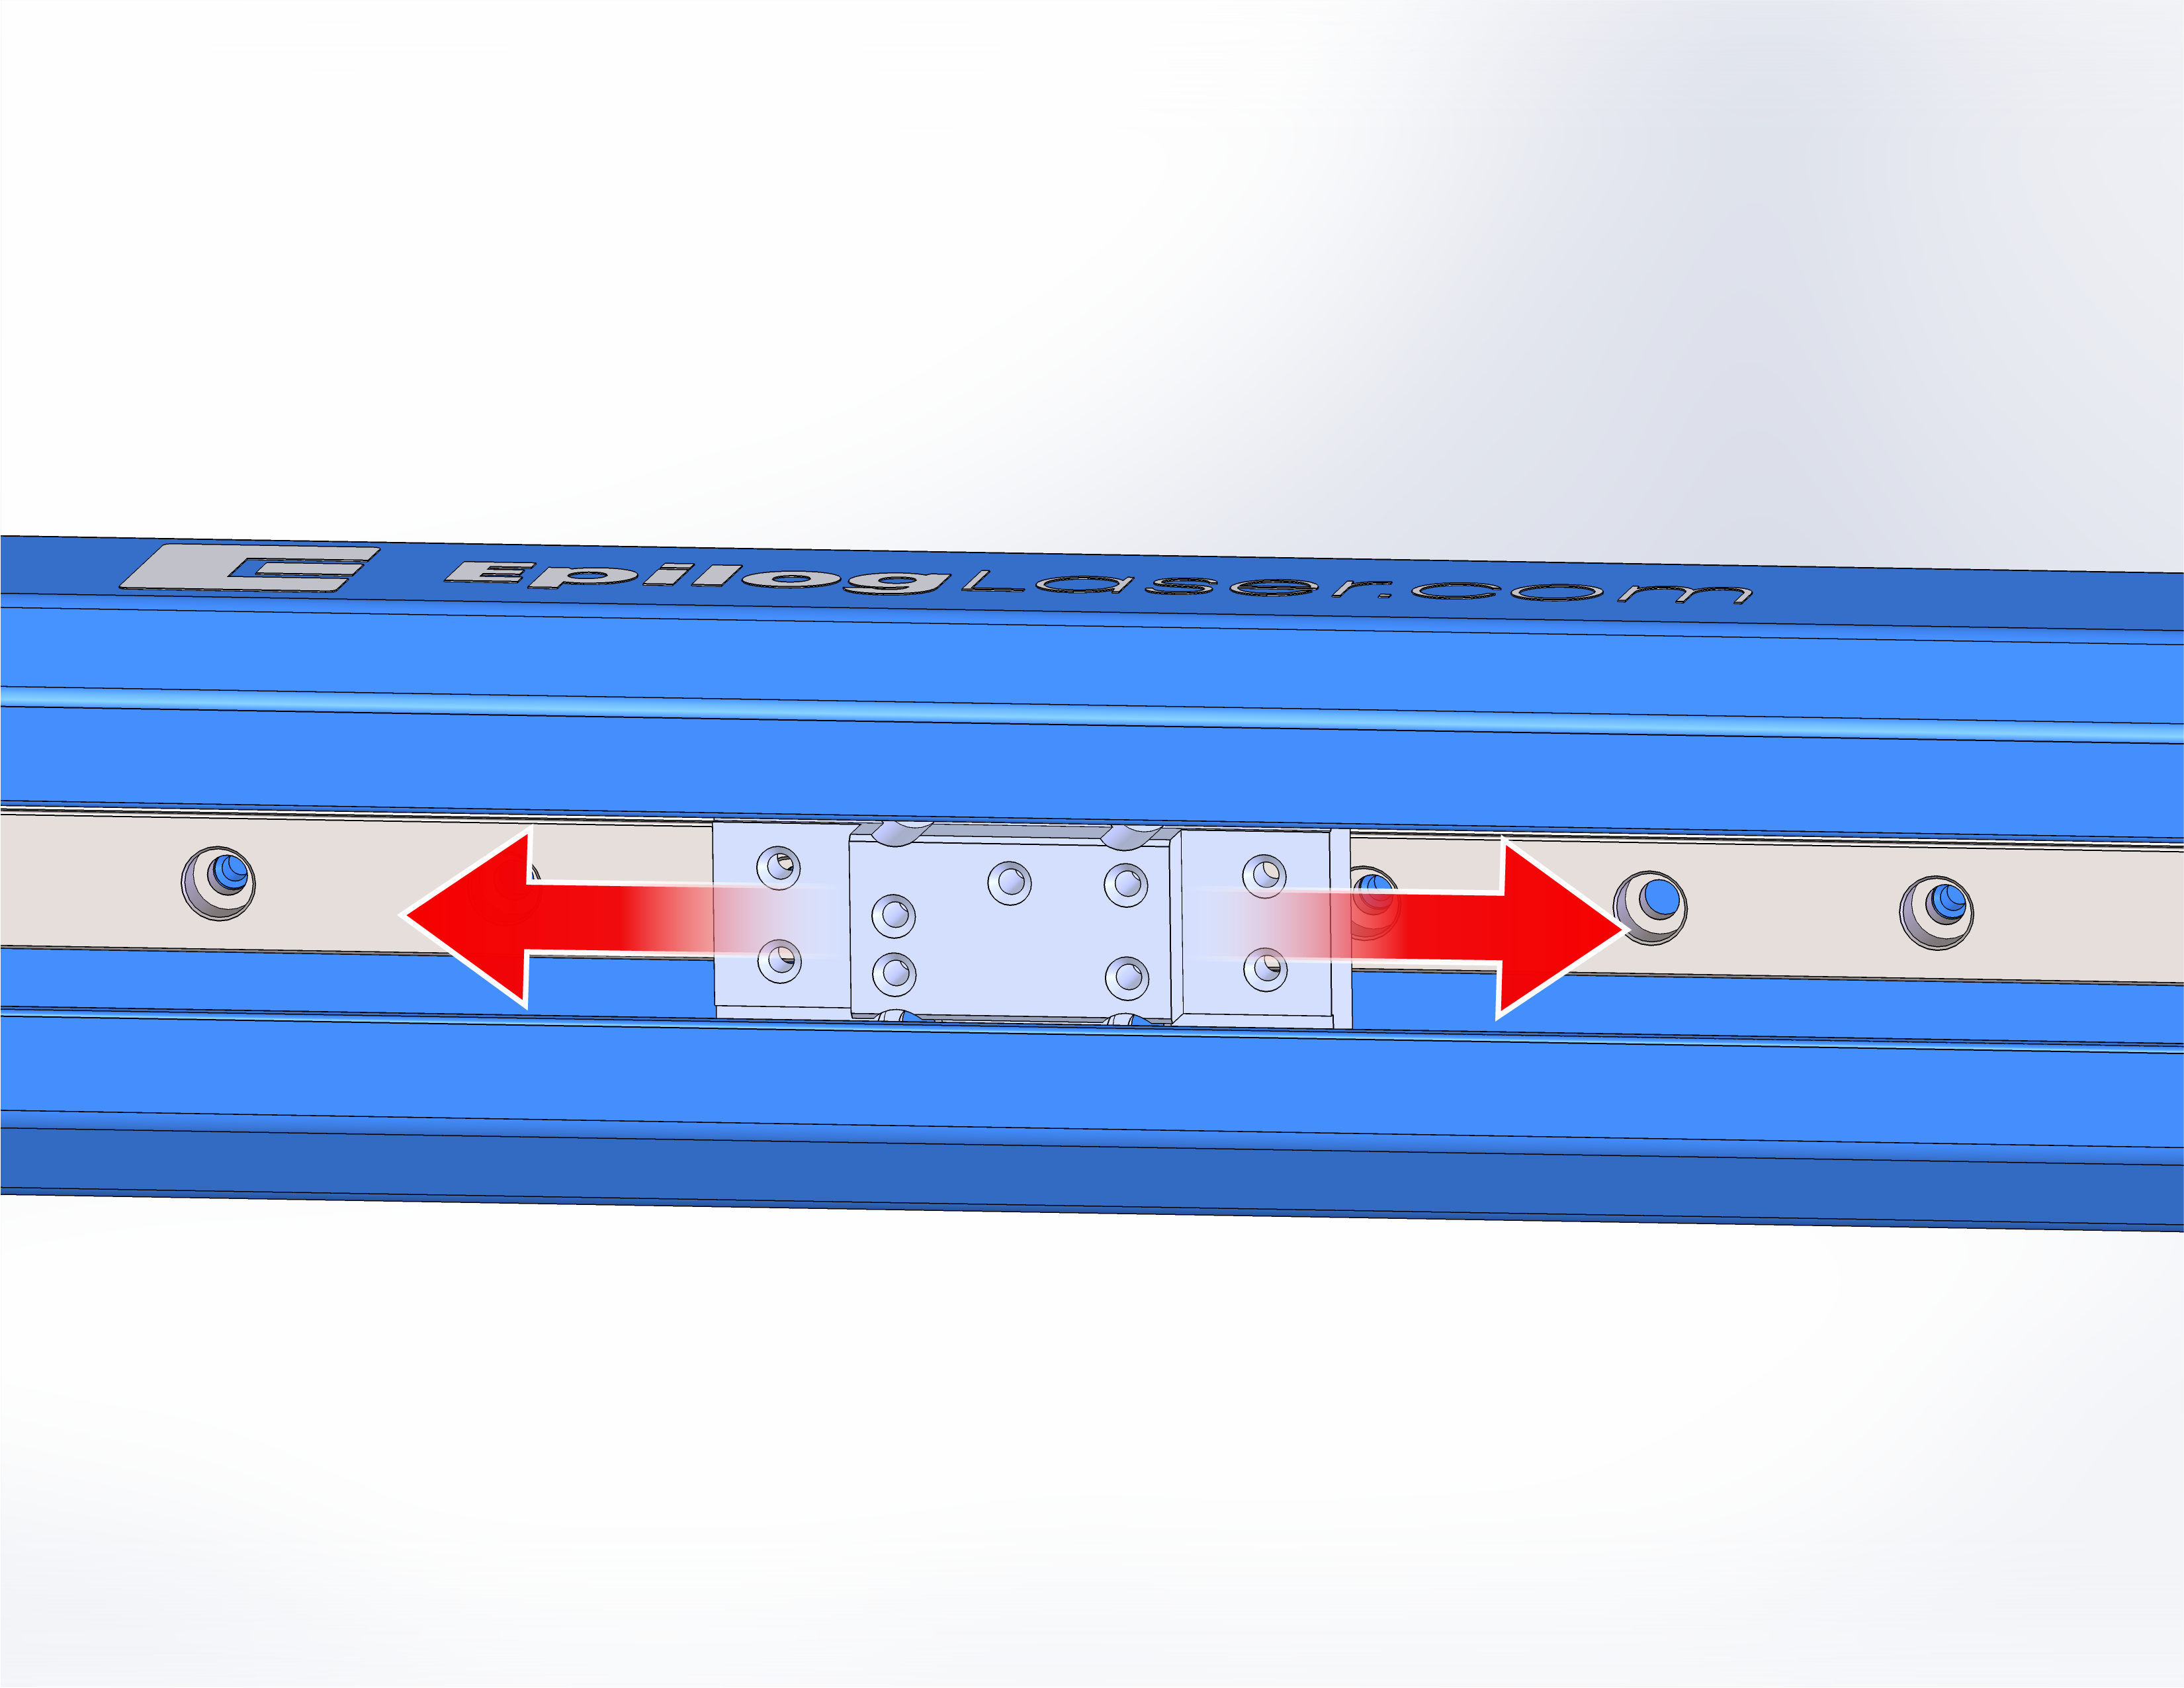
Reassembly
-
Attach the belt clamps to the bearing block.
-
Install the four (4) carriage screws.
-
Install autofocus switch using the longer screw.
Note: If you have the spacer, ensure it is in place before installing the screw.
-
Install the lens.