
This guide covers replacing the power supply on the Fusion Maker, Fusion Edge and Fusion Pro 24 and 36. It has separate procedures for the Edge 12, the Edge and Pro 24 and 36, and the 48V-to-24V fiber power supply used on fiber and dual source engravers.
Parts Required
- LC0403 – Assy, Power Supply, 600W (30 and 40 watt CO2 engravers)
- LC0404 – Assy, Power Supply, 1000W (50+ watt CO2 and dual source engravers)
- LC0437 – Power Supply, 48V to 24V DC-DC (fiber only and dual source engravers)
Tools Required
- 5/32" Allen Wrench
- Phillips Screwdriver
Safety First: Ensure the engraver is completely powered off and the power cord is disconnected before removing any panels or touching internal components.
Power Supply Locations
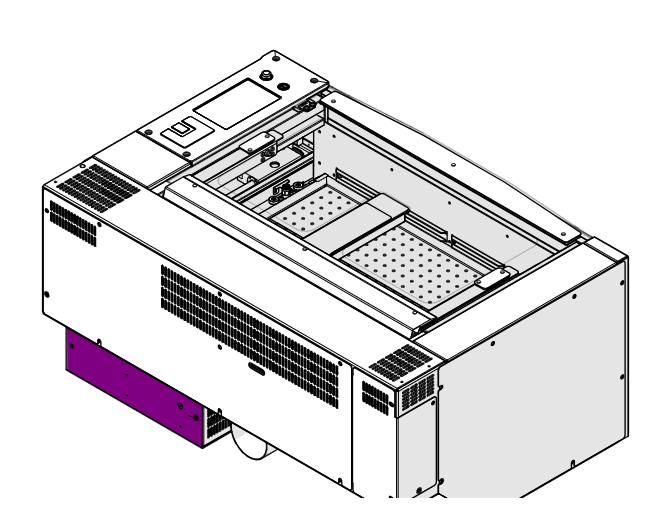
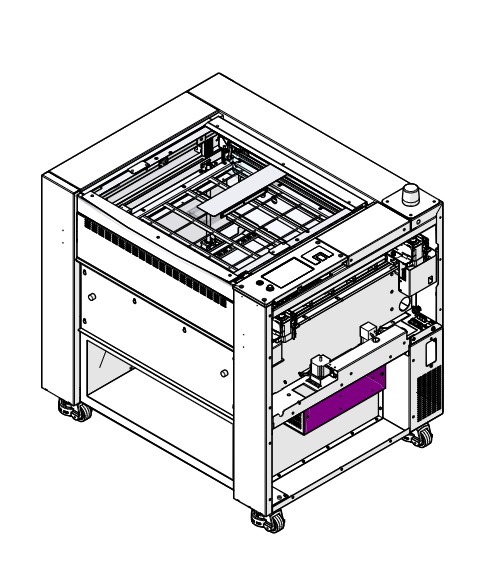
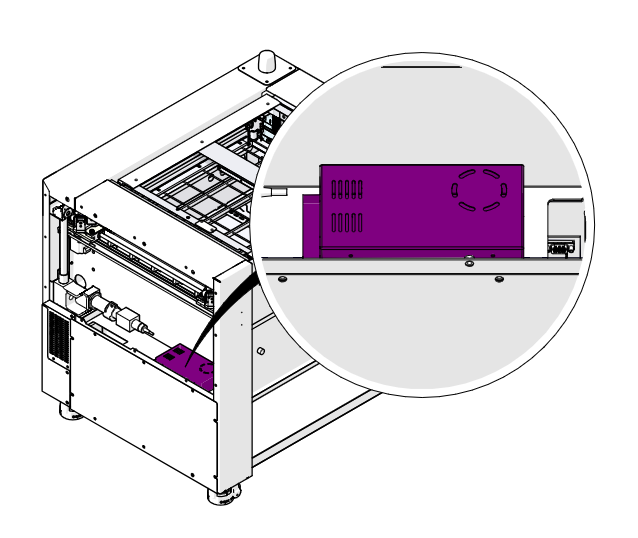
Use the section for your engraver. The power supply is highlighted in purple in each drawing.
Power Supply Locations
Edge 12 (CO2 and Fiber)
Edge / Pro 24 and 36
Edge / Pro 24 and 36 Fiber Source
Power Supply Replacement (Edge 12)
Power Supply Removal
Turn Off Engraver
Turn off the engraver.

Disconnect from Power
Unplug the engraver from its power source.
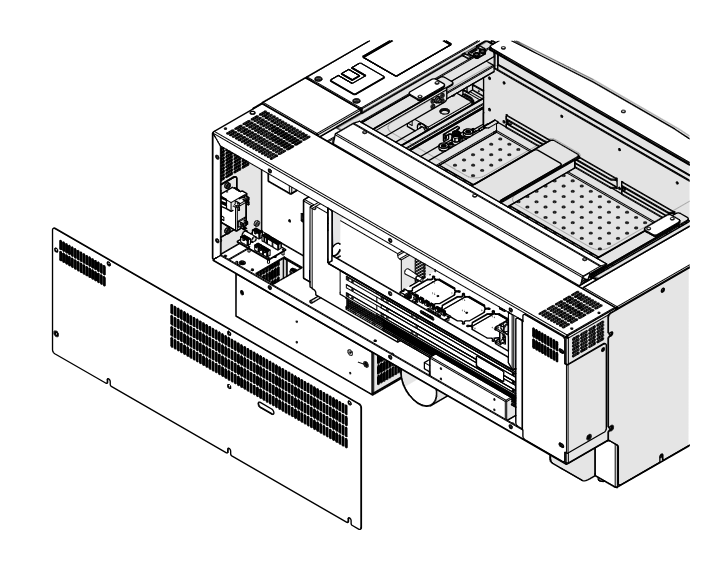
Remove Rear Panel
Remove the rear panel of the engraver.
Disconnect at Distribution Board
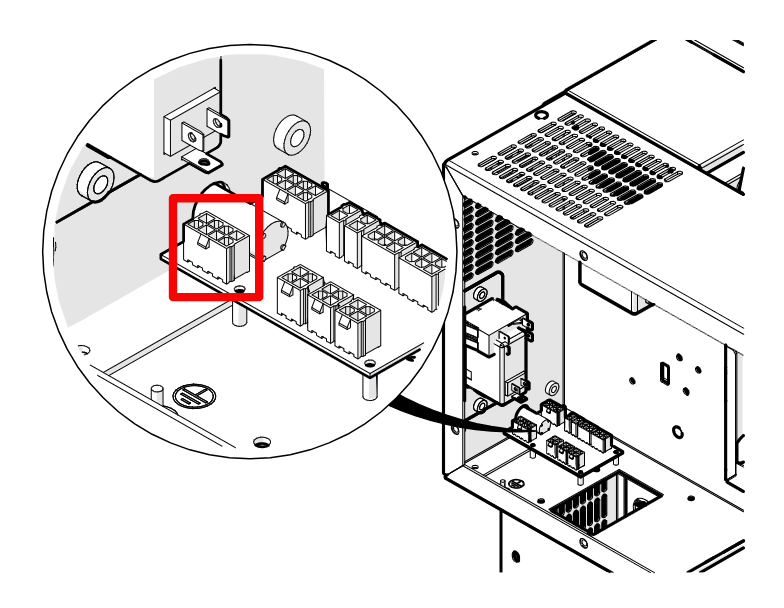
Disconnect the power supply harness from the power distribution board (outlined in red).
Disconnect from Main Harness
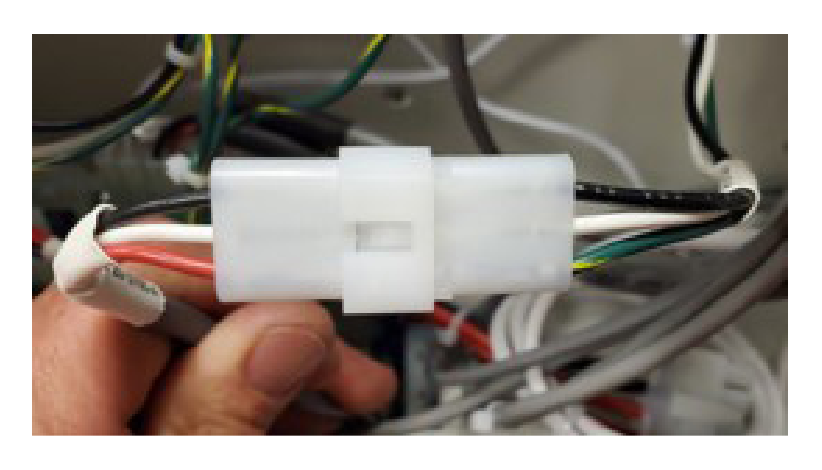
Follow the power supply harness from the square cutout in the lower left corner of the engraver and disconnect it from the main electrical harness.
Remove Mounting Screws
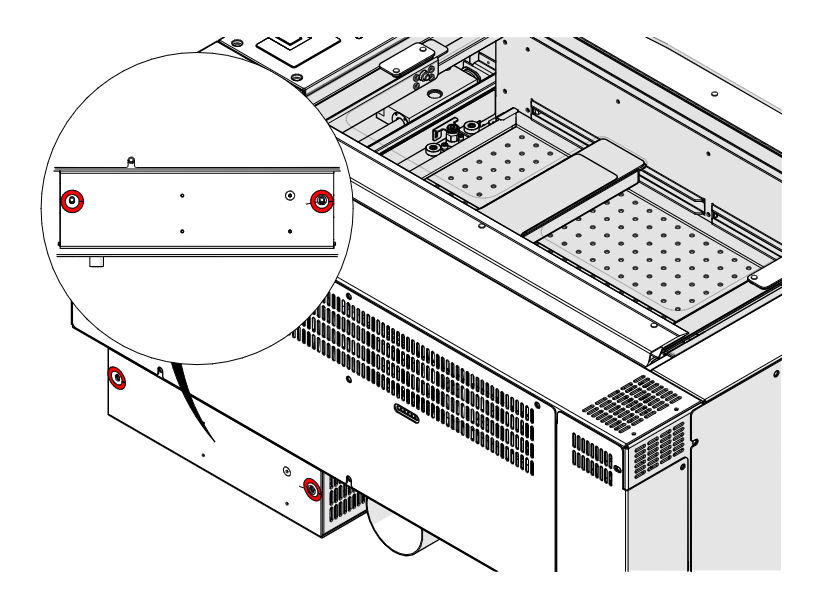
Loosen and remove the two 5/32" Allen screws that secure the power supply assembly to the engraver chassis (circled in red).
Remove the Assembly
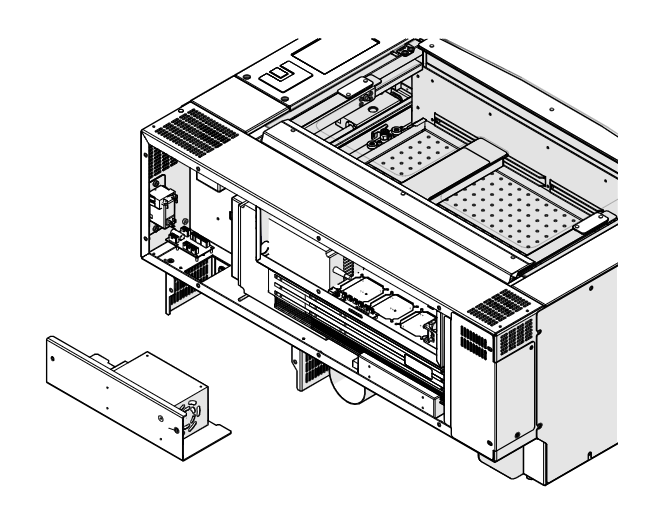
Remove the power supply assembly from the engraver.
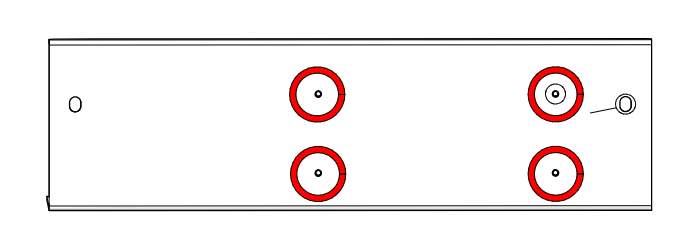
Remove Housing Screws
Loosen and remove the four Phillips screws that secure the power supply to the power supply housing (circled in red).
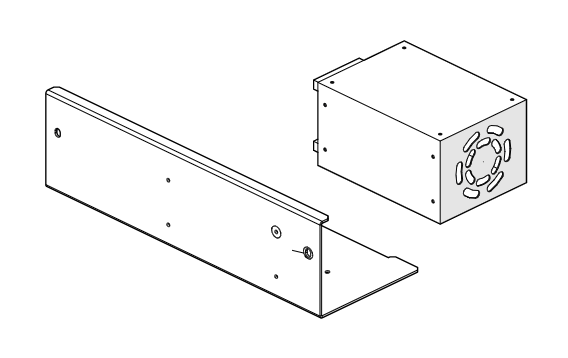
Separate the Power Supply
Separate the power supply from the power supply housing.
Power Supply Installation
Install the New Power Supply
Place the new power supply in the power supply housing. Install and tighten the four Phillips screws that secure it.
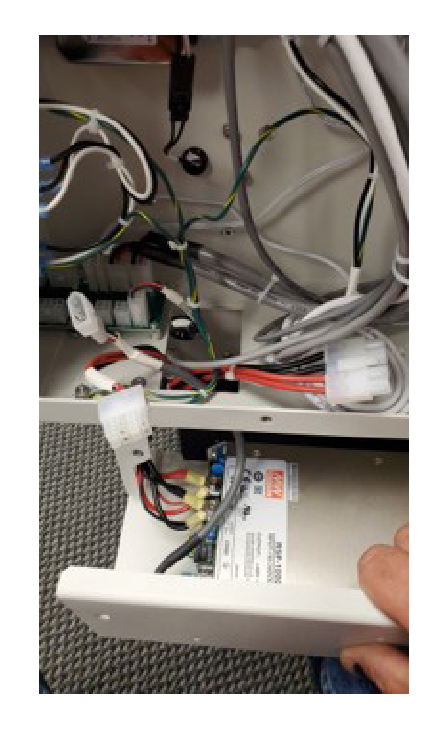
Pass the Harnesses Through
Pass the power supply harnesses through the square cutout in the lower left corner of the engraver.
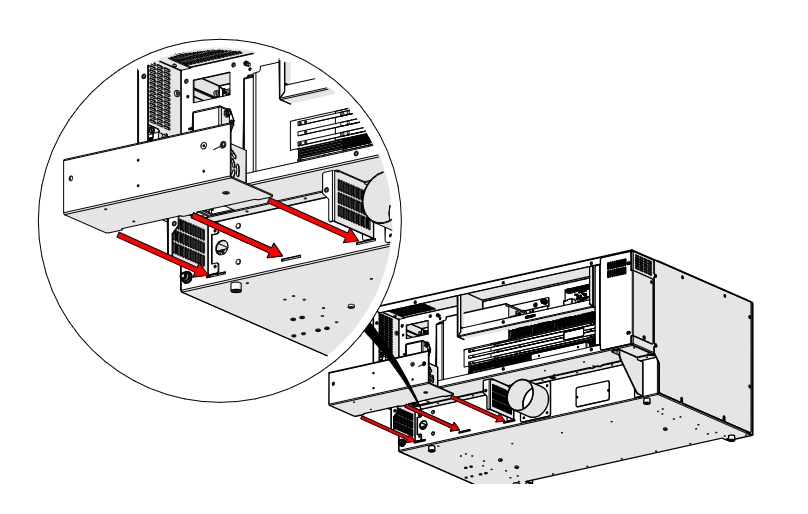
Position the Assembly
Position the power supply assembly so the three tabs on the housing enter the cutouts in the engraver chassis (red arrows).
Install Mounting Screws
Install and tighten the two 5/32" Allen screws that secure the power supply assembly to the chassis.
Connect to Main Harness
Connect the power supply harness to the main harness.
Connect at Distribution Board
Connect the power supply harness to the power distribution board.
Install Rear Panel
Install the rear panel of the engraver.

Power On
Reconnect the engraver to power and turn it on.
Power Supply Replacement (Edge / Pro 24 and 36)
Power Supply Removal
Turn Off Engraver
Turn off the engraver.
Disconnect from Power
Unplug the engraver from its power source.
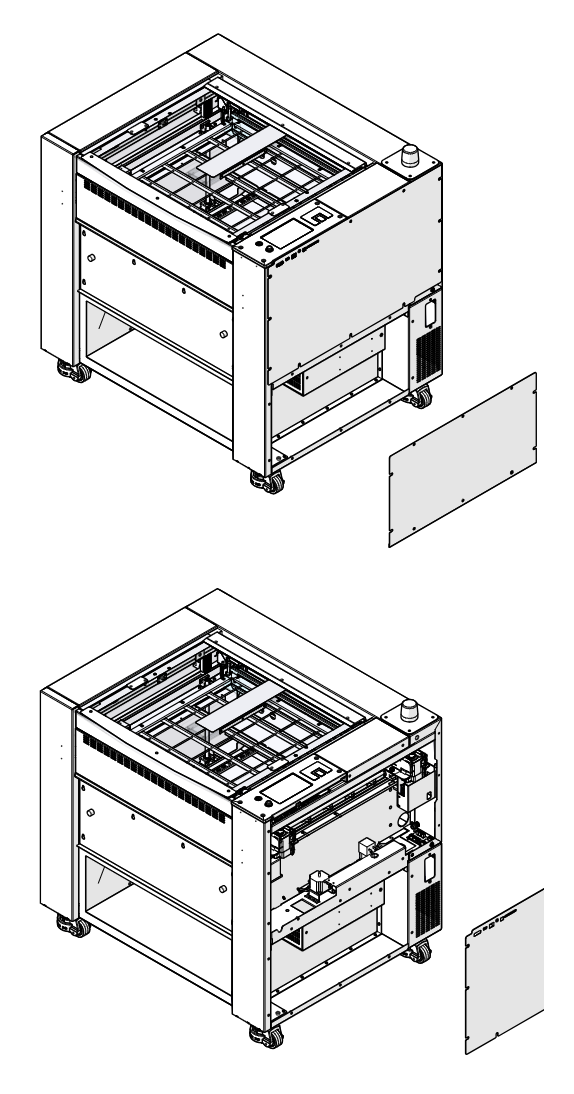
Remove Right Panels
Remove the upper and lower right panels of the engraver.
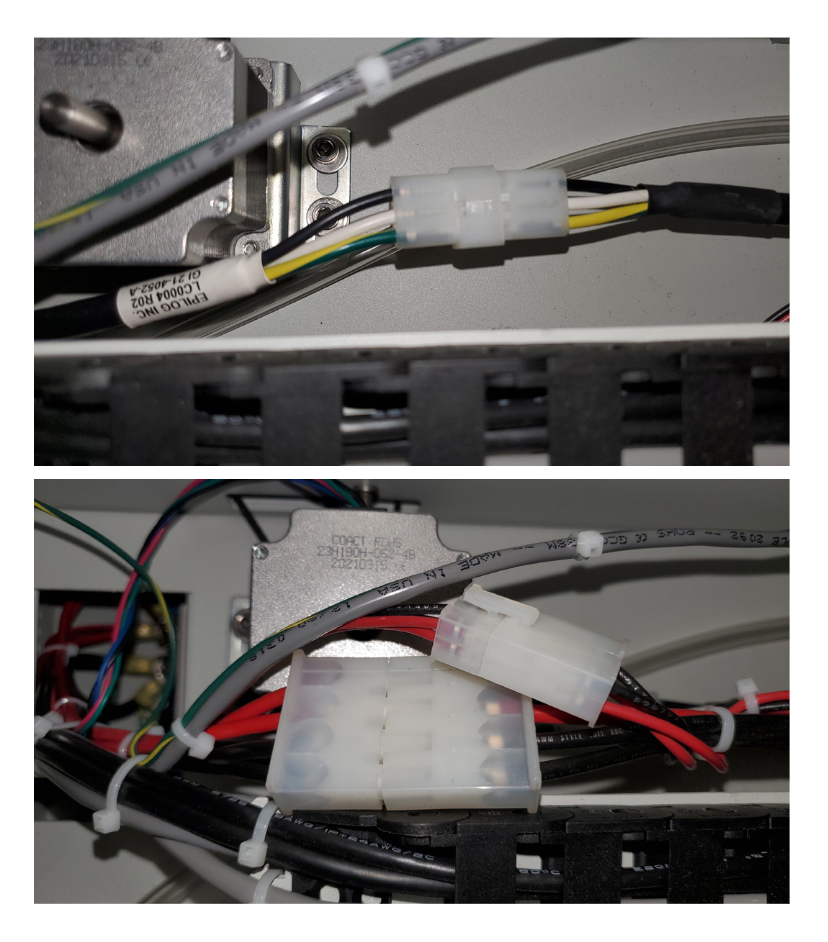
Disconnect the Harnesses
Follow the power supply harness from the square cutout in the engraver chassis and disconnect the three power supply harnesses.
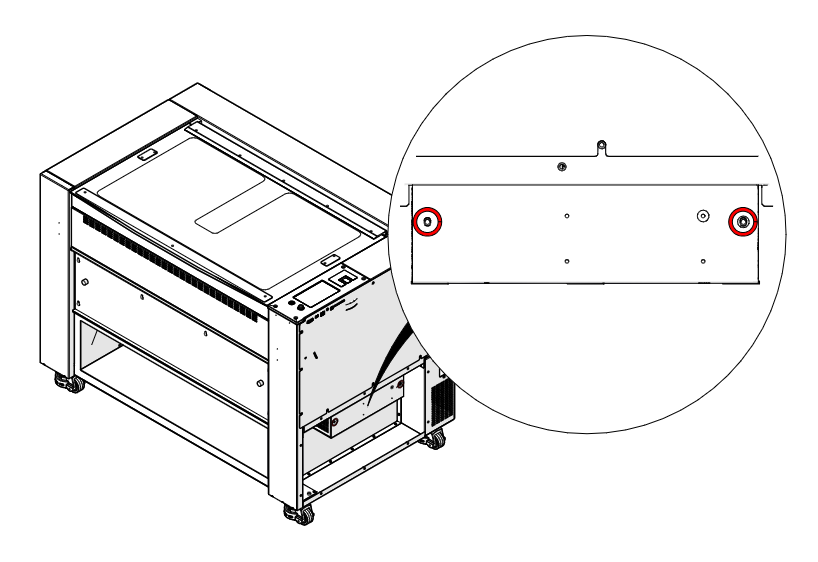
Remove Mounting Screws
Loosen and remove the two 5/32" Allen screws that secure the power supply assembly to the engraver chassis (circled in red).
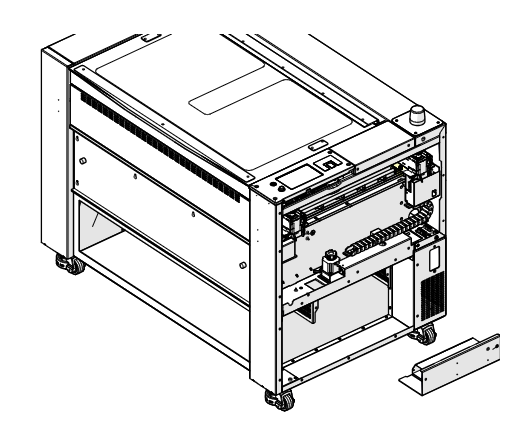
Remove the Assembly
Remove the power supply assembly from the engraver.
Remove Housing Screws
Loosen and remove the four Phillips screws that secure the power supply to the power supply housing (circled in red).
Separate the Power Supply
Separate the power supply from the power supply housing.
Power Supply Installation
Install the New Power Supply
Place the new power supply in the power supply housing. Install and tighten the four Phillips screws that secure it.
Connect the Harnesses
Feed the power supply harness through the square cutout in the engraver chassis and connect the three power supply harnesses.
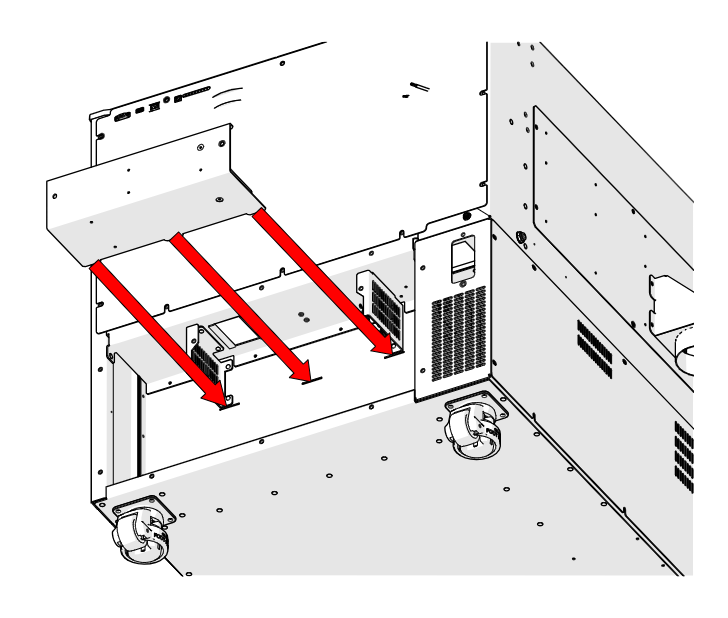
Position the Assembly
Position the power supply assembly so the three tabs on the housing enter the cutouts in the engraver chassis (red arrows).
Install Mounting Screws
Install and tighten the two 5/32" Allen screws that secure the power supply assembly to the chassis.
Install Right Panels
Install the upper and lower right panels of the engraver.
Power On
Reconnect the engraver to power and turn it on.
Fiber Power Supply Replacement
Fiber Power Supply Removal
Turn Off Engraver
Turn off the engraver.
Disconnect from Power
Unplug the engraver from its power source.
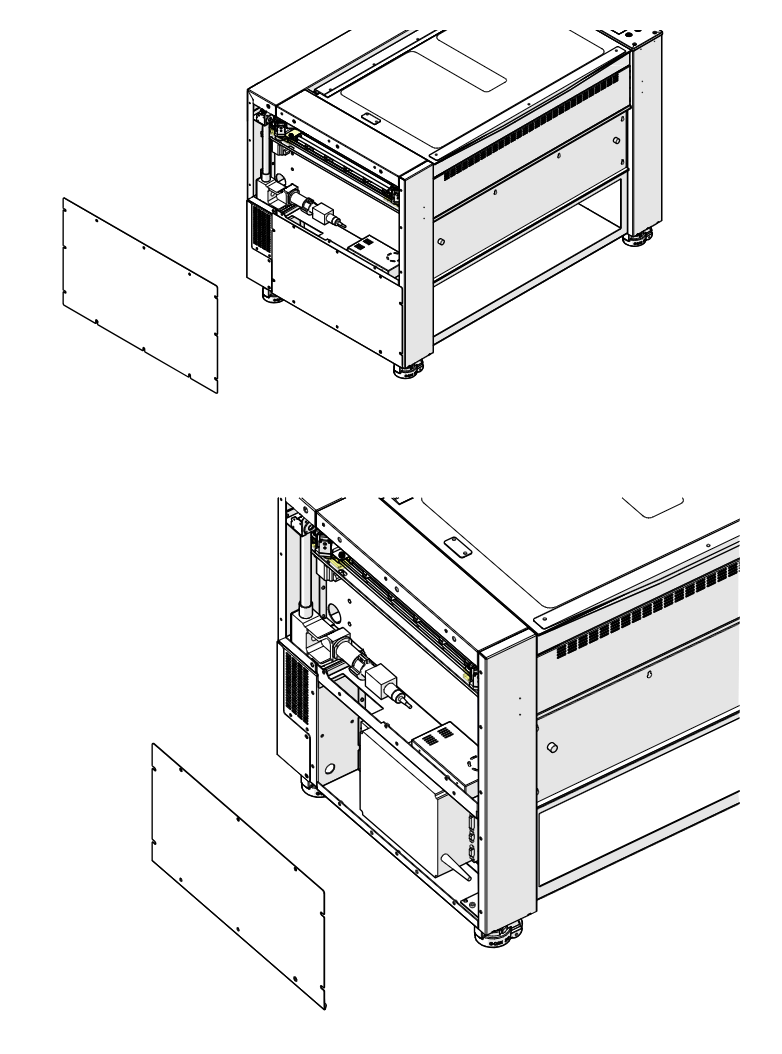
Remove Left Panels
Remove the upper and lower left panels of the engraver.
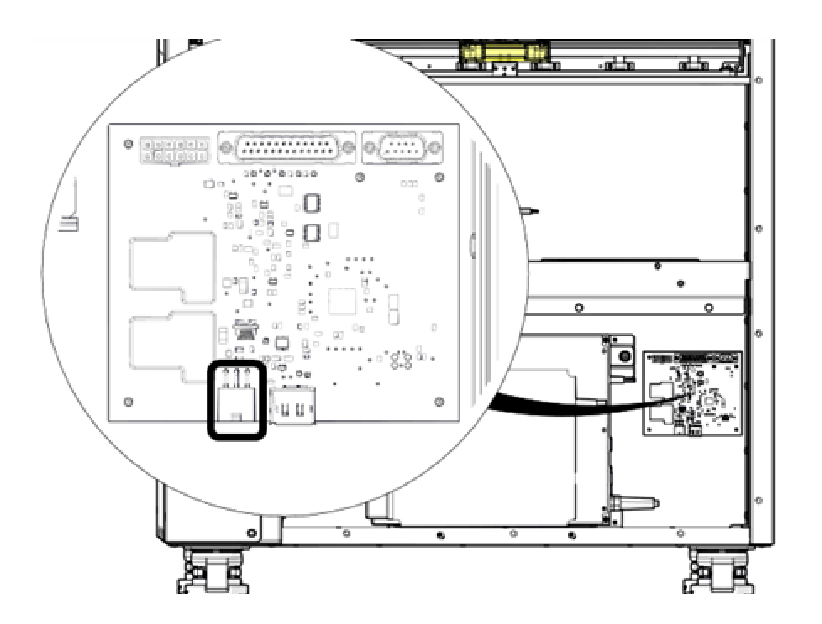
Disconnect at Fiber Laser Board
Follow the power supply harness from the square cutout in the lower left corner of the engraver and disconnect it from the fiber laser board (outlined in black).
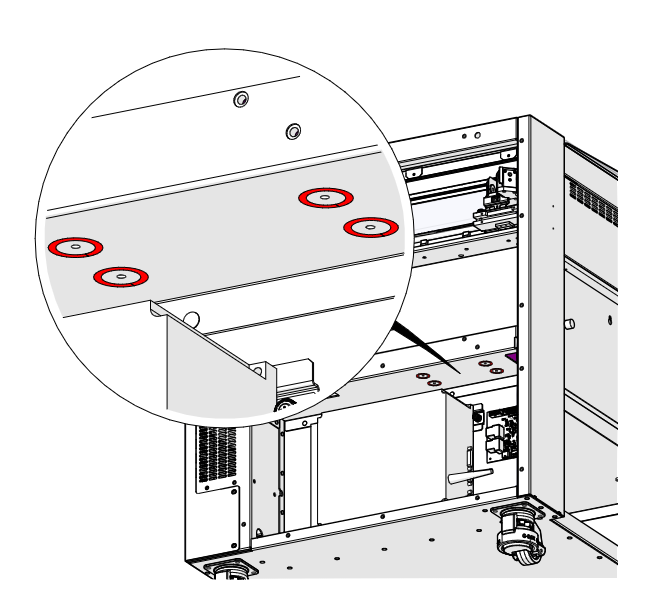
Remove Mounting Screws
Loosen and remove the four 5/32" Allen screws that secure the power supply to the engraver chassis (circled in red).
Remove the Power Supply
Remove the power supply from the engraver.
Fiber Power Supply Installation
Install the New Power Supply
Position the new LC0437 power supply over the mounting holes on the engraver chassis. Install and tighten the four screws that secure it.
Connect at Fiber Laser Board
Route the power supply harness through the square cutout in the lower left corner of the engraver and connect it to the fiber laser board.
Install Left Panels
Install the upper and lower left panels of the engraver.
Power On
Reconnect the engraver to power and turn it on.
