This guide covers the removal of the control board (LC1000) from the Fusion Galvo G100 and the installation of the replacement board.
Parts Required
- LC1000 – Assy, Main Controller
Tools Required
- 5/32″ Allen Wrench
- Phillips Head Screwdriver
- Anti-Static Bracelet
Safety First: Ensure the engraver is completely powered off and the power cord is disconnected before removing any panels or touching internal electronics.
Static Warning: The control board is sensitive to static discharge. Wear a grounded anti-static bracelet whenever you handle the board.
Control Board Removal
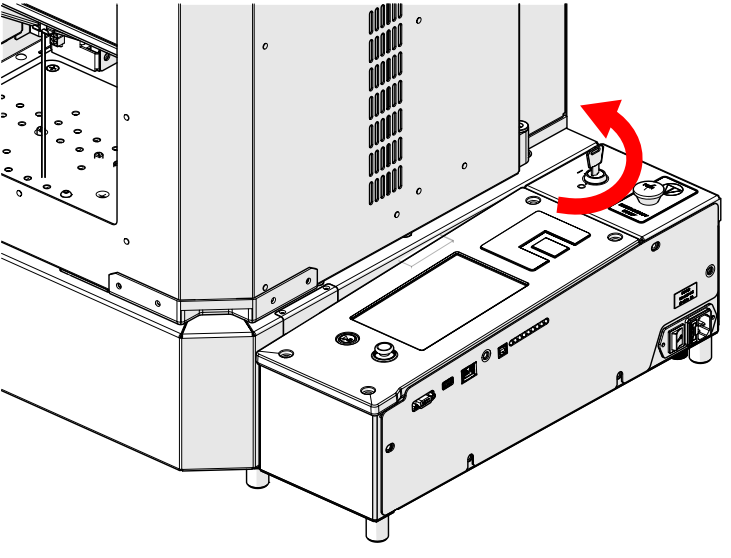
Power Off Engraver
Turn off the engraver.

Disconnect From Power
Unplug the power cord from the engraver.
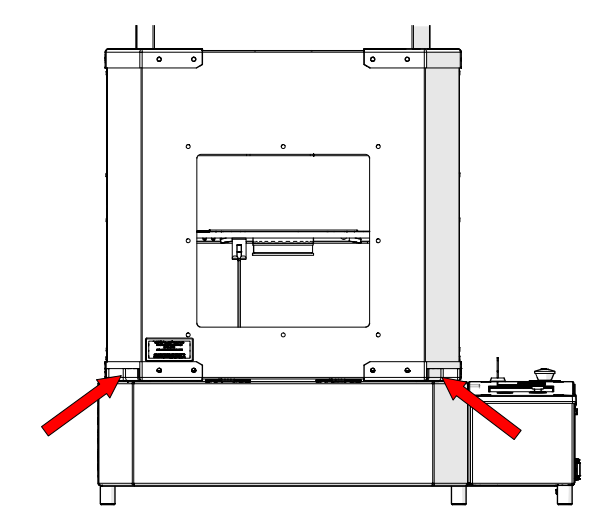
Locate Door Handles
Locate the handles on the engraver door.
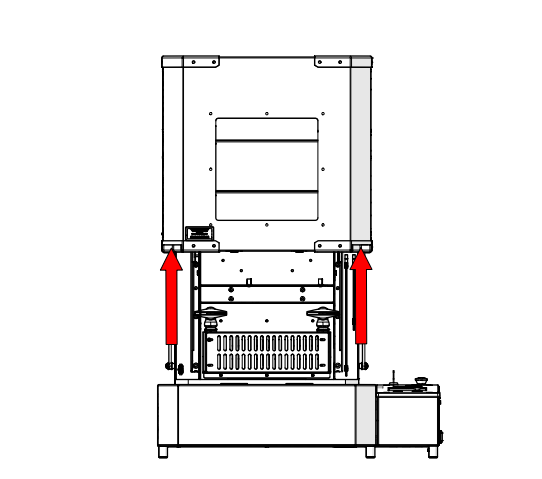
Open Door
Open the door.
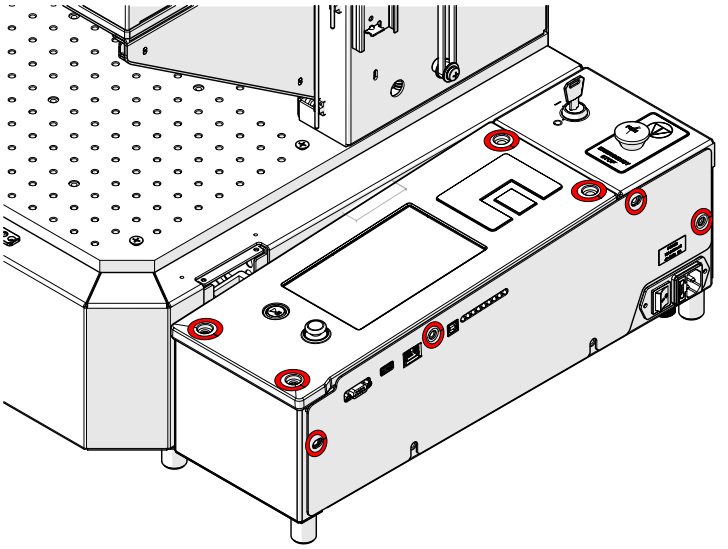
Remove Control Module Screws
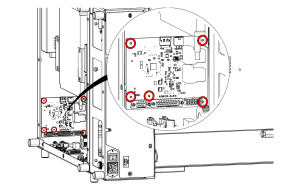
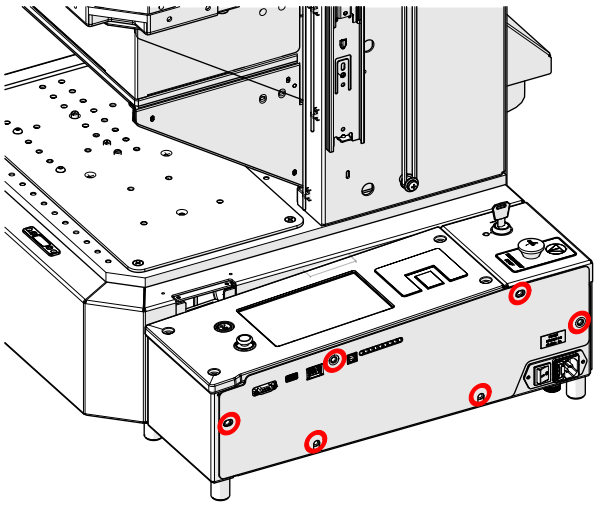
Loosen and remove the screws on the top and side of the control module (highlighted in red).
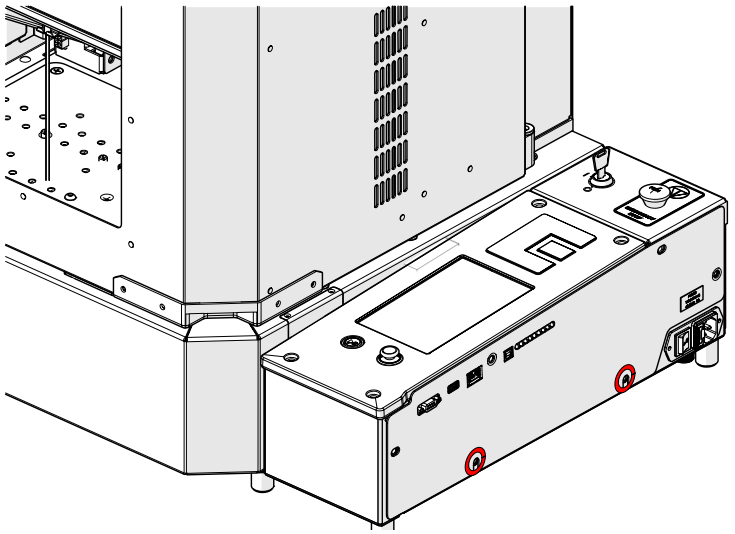
Loosen Lower Screws
Loosen the two lower screws on the side of the control module (highlighted in red), but do not remove them.
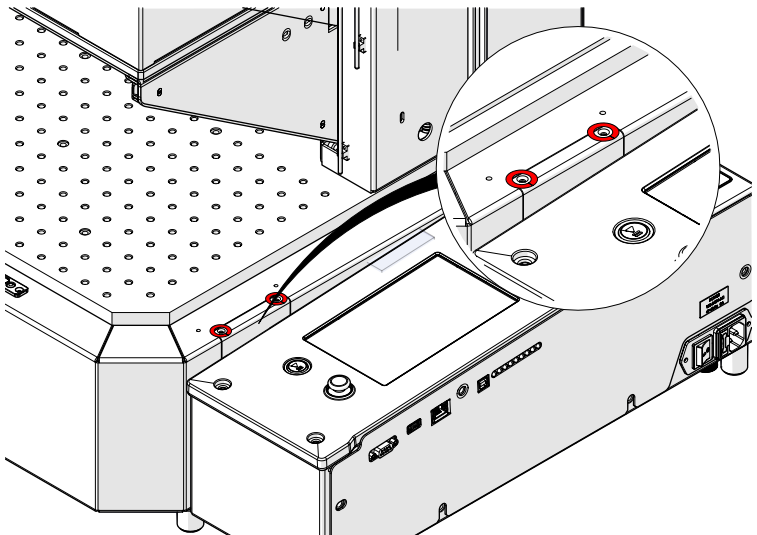
Remove Edge Screws
Loosen and remove the two screws along the edge of the control module (highlighted in red).
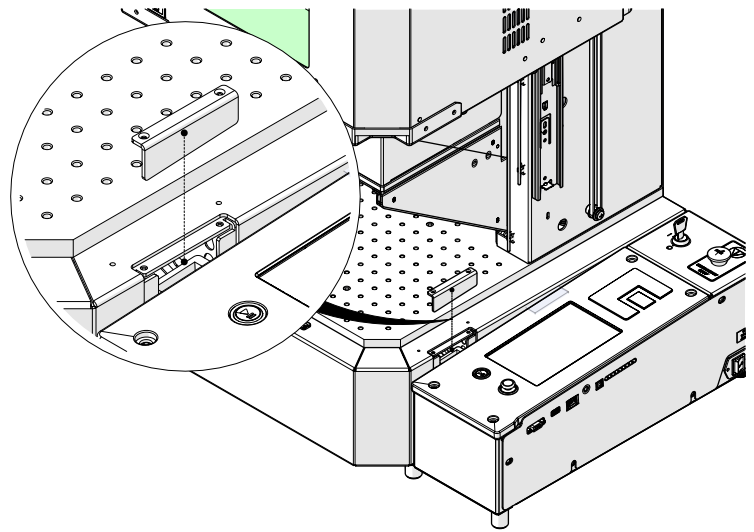
Remove Cover
Remove the cover.
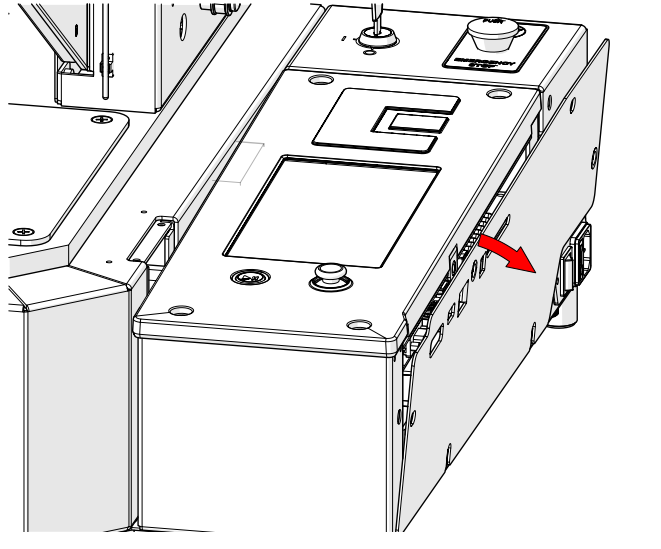
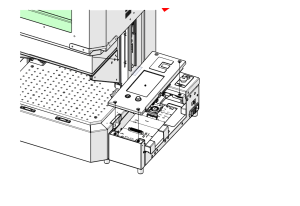
Tilt Panel Away
Tilt the front panel of the control module away from the engraver.
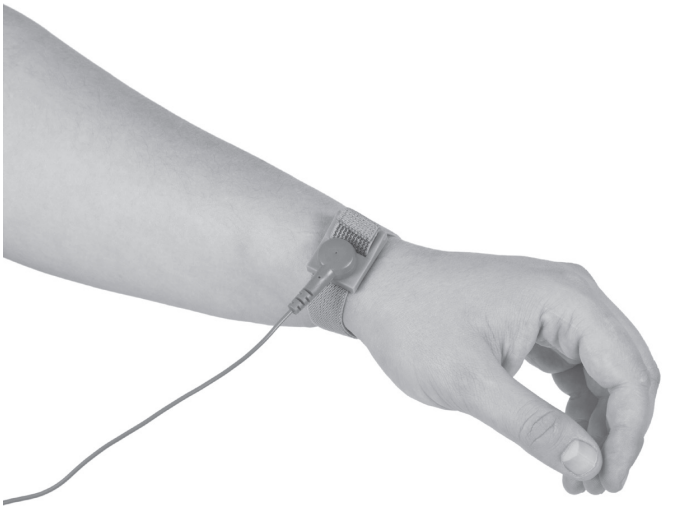
Put On Anti-Static Strap
Place the anti-static strap on your wrist.
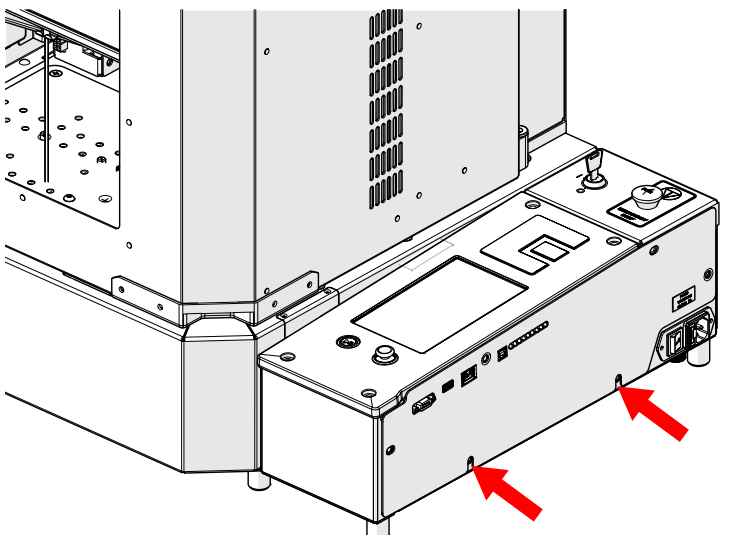
Ground the Strap
Attach the anti-static strap clamp to one of the side panel screws.
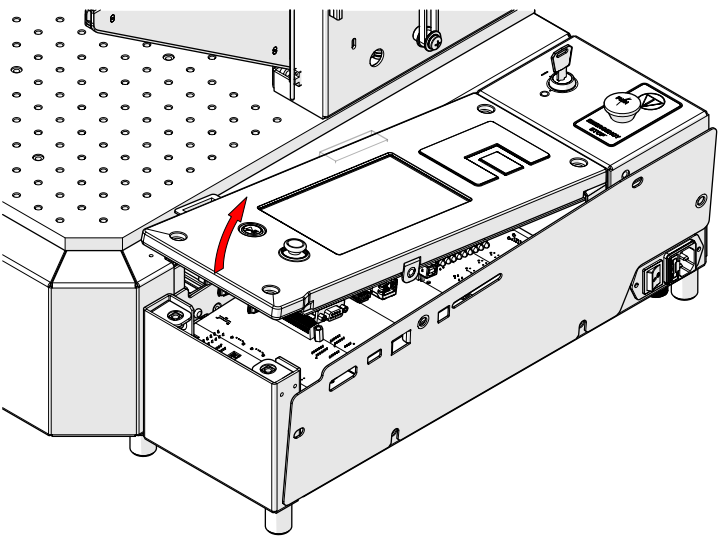
Remove Control Board
Gently lift the control board to remove it from the engraver.
Control Board Installation
Now that the old control board is removed, proceed with the installation of the replacement board.
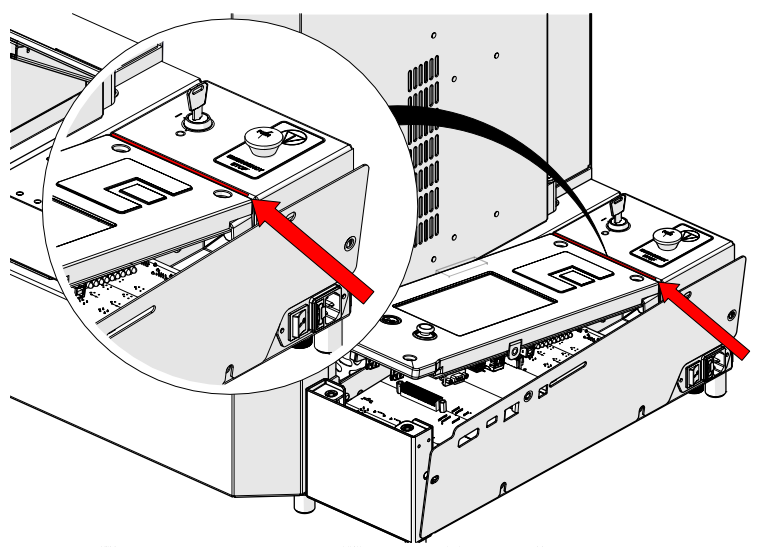
Align Control Board
Align the new control board with the engraver chassis.
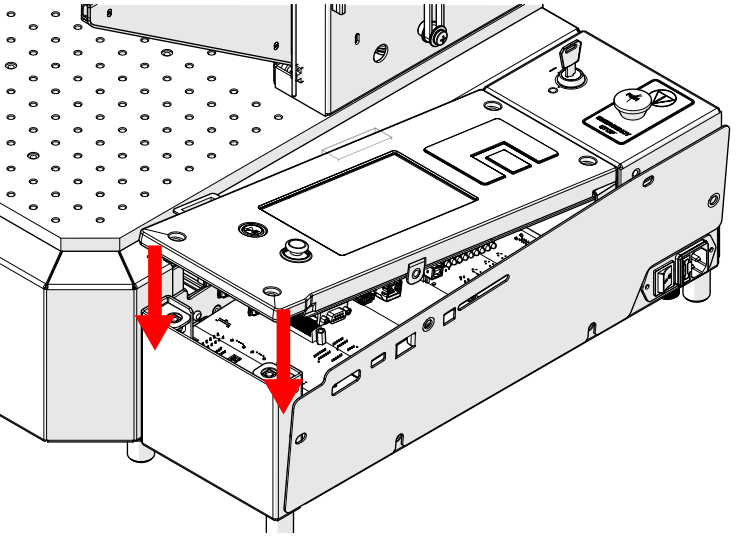
Seat Connector
Slowly press down to seat the control board connector.
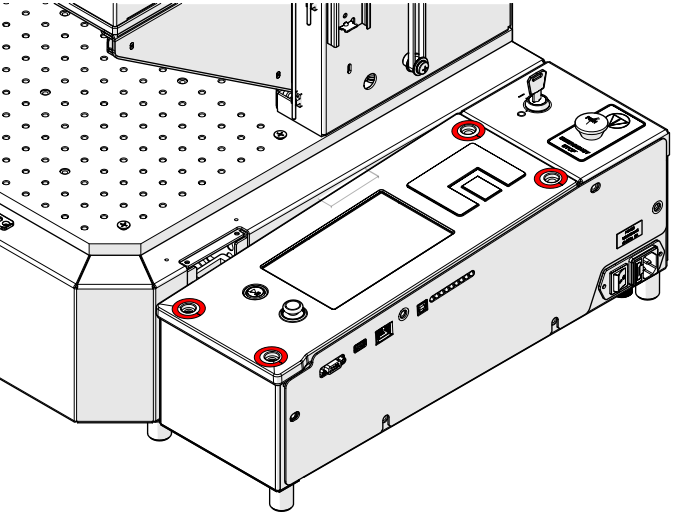
Install Top Screws
Install the top screws with the two longer screws toward the rear, then tighten.
Secure Side Panel
Install and tighten the side panel screws, including the two lower screws loosened earlier.
Install Cover
Reinstall the cover.
Secure Edge
Install and tighten the two screws along the edge of the control module.

Connect to Power
Plug the power cord back into the engraver.