
Over time, the lens in your laser’s lens tube can become scratched, pitted or clouded by smoke and debris that cleaning won’t remove. Instead of replacing the entire lens tube, the lens removal tool lets you swap out just the lens. The tool unscrews the brass retaining ring that holds the lens in place, its color bands show your lens’s focal length so you can set the new lens back at exactly the right height, and its back end holds the new lens so you can set it into the tube without touching it. It’s a quick job that takes about ten minutes and doesn’t require any special skills. This guide walks you through choosing the right tool for your machine, how the lens tube is put together, and how to remove the old lens and install the new one.
Which tool do I need?
There are three versions of the lens removal tool, one for each style of lens tube. They all work the same way, so the steps in this guide apply to every version.
Edge and Maker
All Edge and Maker machines use the LC small aperture lens tube. Order the LC small aperture tool, part no. LC1863.
Pro
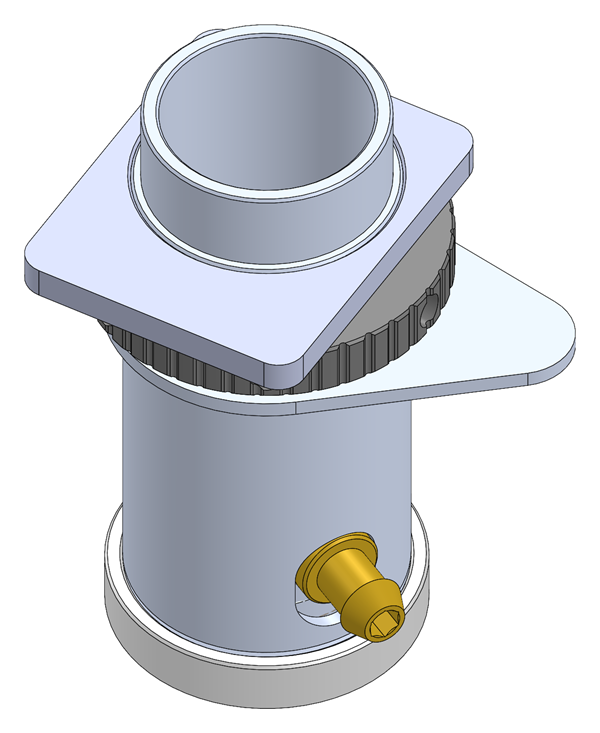
Pro machines can use any of the three lens tube styles, and the model number alone doesn’t tell you which one you have. Remove your lens tube and compare it to the styles below.
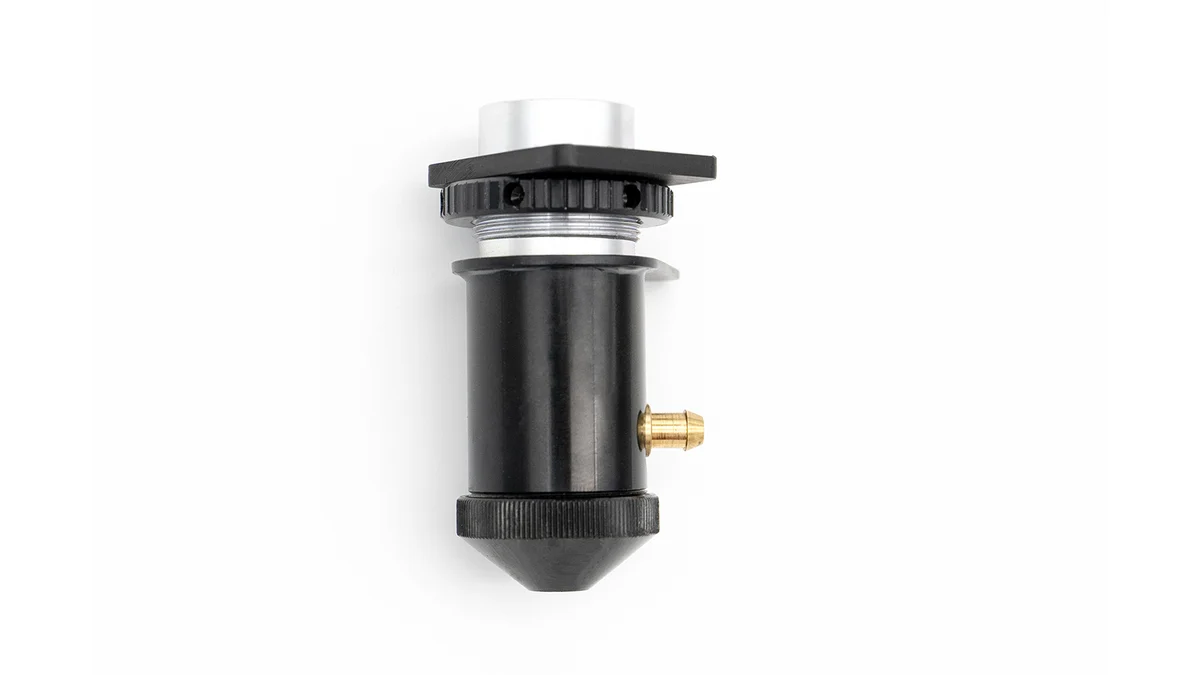
LC small aperture
- Outside diameter: 0.875 in (22.2 mm)
- Same diameter as the CS tube; compare the shape to the photo
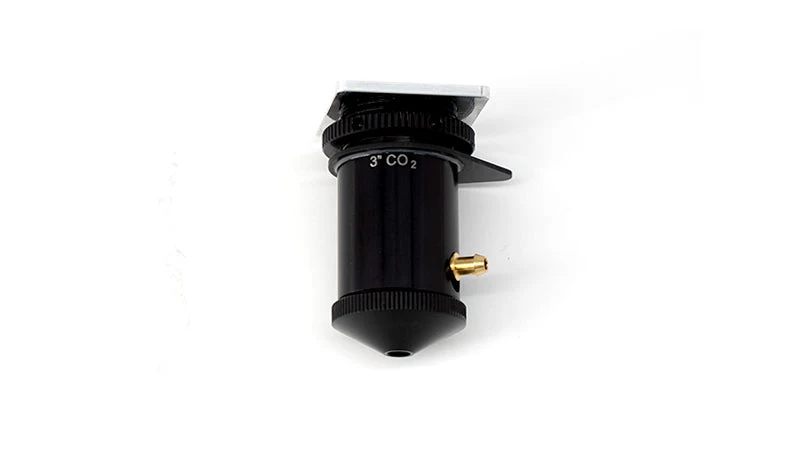
LC large aperture
- Outside diameter: 1.15 in (29.2 mm)
- Noticeably wider than the two small aperture tubes
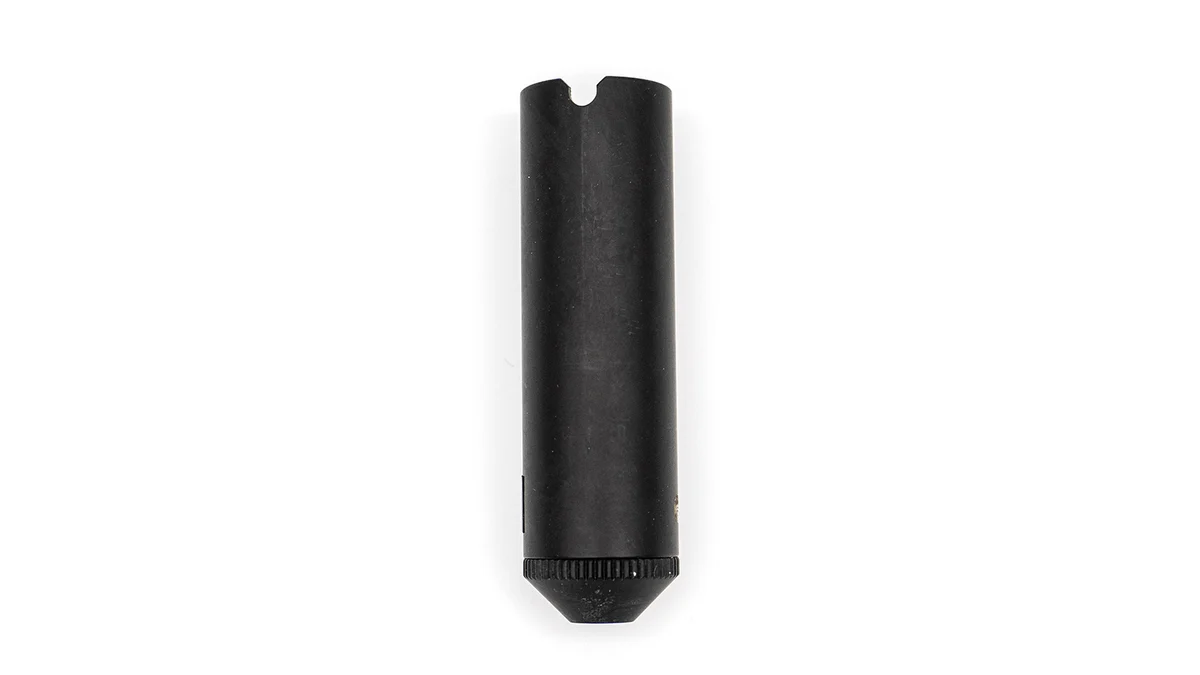
CS small aperture
- Outside diameter: 0.875 in (22.2 mm)
- Same diameter as the LC small tube; compare the shape to the photo
Still not sure which tube you have? Contact support with your machine’s serial number and a photo of your lens tube.
What’s inside the lens tube
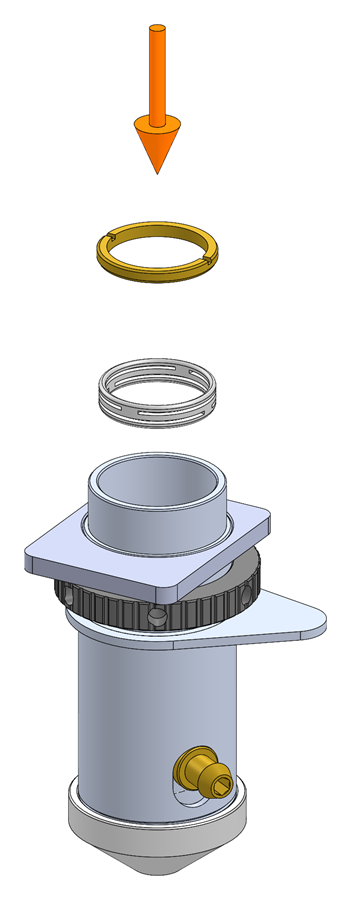
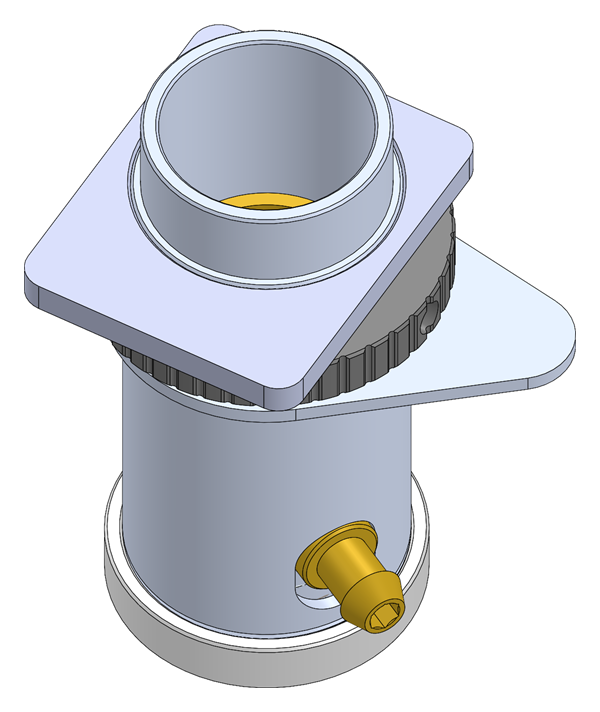
The lens tube is a threaded, hollow tube. The lens sits between two brass rings, along with a thin flexure (a small wave spring) that keeps gentle, even pressure on it. The top brass ring screws down to hold everything in place. You only remove the top brass ring; the bottom ring stays in the tube unless it needs adjusting.
Where the flexure goes depends on your lens:
- 1.5 in and 2 in lenses, and the 4 in lens in the LC large aperture tube: the flexure sits on top of the lens.
- 3 in lenses (CO2, fiber and dual) and the 4 in lenses in the CS tube: the flexure sits under the lens, on the bottom brass ring.
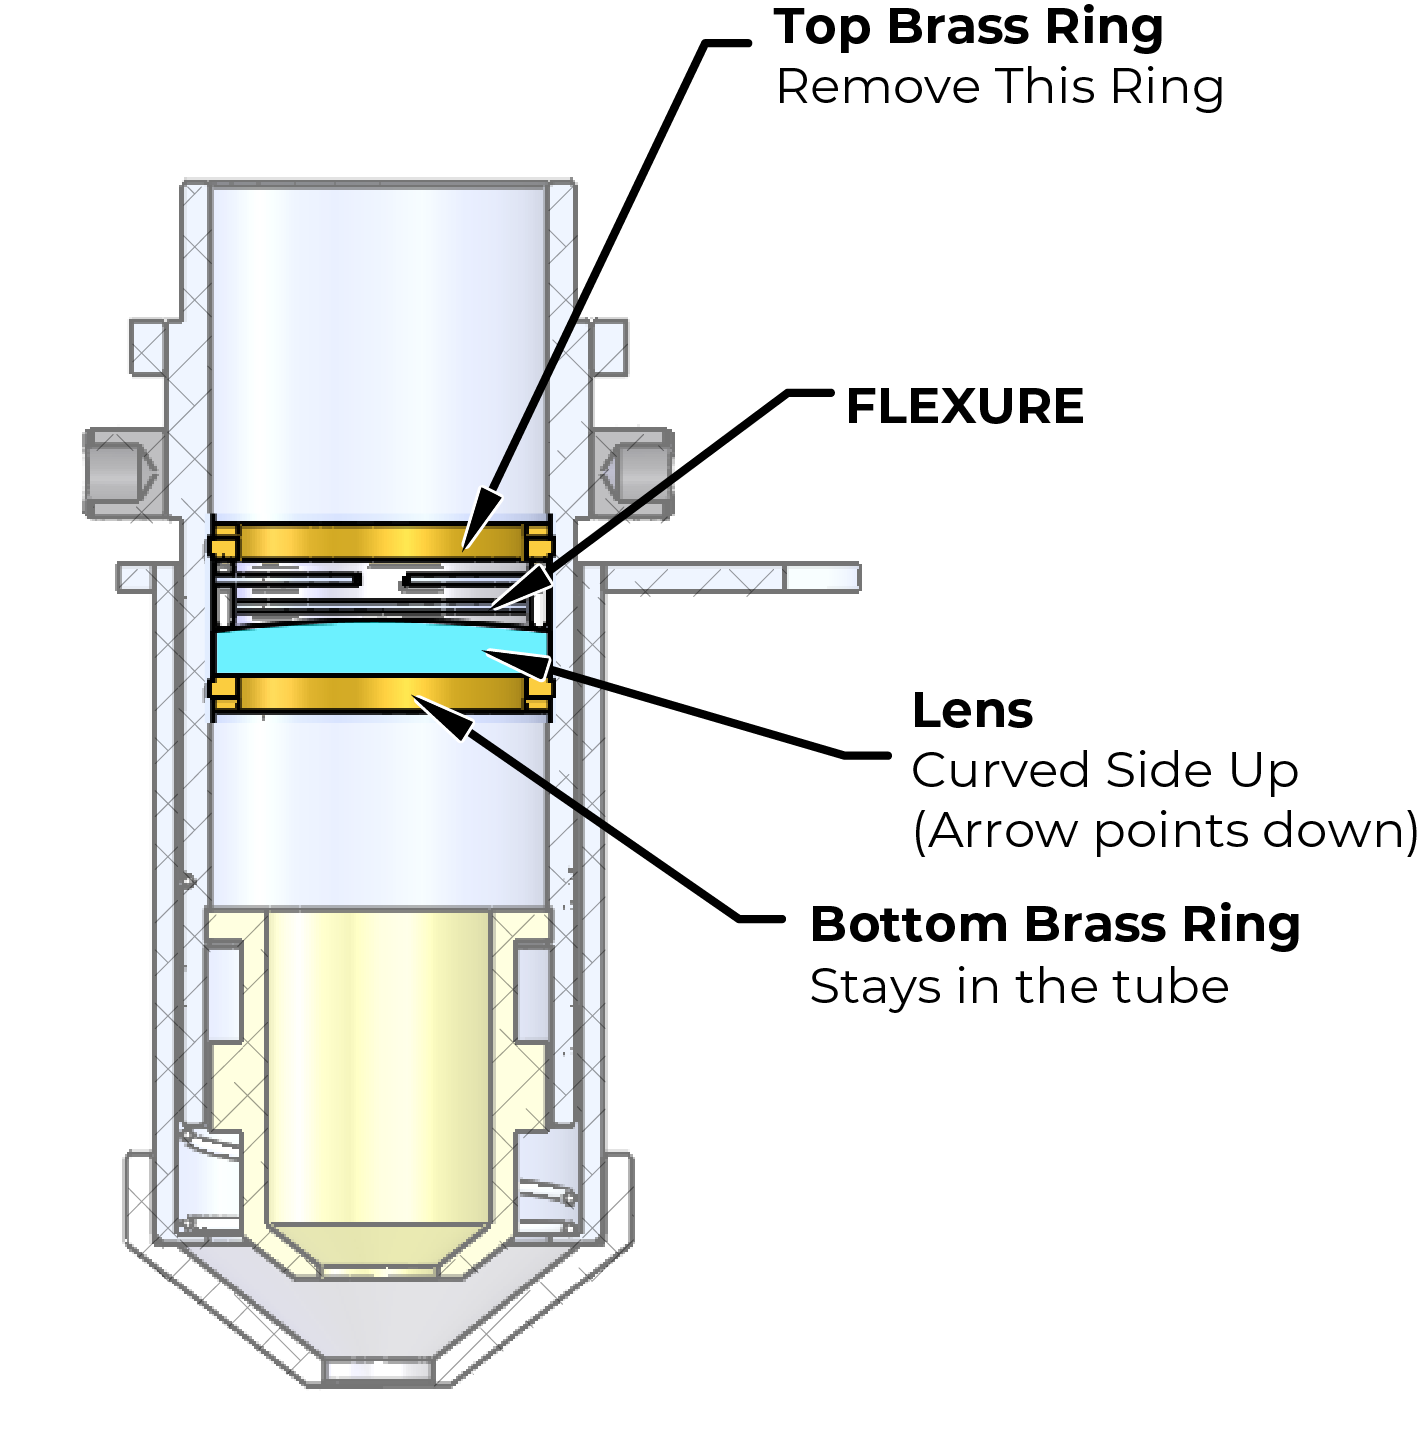
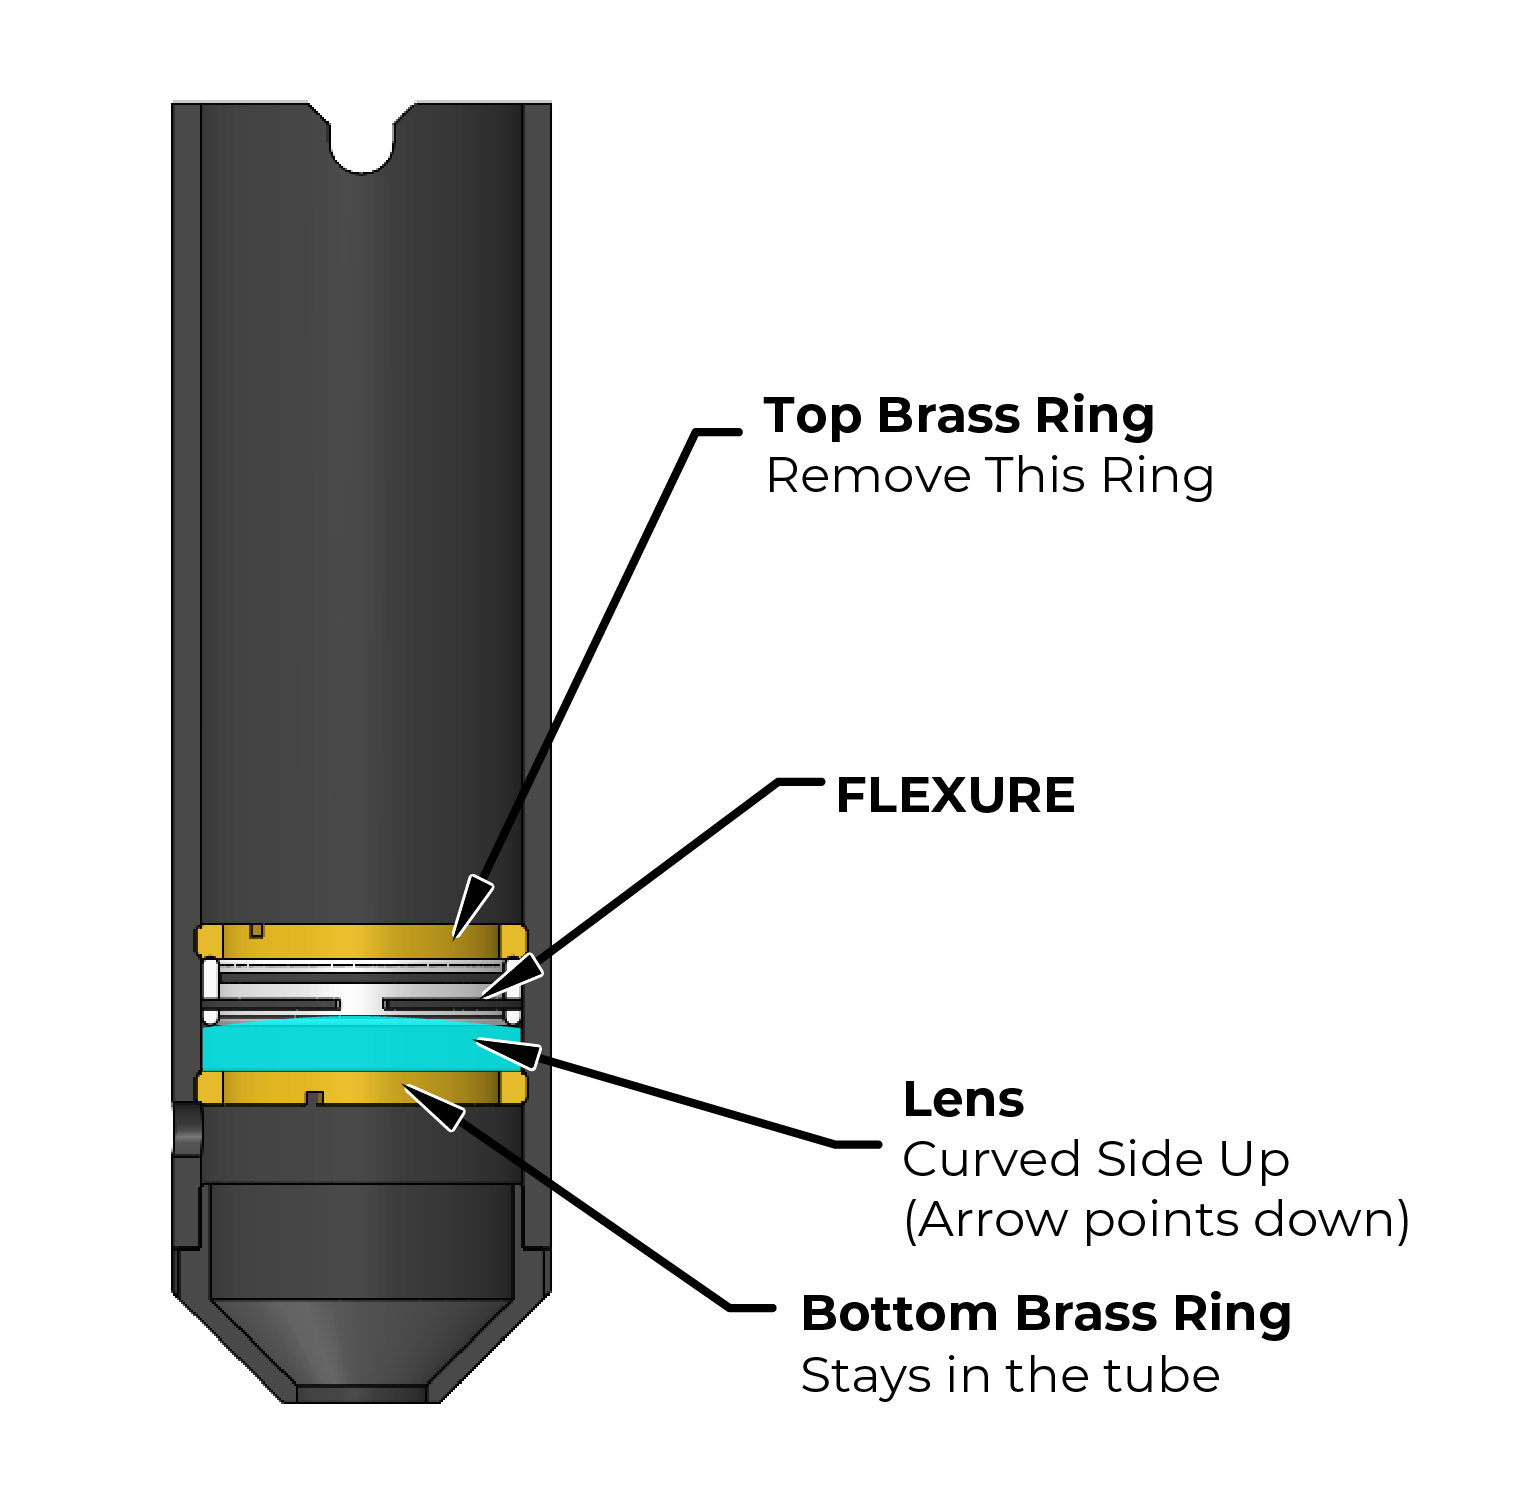
The Flexure column in each band table shows where the flexure goes for your lens.
Reading the tool’s color bands
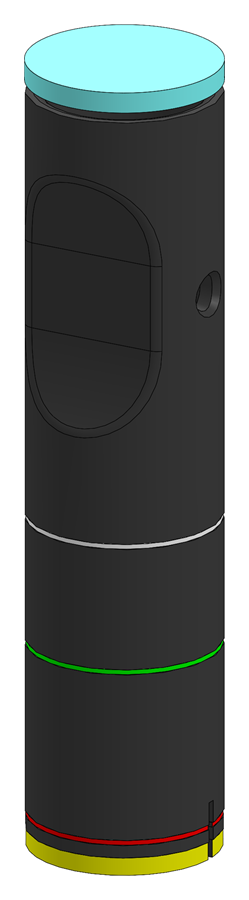
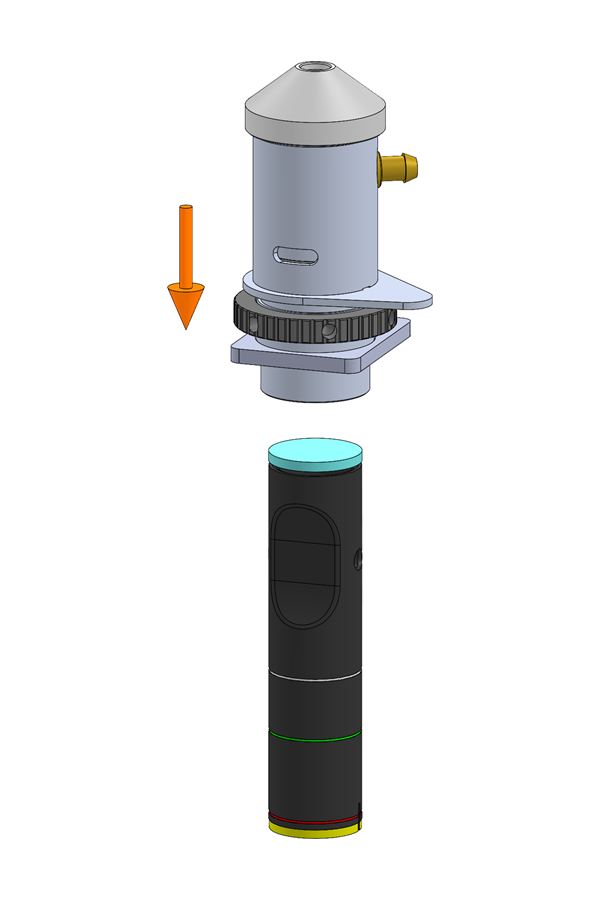
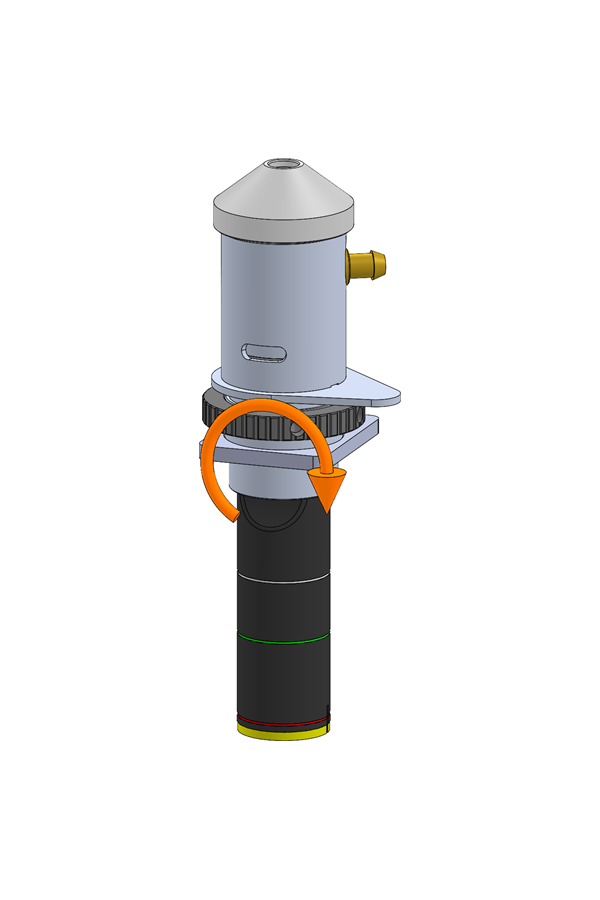
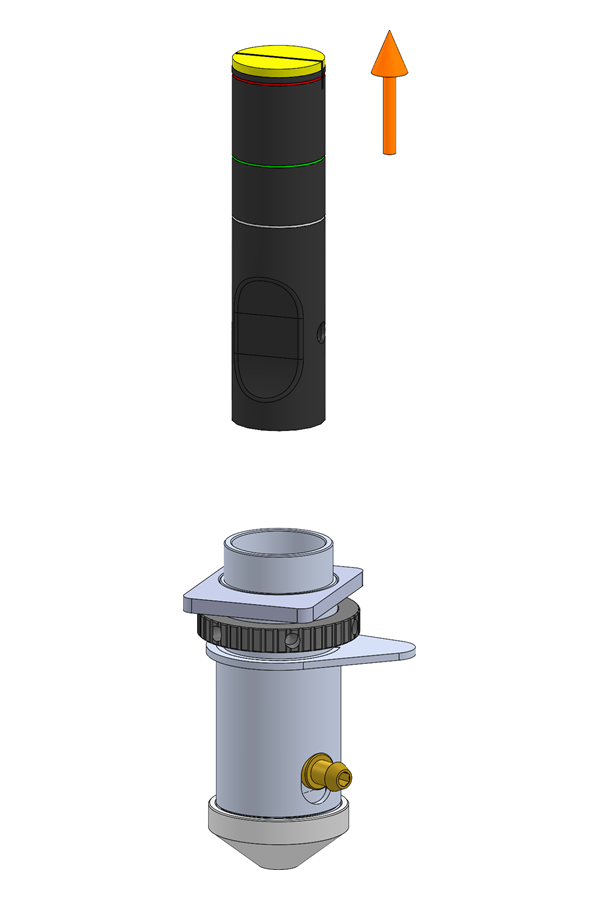
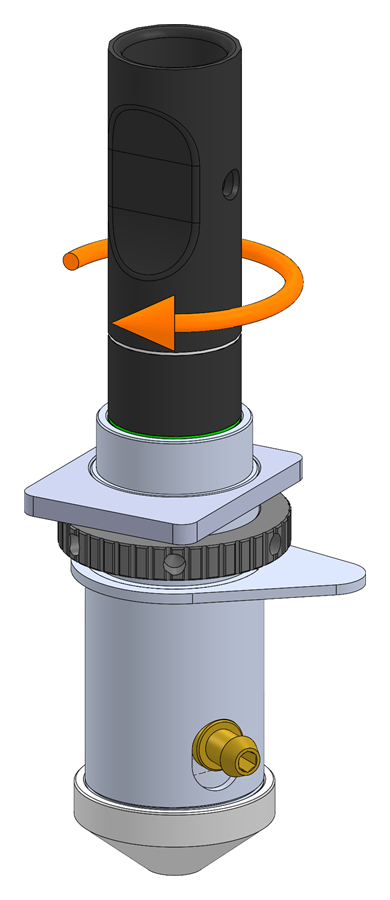
Each tool has a set of colored bands that mark the lenses it works with. The LC tools have four bands and the CS tool has five; open the section for your tool below to see which band goes with which lens. Insert the tool into the top of the lens tube and rotate it until it seats in the notches of the top brass retaining ring. The color band that’s level with the top of the lens tube tells you the focal length of the lens. When you install the new lens, that same band is your reference: tighten the ring until it’s level with the top of the tube again, and the lens is at the correct height.
Each table also lists the lens tube assembly and the part number for the lens by itself, so you can order the right replacement lens.
The tool also has a hole through its body. If a ring is too tight to turn by hand, you can slide your machine’s focus tool, or another sturdy shaft, through the hole to use as a handle. Most of the time you won’t need it.
Lens sizes are focal lengths, not diameters. A 2 in lens focuses the beam 2 inches below the lens. It isn’t 2 inches across.
Select your tool to see its bands:
-
LC small aperture tool (LC1863)
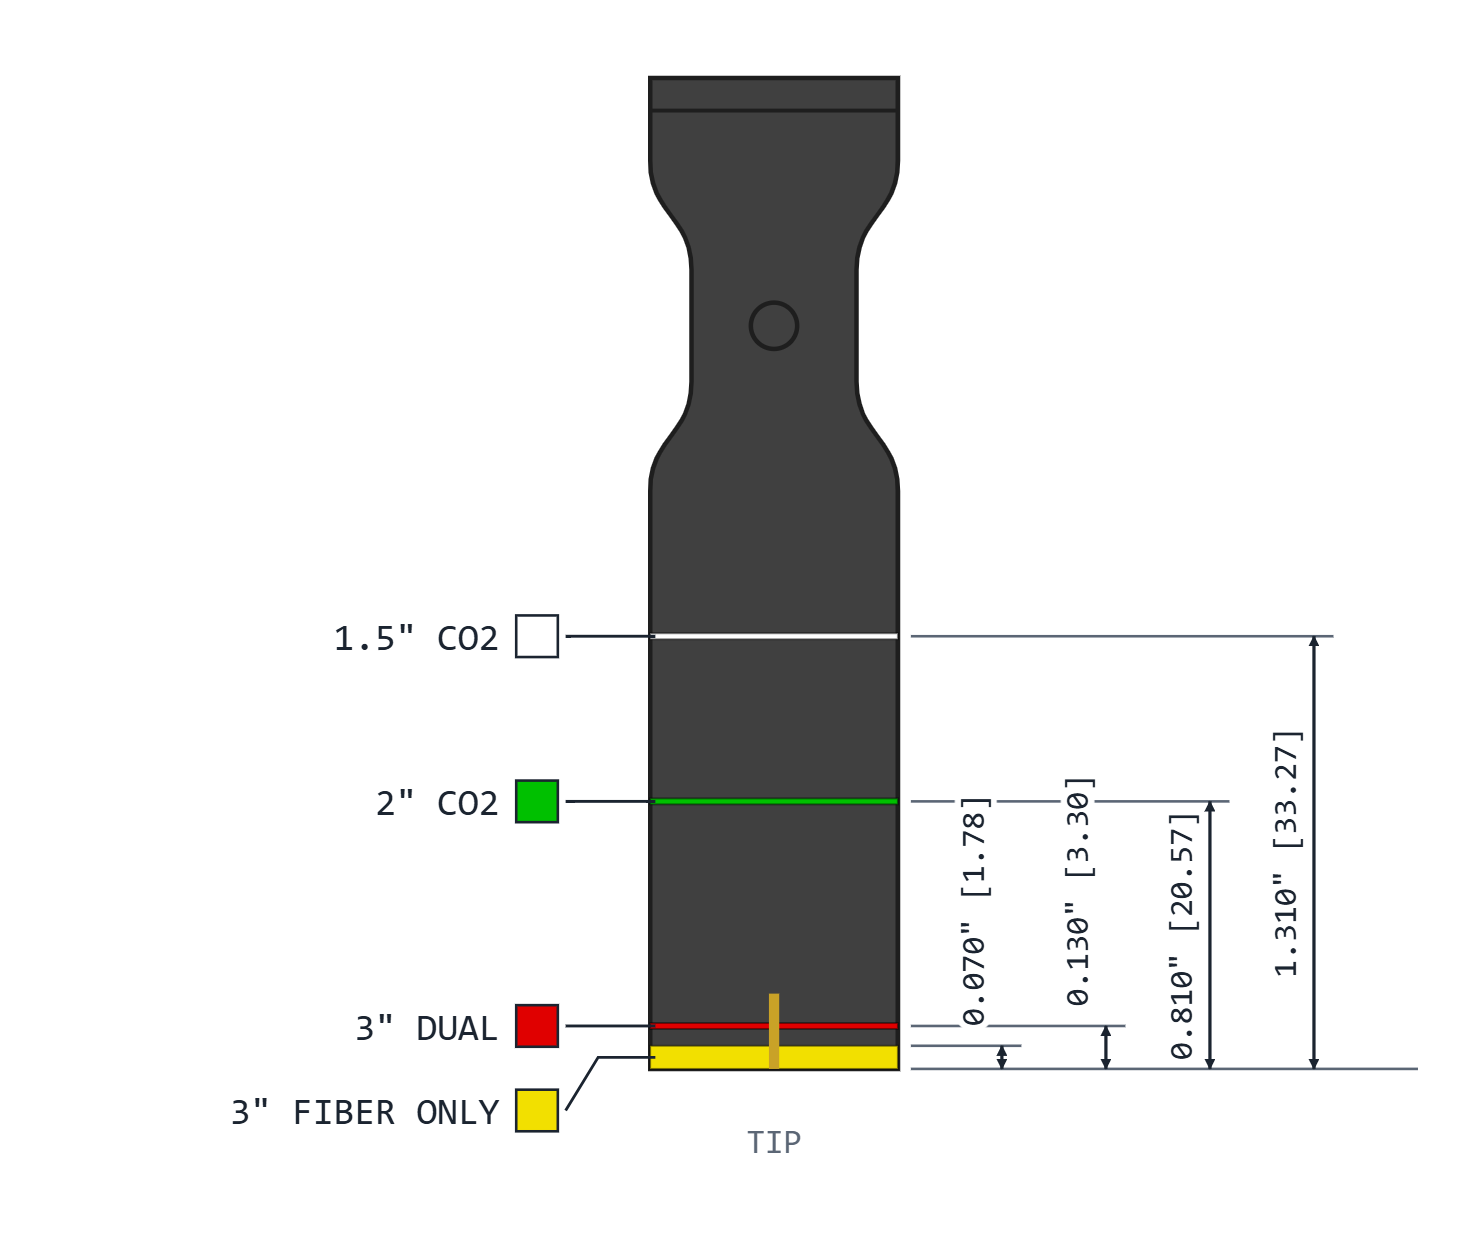
Lens focal length Band Lens tube assy Lens part no. Flexure 1.5 in CO2 ⚪ White LC0418 FT0805 On top of lens 2 in CO2 🟢 Green LC0230 260558 On top of lens 3 in dual 🔴 Red LC0419 CS0826 Under lens 3 in fiber only 🟡 Yellow LC0930 CS1085 Under lens -
LC large aperture tool (LC1864)
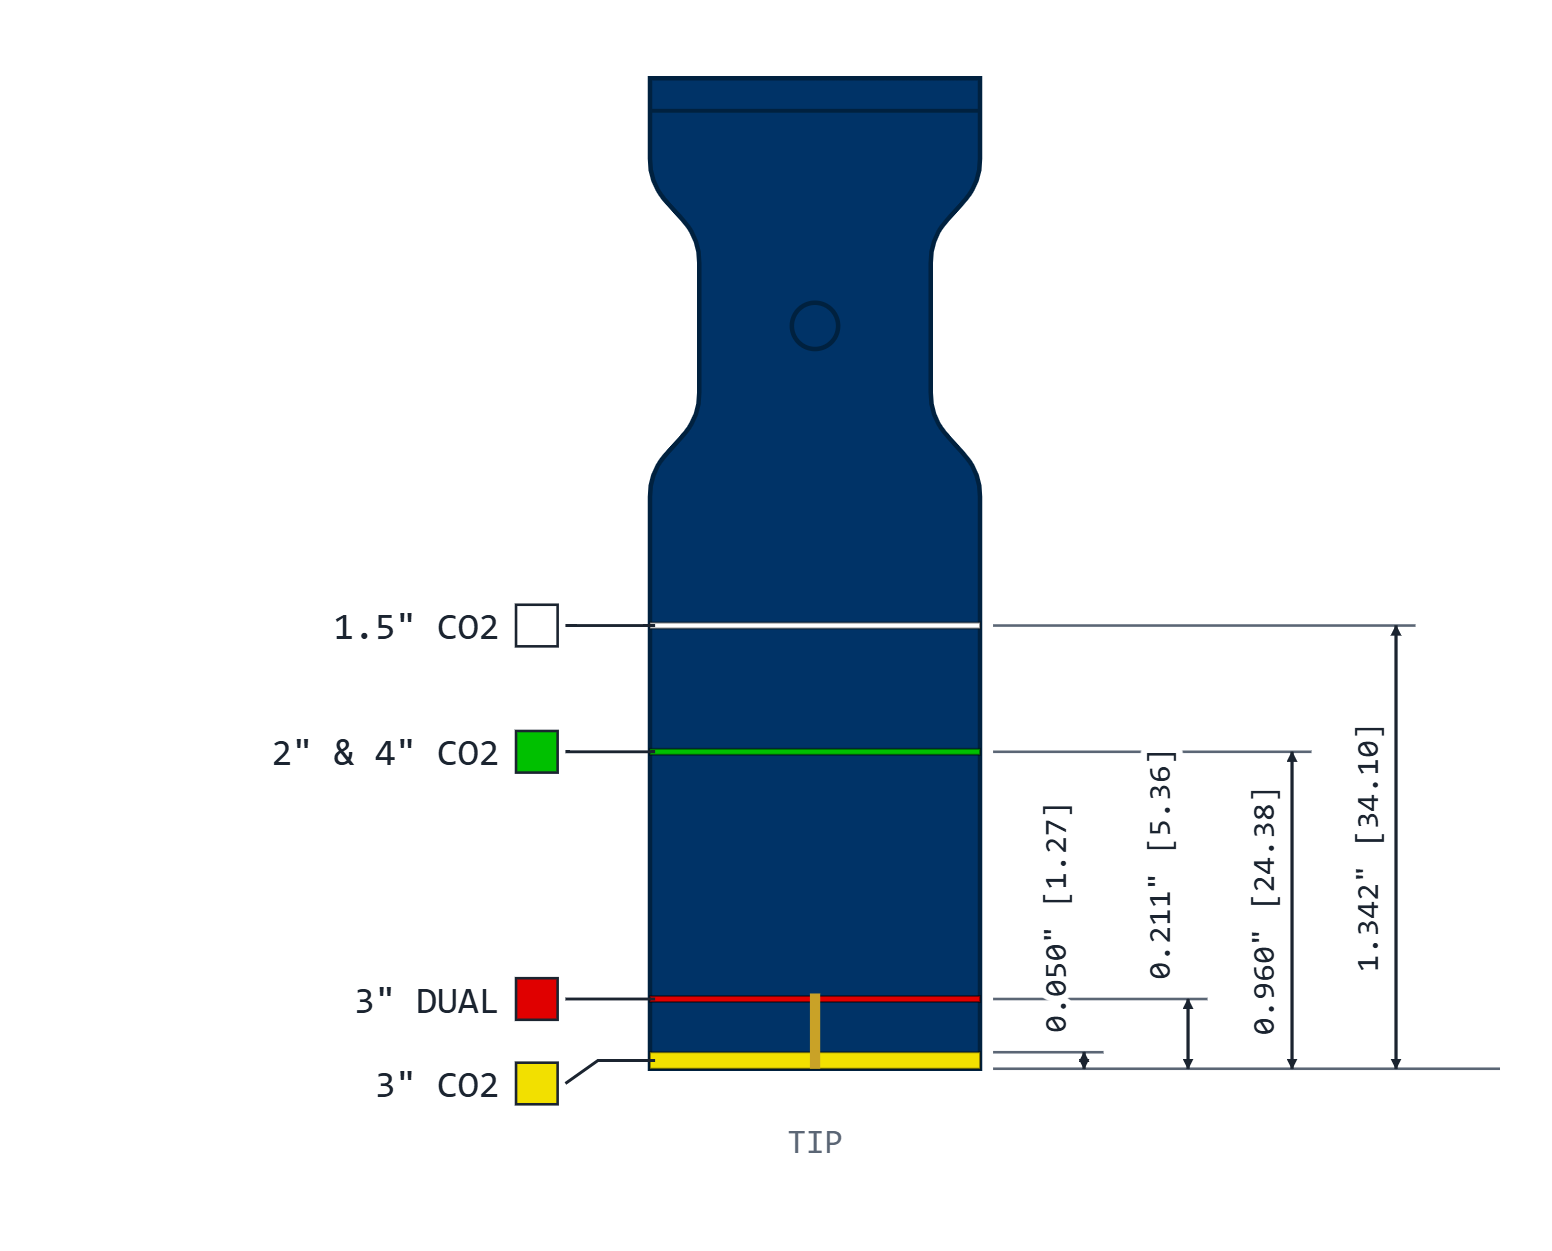
Lens focal length Band Lens tube assy Lens part no. Flexure 1.5 in CO2 ⚪ White LC1297 LC1197 On top of lens 2 in CO2 🟢 Green LC1145 LC1157 On top of lens 4 in CO2 🟢 Green LC1296 LC1196 On top of lens 3 in dual 🔴 Red LC1298 LC1198 Under lens 3 in CO2 🟡 Yellow LC1311 LC1308 Under lens The 2 in and 4 in lenses both line up with the green band.
-
CS small aperture tool (CS1428)
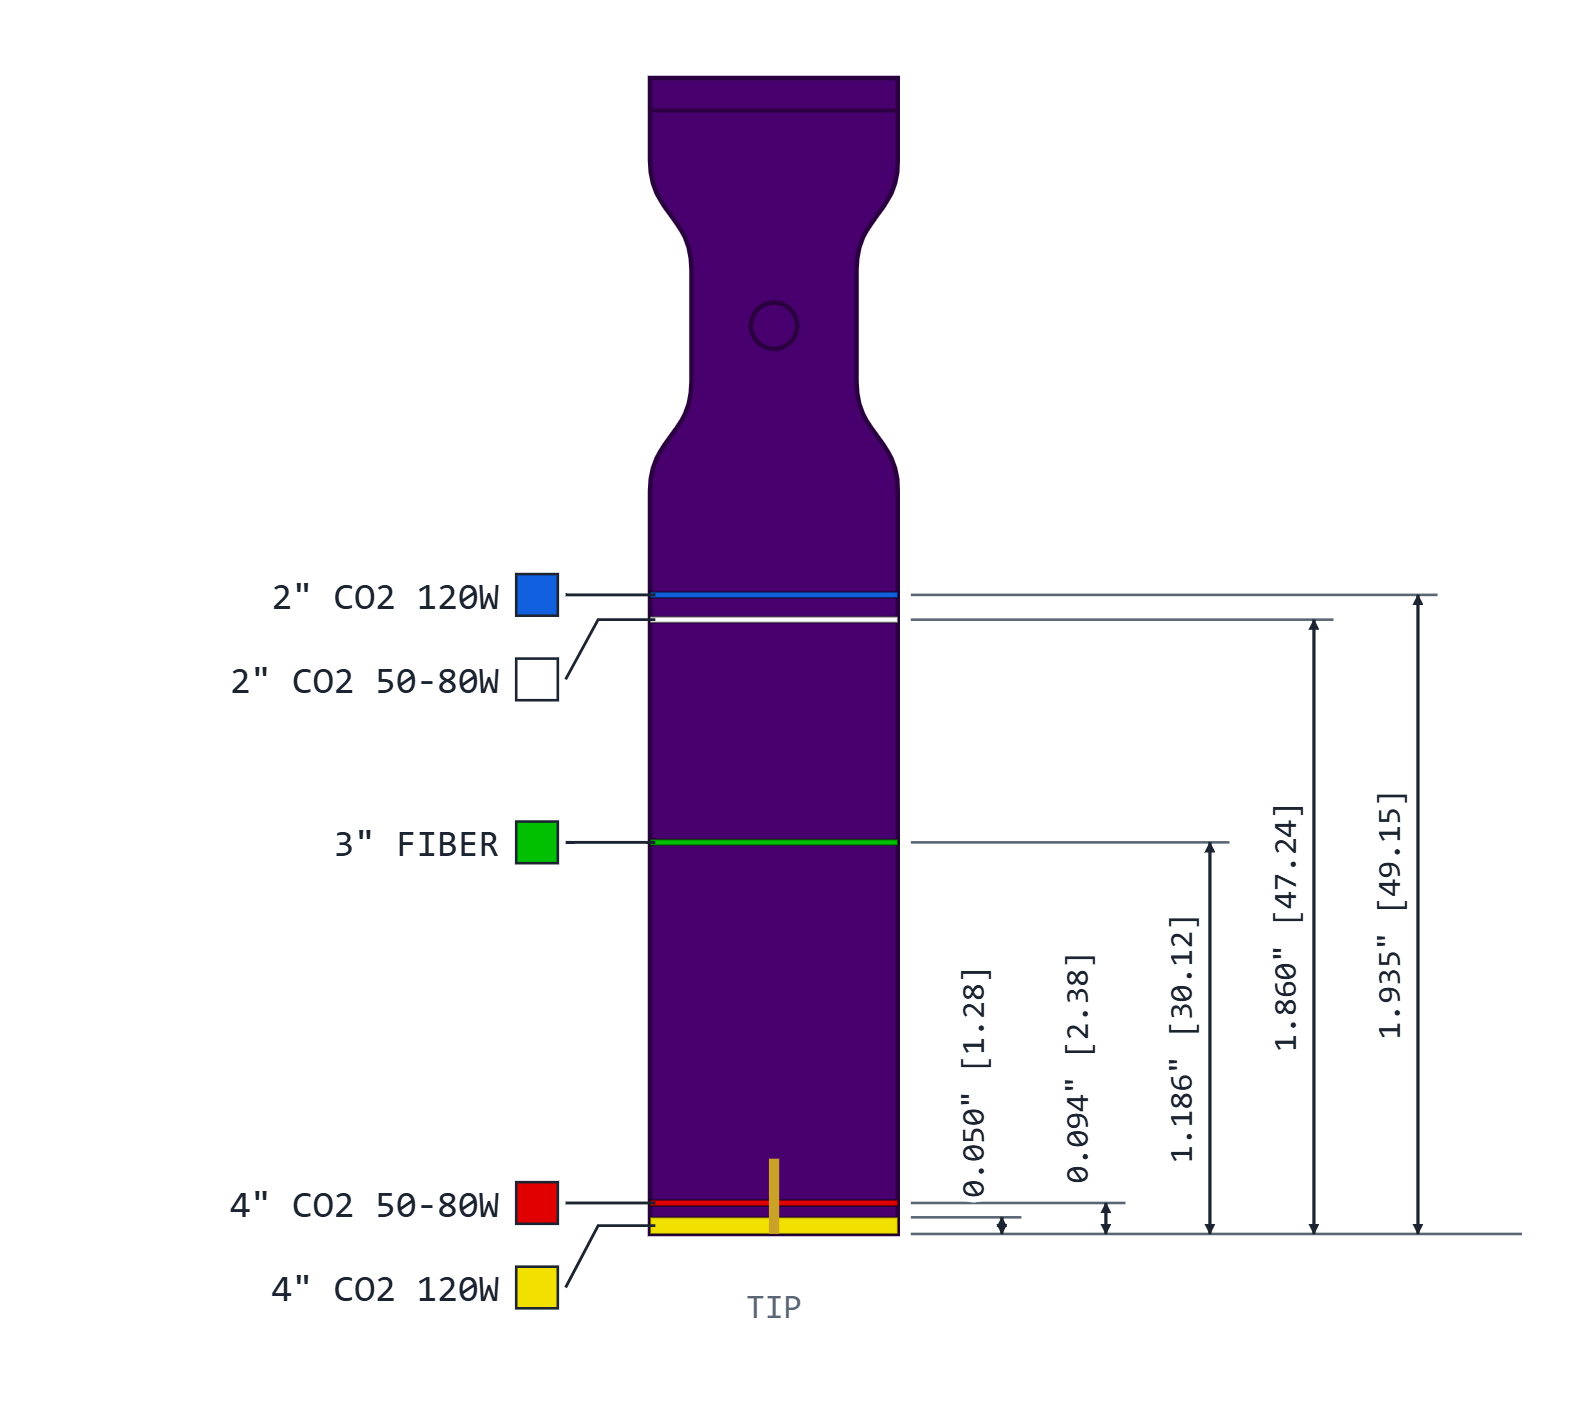
Lens focal length Band Lens tube assy Lens part no. Flexure 2 in CO2 (120 watt) 🔵 Blue CS0990 260558 On top of lens 2 in CO2 (50–80 watt) ⚪ White CS0910 260558 On top of lens 3 in fiber / dual 🟢 Green CS0993 CS0826 Under lens 4 in CO2 (50–80 watt) 🔴 Red CS0991 CS0971 Under lens 4 in CO2 (120 watt) 🟡 Yellow CS0992 FT0806 Under lens The blue and white bands sit close together, and so do the red and yellow bands. Check the wattage of your machine if you’re not sure which one you’re reading.
Before you begin
You’ll need
- Lens removal tool for your tube type
- Replacement lens with the same focal length (see the lens part numbers)
- Powder-free nitrile gloves or finger cots
- Lint-free lens tissue or a clean microfiber cloth
- Cotton swab
- Lens cleaner, such as MCP-303 Lens Cleaning Solution
Set up your workspace
- Work on a clean, flat surface covered with a soft cloth
- Use good lighting so you can see the brass rings clearly
- Keep a small tray nearby so the flexure doesn’t get lost
- Wear gloves the whole time; skin oils can damage the lens coating
Remove the old lens
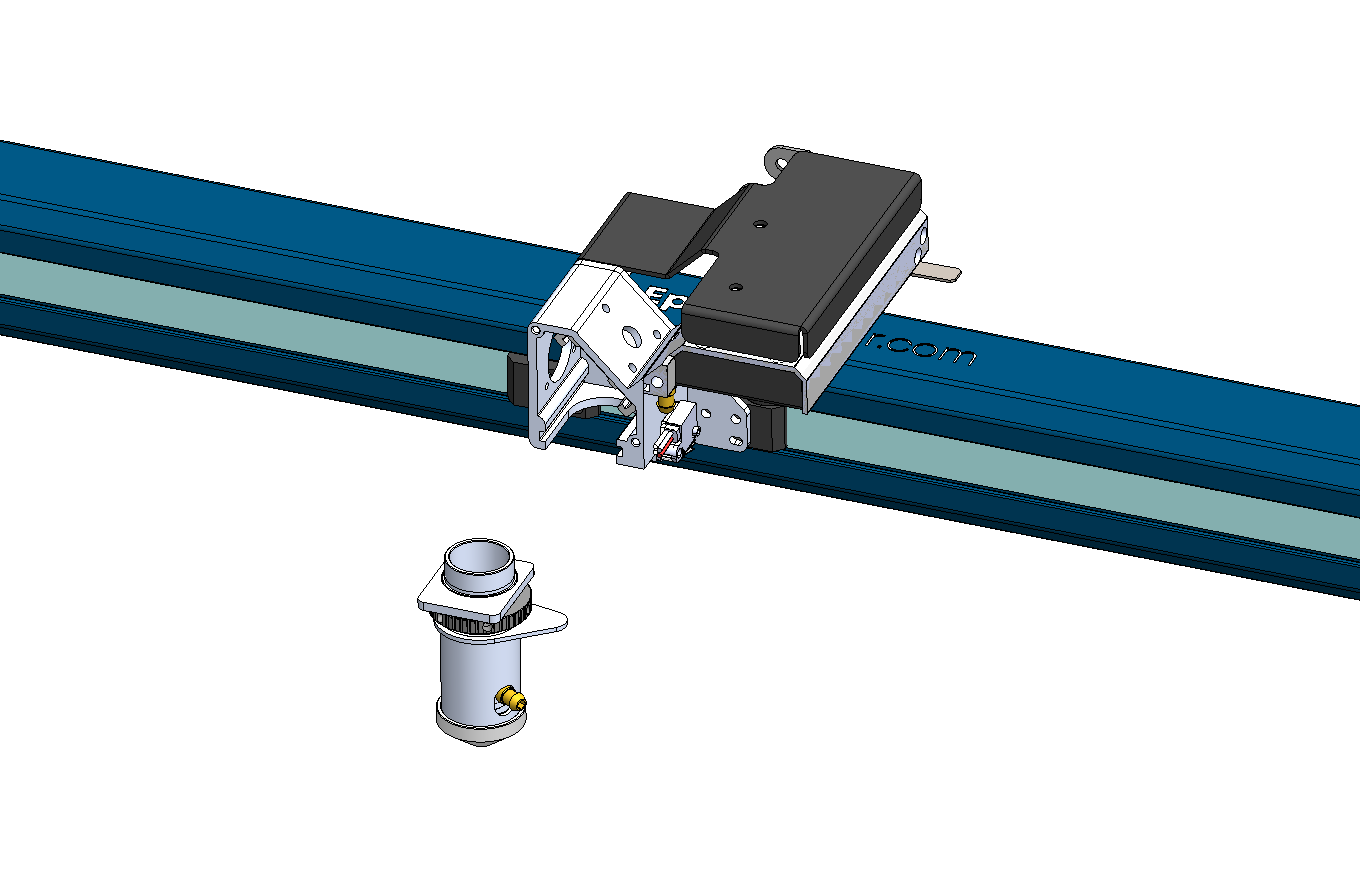
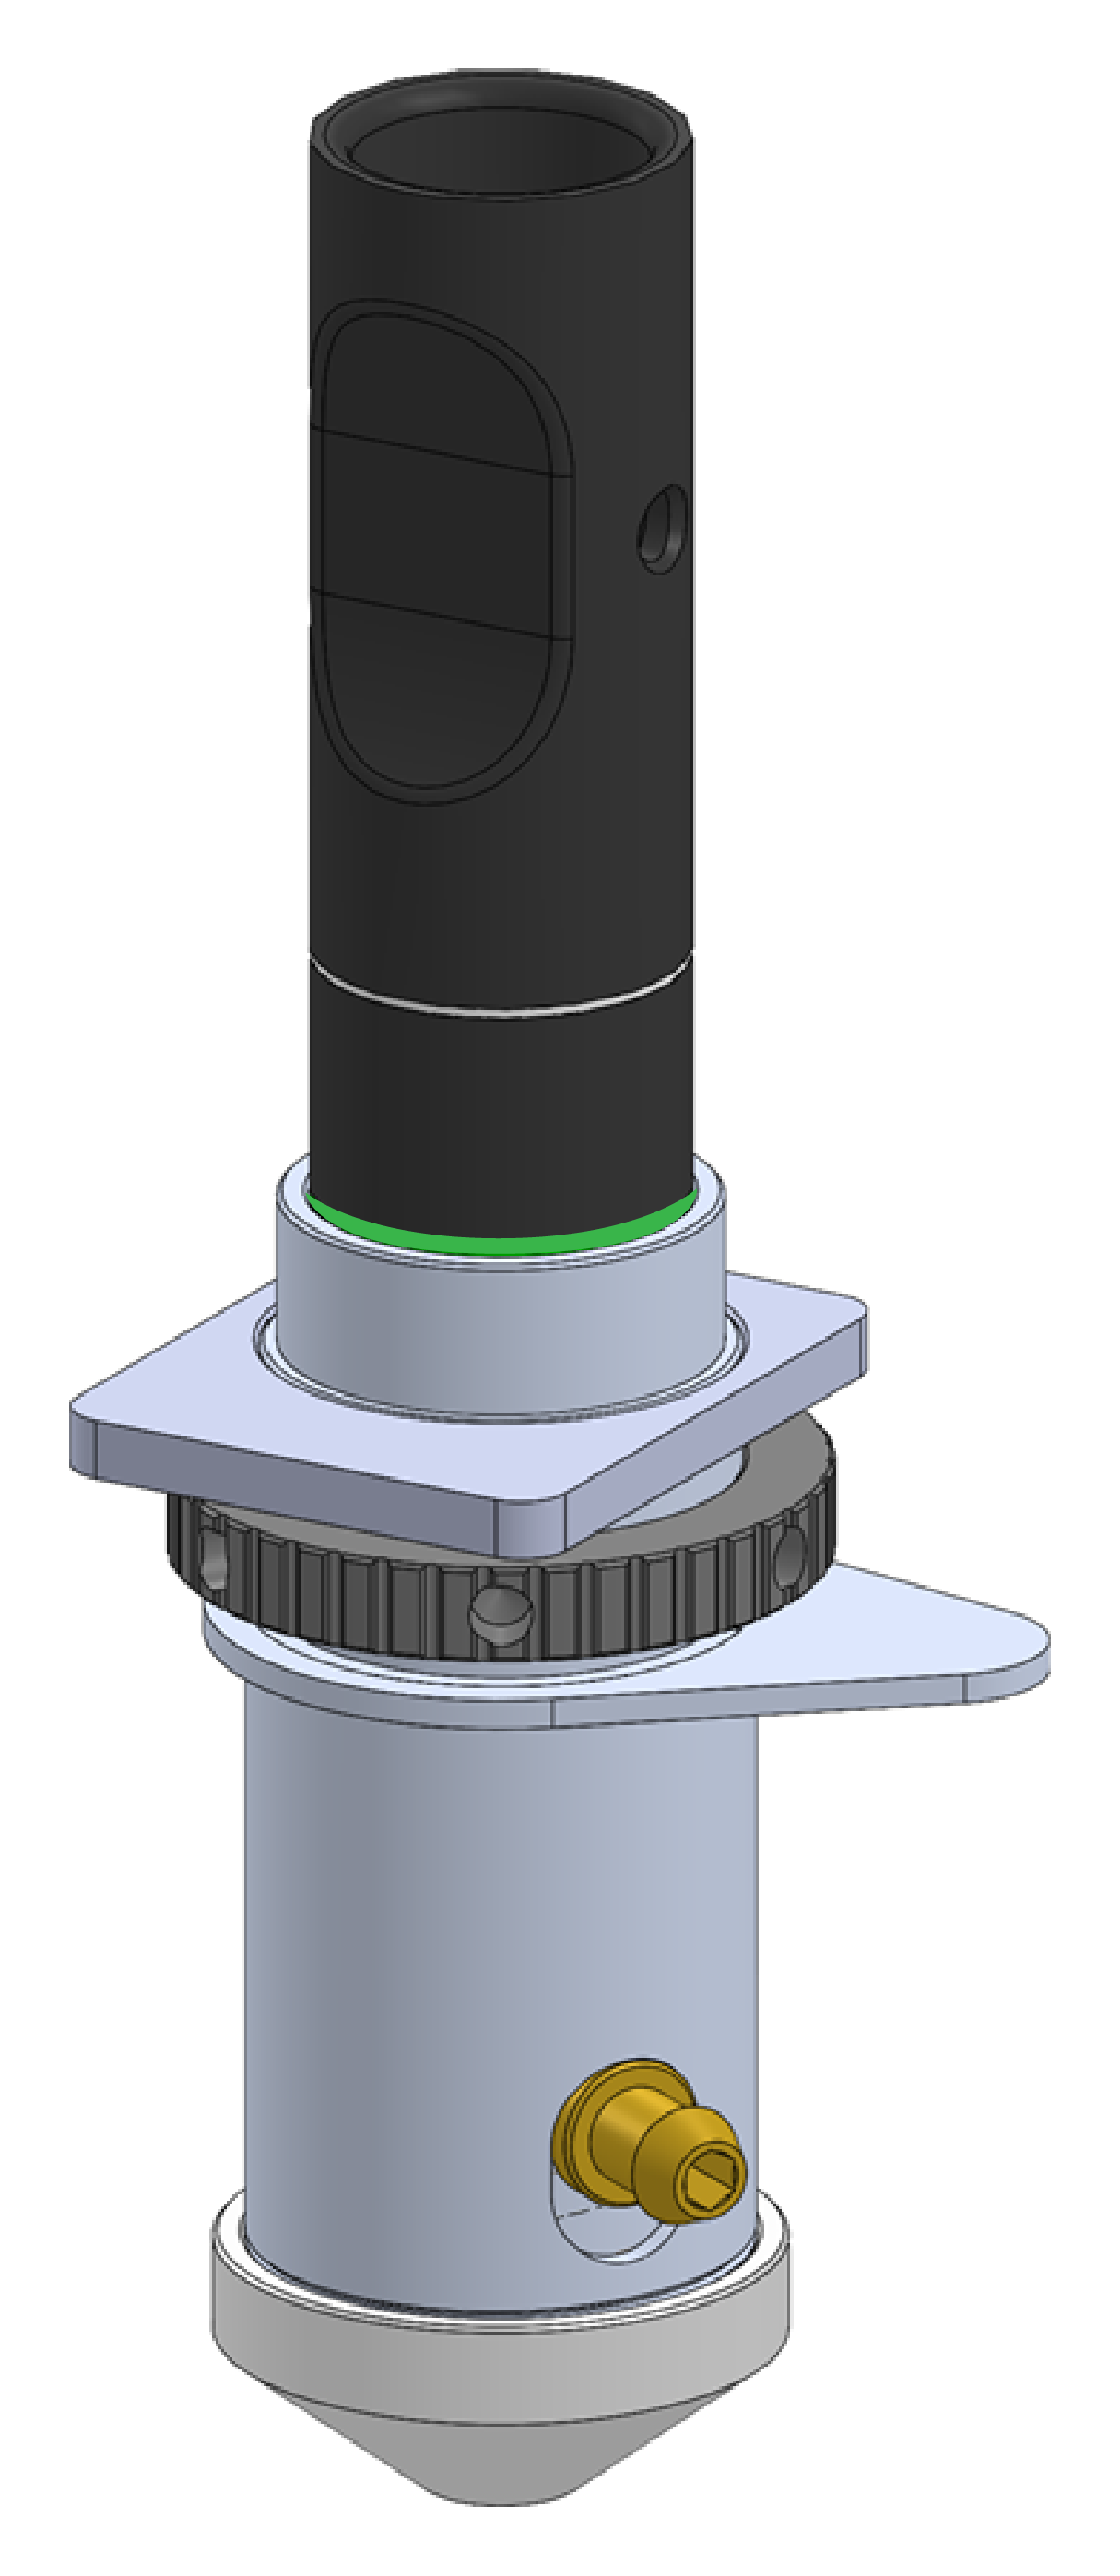
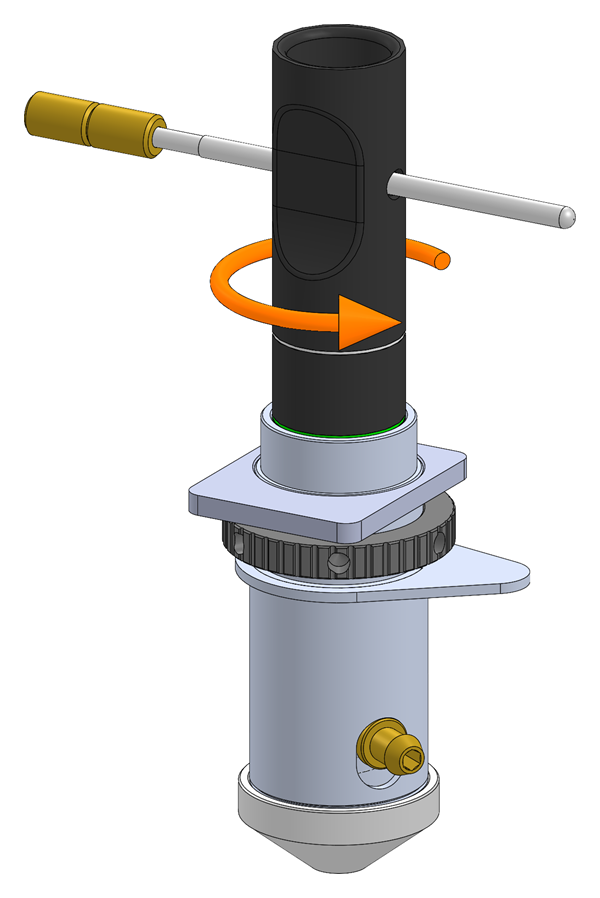
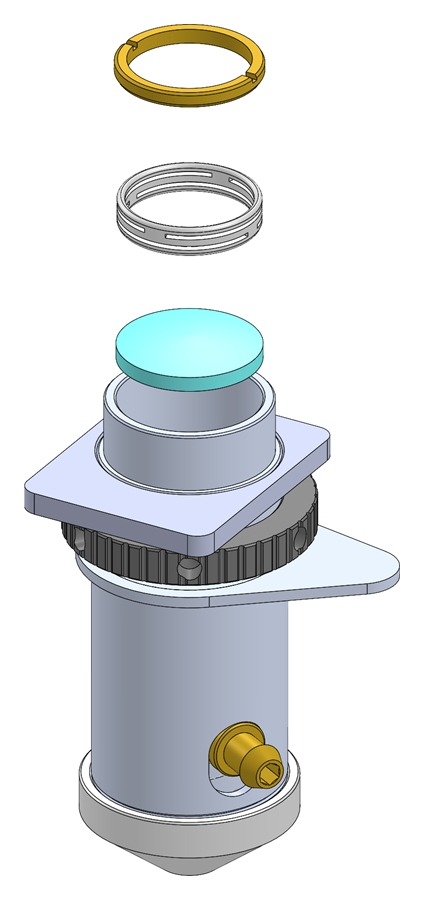
Install the new lens
Which side of the lens is curved?
Each lens is flat on one side and curved on the other. Once installed, the curved side always faces up, toward the top of the tube. Because you’ll load the lens into the tube upside down in step 6, that means the curved side goes down against the tool. On some lenses, especially longer focal lengths, the curve is so slight that both sides can look flat. Use these checks to tell them apart.
1. Look for an arrow
Some lenses have a small arrow on the edge. If yours does, it points toward the curved side. Not every lens has one.
2. Check your reflection
Hold the lens by its edges and look at your reflection in it. Then flip the lens over and look again. The side where your reflection is right-side up (not upside down) is the curved side. That’s the side that faces up in the tube, so place it face down on the tool when you load the lens in step 6.
3. Look at the edge
Hold the lens edge-on at eye level against a light background. The curved side bulges slightly past the edge, while the flat side stays level. This works best on shorter focal lengths, which have more curve.
Adjusting the bottom brass ring
The bottom brass ring sets the height the lens sits at. Most of the time you won’t need to touch it. But when you tighten the top ring in step 9, your band should reach the top of the tube just as the ring gets snug. If it doesn’t, the bottom ring is at the wrong height. The bottom ring is adjusted from underneath, so the lens tube needs to be taken apart from the bottom. You only need to loosen the top ring, not remove it.
| What you see | What it means | What to do (working from the bottom) |
|---|---|---|
| The top ring keeps turning past your band (band ends up below the top of the tube) | The lens is sitting too low | Raise the bottom ring: turn it clockwise |
| The top ring gets snug before your band reaches the top of the tube | The lens is sitting too high | Lower the bottom ring: turn it counterclockwise |
To adjust the bottom ring
- Loosen the top ring a few turns (step 3) so the lens isn’t clamped. You don’t need to take the top ring, flexure or lens out.
- Take apart the bottom of the lens assembly by following the Monthly Detailed Cleaning section of Optics Cleaning – Fusion Maker, Edge, and Pro. Stop once the inner lens cone is removed and you can reach the bottom brass ring from underneath.
- Insert the tool from the bottom and rotate it until it grabs the bottom ring’s notches.
- Turn the ring a small amount in the direction shown in the table. Start with one full turn; the threads are very fine, so each turn moves the ring only slightly. If the ring is stiff, slide the focus tool through the tool’s hole for leverage.
- Check the height before reassembling anything else: tighten the top ring from the top (step 9) and see whether your band lines up with the top of the tube just as the top ring gets snug.
- If it doesn’t, loosen the top ring again and repeat steps 3 to 5.
- Once the height is right, reassemble the bottom of the lens assembly by following the same optics cleaning instructions.
Troubleshooting
-
The top ring won’t turn
Make sure the tool’s tabs are fully seated in the ring’s notches and the tool is straight. Slide the focus tool through the hole in the lens removal tool for more leverage, and grip the tube with a rubber jar opener or cloth. If the ring still won’t move, contact support rather than forcing it.
-
The tool doesn’t fit in the tube
You may have the tool for a different tube style. Pro owners should compare their lens tube to the three styles in Which tool do I need?
-
The tool won’t go in far enough to reach my band
Double-check your lens focal length. Debris on top of the ring can also block the tool; clean it out and try again.
-
The lens fell off the tool or landed tilted
Keep the tube straight as you lower it over the tool, and hold the tube and tool firmly together while you flip them. If the lens ends up tilted in the tube, nudge it flat with a cotton swab. If it landed upside down, tip it back out onto your cloth and repeat steps 6 and 7.
-
The lens rattles after reassembly
The top ring isn’t tight enough, or the flexure is missing or flattened. Remove the ring, confirm the flexure is in place and undamaged, and retighten until your band lines up with the top of the tube.
-
My band ends up above or below the top of the tube
First, make sure you’re reading the right band for your lens and that the flexure is in the right place for your lens (see the Flexure column in the band table). If the band is above the top of the tube and the ring still turns easily, keep tightening gently. If the ring is already snug with the band above the top, or it turns past the band, the bottom ring needs adjusting. See Adjusting the bottom brass ring.
-
Cuts or engraving look weaker after replacing the lens
Check that the lens is installed curved side up (see Which side of the lens is curved?) and that it’s clean. Then confirm your focus settings match the new lens size.