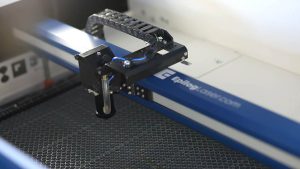
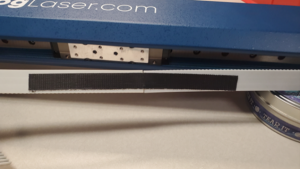
This guide covers replacing the x-axis belt on the Fusion Edge 12, 24 and 36 and the Fusion Pro 24 and 36. The new belt is taped to the old one and pulled through the x-axis assembly, then tensioned using the x-axis motor’s RMS current reading.
Parts Required
- LC0435 – Belt, X-Axis, 24
- LC0725 – Belt, X-Axis, 36
Tools / Materials Required
- 3/32", 5/32" and 7/64" Allen Wrenches
- Heavy-Duty Tape (such as duct tape)
Safety First: Ensure the engraver is completely powered off and the power cord is disconnected before removing any panels or touching internal components.
X-Axis Belt Removal
Turn Off Engraver
Turn off the engraver.

Disconnect from Power
Unplug the engraver from its power source.
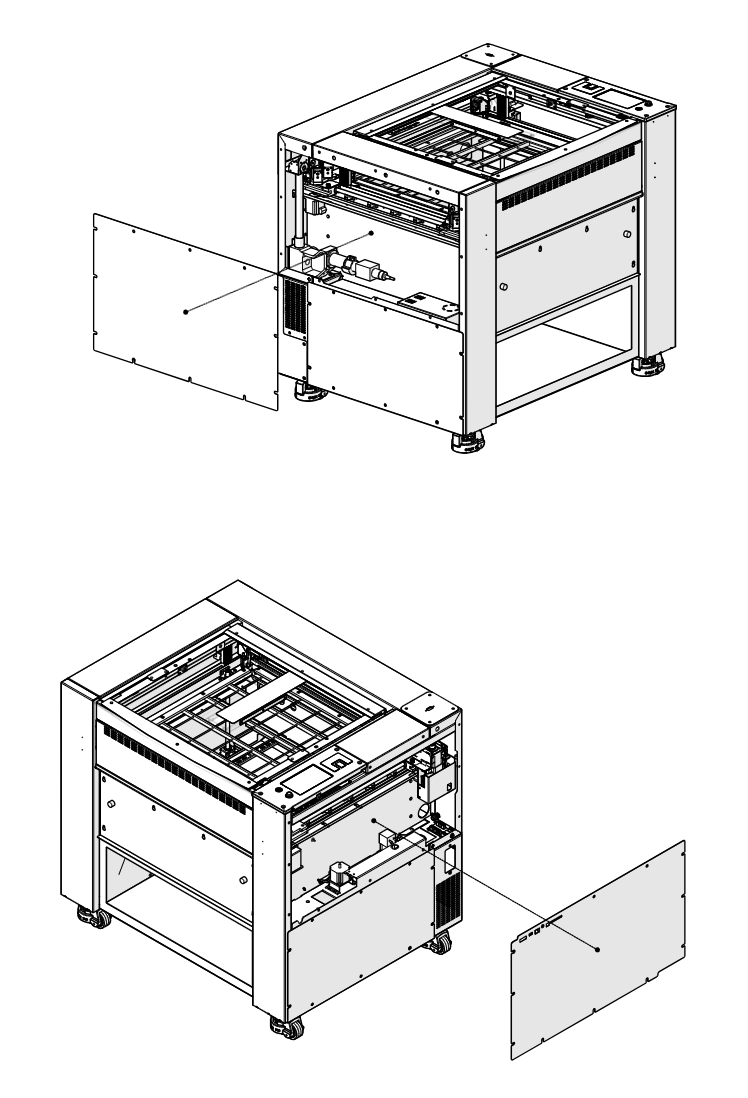
Remove Side Panels
Remove the left and right panels of the engraver.
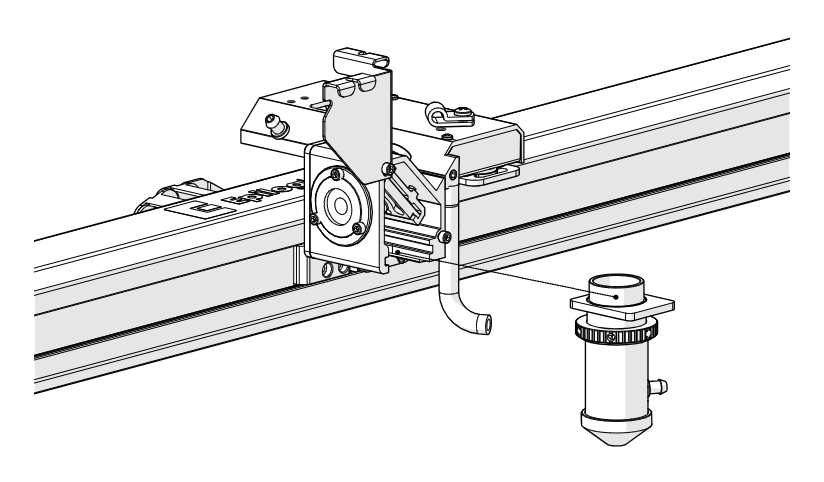
Remove Lens Tube
Loosen and remove the lens tube assembly from the x-axis assembly.
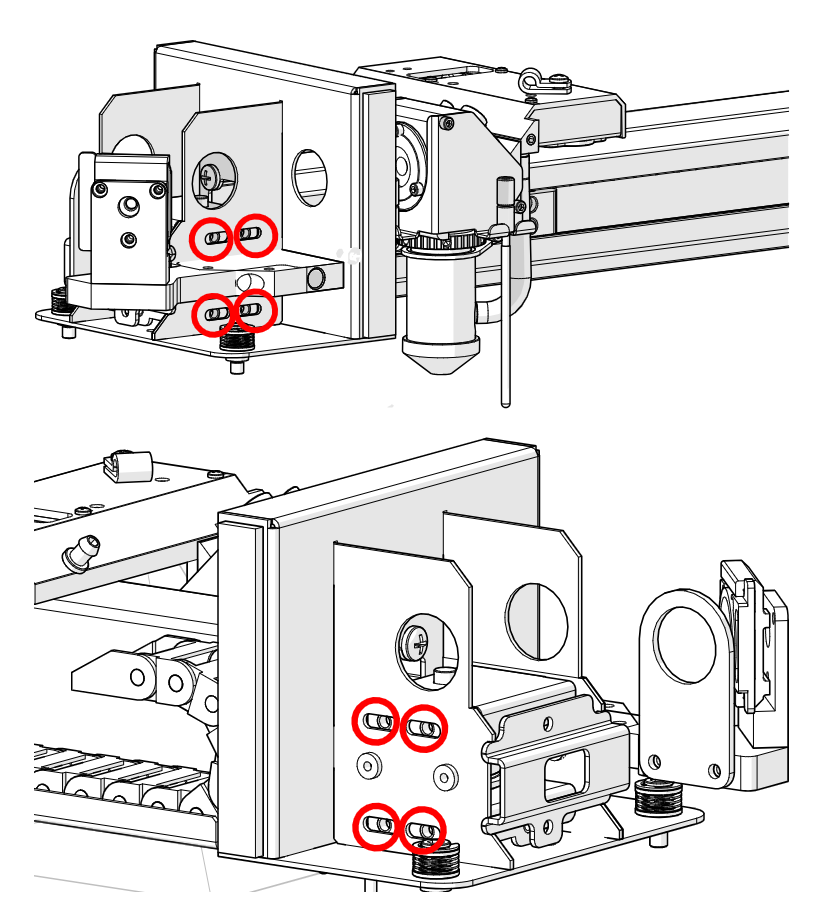
Loosen Idler Mounting Screws
Loosen, but do not remove, the eight 7/64" Allen screws on the x-axis idler assembly (circled in red).
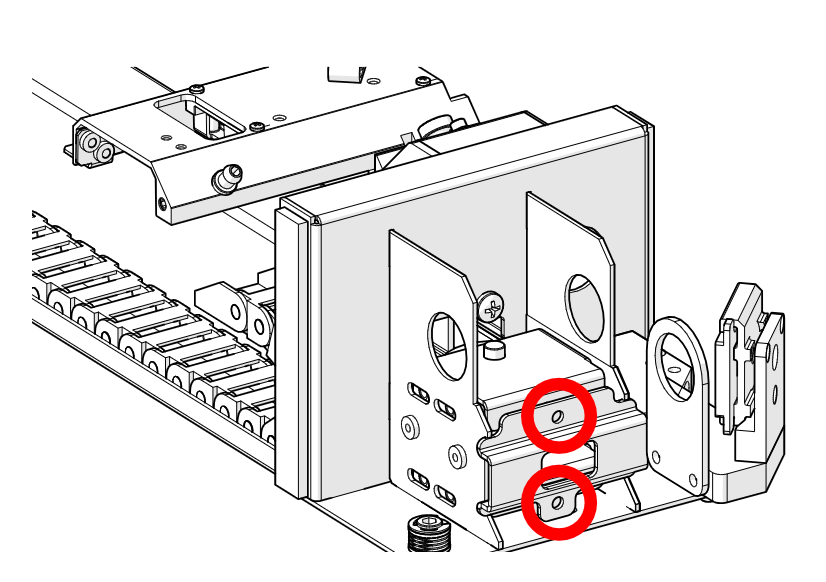
Loosen Tensioner Screws
Loosen, but do not remove, the two 7/64" Allen screws on the x-axis belt tensioner bracket (circled in red).
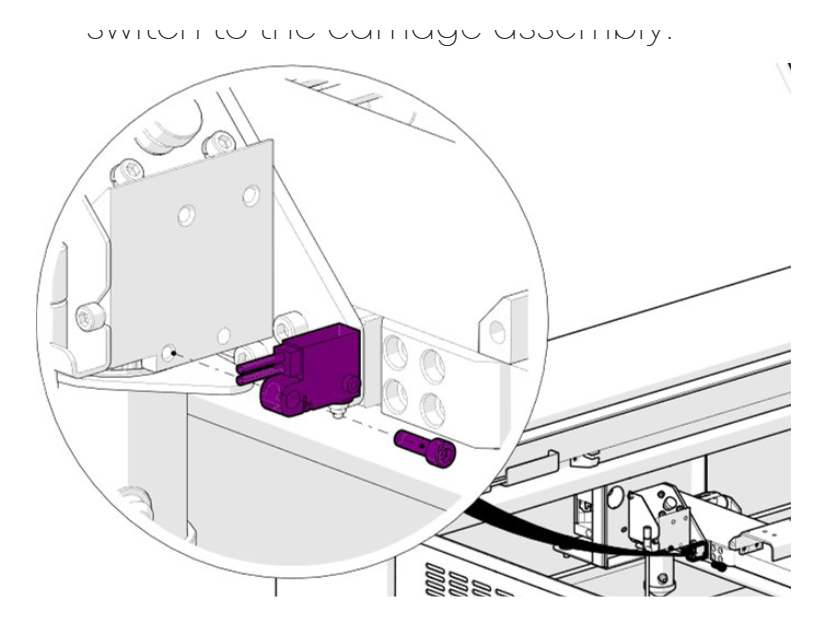
Remove Autofocus Switch
Loosen and remove the 3/32" Allen screw that secures the autofocus switch (highlighted in purple) to the carriage assembly.
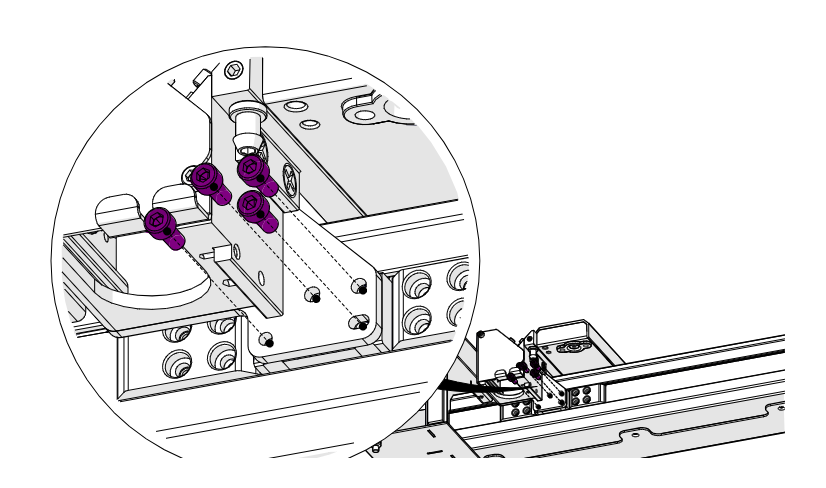
Remove Carriage Screws
Loosen and remove the four 3/32" Allen screws that secure the carriage assembly to the carriage mounting plate (highlighted in purple).
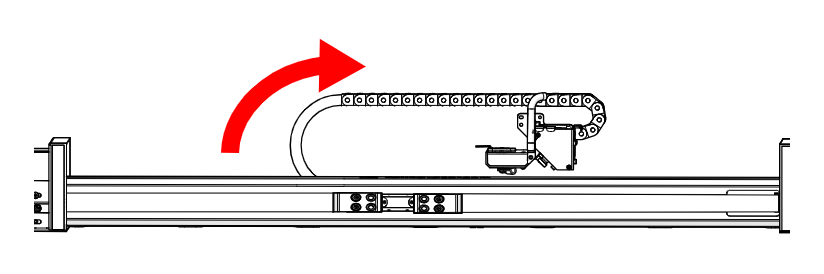
Move the Carriage Aside
Move the carriage assembly to the side, out of the way of the belt clamps.
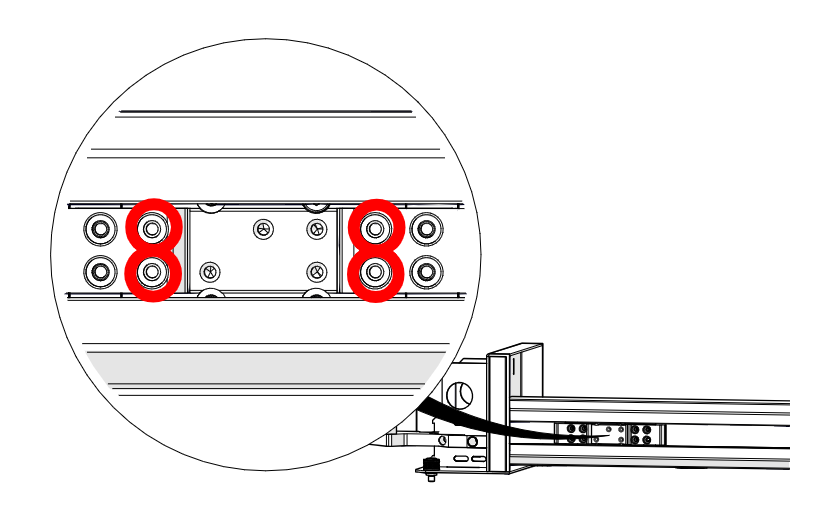
Remove Belt Clamp Screws
Loosen and remove the four 3/32" screws that secure the x-axis belt clamps to the linear guide slider block (circled in red).
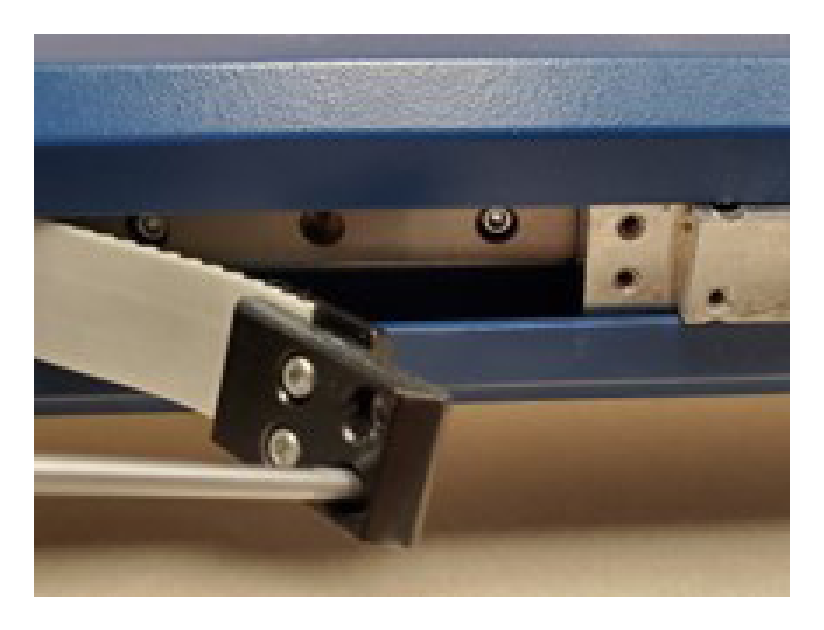
Remove Belt Clamps
Remove the left and right belt clamps from the x-axis assembly.
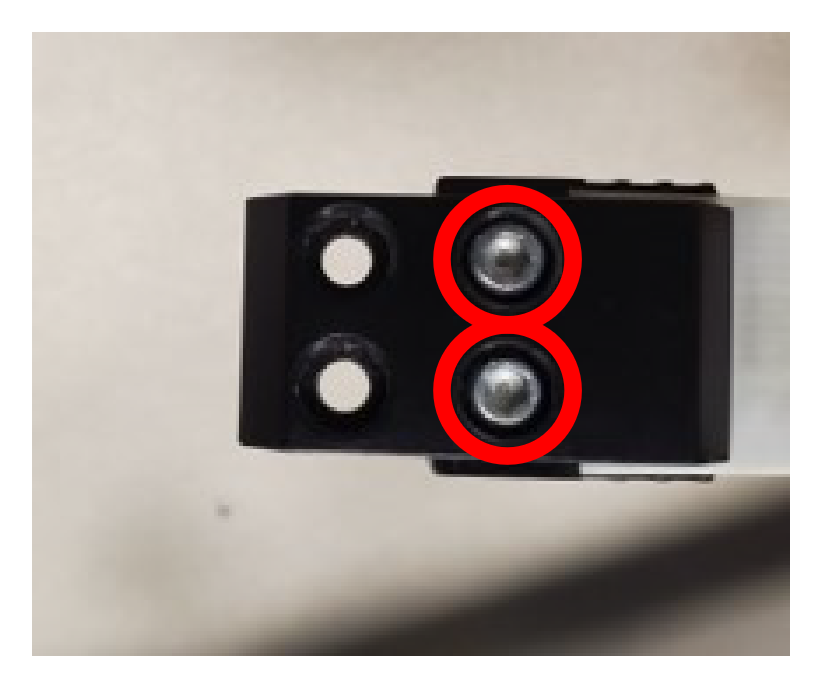
Free the Right Belt End
Loosen and remove the two 3/32" Allen screws that secure the x-axis belt to the right belt clamp (circled in red).
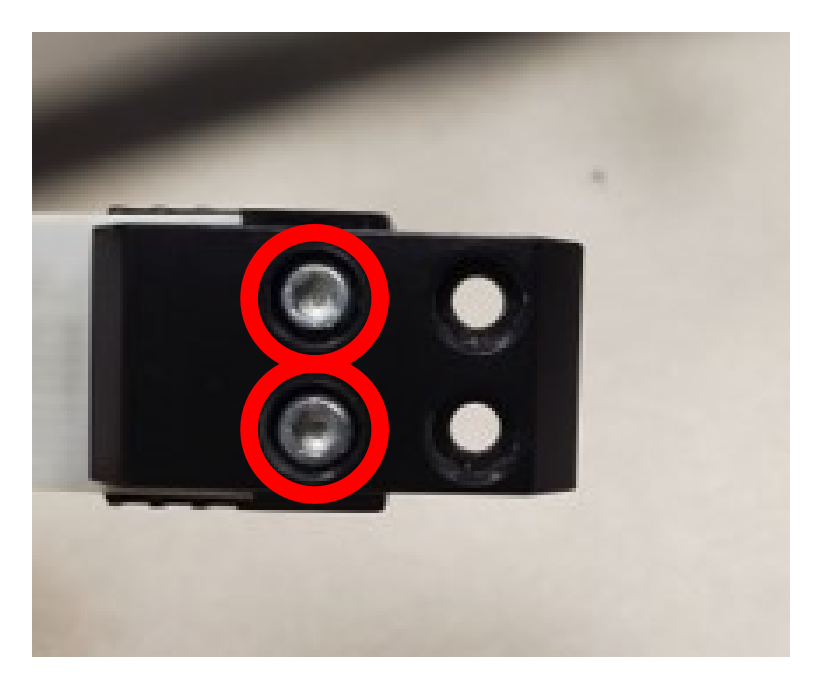
Free the Left Belt End
Loosen and remove the two 3/32" Allen screws that secure the x-axis belt to the left belt clamp (circled in red).
X-Axis Belt Installation
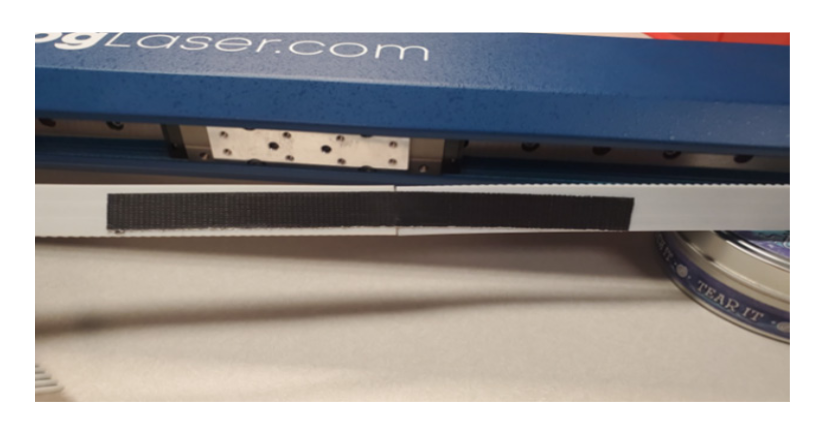
Tape the Belts Together
Pull the right end of the old belt away from the lens assembly and lay it end to end with the new belt. Join them with a strip of duct tape or similar heavy-duty tape on the outer (smooth) sides.
Important: Make sure the teeth of both belts face the same way: teeth toward the rear of the engraver, smooth side toward the front.
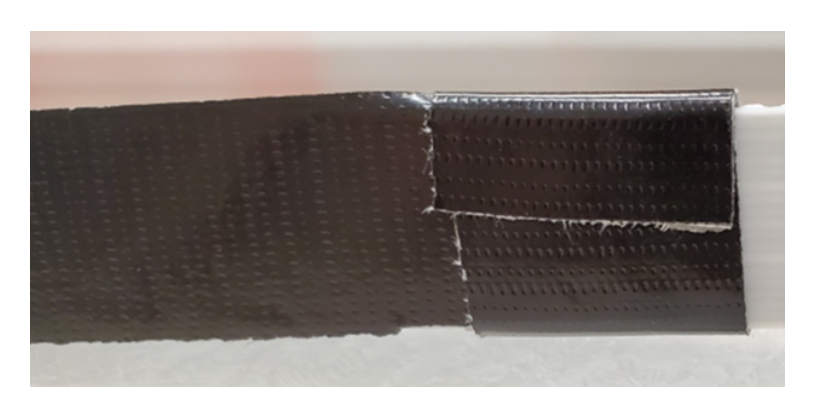
Wrap the Joint
Wrap another piece of tape around the joint between the new and old belts.
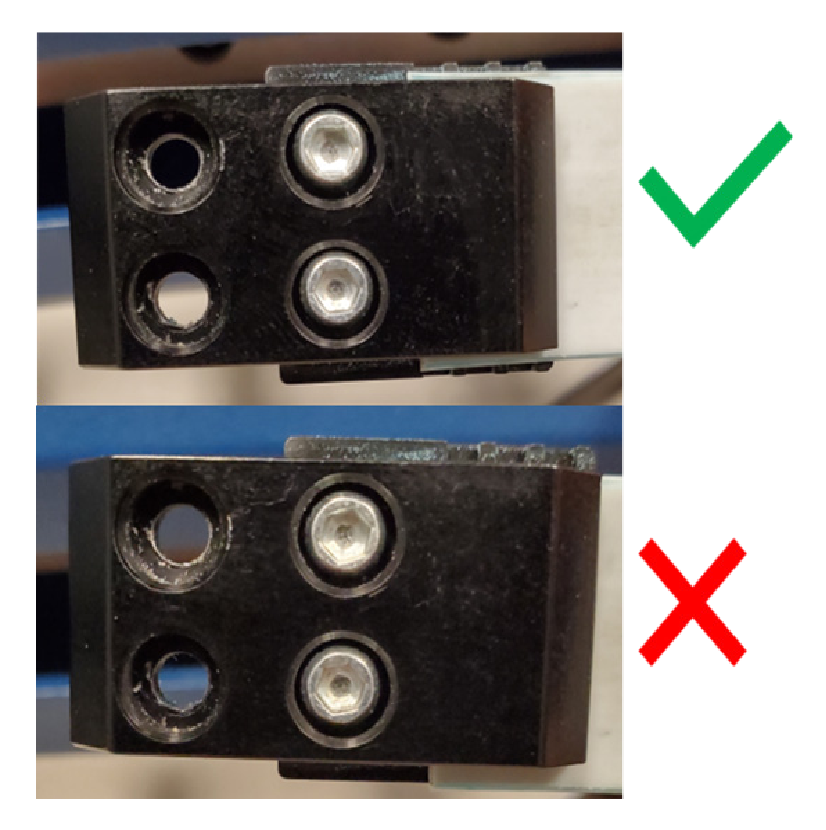
Clamp the Free End
Install the right belt clamp on the untaped end of the new belt. This keeps the new belt from being pulled into the reducer housing. Center the clamp on the belt before tightening it (top: correct, bottom: incorrect).
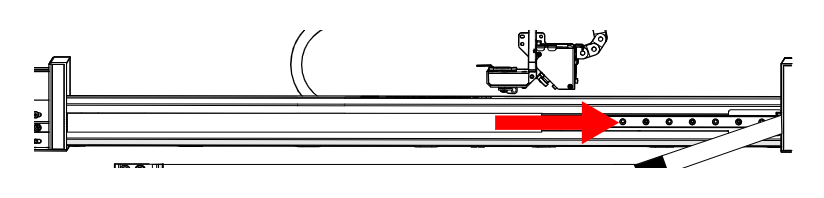
Thread the New Belt
Slowly pull the left end of the old belt to remove it, threading the new belt through the x-axis assembly as you go.
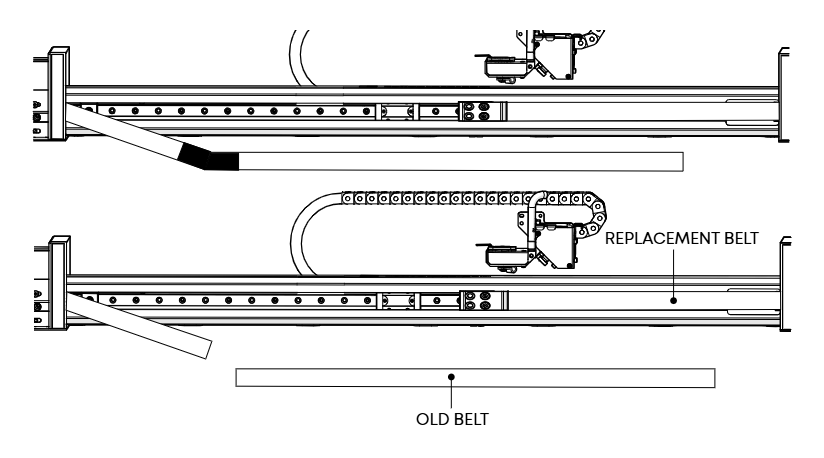
Separate the Belts
When the taped joint has come out of the idler assembly on the left side of the x-axis assembly, separate the old and new belts.
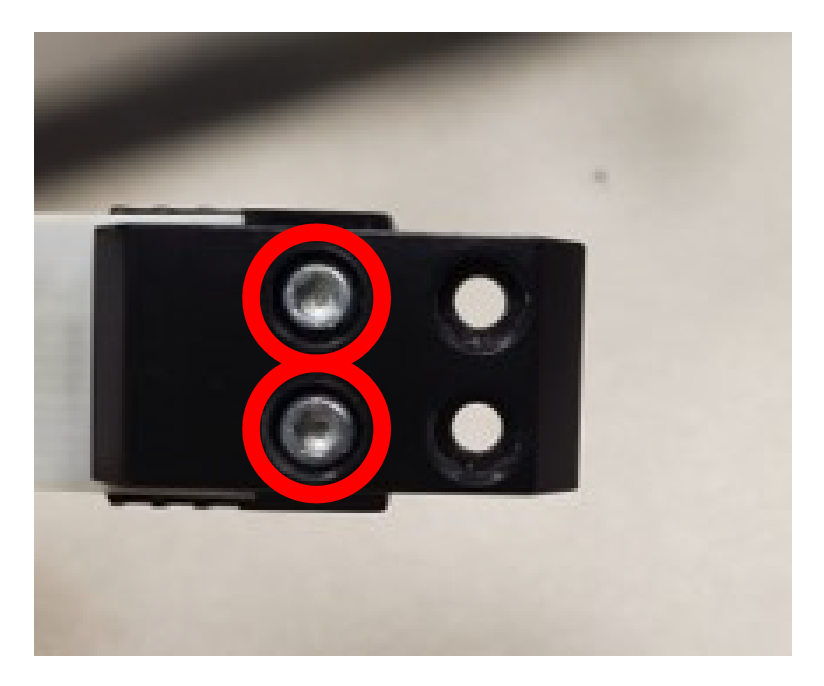
Clamp the Left End
Install the left belt clamp on the left end of the new belt. Center the clamp on the belt before tightening it.
Install Belt Clamps
Position the belt clamps in the x-axis assembly. Install and tighten the four screws that secure them to the linear guide slider block.
Install the Carriage
Place the carriage assembly in position. Install and tighten the four 3/32" Allen screws that secure it to the carriage mounting plate.
Install Autofocus Switch
Place the autofocus switch in position. Install and tighten the 3/32" Allen screw that secures it to the carriage assembly.
Install Lens Tube
Install and tighten the lens tube assembly.
Remove Belt Slack
Tighten the two 7/64" Allen screws on the x-axis belt tensioner bracket to remove the excess slack from the belt.

Power On
Reconnect the engraver to power and turn it on.
Tensioning the X-Axis Belt
Create a Test Box
In your preferred illustration program, create a black raster box on the artboard that is:
- Edge / Pro 12 and 24: 22" (560 mm) wide
- Edge / Pro 36: 34" (860 mm) wide
- Roughly 4" (100 mm) tall
Print the Job
Print the job with the speed set to 100%.
Note: Power does not matter here, as the engraver runs with the lid open for this procedure.
Start the Job
Send the job to the engraver and start it.

Open the Settings Menu
On the display, press the gear icon in the upper right corner to open the Settings menu.
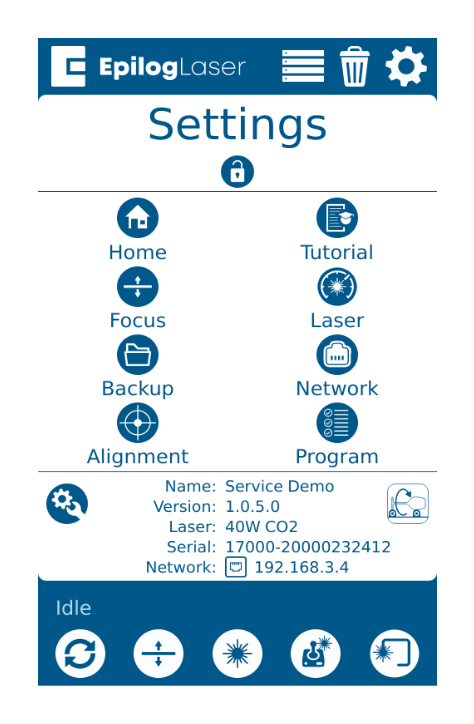
Open Advanced Settings
Press and hold the word Settings to open the Advanced Settings menu.
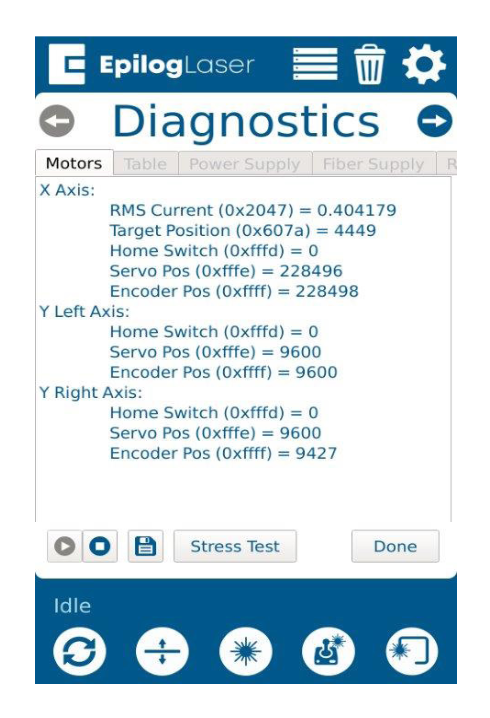
Find the X-Axis RMS Current
Open the Diagnostics menu and find the RMS Current reading for the X-Axis motor/drive.
Adjust to 4.0 – 5.1 A
While the job runs, the x-axis motor RMS current should be between 4.0 and 5.1 A, depending on the engraver model.
- If the current is lower, increase belt tension by tightening the two 7/64" tensioner screws on the x-axis idler assembly.
- If the current is higher, decrease belt tension by loosening the two 7/64" tensioner screws.
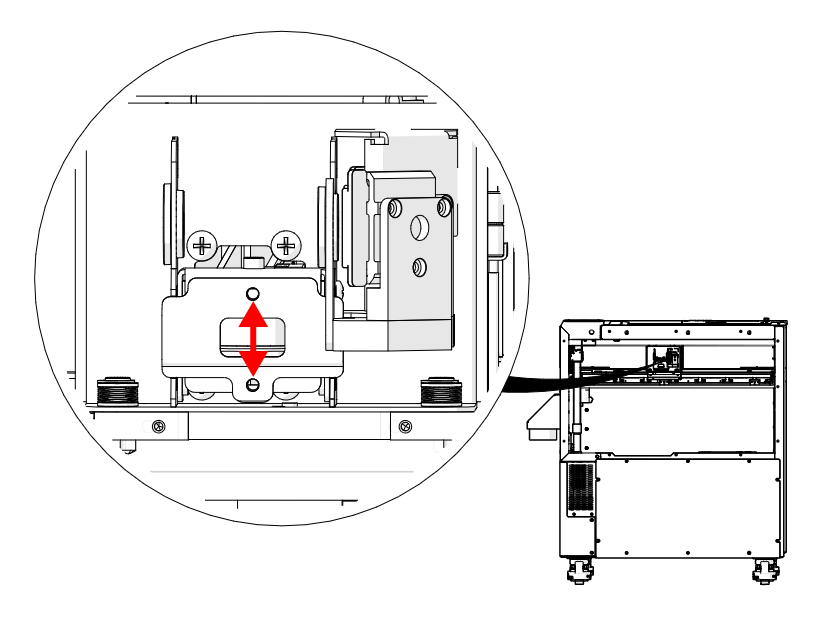
Check Belt Tracking
With the belt tensioned, check that the x-axis belt stays as centered as possible on the idler pulley while in motion.
Center the Belt
If the belt rides against the idler pulley flange, make equal but opposite adjustments to the two 7/64" tensioner screws. Repeat until the belt stays centered on the pulley in motion.
- Belt too high: tighten the top screw 1/4 turn and loosen the bottom screw 1/4 turn.
- Belt too low: loosen the top screw 1/4 turn and tighten the bottom screw 1/4 turn.
Tighten Idler Mounting Screws
Once the belt is centered and the RMS current is in range, tighten the eight 7/64" idler mounting screws on the left side of the x-axis assembly.
Install Side Panels
Install the left and right panels of the engraver.