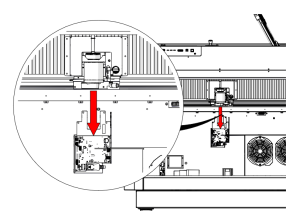
This guide covers replacing the x-axis motor on the Fusion Pro 32 and 48. The motor is mounted on the right end of the x-axis assembly and drives the x-axis through a reducer belt.
Parts Required
- CS0833 – Assy, Motor, X-Axis
Tools Required
- 5/32" Allen Wrench
- 2.5 mm Allen Wrench
- Phillips Screwdriver
Safety First: Ensure the engraver is completely powered off and the power cord is disconnected before removing any panels or touching internal components.
X-Axis Motor Removal
Turn Off Engraver
Turn off the engraver.

Disconnect from Power
Unplug the engraver from its power source.
Remove Right Panel
Remove the right panel of the engraver.
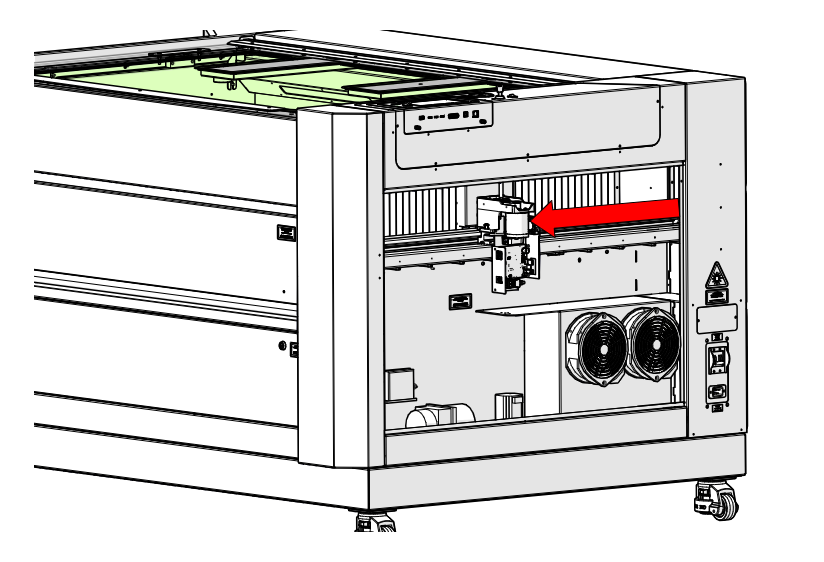
Center the X-Axis Assembly
Manually move the x-axis assembly to the middle of the engraver.
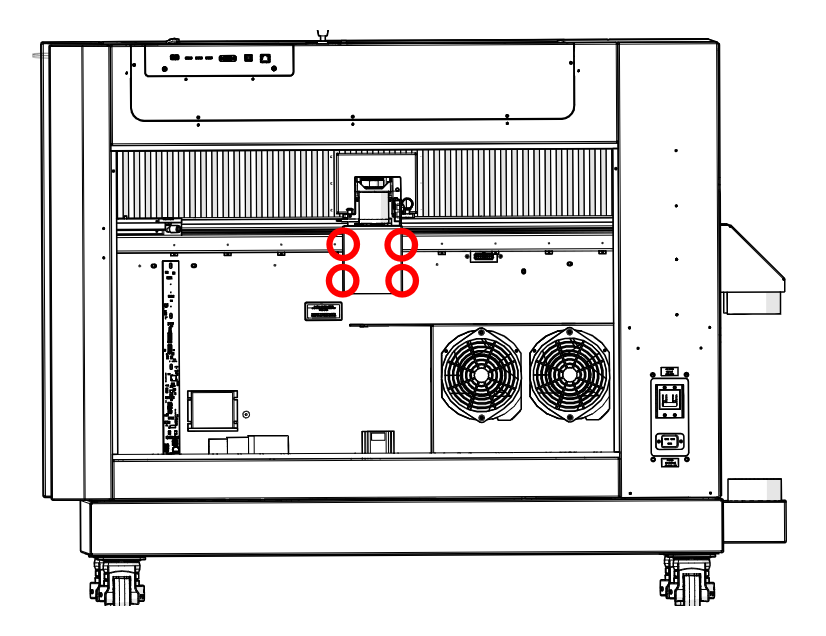
Remove Drive Board Cover
Loosen the four Phillips screws (circled in red) and remove the x-axis motor drive board cover.
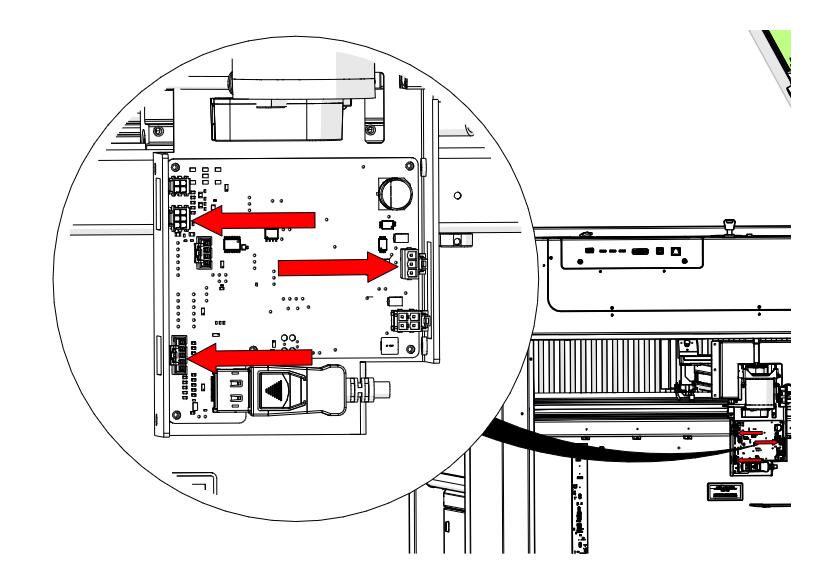
Disconnect Motor Leads
Disconnect the three x-axis motor leads from the x-axis motor drive board (red arrows).
Remove Motor Screws
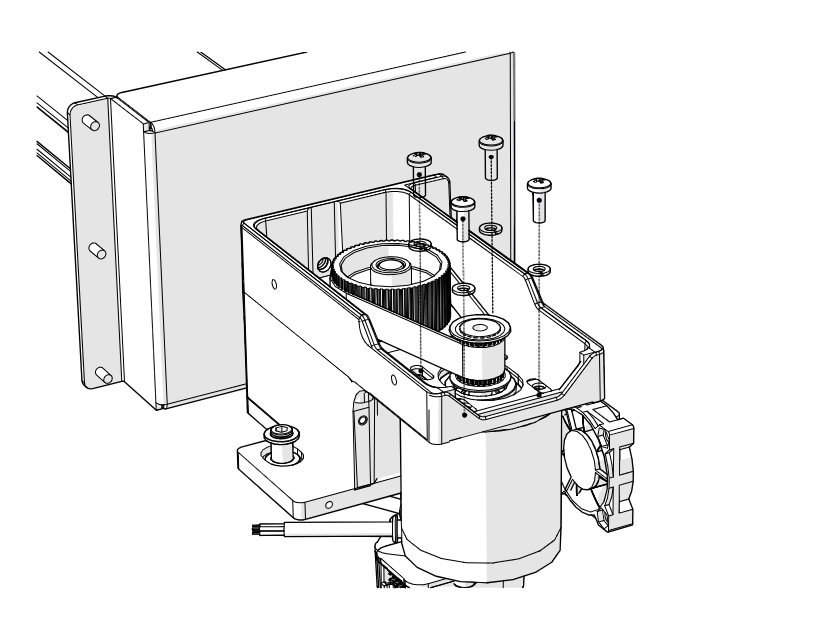
Loosen and remove the four 2.5 mm Allen screws that secure the x-axis motor to the x-axis assembly.
Remove Reducer Belt
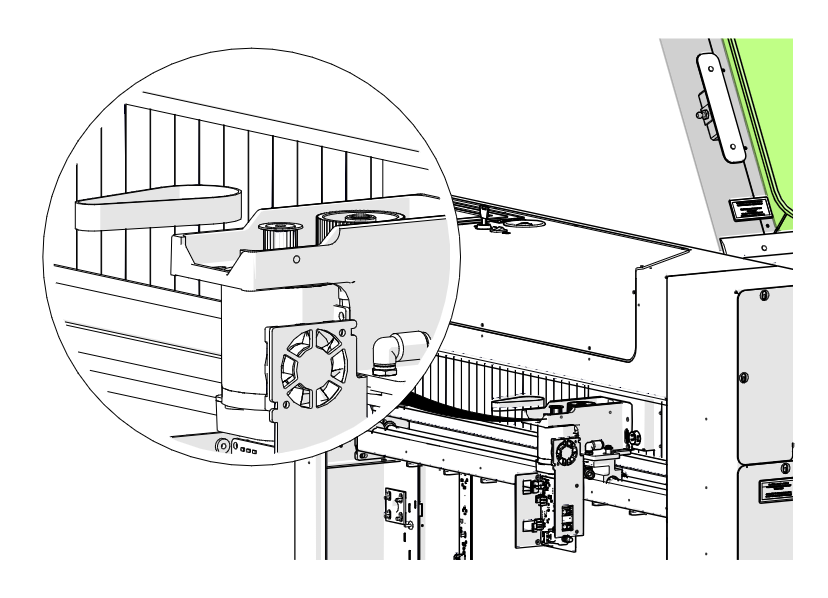
Remove the x-axis reducer belt from the x-axis assembly.
Remove the X-Axis Motor
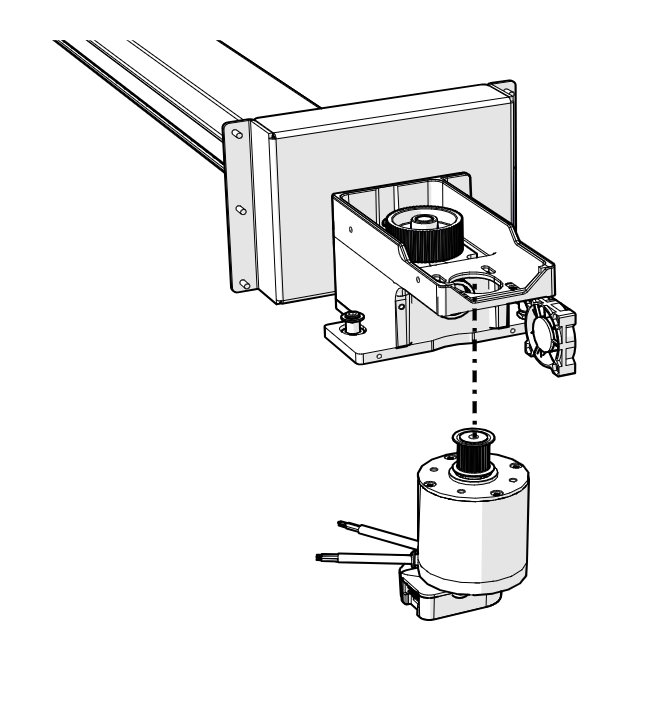
Remove the x-axis motor.
X-Axis Motor Installation
Place the New Motor
Place the new CS0833 x-axis motor in the x-axis assembly.
Note: The x-axis encoder connection must face the front of the engraver, as shown.
Install Motor Screws
Install, but do not fully tighten, the four 2.5 mm Allen screws that secure the x-axis motor to the x-axis assembly.
Install Reducer Belt
Install the x-axis reducer belt.
Tension the Reducer Belt
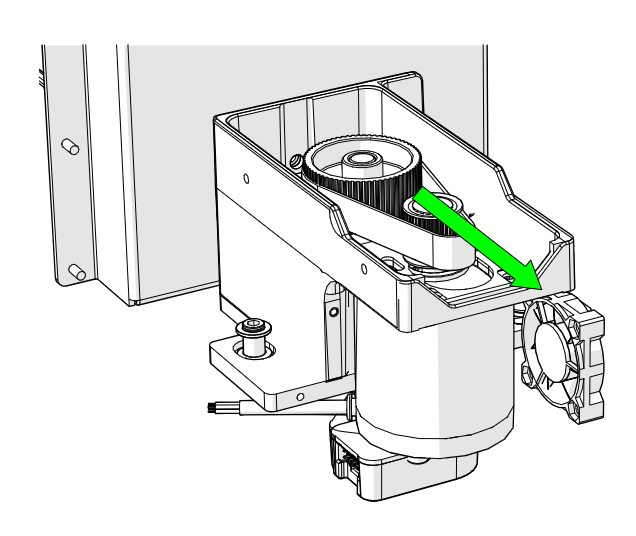
Apply tension to the reducer belt by pulling the motor away from the x-axis reducer pulley (green arrow). Once the slack is removed, fully tighten the four 2.5 mm Allen screws.
Connect Motor Leads
Connect the three x-axis motor leads to the x-axis motor drive board.
Install Drive Board Cover
Install the x-axis motor drive board cover and tighten the four Phillips screws.
Install Right Panel
Install the right panel of the engraver.

Power On
Reconnect the engraver to power and turn it on.