This guide covers the recommended cleaning for the Legend 36EXT: the cabinet, the optics, the table tray, the exhaust and the laser tube. Regular cleaning keeps the engraver performing well, extends the life of its mechanical and optical parts, and reduces fire risk.
Parts Required
- None
Tools / Materials Required
- Soft cloth and isopropyl alcohol
- Cotton swabs and the optics cleaner from the accessory kit
- Small brush or vacuum cleaner
- Flexible plastic or wire brush
- Compressed air
Safety First: Turn off and unplug the engraver before any cleaning or maintenance.
Fire Safety
Through normal use the engraver collects debris and soot that can catch fire. Some materials are extremely flammable and can burst into open flame, which could destroy the engraver and the building it is in. Follow these rules at all times:
- Never leave the engraver running unattended.
- Keep the area around the engraver clean and free of clutter, combustible materials, explosives and volatile solvents such as acetone, alcohol or gasoline.
- Always keep a properly maintained and inspected fire extinguisher on hand. Epilog recommends a Halotron extinguisher, which leaves a clean residue that will not harm the engraver, or a multi-purpose dry chemical extinguisher, which leaves a sticky, corrosive powder that is very hard to clean up.
- Always use air assist when vector cutting.
- Be careful when vector cutting. Many materials can burst into flames, even familiar ones. Always watch the engraver while it runs.
- Keep the engraver clean. A build-up of cutting and engraving residue is a fire hazard in its own right.
Keeping the engraver clean is the single most important thing you can do to keep it working like new. Five minutes a day keeps residue from building up, and there is almost no other maintenance needed.
General Cleaning

Turn Off and Unplug
Turn off the engraver and unplug the power cord before cleaning.
Wipe Down the Cabinet
Use a soft cloth and a mild solvent such as isopropyl alcohol to remove smoke and vapor residue from the table, the X-beam and anywhere else dirt collects.
Clean the Autofocus Plunger
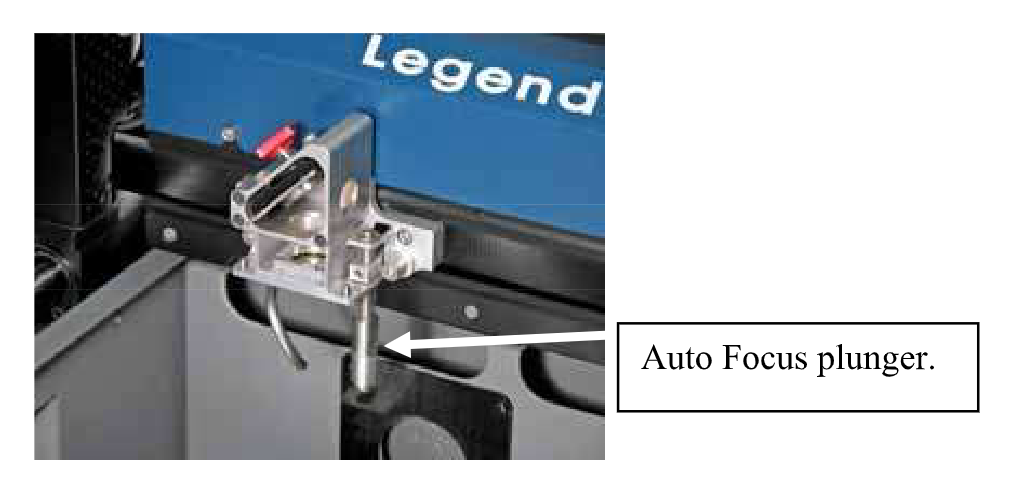
The autofocus plunger is at the back of the lens carriage, about 1/4" in diameter and 2" long. Its lower shaft must be kept clean for accurate focusing. Gently wipe it with a cotton rag and a mild household cleaner (Windex, 409 or isopropyl alcohol).
Cleaning the Optics
Clean the optics about once a week, or whenever they look dirty. Smoke, resin and other contaminants reduce laser power and can damage the optics.
Remove the Carriage Mirror
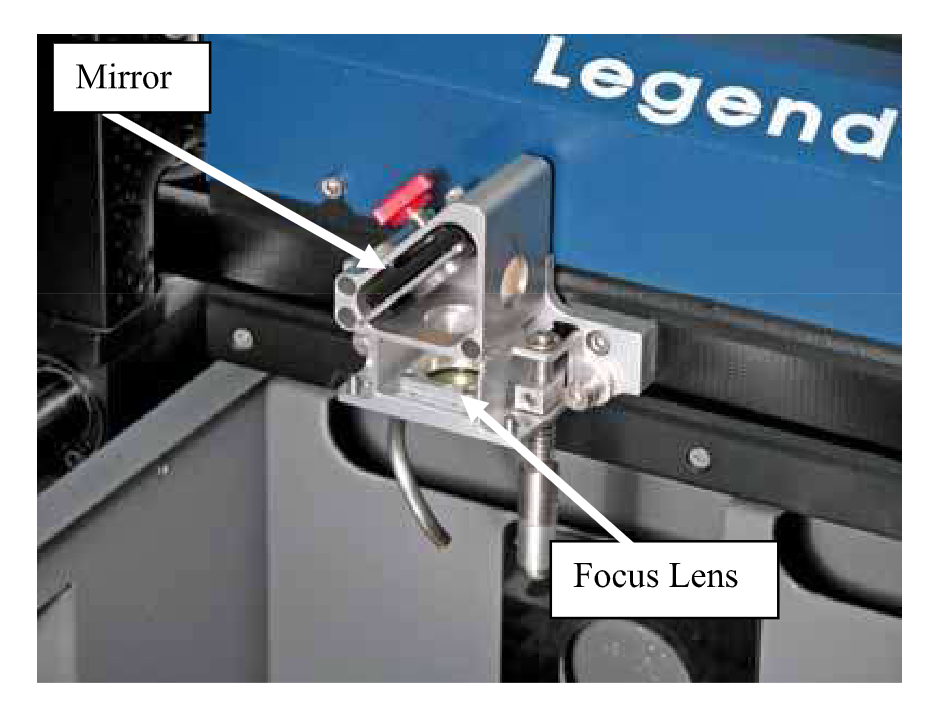
The focus lens and the mirror directly above it need cleaning most often. Loosen the red thumbscrew and slide the mirror out of its holder.
Prepare a Swab
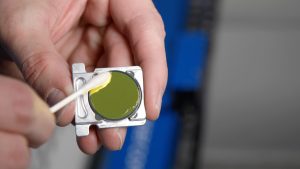
Moisten a high-quality cotton swab with the optics cleaner from the accessory kit, then blot it on a piece of cotton so it is not soaking wet.
Note: Read the label on the cleaner. Use rubbing alcohol only to remove fingerprints. Acetone can be used briefly if you run out of cleaner, but not regularly, because its impurities can contaminate the optics. Pure ethyl (grain) alcohol such as Golden Grain or Everclear is the best substitute.
Daub the Optic
Daub the optic gently, rotating the swab after each daub to expose clean cotton, until there is no visible contamination.
Finish the Surface
With a fresh swab, clean the surface with a gentle zigzag motion. Do not scrub, especially while there are visible particles, and avoid repeated circular motions. Remove any cotton threads caught on the mountings and let the optic dry before running the engraver.
Reinstall the Carriage Mirror
Slide the mirror mount back into its holder and tighten the red thumbscrew. It only needs to be snug.
Clean the Other Optics
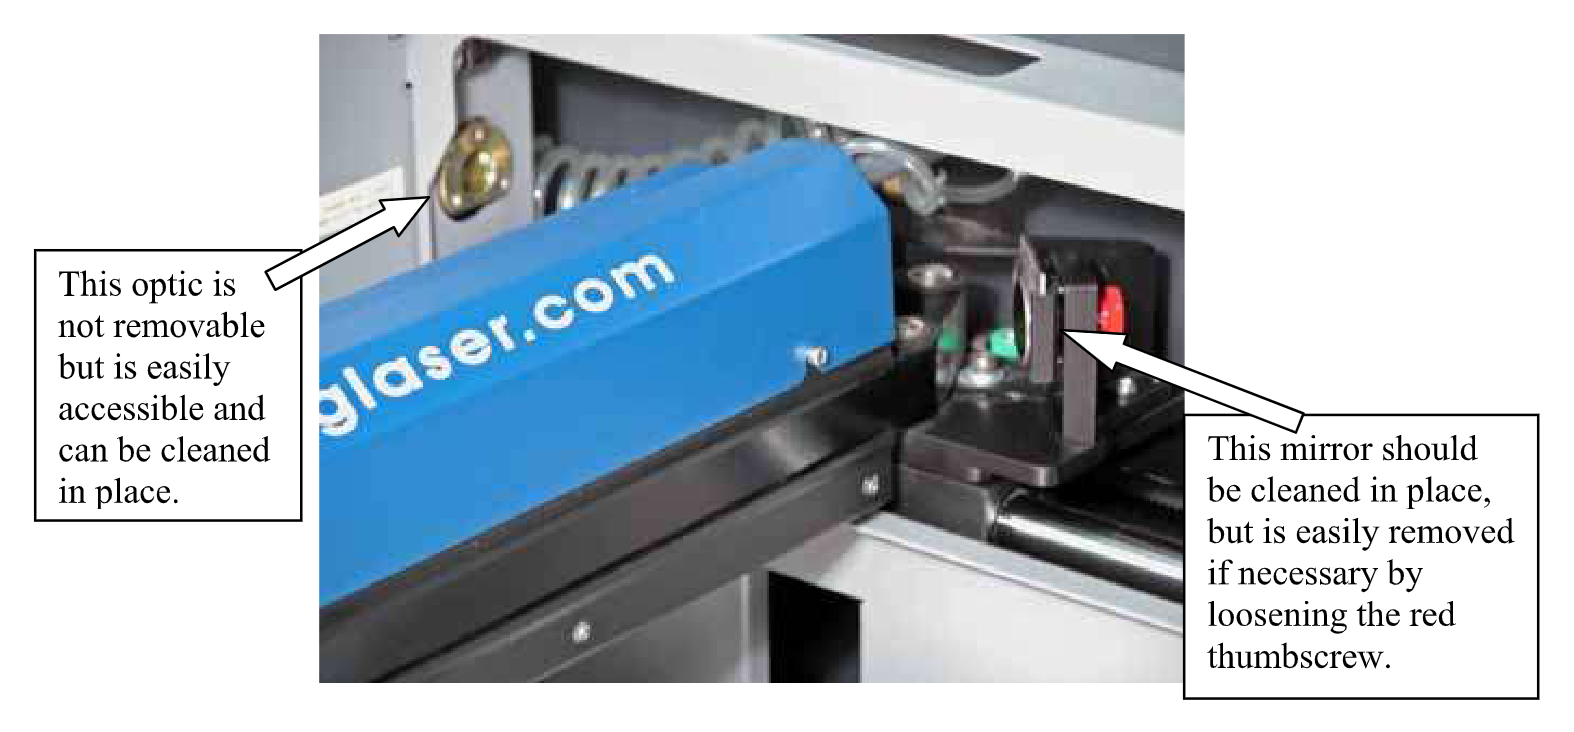
The other optics are on the right end of the X-beam and in the upper right corner of the cabinet. Clean them in place the same way, with a cotton swab or lens cleaning paper. The X-beam mirror can be removed by loosening its red thumbscrew if needed.
Cleaning the Table Tray
https://support.epiloglaser.com/wp-content/uploads/9000_ext_cleaning_04_table_tray.pngVacuuming debris from the table trayClean the Table TraySmall pieces that fall through the vector grid are a serious fire hazard. Remove the vector grid and clean out the table tray with a small brush or vacuum. Remove all the debris from the bottom of the tray on a regular basis.
Cleaning the Exhaust
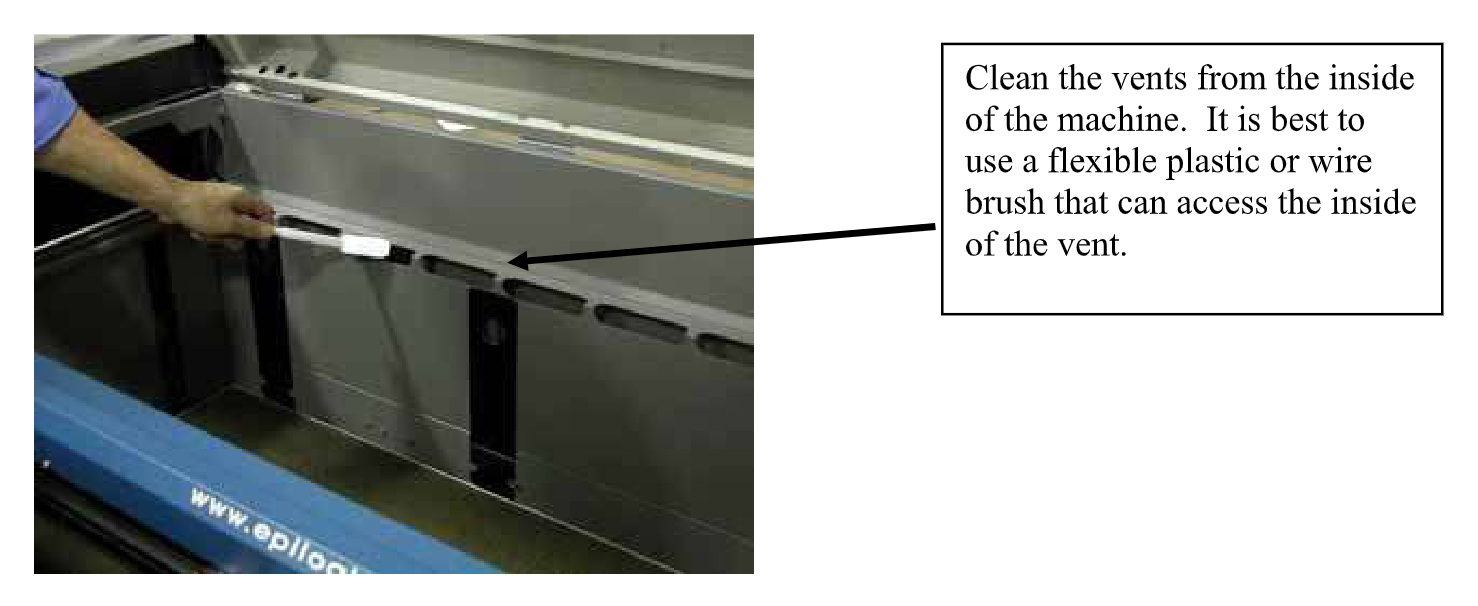
Clean the Vents
Clean the exhaust vents from inside the engraver. A flexible plastic or wire brush that reaches inside the vent works best.
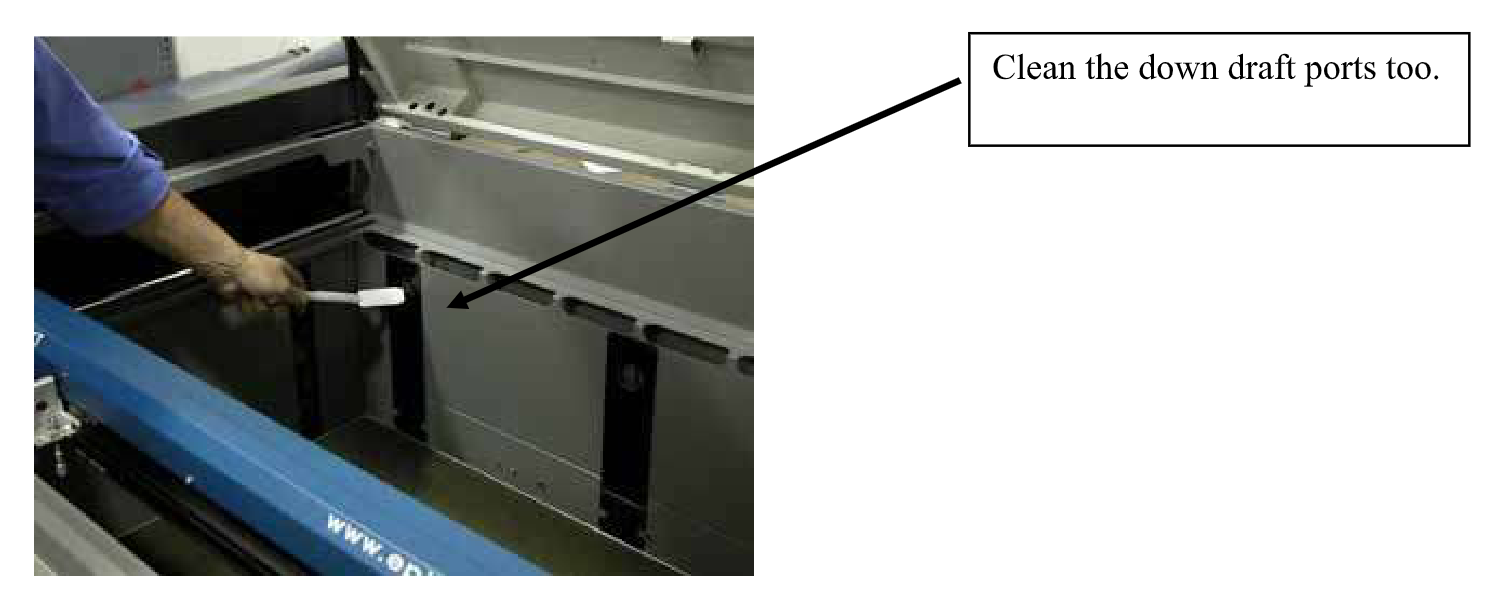
Clean the Down Draft Ports
Clean the down draft ports the same way.
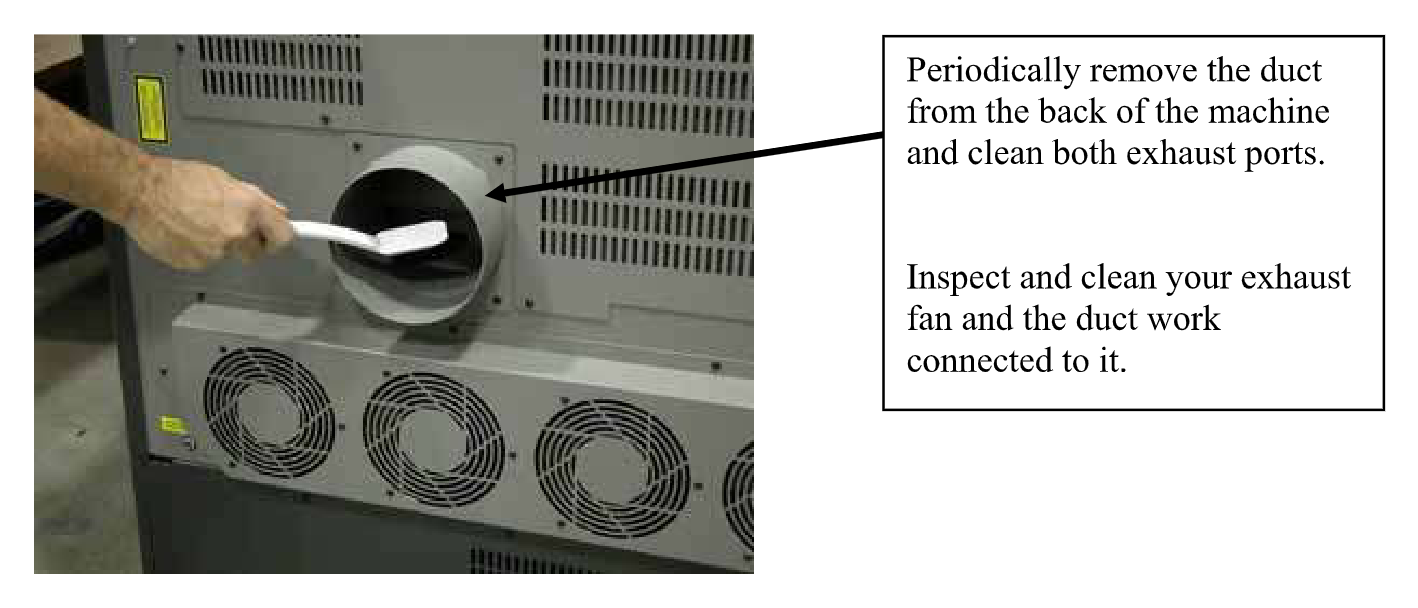
Clean the Exhaust Ports
Periodically remove the duct from the back of the engraver and clean both exhaust ports.
Check the Exhaust Blower
Clean and inspect the exhaust blower and the duct work connected to it. If you smell odor while engraving, or see smoke near the lens carriage, check for loose or broken pipe and hose connections or obstructions.
Laser Tube Care
Check the Cooling Fans
Make sure all of the laser cooling fans are working. An overheated laser tube gives erratic output and may fail completely.
Clean the Cooling Fins
In a dusty environment, keep the cooling fins on the laser tube free of dust. Blow the dust off with compressed air, with the engraver unplugged.

Reconnect Power
When cleaning is done and the optics are dry, plug the power cord back in.