Índice
- Introducción
- Seguridad
- Introducción
- Setting Up Your Laser System
- Unpacking the Fusion Ascent
- Choose Where to Locate the System
- Connecting the Exhaust
- Connecting Electrical Power
- Connecting the Laser to Your Computer
- Power on the Laser
- Set the IP Address
- Install the Software Suite & Set Up Your Laser
- Sign Up for Driver Updates and Register Your System
- Panel de control
- System Features
- Machine Maintenance
- Specifications
- Technical Support
- Warranty
- Configuración de materiales
- Calibration
Set the IP Address
Ethernet Setup
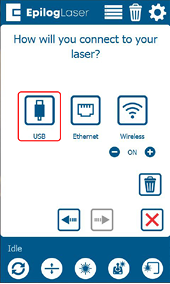
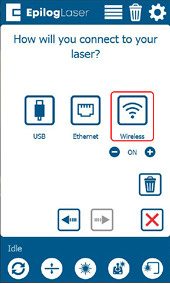
A screen will appear asking how you would like to connect your laser. Select “Ethernet”.
Select the text in the IP Address box and type in whichever IP Address you prefer to use. Most Epilog users will use the IP Address of 192.168.3.4 which is what we use in this manual. Press the Green arrow to complete the setup.
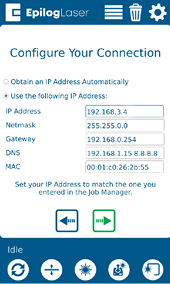

This will be the IP Address you use in the Job Manager when you set up your machine.
USB Cable Setup
A screen will appear asking how you would like to connect your laser. Select “USB”.
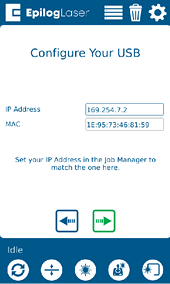
Under “IP Address” the IP Address will be 169.254.7.2. Press the Green arrow to complete the setup.
This will be the IP Address you use in the Job Manager when you set up your machine.
Wireless Setup
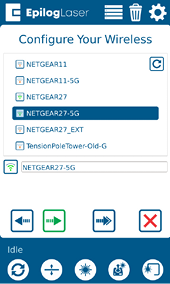
A screen will appear asking how you would like to connect your laser. Select “Wireless”.
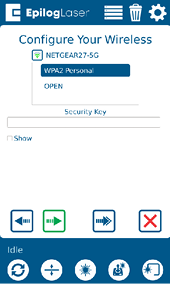
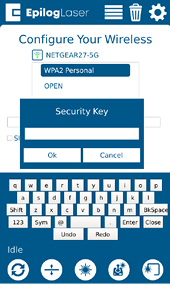
On the next screen, select your wireless network from the list and press the green next arrow. Select “WPA2 Personal” if you are connecting to a secured network. Select Open if you are connecting to an open network. Tap the box under “Security Key” and type in your password. Then press the green next arrow to connect.
Note: You must select the same network that your computer is connected to.
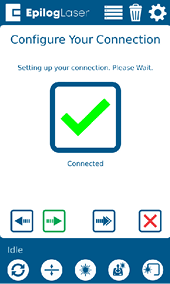
Select “Obtain an IP Address Automatically” and click the green arrow to finish setup. Once connected, your screen will show a green check mark. Press the green next arrow.
