目次
- はじめに
- 安全
- はじめに
- Setting Up Your Laser System
- Unpacking the Fusion Ascent
- Choose Where to Locate the System
- Connecting the Exhaust
- Connecting Electrical Power
- Connecting the Laser to Your Computer
- Power on the Laser
- Set the IP Address
- Install the Software Suite & Set Up Your Laser
- Sign Up for Driver Updates and Register Your System
- コントロールパネル
- System Features
- Machine Maintenance
- Specifications
- Technical Support
- Warranty
- マテリアル設定
- Calibration
Carriage Camera Calibration
The following procedure must be performed first for all Fusion Ascent machines. Turn on the engraver, and let it complete the startup process.
- On the display, press the gear icon to enter the Settings Menu.
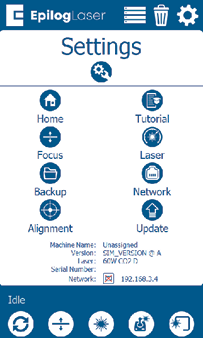
- Long Press the “Settings” text for 2-3 seconds to enter the Advanced Settings Menu.
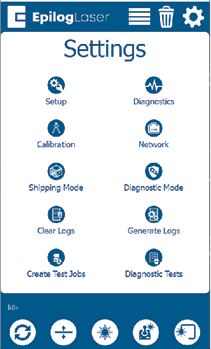
- Click on “Calibration” followed by “Calibrate Cameras” to enter the Camera Calibration menu. If using 1.1.2.8 or older, just tap “Calibrate Cameras”.
- テーブルの左上隅に、陽極酸化処理されたアルミニウムの板(8インチ×5インチ/200mm×125mm)を配置してください。
- 彫刻機の上部ドアを閉めてください。
- OKを押すとキャリッジカメラのキャリブレーションが開始され、彫刻機がテーブルを適切な焦点高さに移動させます。
- 彫刻機は陽極酸化アルミニウムにパターンを刻印し、キャリッジカメラがこれを分析してキャリブレーションを行います。作業が完了すると、成功メッセージが表示されるはずです。
- 画面の指示に従って、上空カメラのキャリブレーションに進んでください。