
This guide covers replacing the fiber laser on the FiberMark.
Parts Required
- Fiber Laser Assembly
Tools Required
- #1 Phillips Screwdriver
- Allen Wrench (isolator mounting screws)
Laser Safety: Never run the FiberMark with the side or rear panels removed; serious and permanent eye damage can occur. Lexan safety glasses do not protect against the FiberMark laser beam.
Fiber Optic Cable: The fiber optic cable is very delicate. Damage to it is not covered by the manufacturer’s warranty and is an expensive repair. Never bend it tighter than a 3" radius.
Laser Removal
Power Off Engraver
Turn off the engraver.

Disconnect From Power
Unplug the power cord from the engraver.
Remove the Rear Panel
Remove the rear panel with a #1 Phillips screwdriver.
Disconnect the Laser Cables
Disconnect the five power supply connections and the one ribbon cable from the laser.
Note: If some connections are hidden behind the laser, you can disconnect them after lifting the laser out (step 11). The cables are short, so keep the laser directly behind the chassis until they are disconnected.
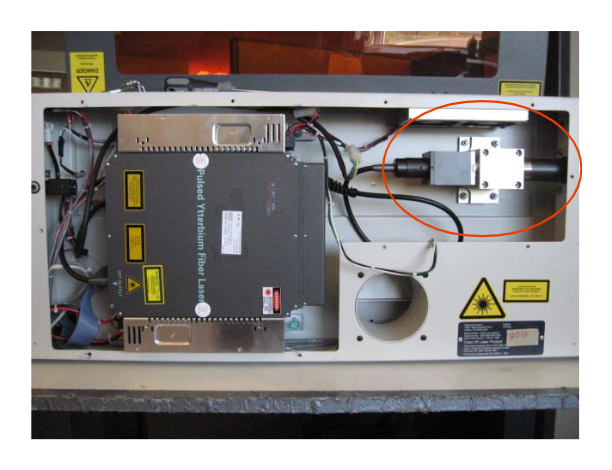
Locate the Isolator/Collimator
The optical isolator/collimator is inside the rear opening, on the right as you face the back of the engraver.
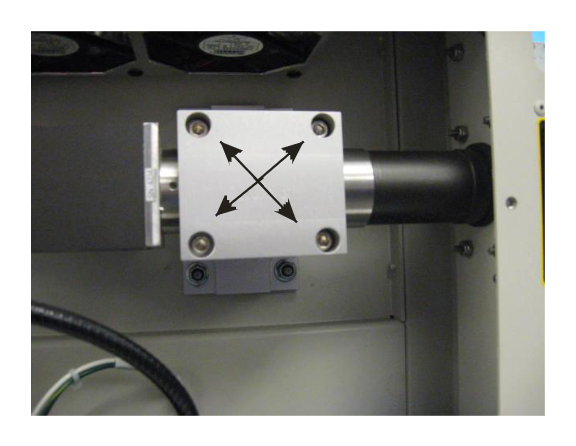
Loosen the Isolator Screws
Loosen the four Allen screws holding the isolator/collimator in its mount, and remove all but one. The last screw keeps it from falling out.
Remove the Isolator
Hold the isolator/collimator in your free hand while you remove the last screw. Do not let it drop out of the mount. Carefully set it to the right side of the engraver.
Important: Never bend the fiber optic cable tighter than a 3" radius.
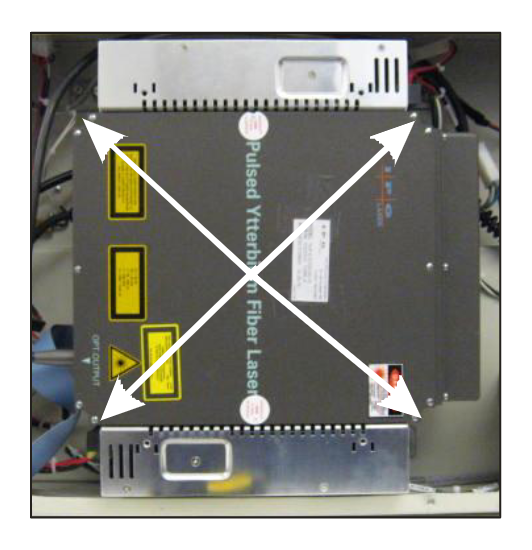
Loosen the Captive Screws
Loosen the four green captive mounting screws at the corners of the laser assembly.
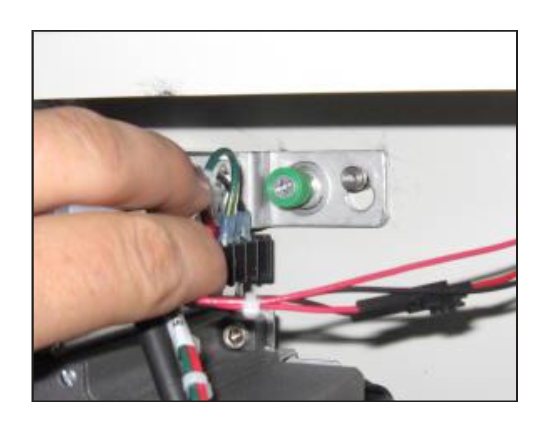
Lift the Laser Off the Pins
The laser rests on guide pins at the top of its mount, which keep it from falling when the screws are loose. Lift the laser slightly to clear the pin heads, then remove it from the chassis.
Finish Disconnecting
If any power supply or laser connections are still attached, disconnect them now. Carefully set the laser aside.
Laser Installation
Connect the New Laser
Hold the replacement laser just behind the engraver and reconnect the five power connections and the ribbon cable.
Hang the Laser on the Pins
Lift the laser and gently set it on the mounting pins at the rear of the chassis.
Tighten the Captive Screws
Tighten the four green captive screws.
Install the Isolator
Carefully set the isolator/collimator on its mounting block and install the four Allen screws.
Important: Never bend the fiber optic cable tighter than a 3" radius.
Reinstall the Rear Panel
Reinstall the rear panel.

Reconnect Power
Plug the power cord back in and turn on the engraver.
Check the Alignment
After installing a new laser, check the FiberMark laser alignment before returning to production work.
