The rotary attachment accessory for Epilog Laser systems allows you to engrave all kinds of cylindrical items, such as bottles, vases, tumblers, wine glasses and much more. Here we’ll guide you step by step in creating a customized glass beer mug.
Install the Rim-Style Rotary
To install the Rim-Style Rotary Attachment, lower the table and turn off the machine.
Place the Rotary at the top-left corner of the table.

Attach the plug to the machine at the top-right corner of the bed.
Turn the machine back on.
Placing the Glass
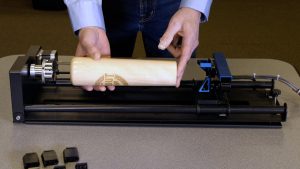
Place the lip of the glass under the top roller.
Move the right side of the Rim-Style Rotary Attachment so the glass sits on the rim.

A level can help to make sure the glass is even.
Rotate the knob up or down to level the engraving area.
Focusing the Laser
Move the laser over the center of the glass.
Place the Manual Focus Gauge.
Raise the table so the glass touches the bottom of the Focus Gauge

Setup Artwork
We’ll be engraving this logo on a glass mug.

Start by changing the color to 70% black, which helps with a smoother engraving.
Select any part of the logo and go to Select > Same > Fill Color

Double click the fill color and change it to 70% black.

Print to the laser.

Configure Laser
Click and Rotate 90 degrees

In the Advanced tab, set the Centering Point as Center-Center.

Turn on the Rotary setting.

Back in the Preview tab, we can see a red dot representation of the center point of our graphic.

Import the glass engraving settings.

Make sure the dithering is set to Stucki.

Press the Print button.

Run the Job with the Rim-Style Rotary Attachment
At the laser, move the Red Dot Pointer to the center of where you want the engraving.

Click Centering Point.

Back in the job list with your job select, press the Start button.
The laser will engrave your artwork around that center point.

It’s that easy!