
In this video, we will walk you through replacing the Power Supply on the Fusion Edge.
Remove Old Power Supply
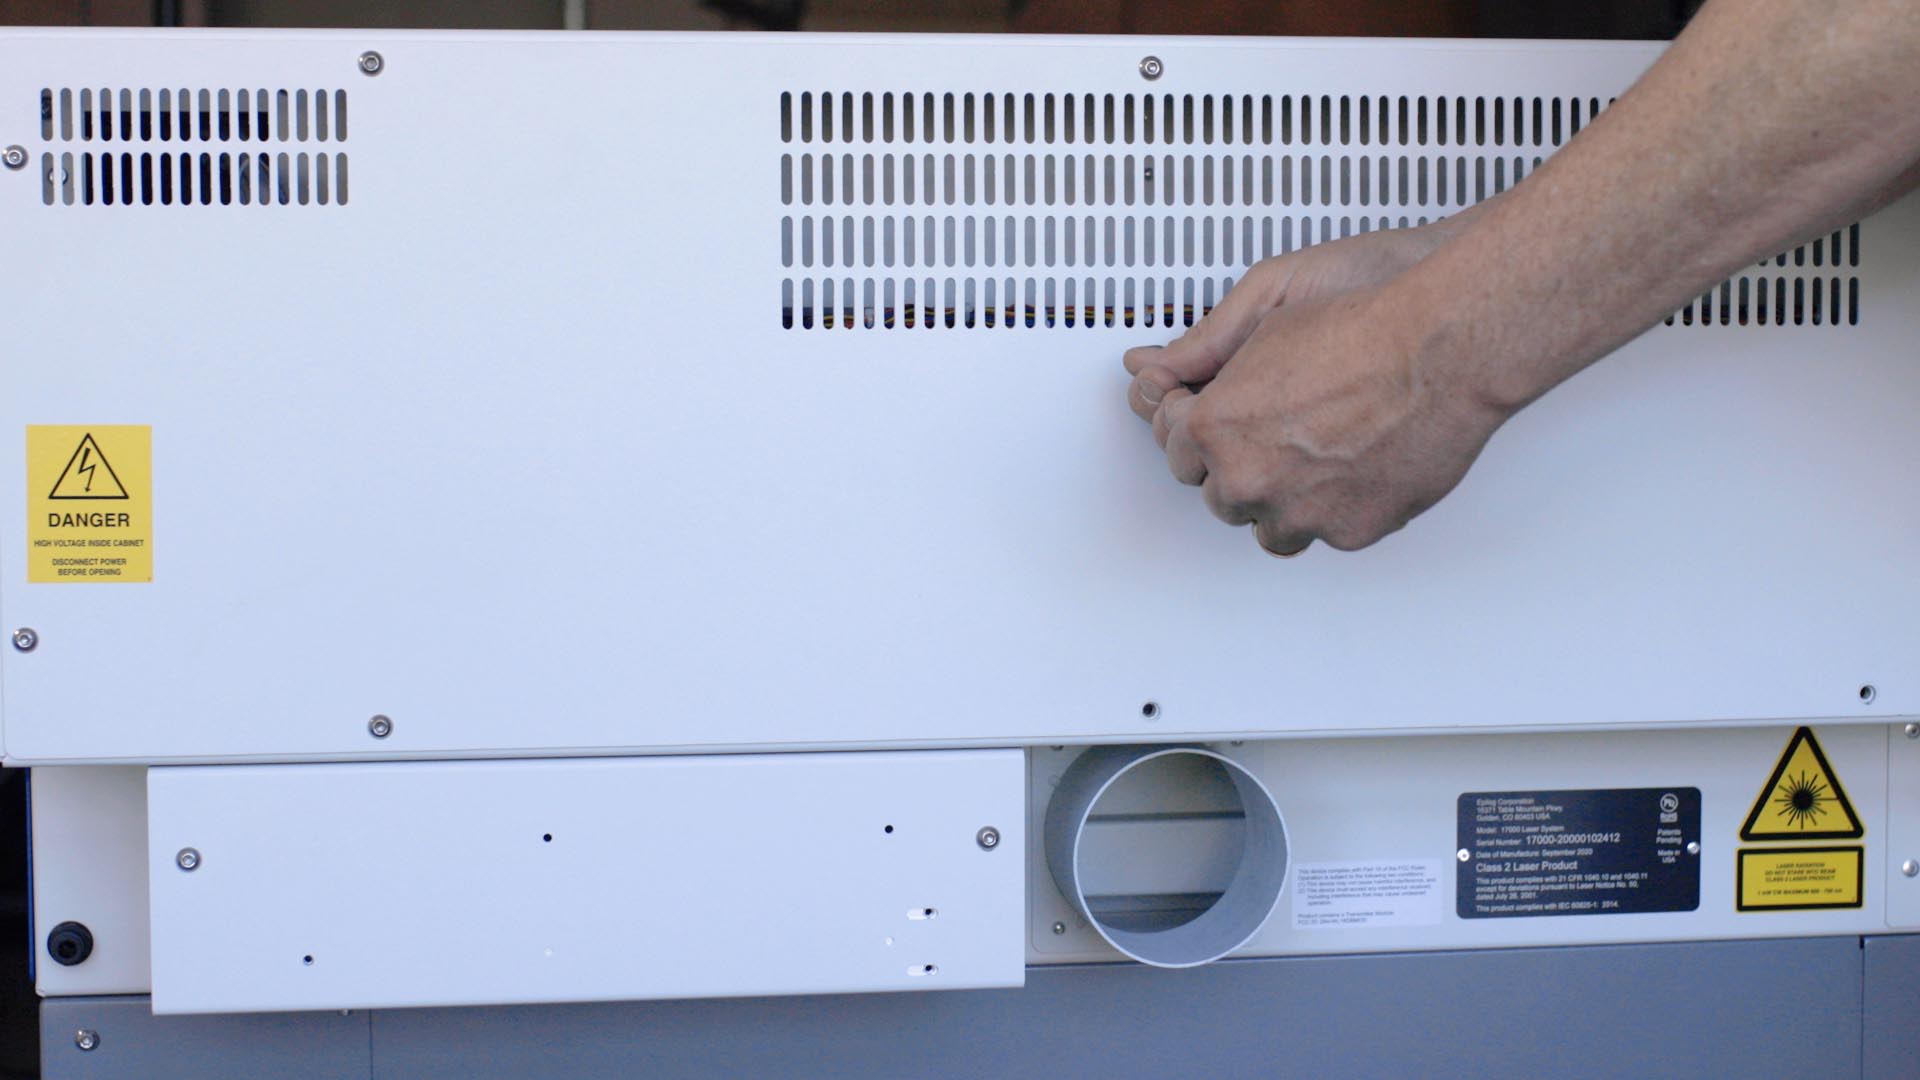
Now move to the rear of the machine.
Using the 5/32″ Allen Wrench, remove the 9 screws that secure the rear panel to the machine.

Locate the power supply housing. It is located to the left of the exhaust port as you face the machine from the rear.

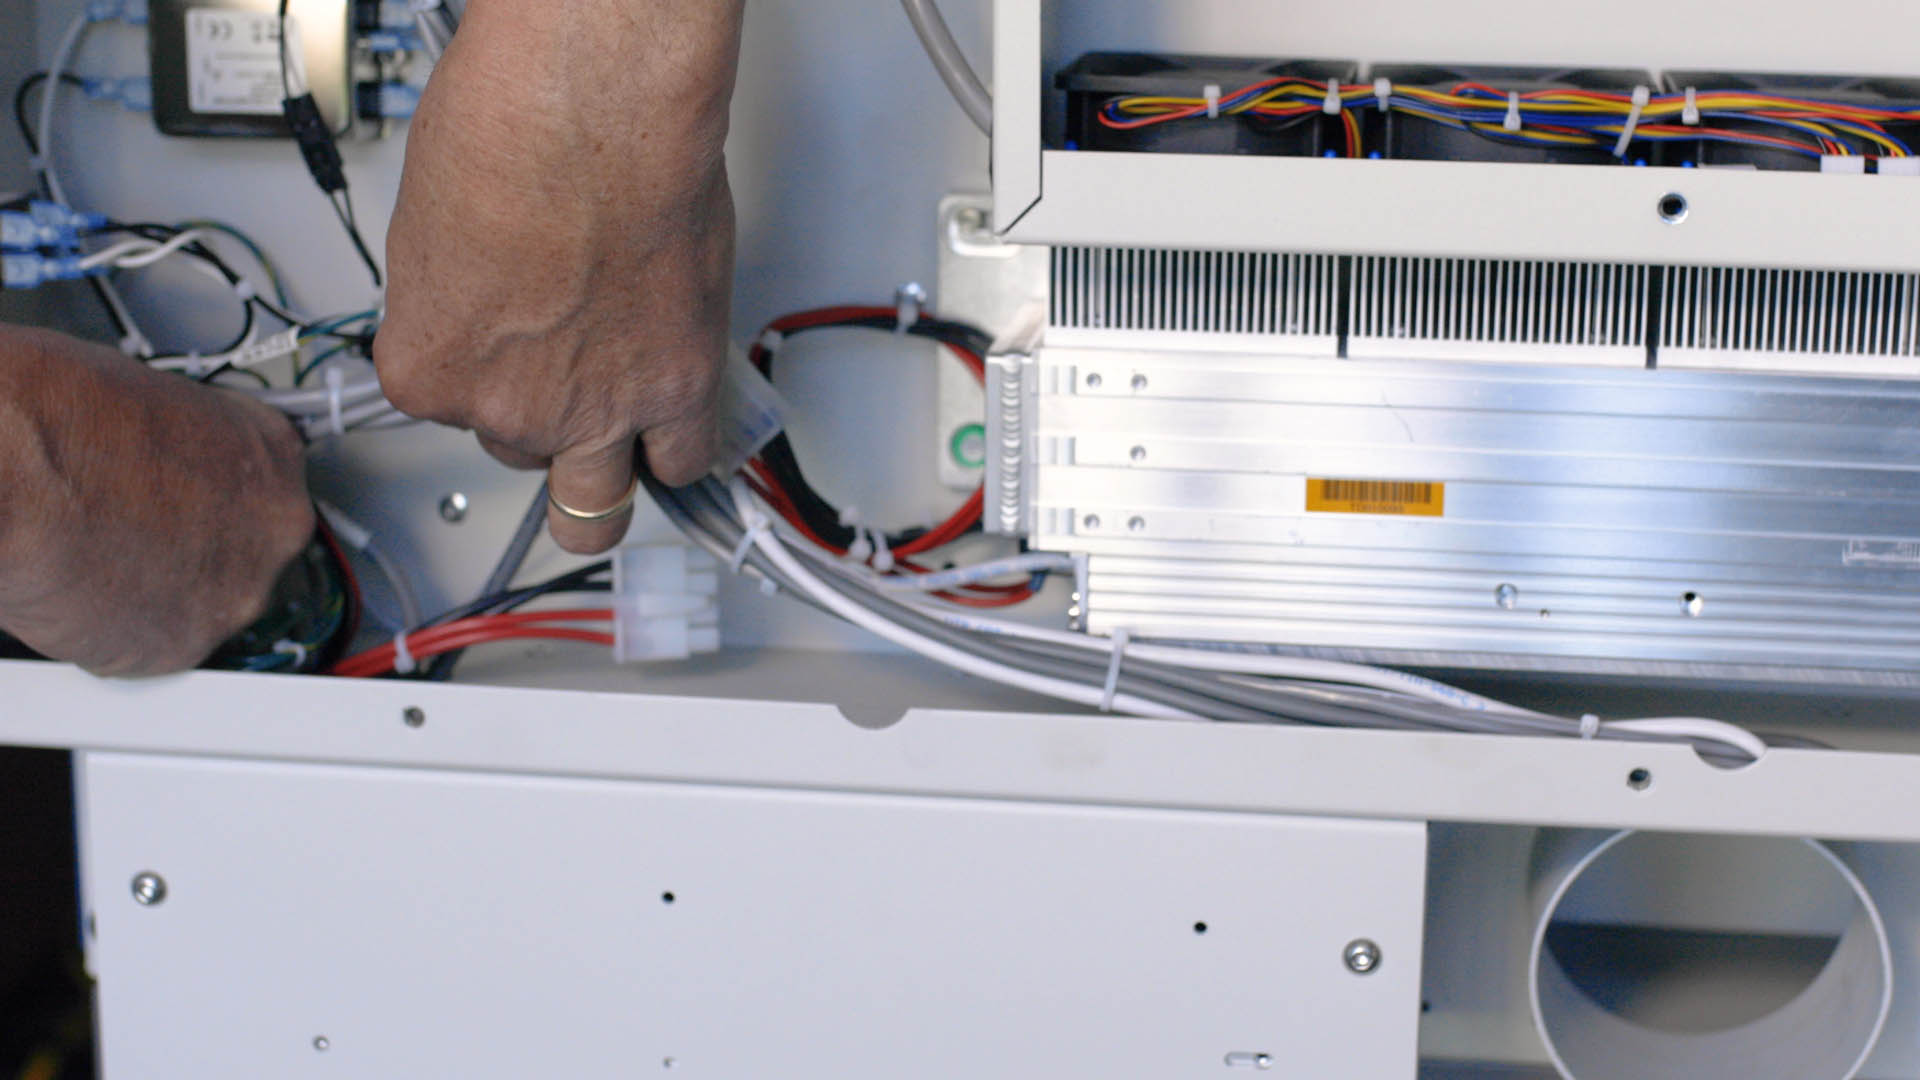
There are three Electrical connections that need to be disconnected once the back panel is removed.
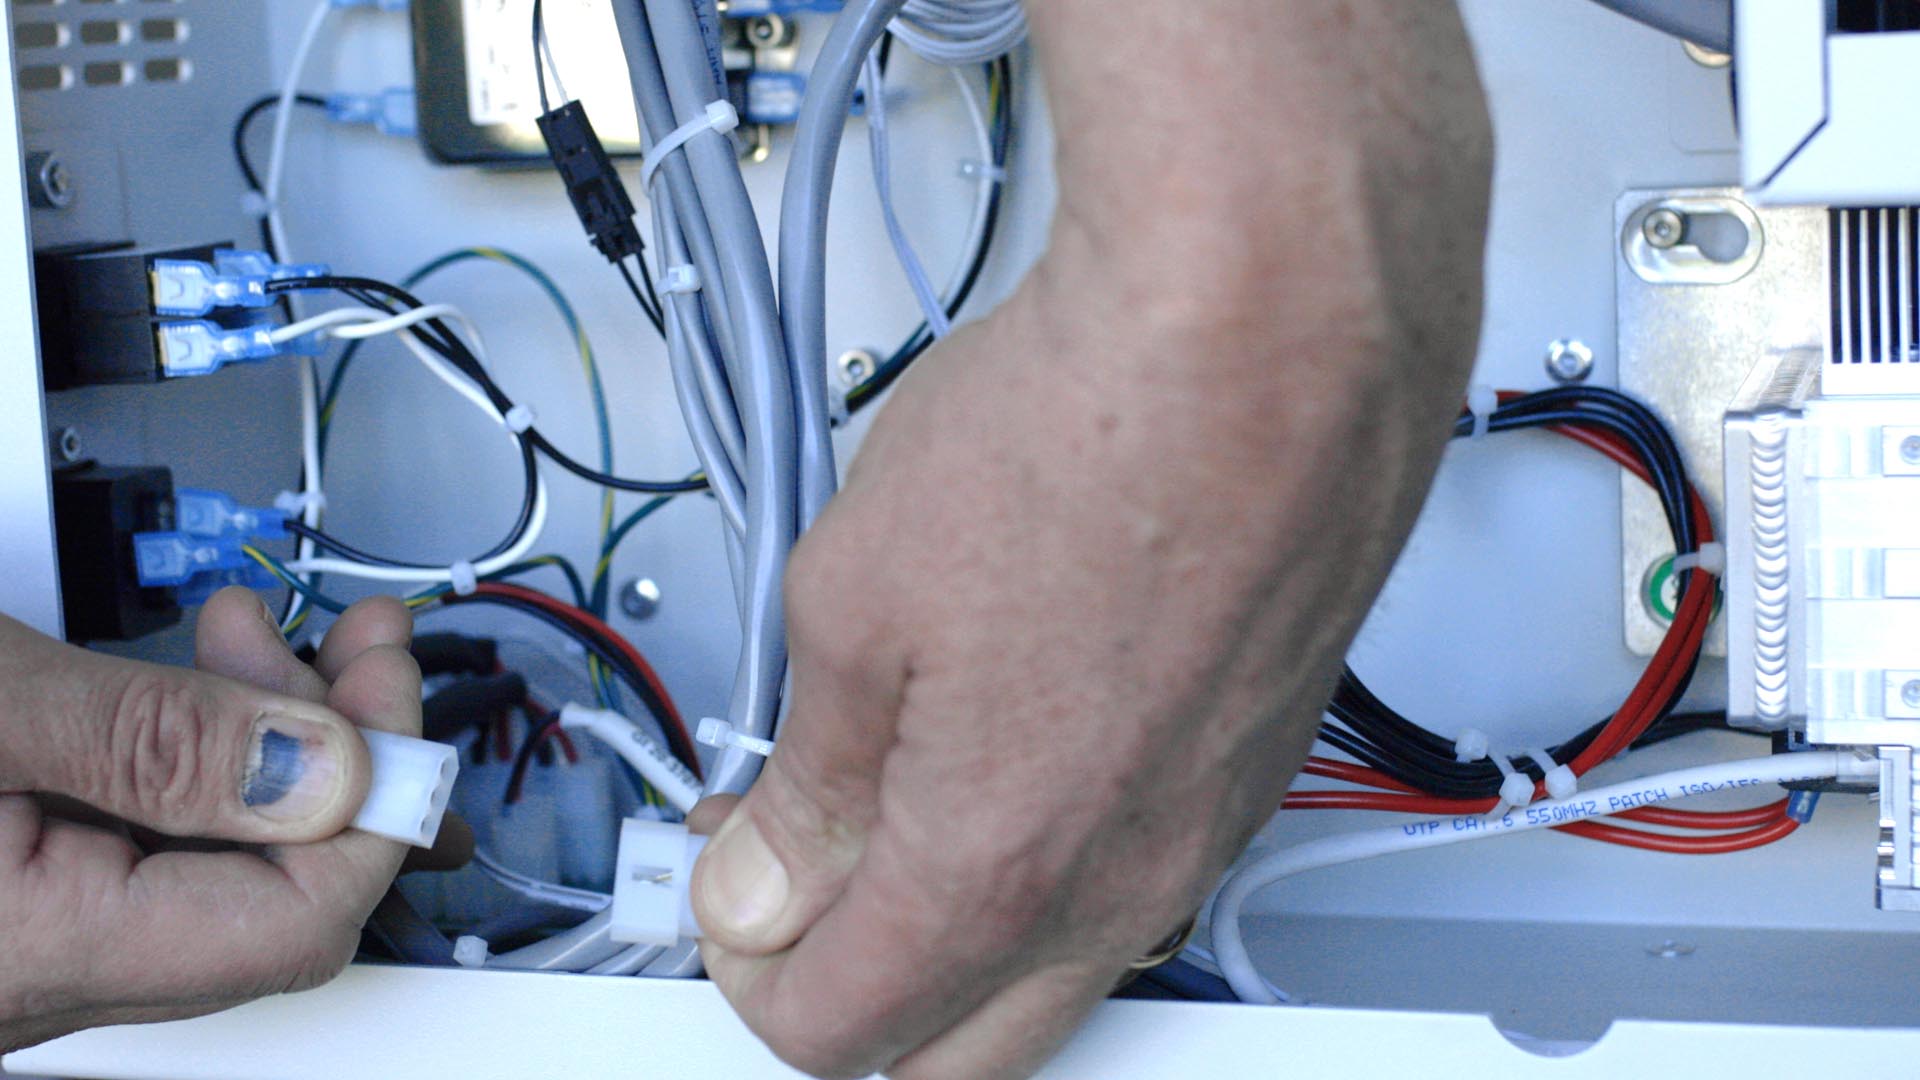
First locate and disconnect the laser power connector. It is identifiable as the red and black wires coming from the laser assembly that are connected via a white connector.

Press down on the latch and pull the connector apart. DO NOT pull on the wires, as you could pull them from the connector.

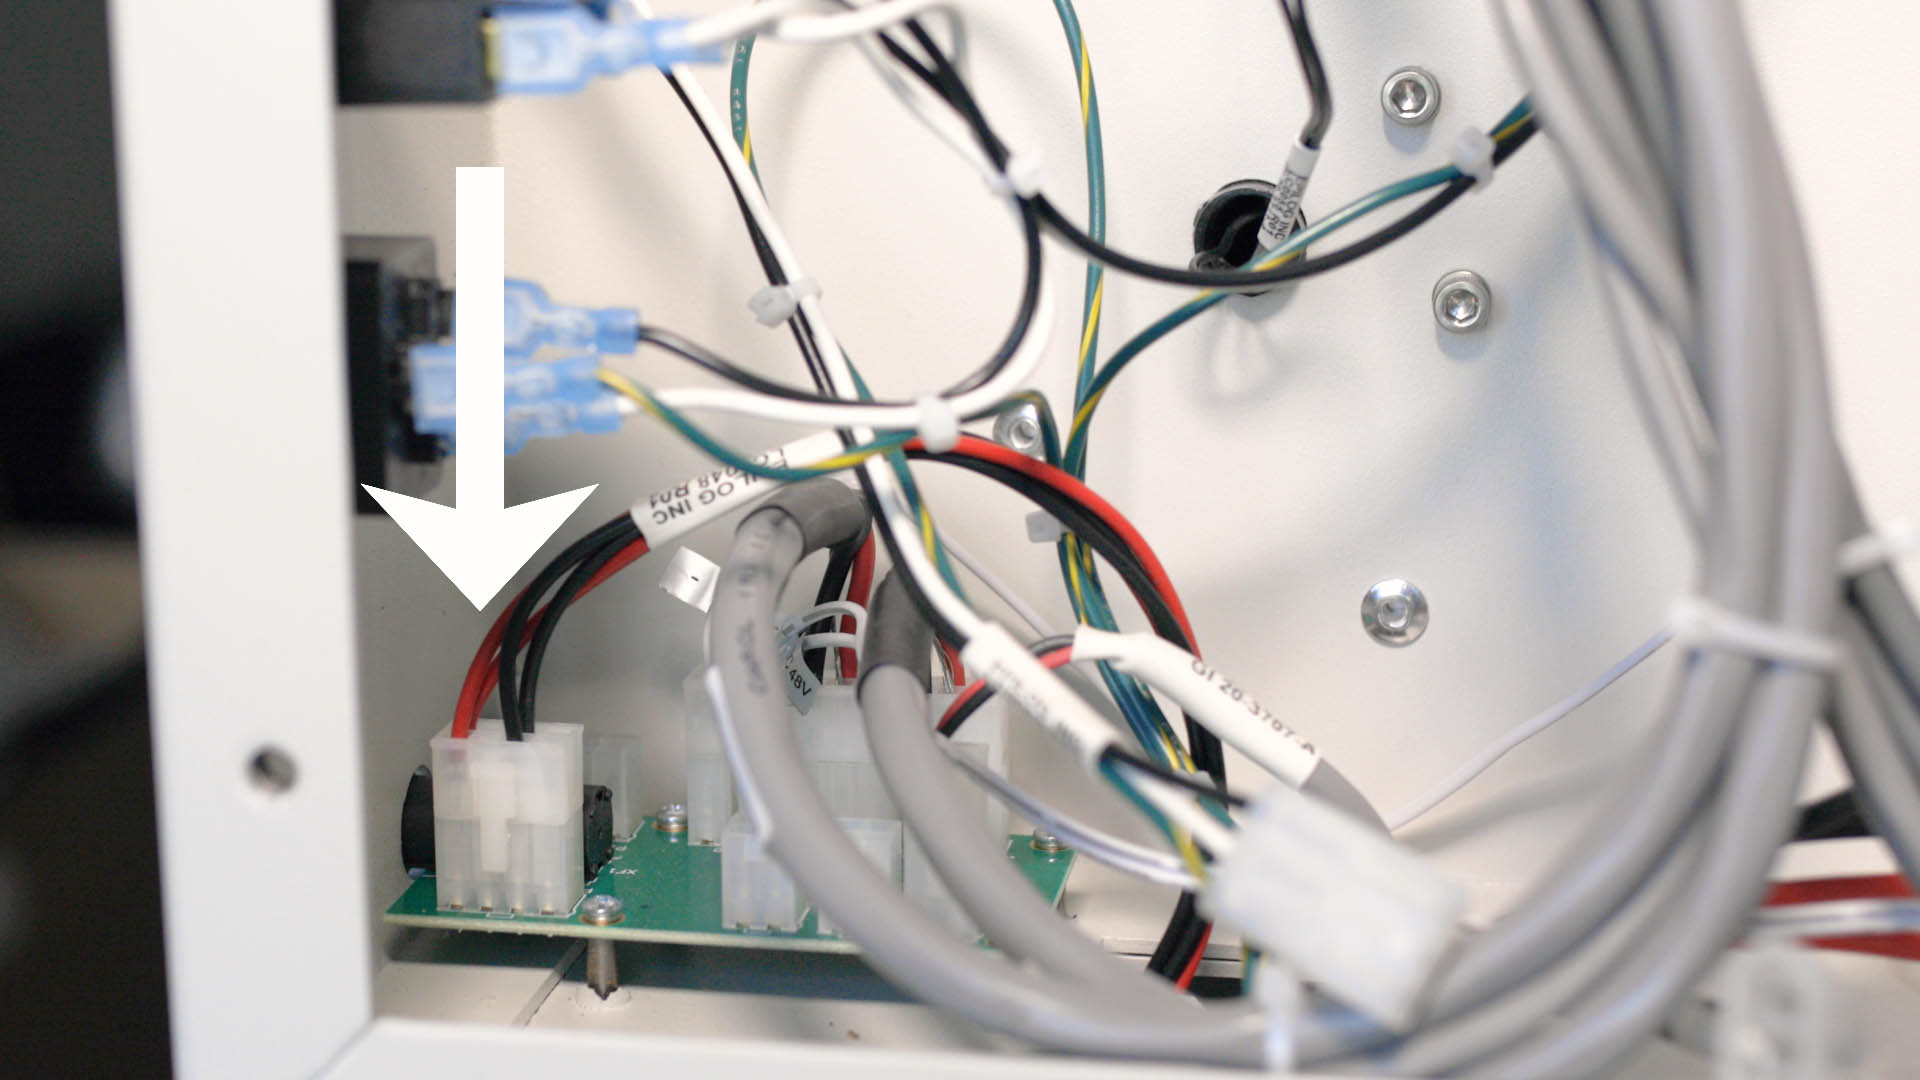
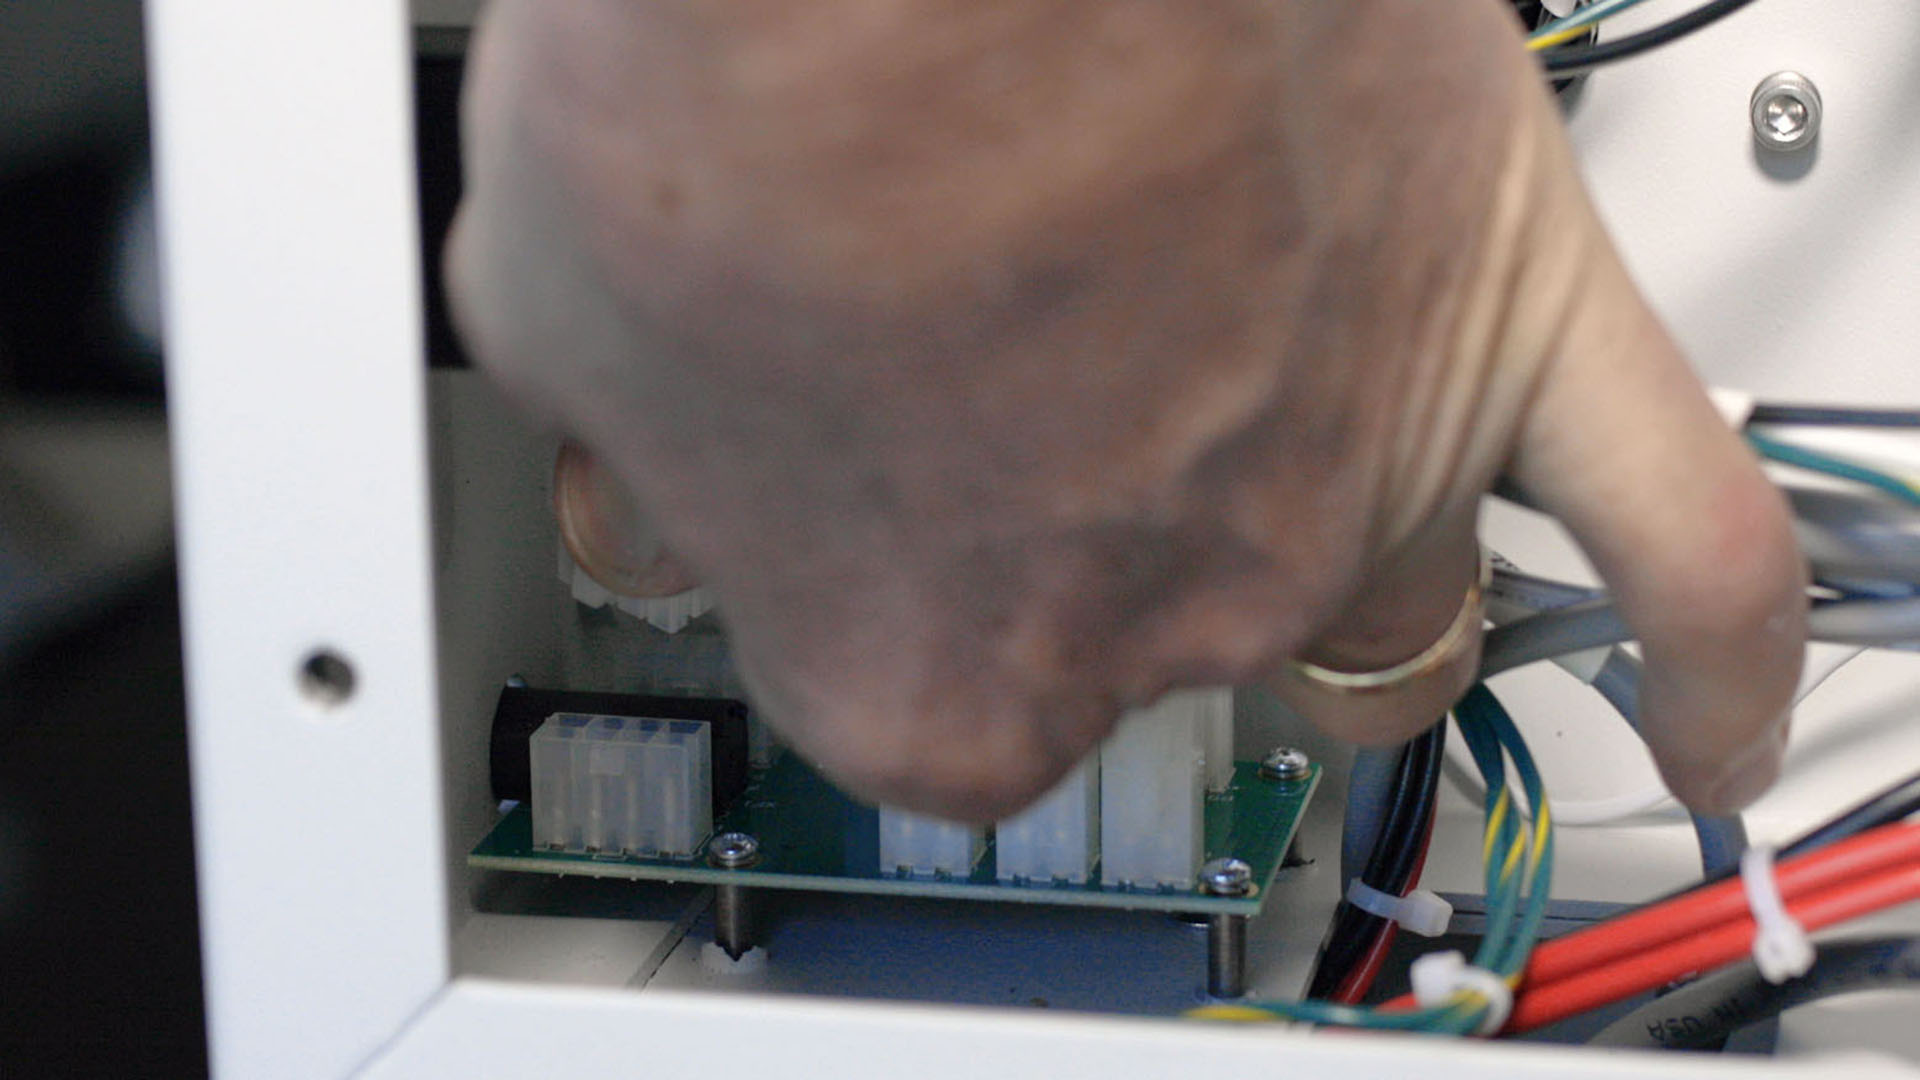
Next, disconnect the electrical connector in the lower left-hand corner of the machine. To remove this connector, press down on the lock and gently pulling the connector from the PCB. DO NOT PULL on the wires, as you could pull them from the connector.
Now, disconnect the Power line filter connection. The filter is the silver box in the upper left-hand corner of the machine.
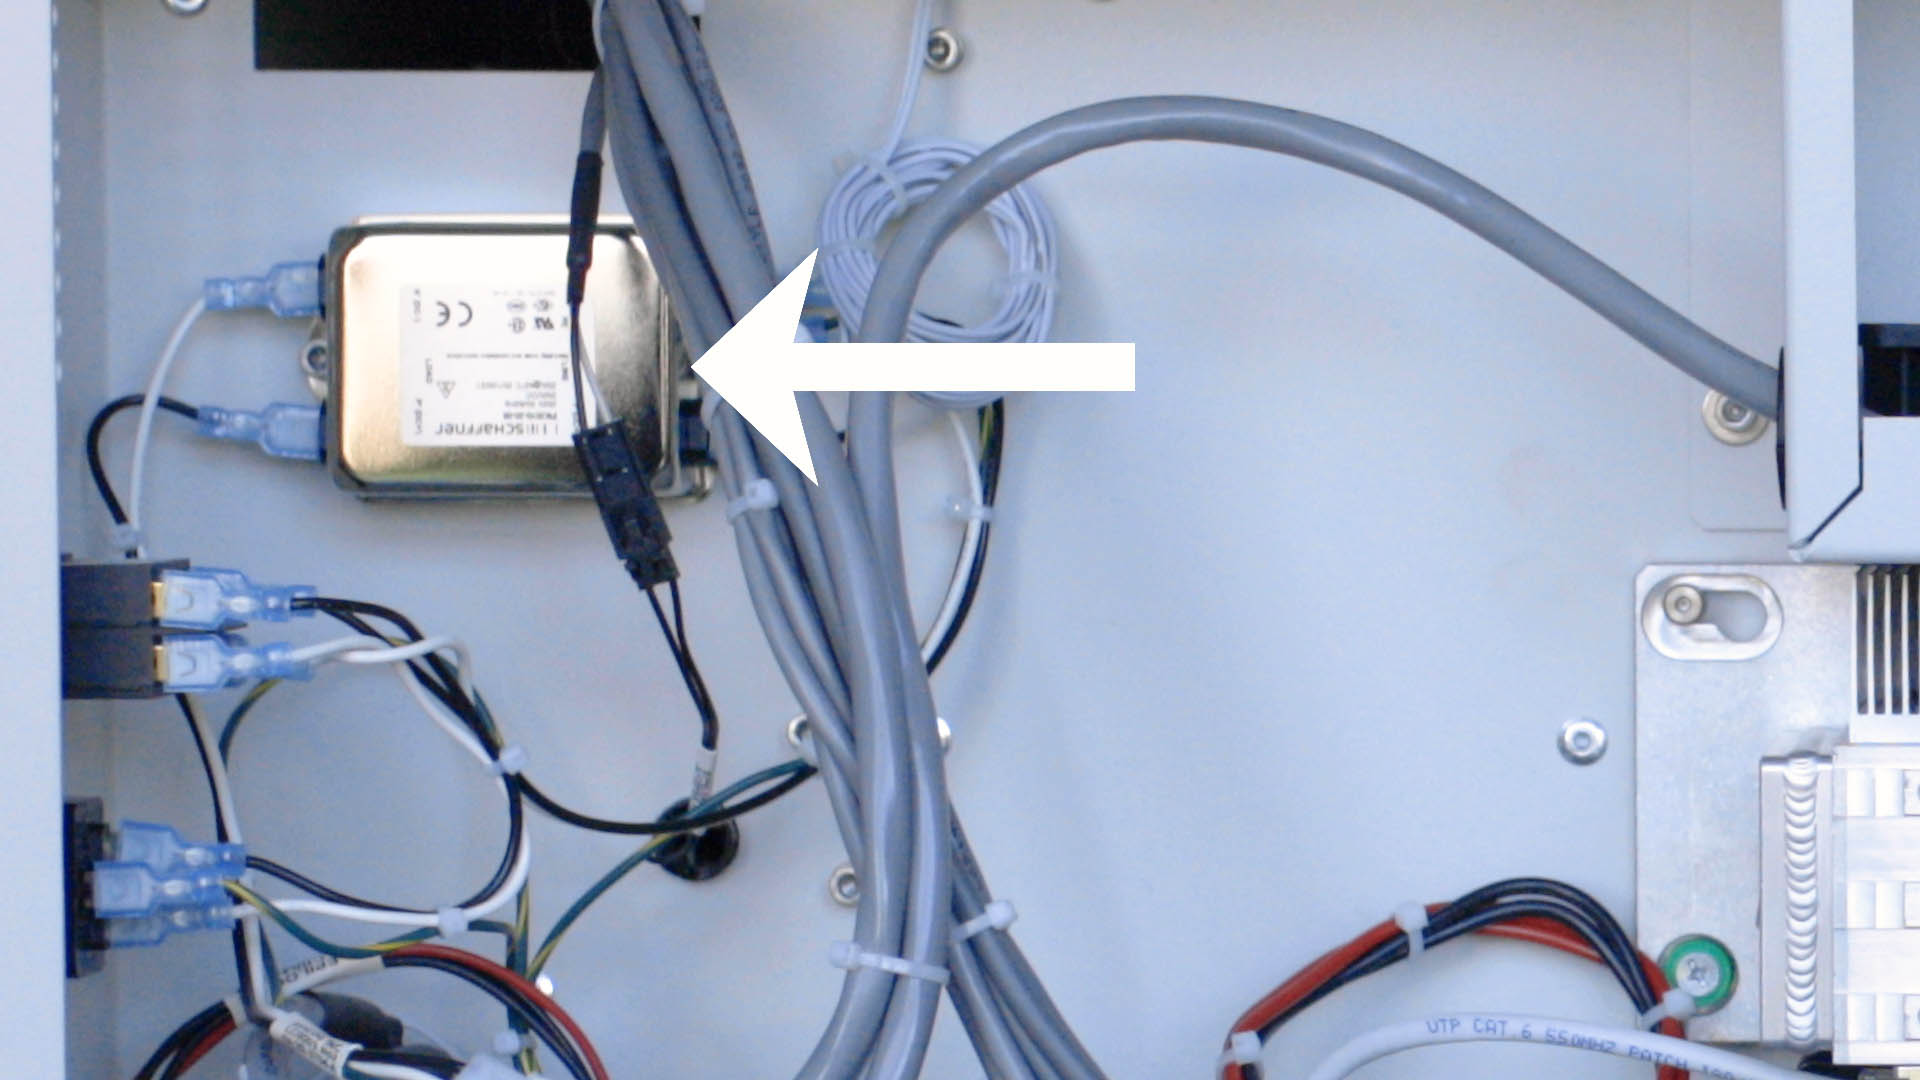
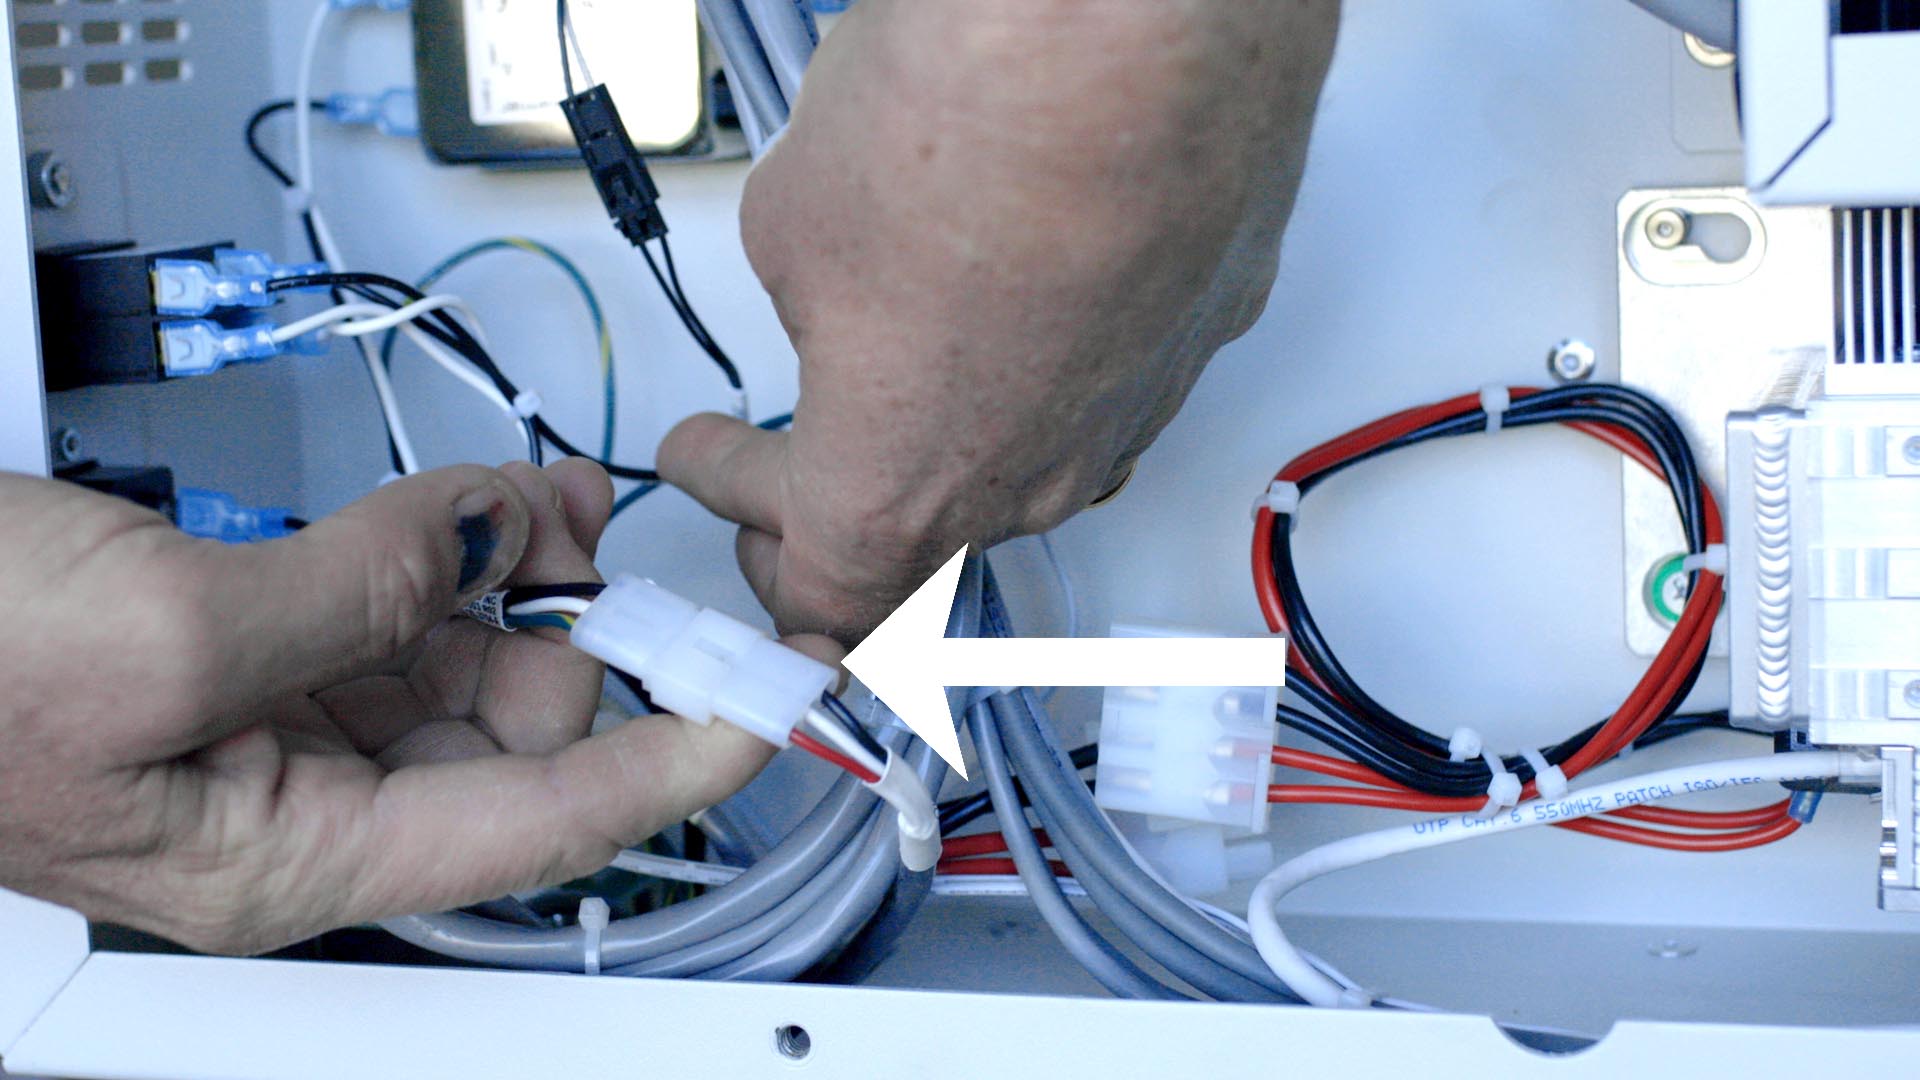
Follow the wires leading from the right-hand side of the filter until you locate the connector. This connector does not have a locking feature to release. Gently pull the two halves of the connector apart. DO NOT pull on the wires, as you could pull them from the connector.
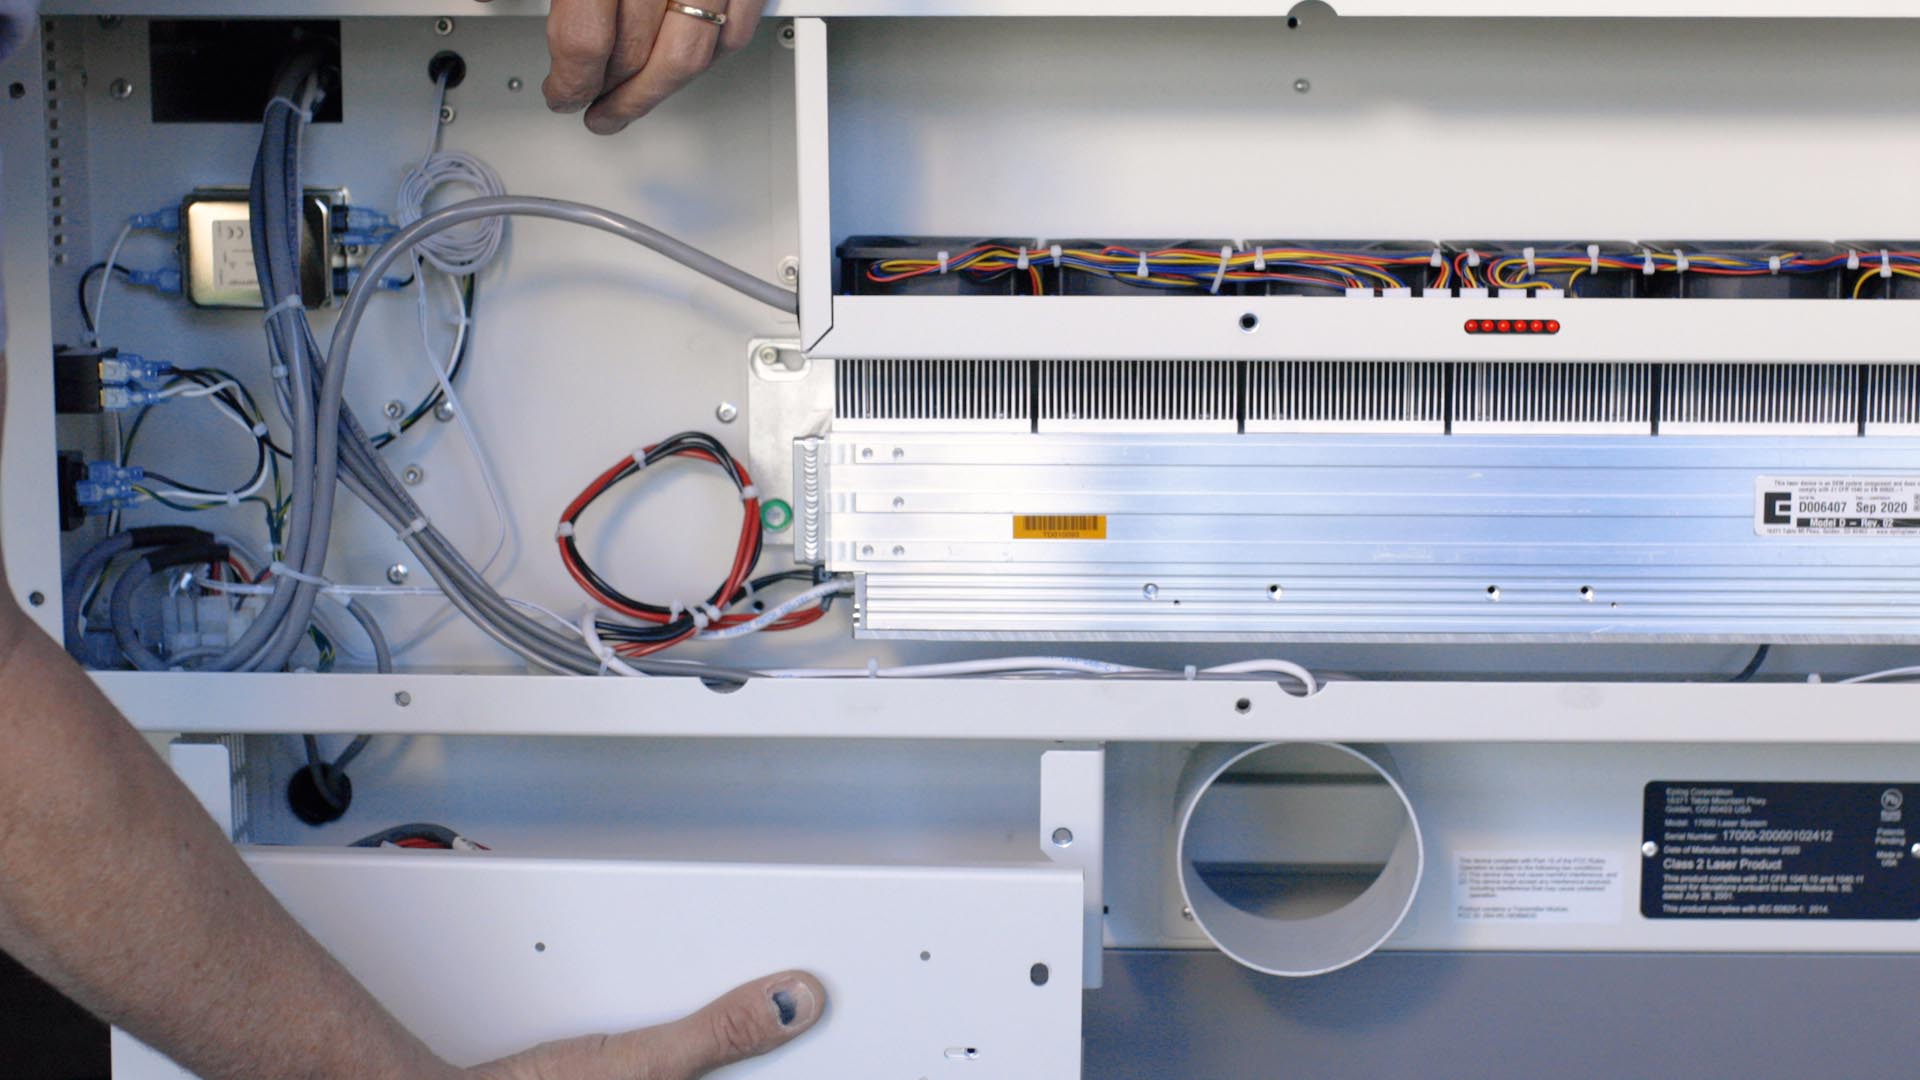
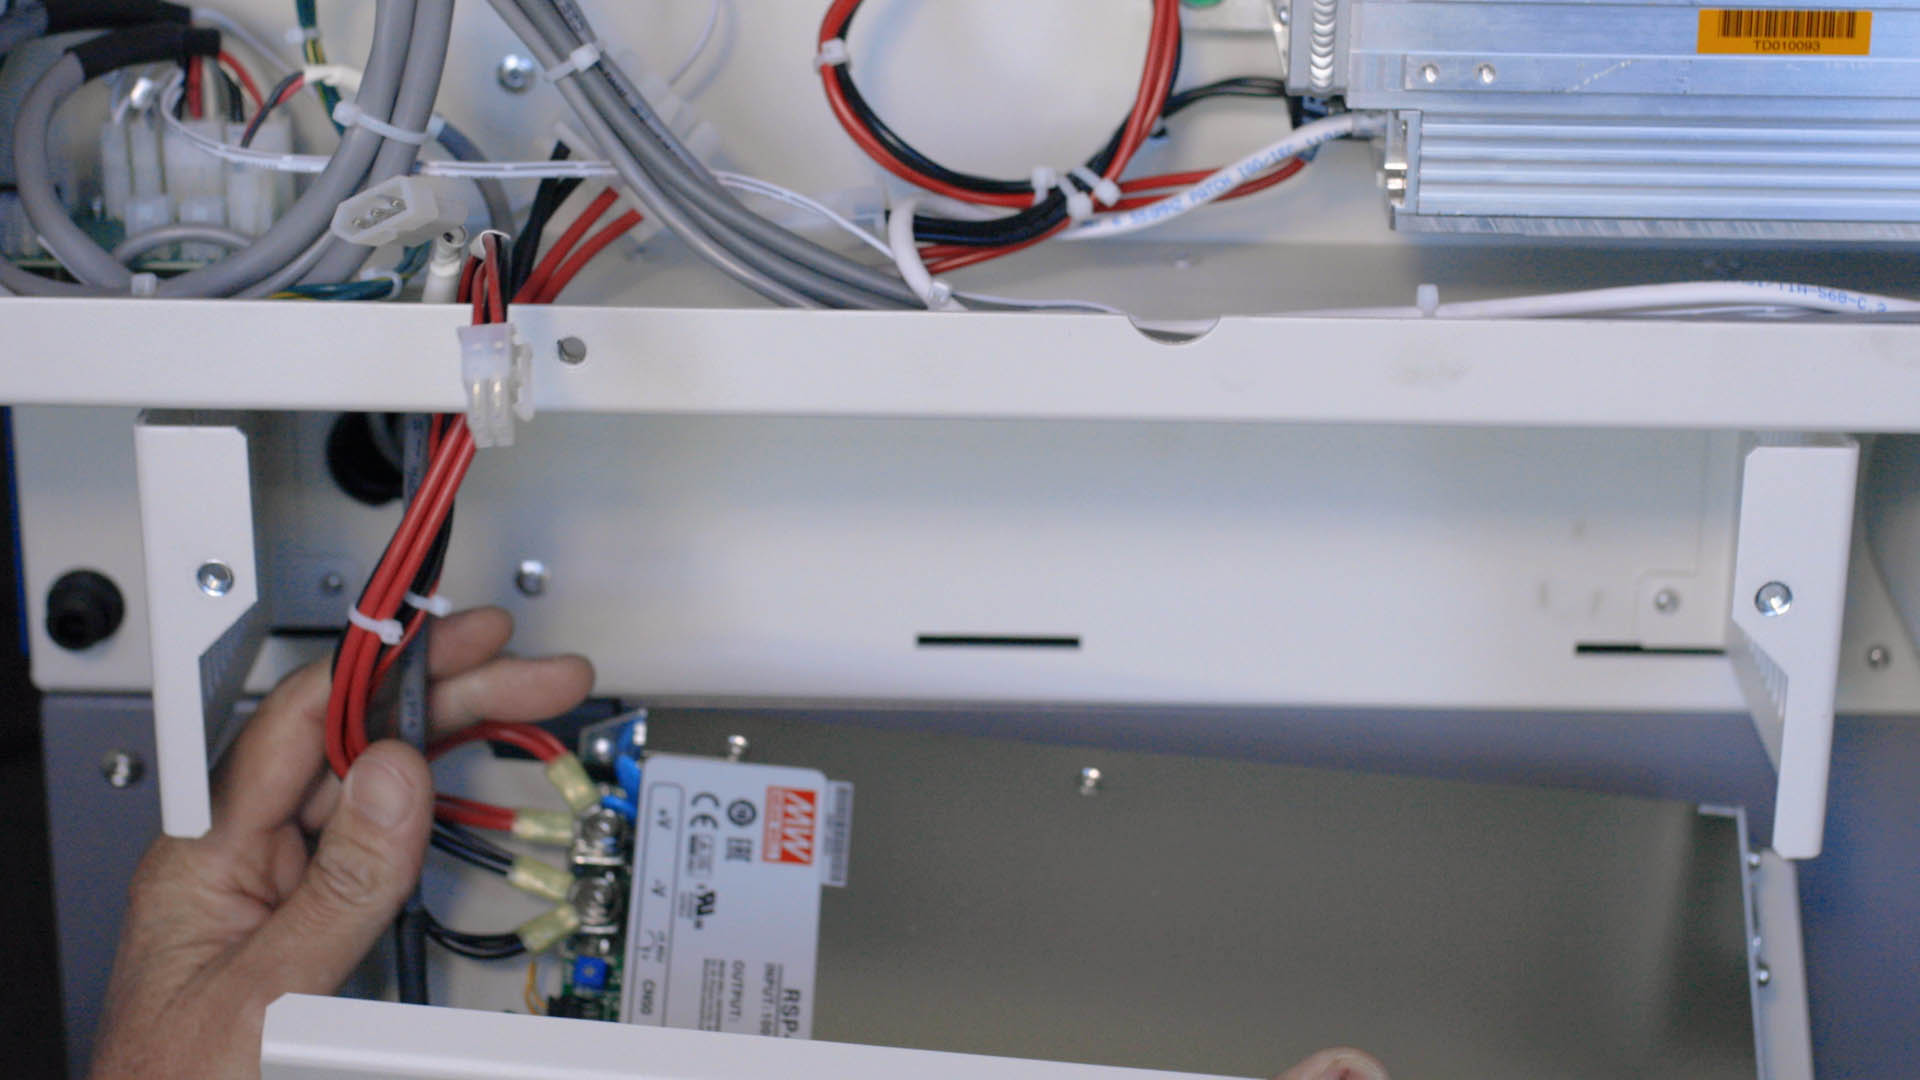
While supporting the power supply from below, remove the two 5/32″ Allen screws securing the power supply assembly to the machine.
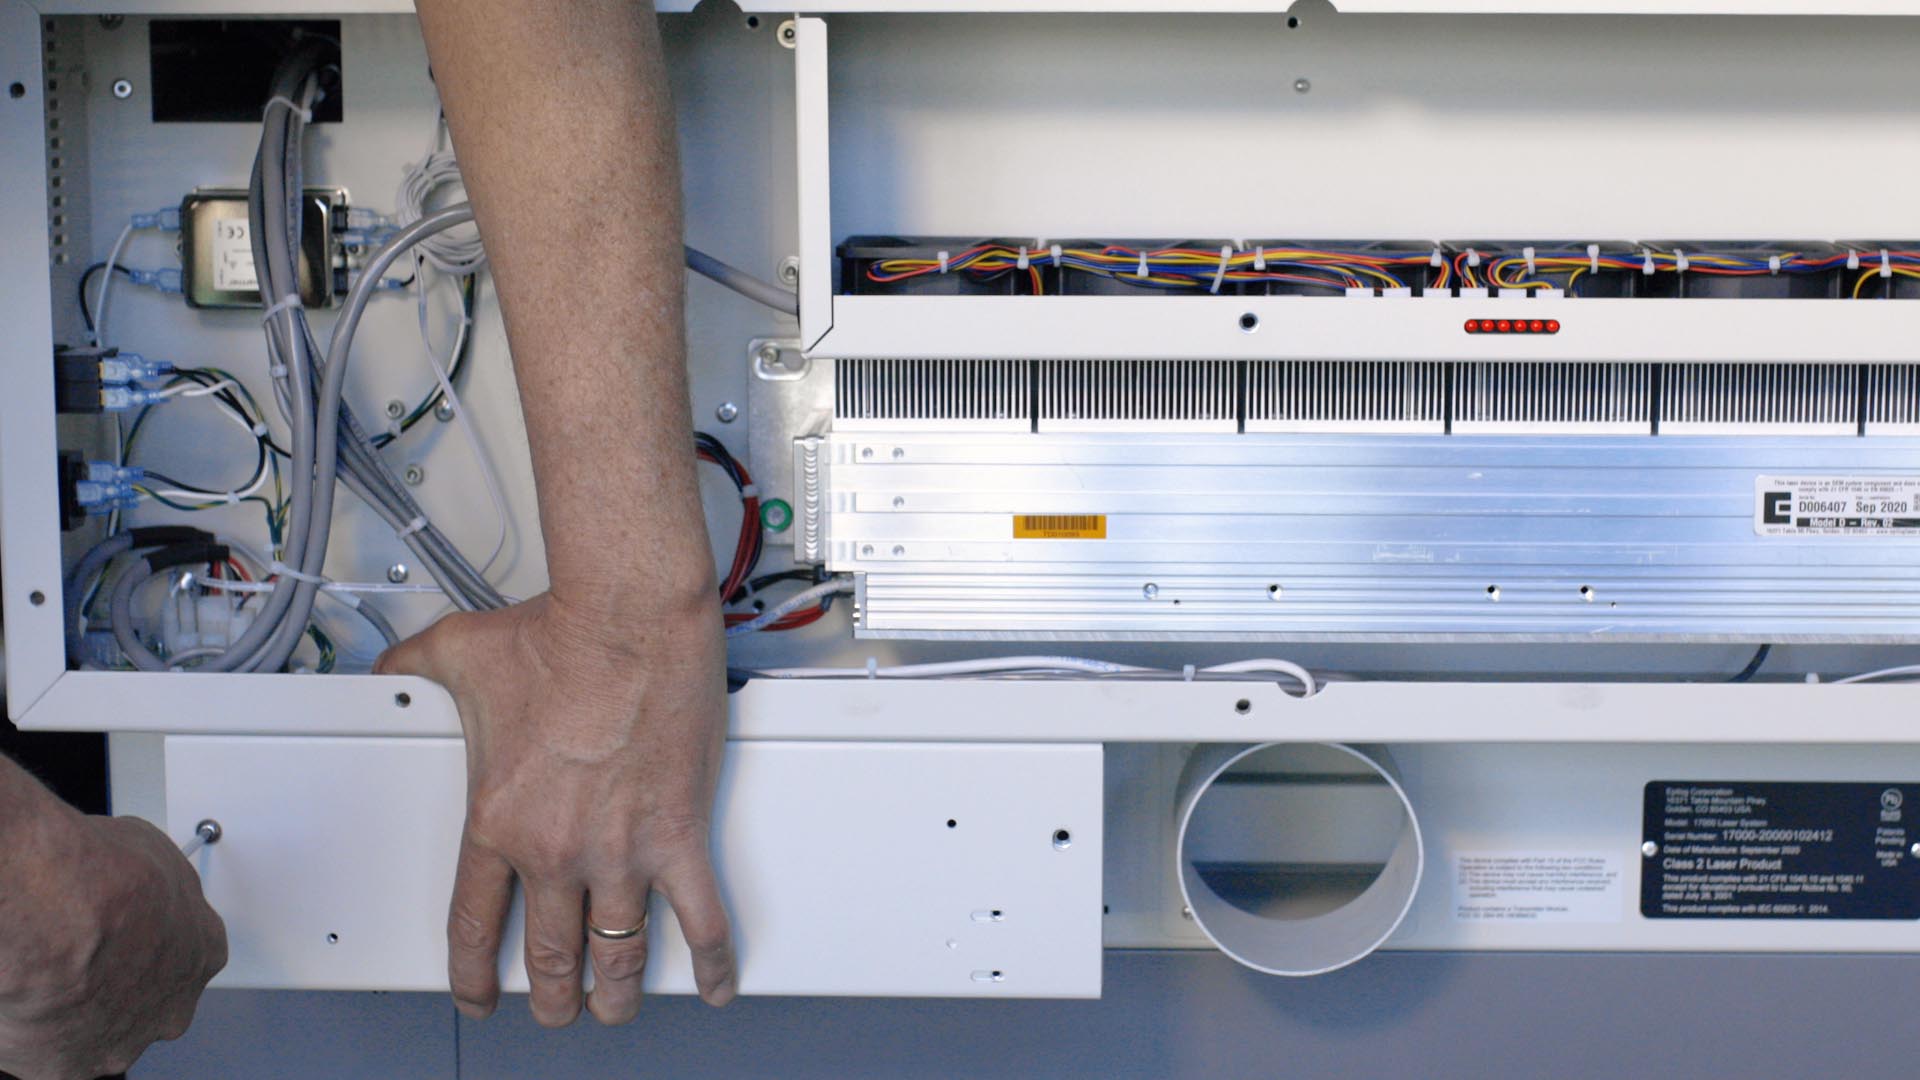
Once the screws are removed, pull the supply toward you while making sure that the wires pass through the opening in the bottom of the machine.
Install New Power Supply
Now that the power supply is removed, you may install your replacement power supply.
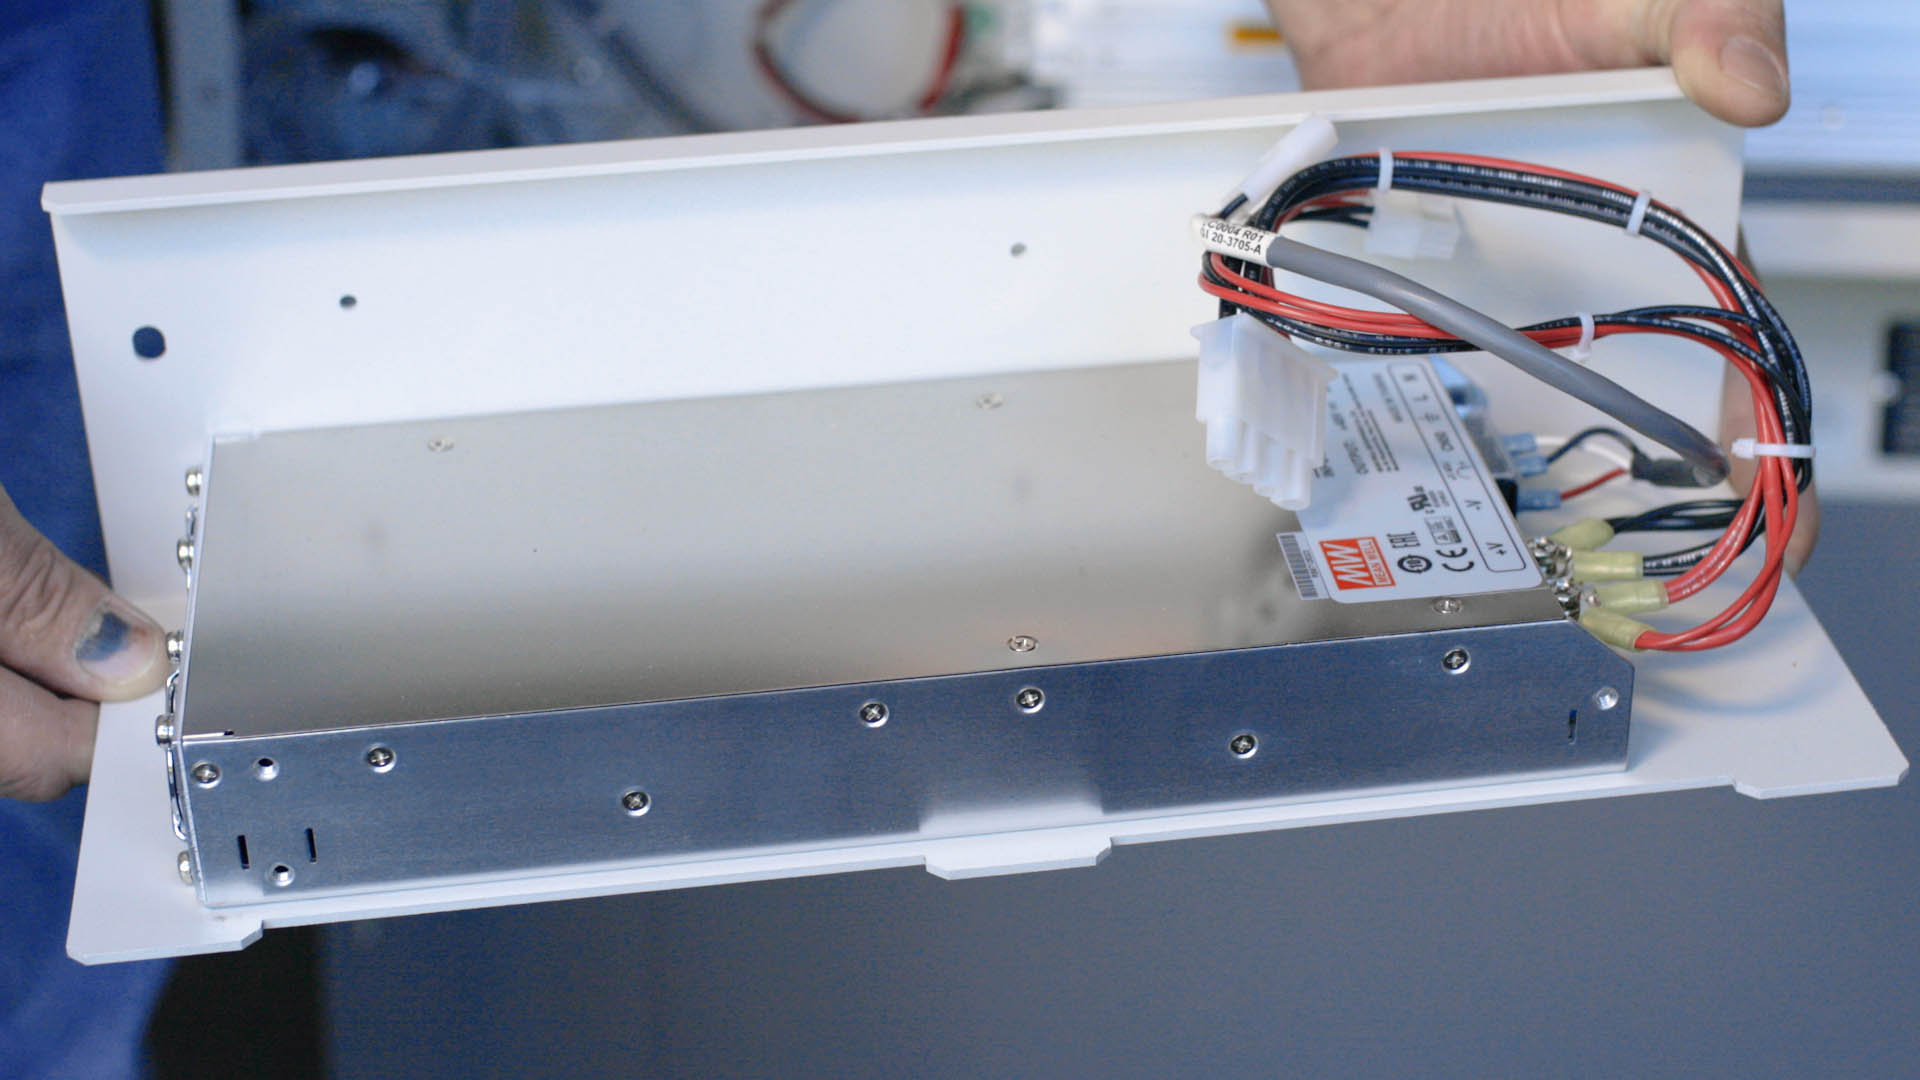
On the rear of the power supply housing are three tabs, these tabs will need to fit into the cut out slots in the chassis as shown.
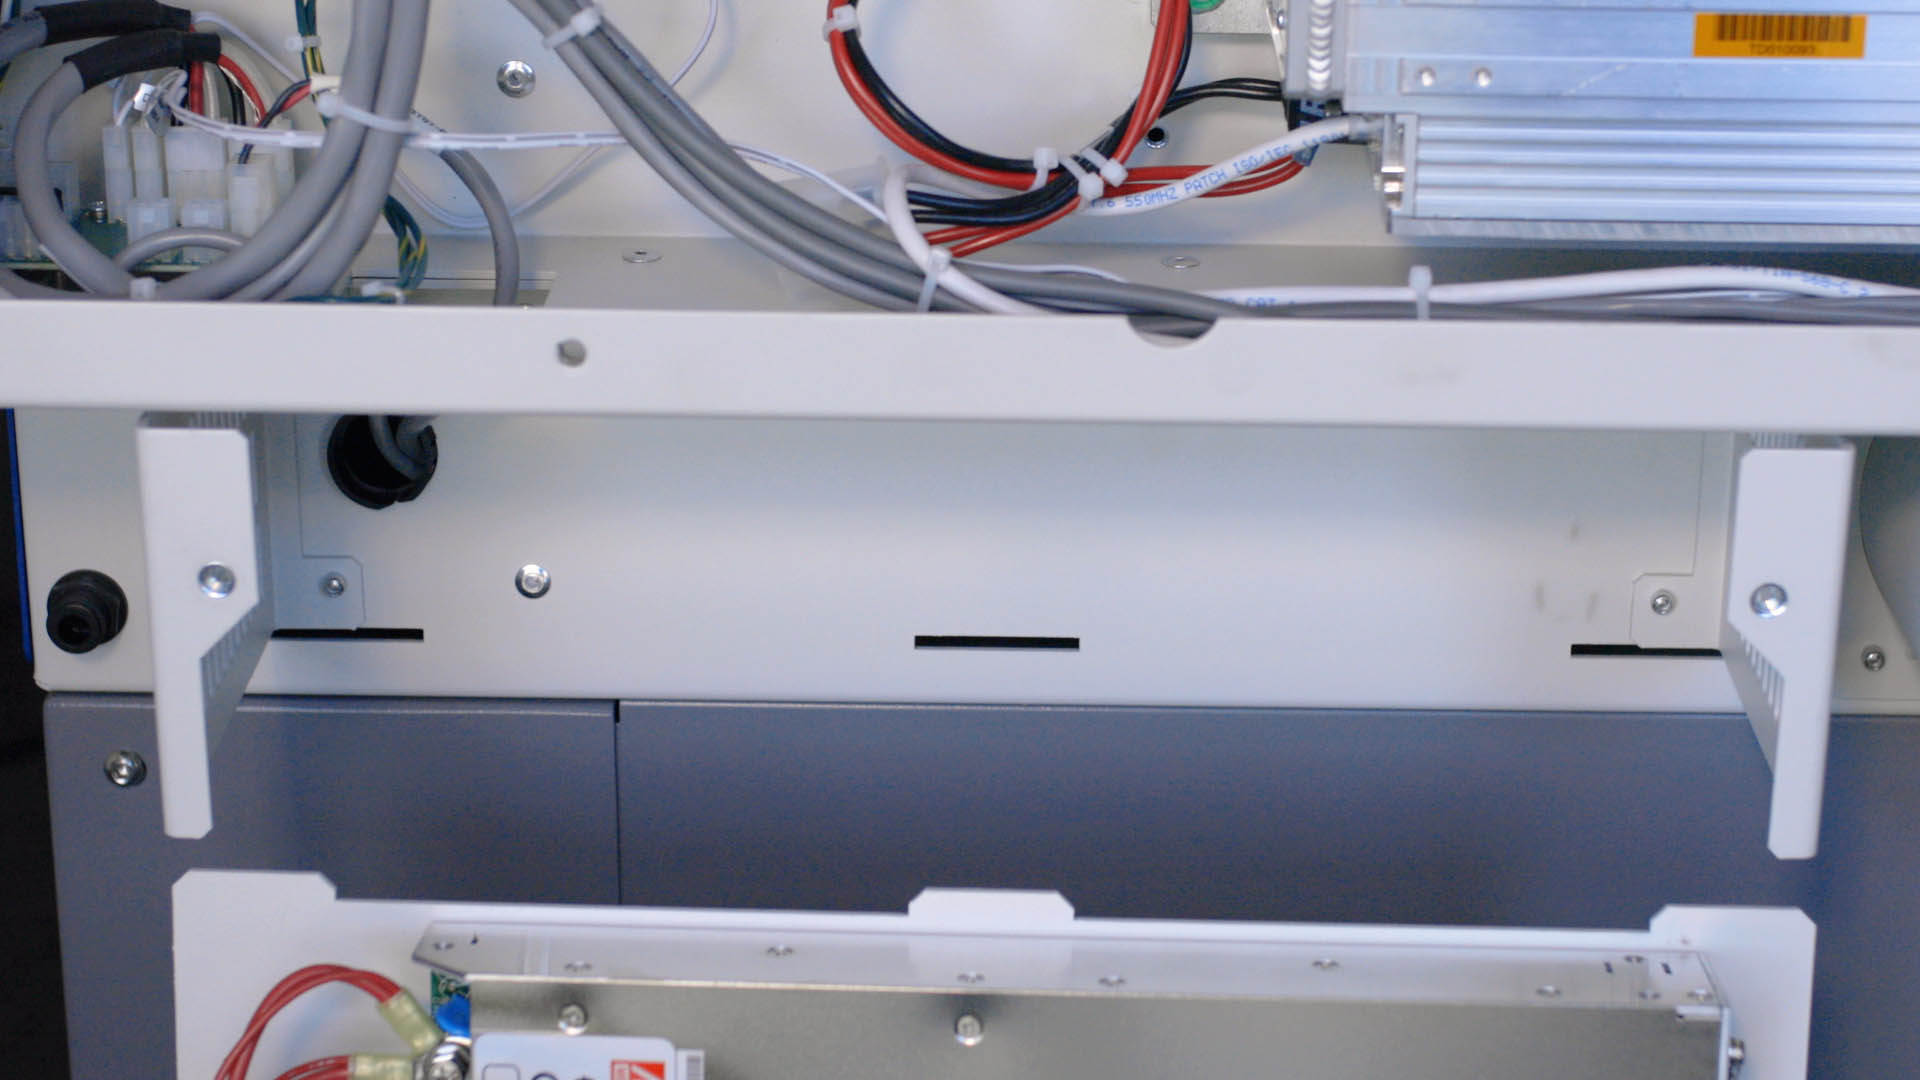
Position the power supply below and behind the machine and feed the wires from the supply up through the opening in the bottom of the machine.
With the power supply assembly centered and pushed up against the lower portion of the housing, slide the power supply into the chassis.
The three tabs identified earlier, must fit in to the three slots in the chassis.

Without letting go of the power supply, install the two 5/32″ Allen screws that secure the power supply to the chassis. Do not let go of the power supply until at least one screw has been installed.

Now that the power supply is secure, you may reconnect the laser power connector, the electrical connector, and the power line filter connector.
Replace the rear panel on the machine using the 5/32″ Allen wrench to tighten all of the screws that secure it to the machine.
You are now finished replacing the Power Supply on your machine.
