
Introduction
This guide provides step-by-step instructions for replacing the lens assembly in the G100 model engraver. Please review all steps carefully before beginning the procedure. Make sure the machine is powered off and the work area is prepared to avoid damage to components. If you need further assistance during or after the replacement, contact Epilog Laser Technical Support.
Replacement Steps
-
Power off the engraver.
-
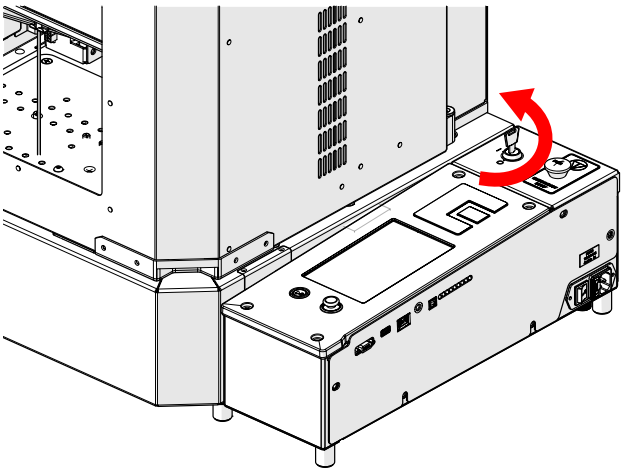
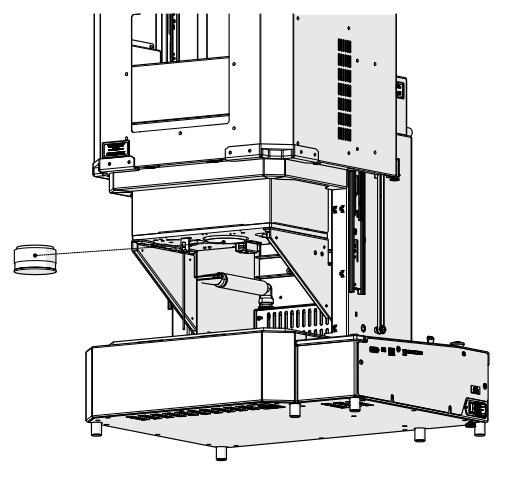
Lift the door.
-
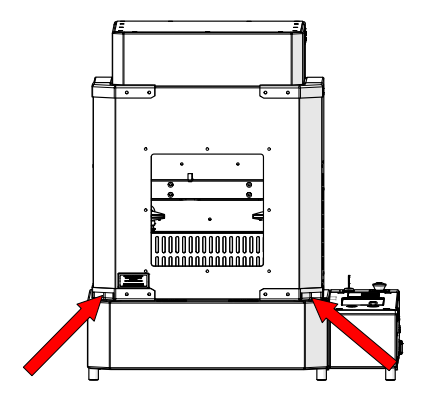
Leave the door open.
-
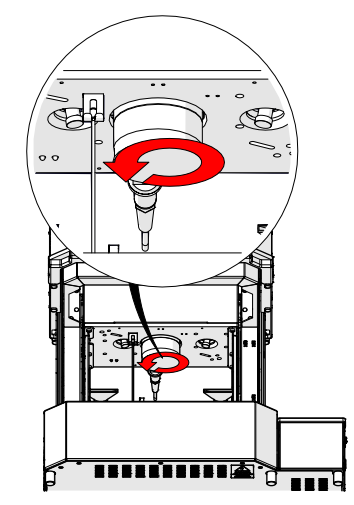
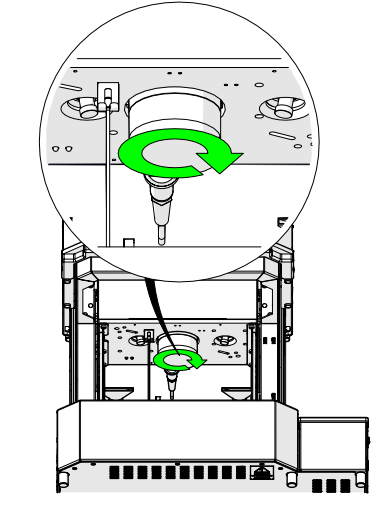
Loosen the lens assembly.
-
Remove the lens assembly.
-
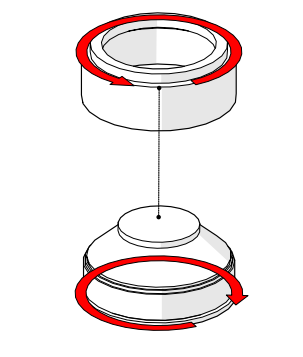
Separate the lens assembly from the lens adapter.
-
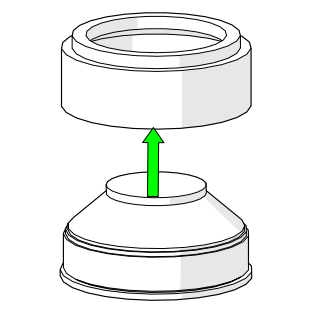
Place the new lens assembly into the lens adapter.
-
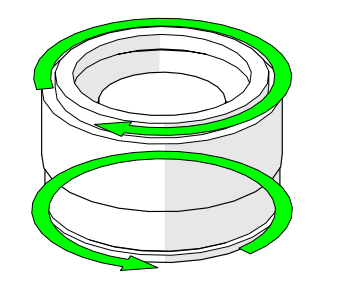
Tighten the lens assembly and lens adapter.
-
Position the lens assembly in the engraver.
-
Tighten the lens assembly.
Was this helpful?
Thanks for your feedback!